
Project Type: DIY Home Renovation
Location: My Own Home, Japan
Project Area: Front Yard / Motorcycle Parking Space
Main Work: Ground Excavation, Soil Compaction, Gravel Base Preparation, Wire Mesh Installation, and Concrete Pouring
Workforce: 1 Person
Estimated Working Time: Approximately 2 Hours for Concrete Pouring
Concrete Thickness: Approximately 10 cm
Purpose: Creating a Stable Parking Space for a Motorcycle
Introduction
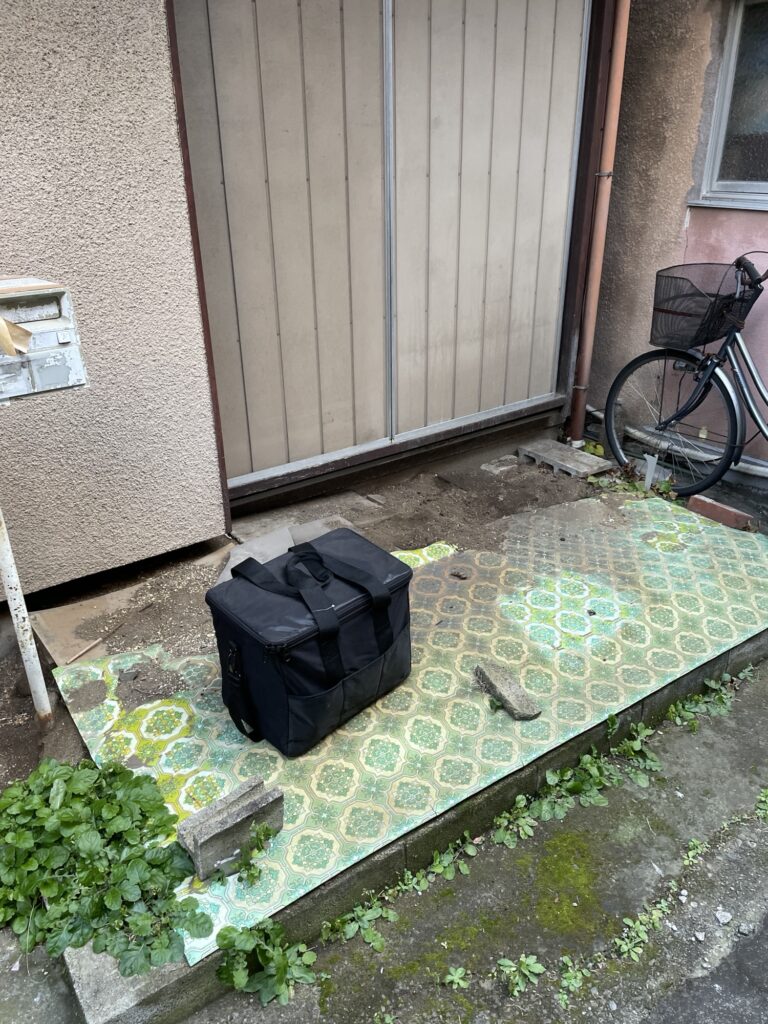
Today was my day off, so I decided to work on my own house. I poured concrete in the space in front of my house to create a stable parking area for my motorcycle.
I have been living in this house for about two years. Whenever I have a day off, I try to find time to renovate and improve the property little by little.
My main job involves installing wallpaper and flooring materials such as cushion flooring. However, concrete work is still a new challenge for me.
Before starting this project, I researched the construction process online and watched YouTube videos. I also asked a construction site supervisor I know for advice so I could prepare the materials and understand the basic procedure.
Previously, the area in front of my house was simply covered with a sheet laid over the soil. When I tried to park my motorcycle there, the ground sank under its weight, making the motorcycle unstable.
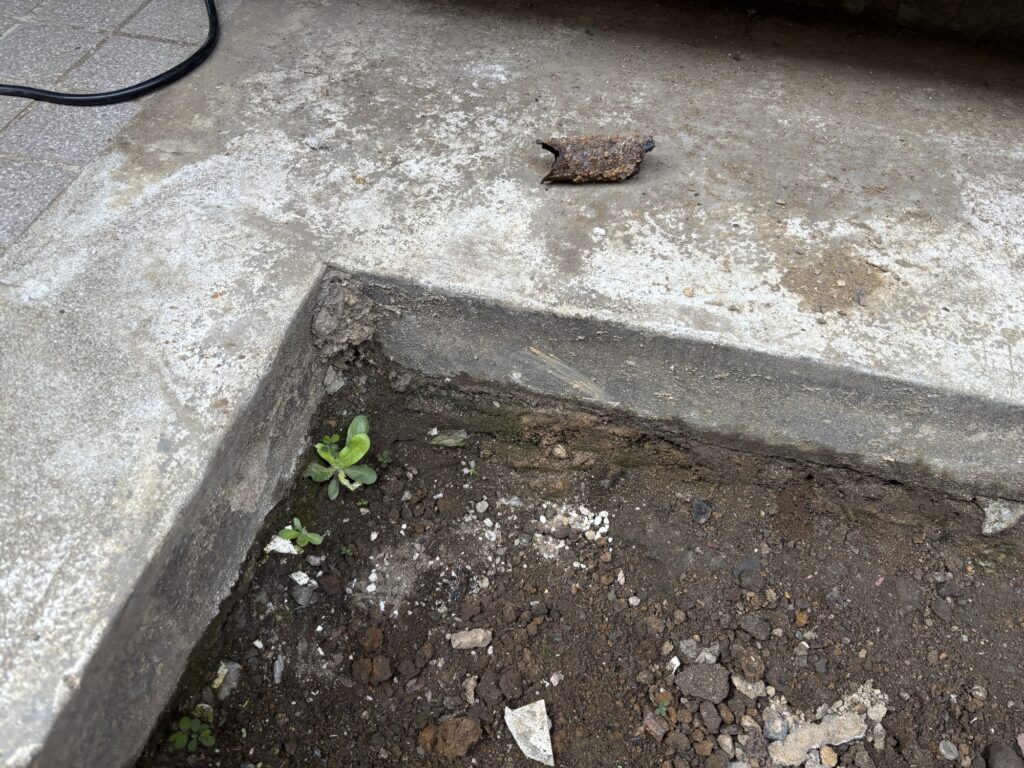
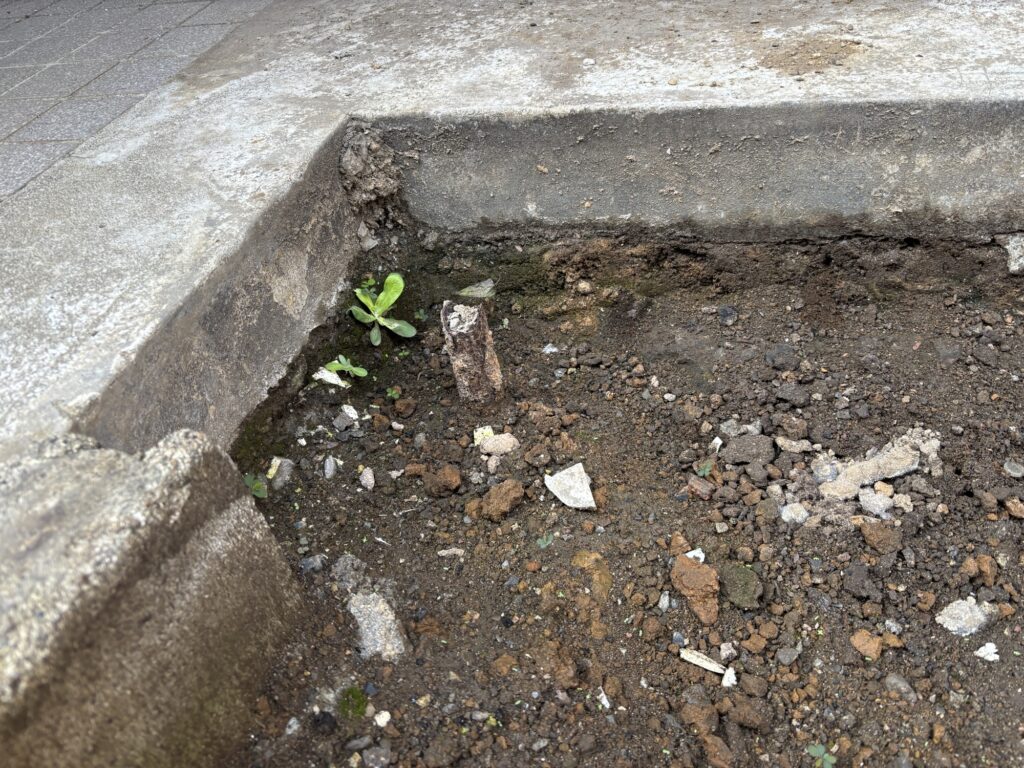
I decided to improve the area by preparing the ground properly and pouring a concrete slab.
This was my first time doing this type of work by myself, and I learned several important lessons throughout the process.
Related Project
Installing a Used Air Conditioner in My 50-Year-Old House | A Craftsman’s DIY Project
Job Site Report: Step-by-Step Concrete Installation
1. Excavating the Ground
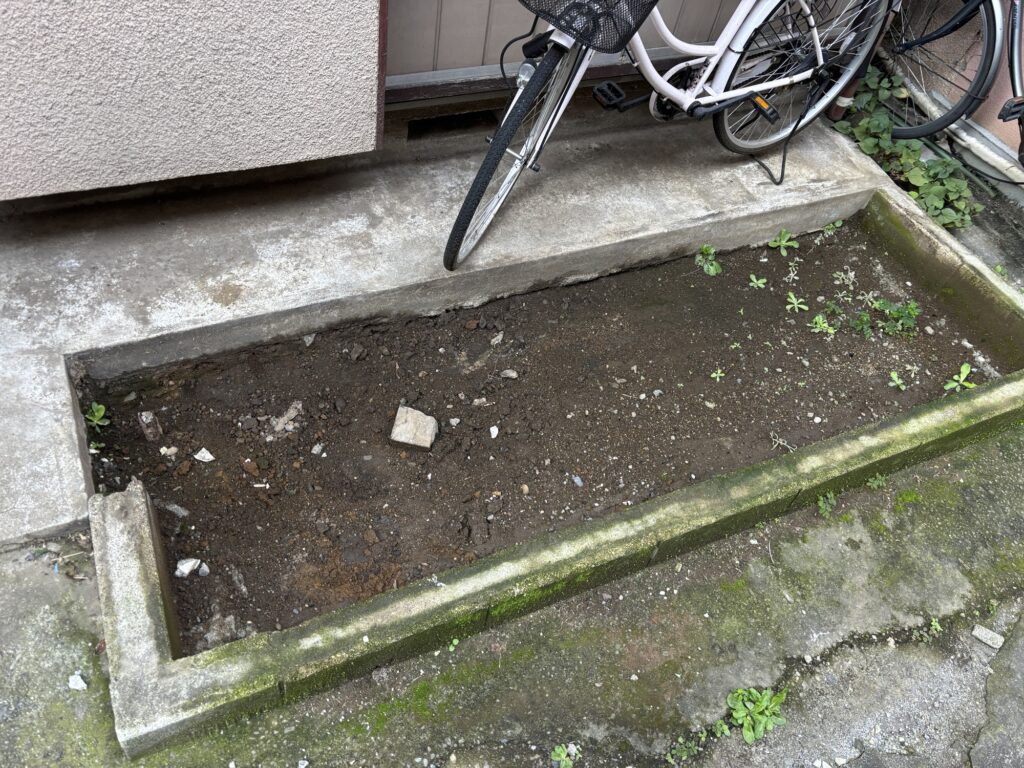
The first step was to remove the existing soil.
I excavated the ground to a depth of approximately 15 cm and removed the excess soil.
This created enough space for the gravel base and the concrete slab.
Proper excavation is important because the finished surface needs to be at the correct height and have enough room for the base materials and concrete.
2. Preparing and Compacting the Soil
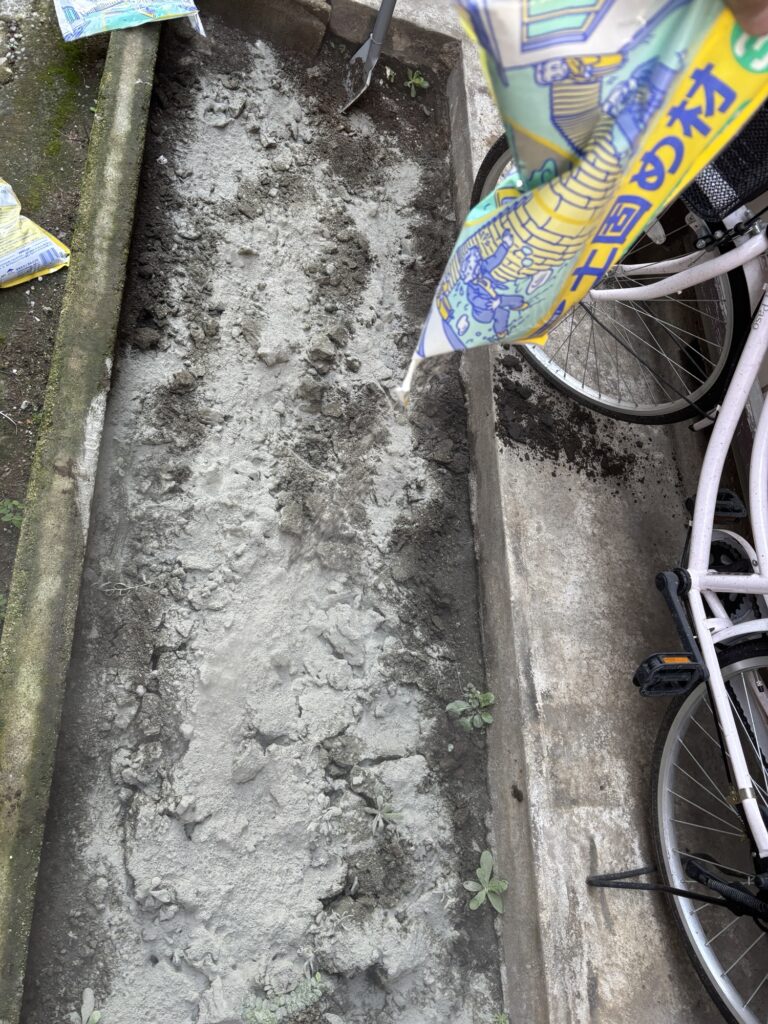
After removing the soil, I spread a soil stabilizer over the ground and mixed it thoroughly with a shovel.
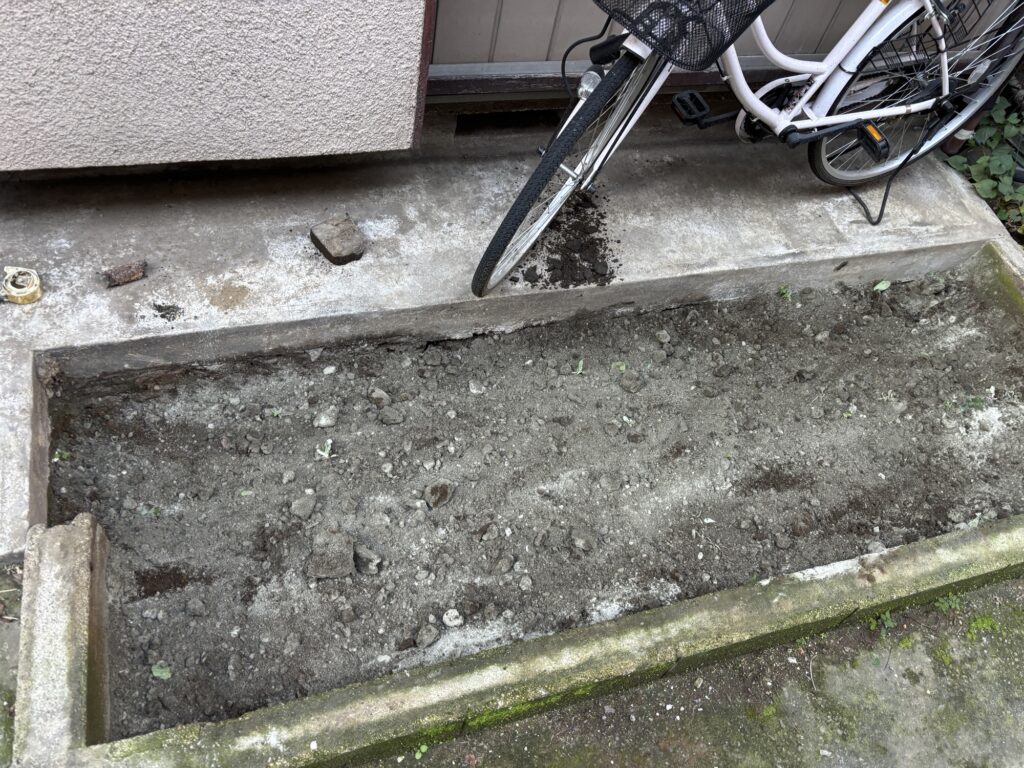
I then used a manual hand tamper to compact the soil.
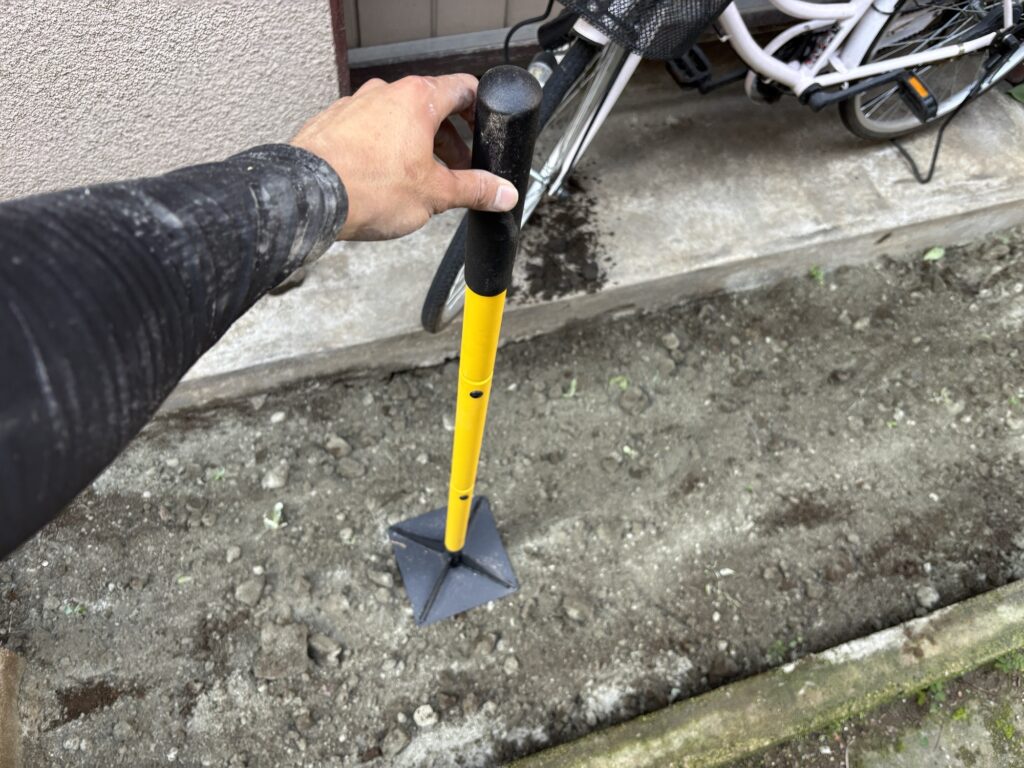
The purpose of this step was to create a firmer foundation before adding the gravel.
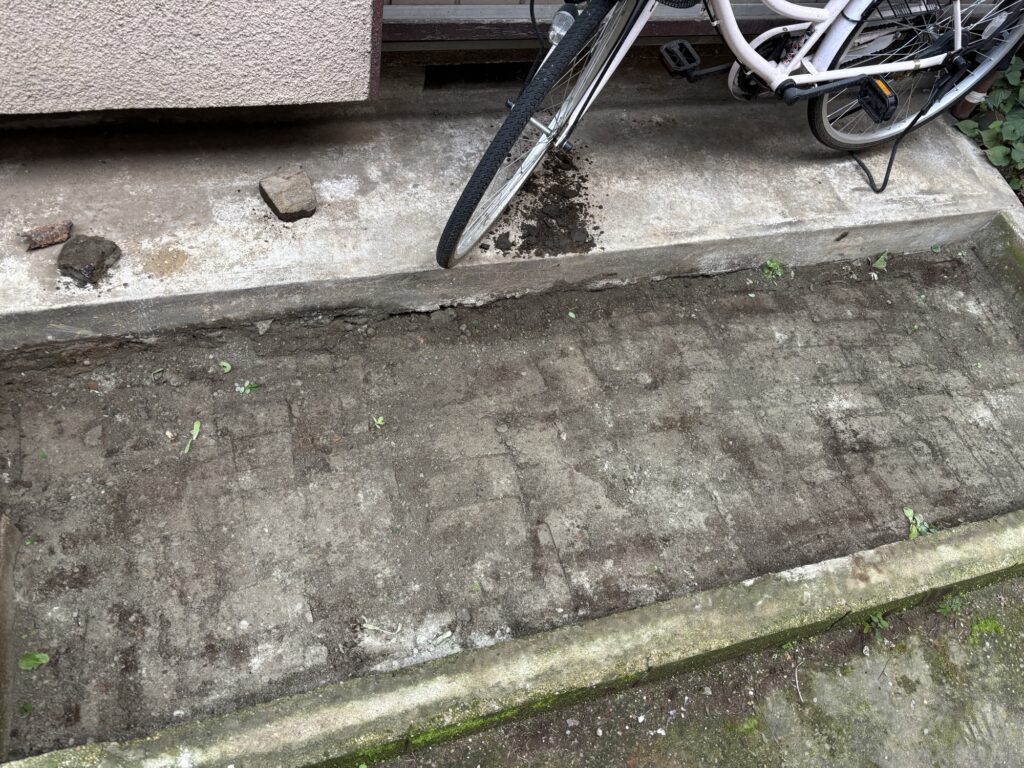
If the ground underneath a concrete slab is not properly prepared, it can settle over time. Uneven settlement may lead to cracks in the concrete.
3. Installing and Compacting the Gravel Base
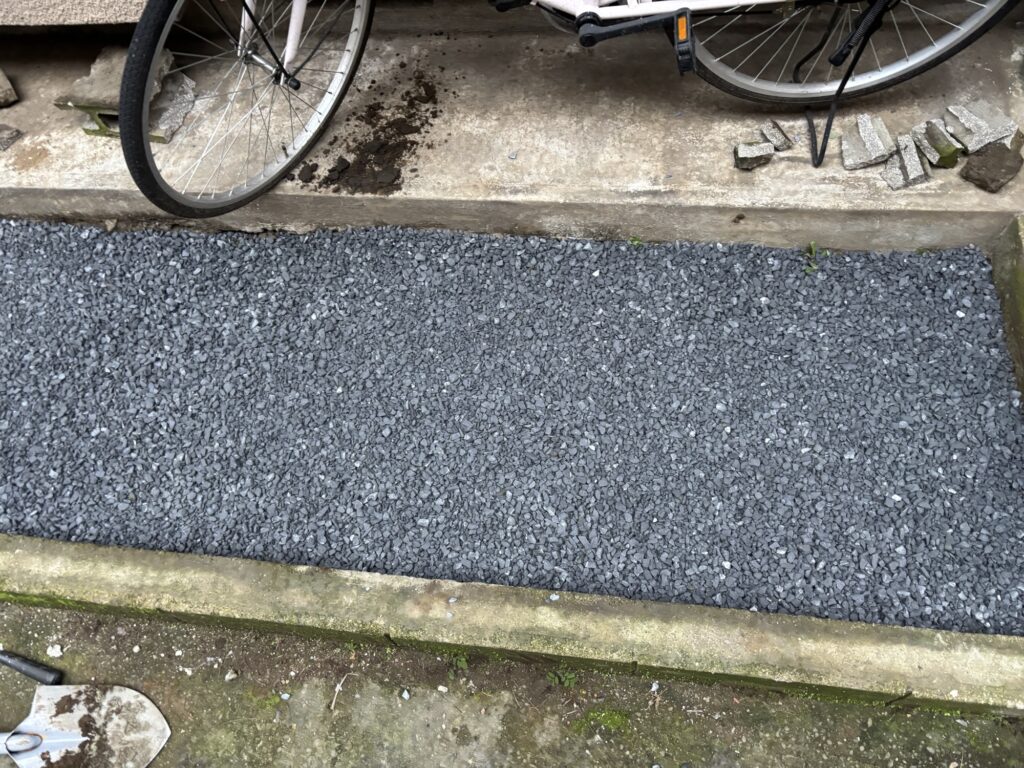
Next, I spread crushed stone over the soil to a thickness of approximately 5 cm.
I compacted the gravel using the manual hand tamper.
This gravel layer helps create a more stable base and supports the concrete above it.
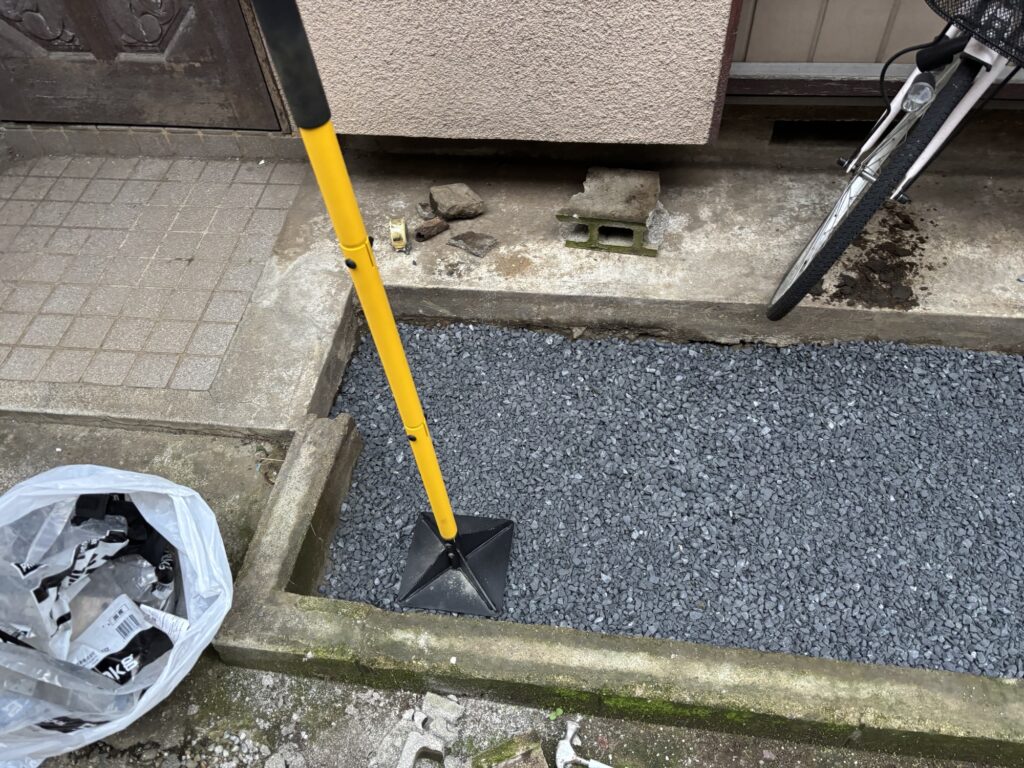
I learned that compacting the base properly is an important part of preparing a durable concrete slab. Simply pouring concrete over loose soil or loose gravel can cause problems later.
4. Positioning the Wire Mesh
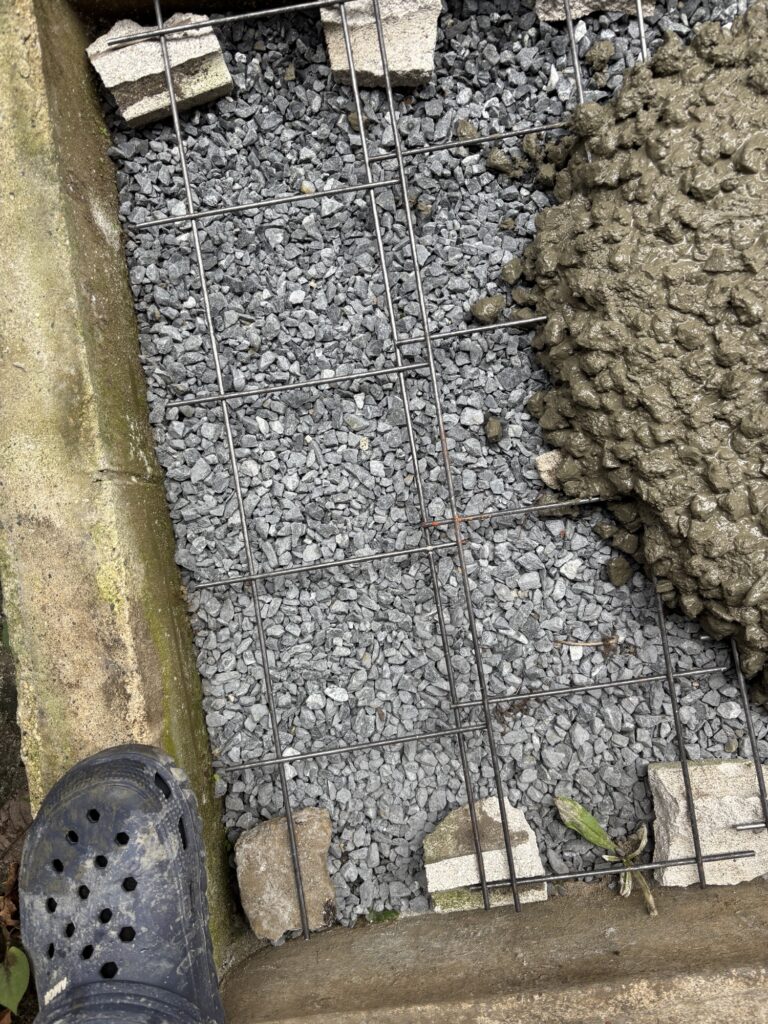
Before pouring the concrete, I installed wire mesh to reinforce the slab.
Normally, wire mesh is supported by concrete spacers or other suitable supports. These keep the mesh at the correct height instead of allowing it to rest directly on the gravel.
In my case, there were some concrete blocks in front of my house. I broke them into smaller pieces and used the pieces as makeshift supports.
For this project, I planned to pour concrete approximately 10 cm thick, so I positioned the mesh about 5 cm above the bottom of the slab.
The goal was to keep the reinforcement around the middle of the concrete thickness.
However, purpose-made spacers are preferable because they provide more consistent support and help maintain the intended reinforcement position during pouring.
5. Preparing the Materials and Tools
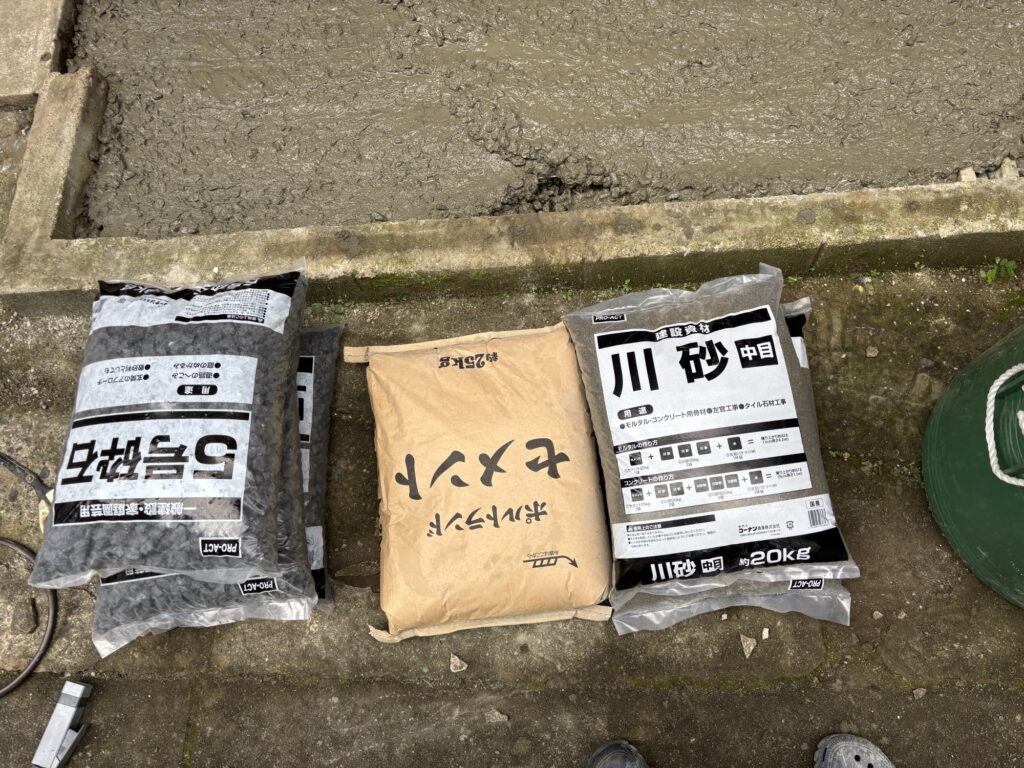
Before mixing the concrete, I prepared the materials and equipment I needed.
I gathered a large bucket, a shovel, cement, river sand, crushed stone, and water.
For the mix, I used the following quantities:
- Cement: One 25 kg bag
- River sand: Two 20 kg bags
- Crushed stone: Three 20 kg bags
- Water: Added gradually while mixing
I adjusted the water as I mixed the materials to achieve a workable consistency.
Getting the right consistency is important. Too little water can make the concrete difficult to place and compact, while too much water can reduce its strength and durability.
The quantities above describe the mix I used for this project. They should not be considered a universally suitable concrete mix for every slab.
6. Mixing the Concrete
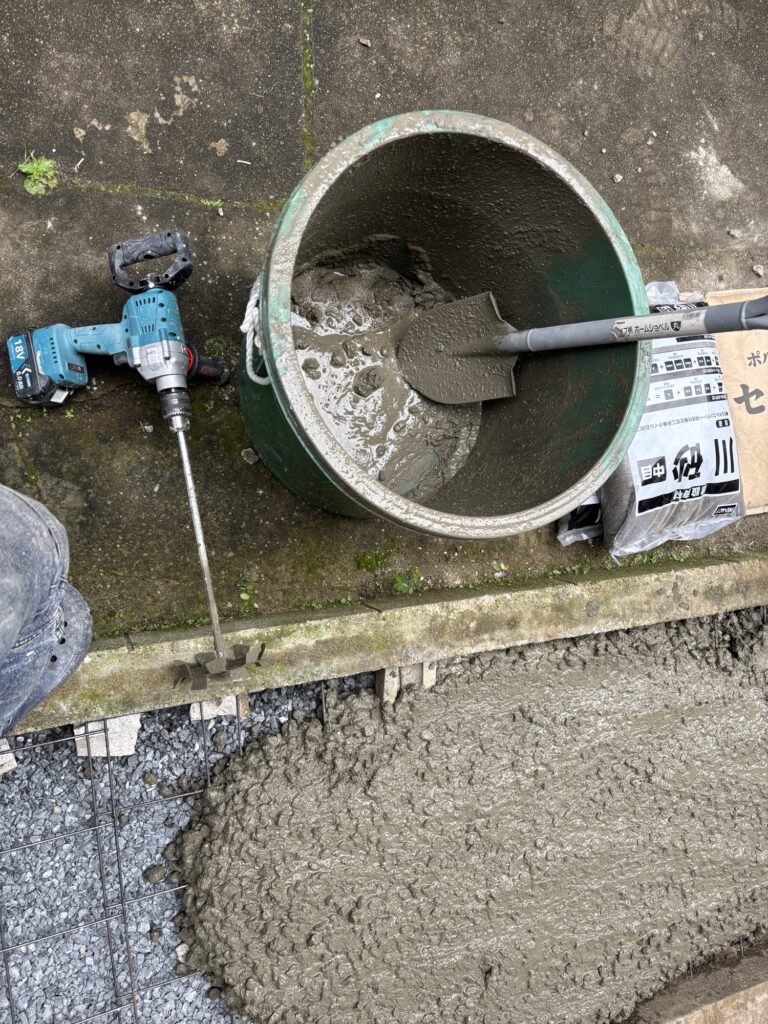
At first, I used an electric mixer to combine the materials.
Unfortunately, the mixer did not have enough power to continue mixing the batch and eventually stopped working.
I had to finish the job by mixing the concrete manually with a shovel.
This was much harder than I expected.
Mixing concrete by hand requires considerable physical effort, especially when working alone. It also takes time to achieve a consistent mixture.
This experience taught me that having the right equipment is important when planning a DIY construction project.
For future projects, I would choose a mixer with sufficient capacity and power for the batch size, or arrange a more practical mixing method before starting.
7. Pouring the Concrete
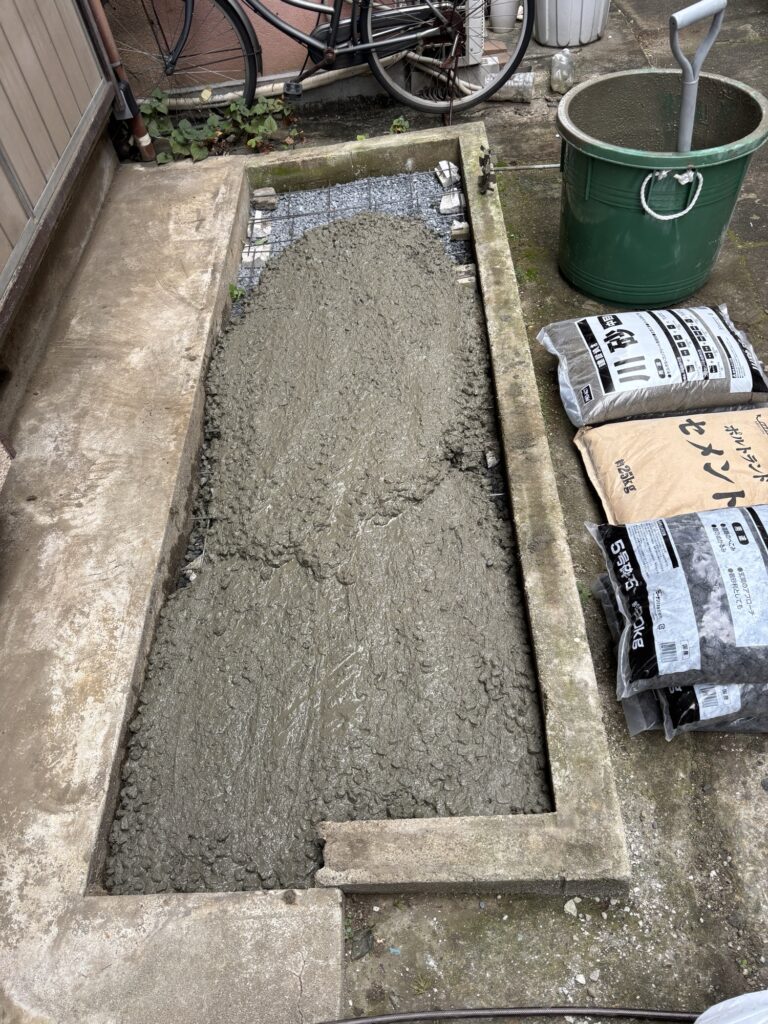
Once the concrete was mixed, I began placing it over the prepared gravel base and around the wire mesh.
I continued mixing and pouring until I had covered most of the area.
The entire concrete-pouring process took approximately two hours.
Unfortunately, I ran short of cement before I could complete the surface to the planned height.
Rather than pretending the job was completely finished, I left approximately 1 cm of additional height to be addressed later.
My plan is to purchase more cement and sand and investigate the appropriate method for finishing the surface.
One thing I learned is that it is important to calculate the required material quantities carefully before beginning a concrete project.
Running short of materials partway through the work can make it difficult to achieve a consistent finish.
8. Checking the Result
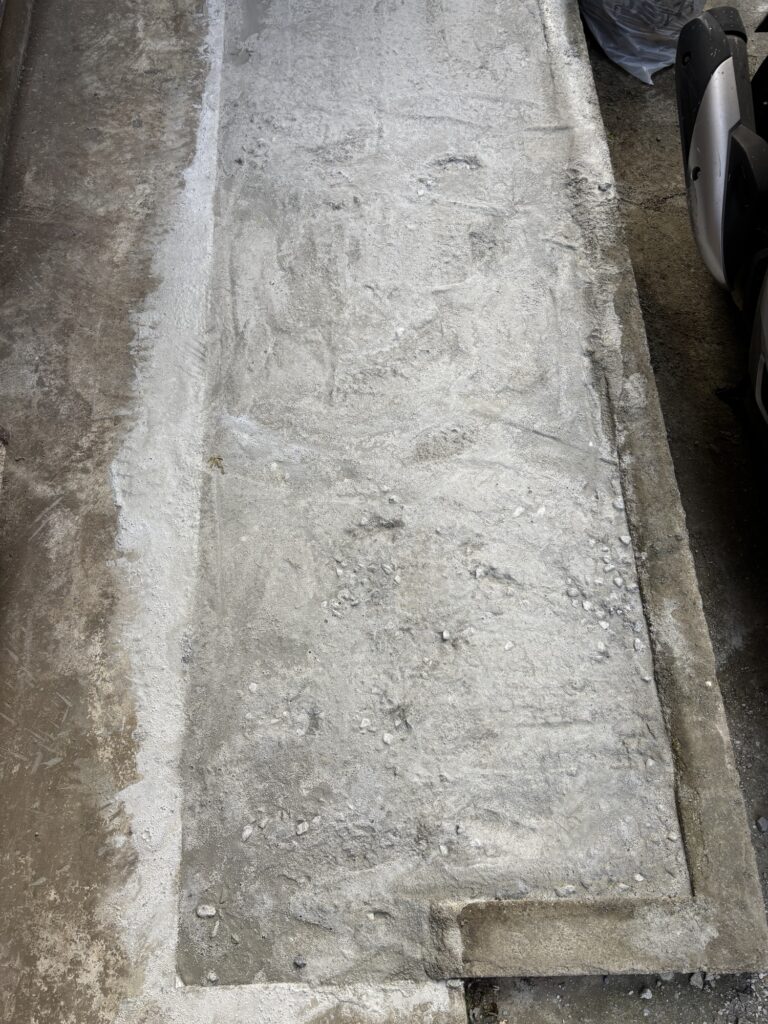
After finishing the work, I allowed the concrete to harden.
By the following day, the surface had become hard enough that I felt relieved to see the project taking shape. I was also able to place my motorcycle in the area.
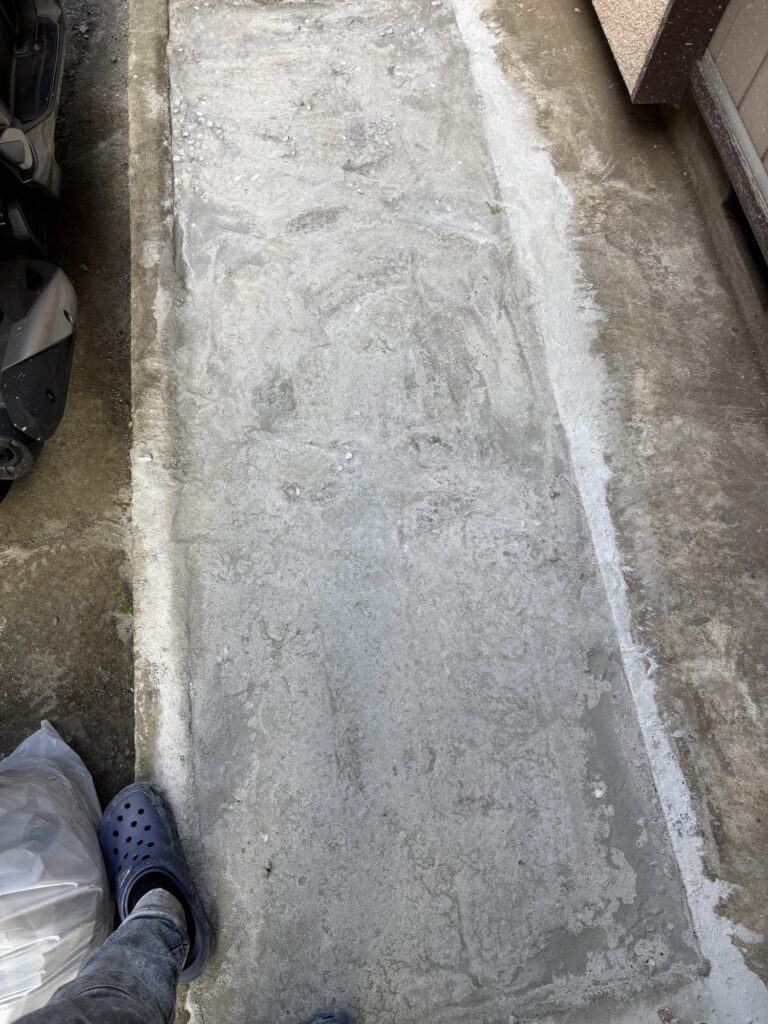
However, concrete can become hard on the surface well before it reaches its intended strength. It still needs proper curing, and I will continue to protect it and allow it to gain strength.
For now, I am happy that I have made progress toward creating a more stable motorcycle parking space in front of my house.
Tools Used
The following tools and materials were used for this project:
- Shovel
- Manual hand tamper
- Large mixing bucket
- Electric mixer
- Cement
- River sand
- Crushed stone
- Water
- Wire mesh
- Temporary supports for the wire mesh
- Soil stabilizer
Using the right tools can make DIY construction work safer, easier, and more efficient.
For a future project, I would pay particular attention to the mixing equipment and use proper concrete spacers to support the reinforcement.
Tips for Beginners: My DIY Concrete Experience
1. Calculate the Required Concrete Volume
Before purchasing materials, measure the area and calculate the volume of concrete required.
For a rectangular slab, use this formula:
Length × Width × Thickness = Concrete Volume
Make sure all measurements use the same unit.
For example, a slab measuring 2.55 m long, 0.80 m wide, and 0.10 m thick requires approximately 0.204 cubic meters of concrete, before allowing for waste or unevenness.
This calculation helps you estimate the amount of concrete and materials needed.
2. Prepare the Ground Carefully
The quality of the ground preparation affects the performance of the finished slab.
Remove unsuitable soil, prepare the subgrade, and compact the ground and gravel base appropriately.
Do not rush this stage just because the concrete will eventually cover everything.
3. Use Proper Supports for Wire Mesh
Wire mesh needs to remain at the intended height during the concrete pour.
Purpose-made concrete spacers are generally more reliable than improvised supports because they help maintain consistent positioning.
The correct reinforcement position depends on the slab design, thickness, and intended use.
4. Choose Suitable Mixing Equipment
An undersized mixer can turn a manageable job into a physically exhausting one.
Before starting, check that your mixer can handle the batch size and the type of material you intend to mix.
If you are mixing concrete manually, prepare a realistic work plan and avoid making batches that are too large to handle properly.
5. Plan the Pour Before Mixing
Concrete work requires good timing.
Prepare your tools, materials, formwork, reinforcement, and working area before mixing begins.
Once the concrete is mixed, you need to place and finish it within the appropriate working time.
6. Pay Attention to Curing
Concrete does not reach its intended strength simply because the surface has hardened.
Follow suitable curing practices for the concrete and weather conditions. Protect the slab from premature drying, heavy rain, and loading too early.
If the slab will support a motorcycle, allow adequate curing time before relying on it for regular parking.
7. Be Careful When Finishing the Surface
Surface finishing should be planned before the concrete is poured.
Adding a thin layer of ordinary cement and sand later is not automatically a reliable way to correct an unfinished slab. A thin topping may crack, shrink, or separate from the concrete underneath if the materials and preparation are unsuitable.
For my next step, I need to check which finishing method is appropriate for the existing surface rather than simply adding another layer.
Common Mistakes to Avoid
1. Underestimating Material Requirements
I ran short of cement before completing the surface to the planned height.
This showed me why it is important to calculate the required concrete volume and estimate the material quantities in advance.
It is also wise to allow for some material loss.
2. Using Equipment That Is Too Small
My electric mixer stopped working partway through the job.
As a result, I had to mix the remaining concrete manually, which required much more physical effort.
Choosing suitable equipment before starting can save both time and energy.
3. Using Improvised Reinforcement Supports
I used broken pieces of concrete blocks instead of purpose-made spacers.
Although I managed to position the mesh, improvised supports may not maintain the correct height consistently.
For future projects, I would use suitable spacers designed for concrete reinforcement.
4. Assuming That Hard Concrete Is Fully Cured
The surface was hard by the following day, but this does not mean the concrete had reached its intended strength.
Concrete needs sufficient curing time before it can safely support its intended loads.
5. Leaving Surface Finishing Until the End
Because I ran short of cement, I could not complete the surface exactly as planned.
I learned that surface height and finishing should be considered when estimating materials and organizing the work.
6. Relying Only on Videos and Instructions
Watching YouTube videos and asking experienced people for advice helped me prepare.
However, working alone on an actual project was more challenging than I had imagined.
Practical experience revealed problems that were difficult to anticipate from watching videos alone.
What I Learned From This Project
This project taught me much more than how to pour concrete.
My main job is installing wallpaper and flooring, so concrete work was outside my usual area of experience.
Before starting, I researched the process online and asked a construction site supervisor for advice. Even with that preparation, several things did not go exactly as planned.
The electric mixer stopped working, the manual mixing required more energy than expected, and I ran short of cement before completing the surface.
These challenges reminded me that understanding a process and carrying it out successfully are two different things.
I have been renovating this house little by little for about two years. Because it is my own home, I have opportunities to learn new skills and improve my practical knowledge.
That experience will be valuable when I buy another property in the future.
My long-term goal is to continue developing my renovation skills so that I can handle more of the work myself when improving houses.
Every project gives me an opportunity to learn something new, make mistakes, and improve the way I work.
Although this concrete project was physically demanding, I am glad I took on the challenge.
Frequently Asked Questions
1. How thick should a concrete slab for motorcycle parking be?
The appropriate thickness depends on the ground conditions, motorcycle weight, intended use, and slab design. A thickness of approximately 10 cm is commonly used for some small residential slabs, but thickness alone does not guarantee durability. Proper ground preparation, reinforcement, drainage, and concrete quality also matter.
2. Why is gravel placed under concrete?
A properly prepared gravel base helps create a stable foundation, provides support, and can improve drainage depending on the material and site conditions. It should be compacted appropriately before the concrete is poured.
3. Why does the ground need to be compacted before pouring concrete?
Loose soil and gravel may settle after the concrete has been placed. Uneven settlement can lead to cracking or movement. Proper compaction helps create a more stable base.
4. What is wire mesh used for in concrete?
Wire mesh helps control the development and opening of cracks caused by shrinkage and other stresses. Its effectiveness depends on correct positioning, concrete cover, and the overall slab design. It does not prevent every crack.
5. Where should wire mesh be positioned in a concrete slab?
The appropriate position depends on the slab design and the purpose of the reinforcement. For my project, I aimed to position the mesh around the middle of the approximately 10 cm slab. In other applications, the specified position may differ, so it is important to follow the relevant design requirements.
6. Can concrete be mixed by hand?
Yes, concrete can be mixed by hand for small projects, but it requires considerable physical effort. Consistency can also be harder to maintain. Suitable mixing equipment is usually a better option when handling larger quantities.
7. How long does concrete take to harden?
Concrete may become firm within hours and hard enough to walk on after a day or so, depending on the mix and weather. However, it continues to gain strength over time. Many conventional concrete mixes use 28 days as a reference age for specified compressive strength. Actual loading times depend on the concrete and site conditions.
8. Can I park my motorcycle on concrete the next day?
It is generally better not to assume that newly poured concrete is ready for vehicle loading the following day. The surface may feel hard while the concrete is still relatively weak. Follow the concrete supplier’s or mix manufacturer’s guidance and allow adequate curing time before regular use.
9. What happens if I run out of cement before finishing the concrete?
Running short of cement can interrupt the pour and make it difficult to achieve a consistent surface. Calculate the required volume and material quantities beforehand. If a slab has already been partially poured, the correct way to continue or repair it depends on the condition of the existing concrete and the required finish.
10. Is DIY concrete work worth learning for home renovation?
It can be a useful skill, especially if you want to renovate properties yourself. However, concrete work requires careful planning, suitable materials, correct preparation, and attention to safety. It is worth learning gradually and getting professional advice when structural performance, drainage, or other technical issues are involved.
Conclusion
Today, I worked on improving the space in front of my house by preparing the ground, installing wire mesh, and pouring concrete for a motorcycle parking area.
The work was harder than I expected, especially after my electric mixer stopped working and I had to mix the concrete manually.
I also learned the importance of estimating material quantities correctly and planning the surface finish before beginning the pour.
Even though I have been renovating this house for about two years, there are still many skills I need to learn.
Watching videos and asking experienced people for advice are valuable ways to prepare, but real experience teaches lessons that are difficult to learn from instructions alone.
I want to use what I learned today when renovating this house and when working on future properties.
My goal is to keep improving my renovation skills, one project at a time.
Have you ever tried a DIY concrete project at home? What did you learn from the experience?


Comments