
Project Data
- Location: 9th-floor apartment in Japan
- Room: Washroom / Laundry Area
- Property Status: Occupied
- Workers: 1
- Work Duration: Approximately 3.5 hours
- Work Performed: Partial wallpaper replacement and cushion flooring replacement
- Flooring Material: Patterned cushion flooring
- Wallpaper: New wallpaper and reused sections of the existing wallpaper
Introduction
Today’s project was a partial wallpaper replacement and cushion flooring installation in the washroom and laundry area of a 9th-floor apartment in Japan.
The apartment was occupied, so I worked carefully while keeping the area as clean and organized as possible. I completed the entire job by myself.
The bathroom door area had recently been modified to allow a new unit bathroom to be installed. Because the opening had been widened, the gypsum board above the bathroom entrance was new.
The wall behind the washing machine was also partially rebuilt because the washing machine water supply valve had been replaced. This meant there were several areas of new gypsum board that needed to be prepared before wallpaper installation.
There was also a limited amount of new wallpaper available for this project. Therefore, I installed new wallpaper across the entire front wall of the washing machine space and used pieces of the old wallpaper that had been removed to repair the areas above the bathroom entrance and to the left of the washing machine.
This project required careful planning because I had to make the best use of the available materials while still achieving a clean finish.
Work Process — Site Report
1. Preparing the New Gypsum Board
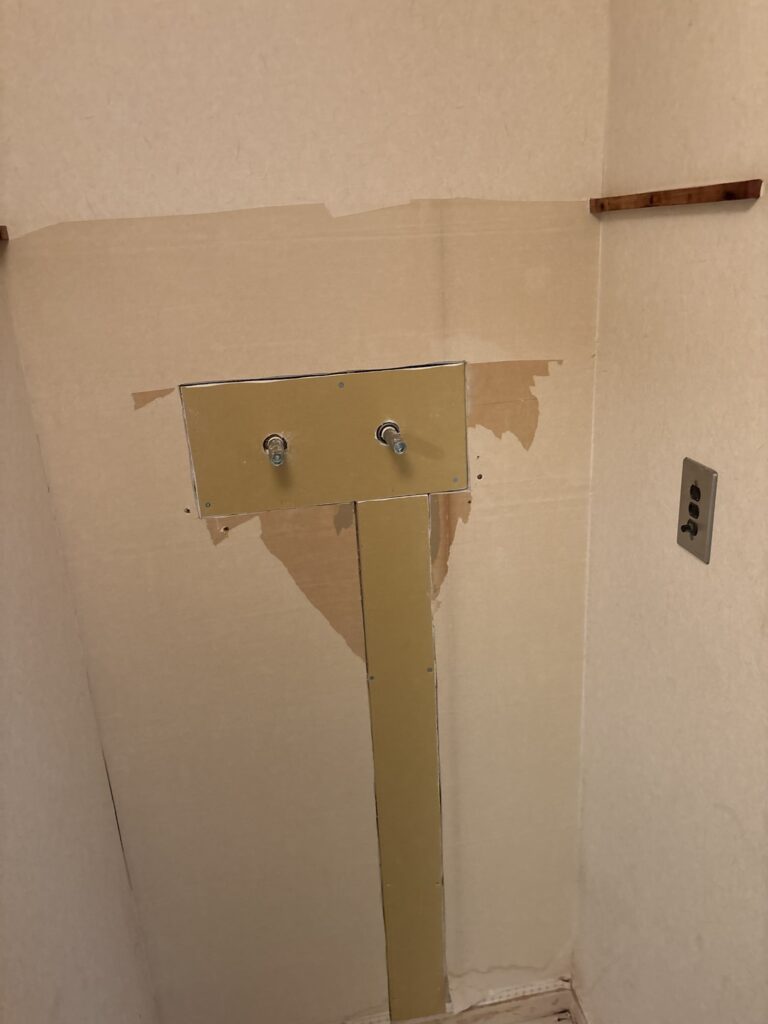
Before applying the first coat of joint compound, I noticed that some of the new gypsum board was sticking out farther than the existing board.
Instead of trying to level the difference with a large amount of joint compound, I first used a utility knife to carefully shave down the protruding gypsum board.
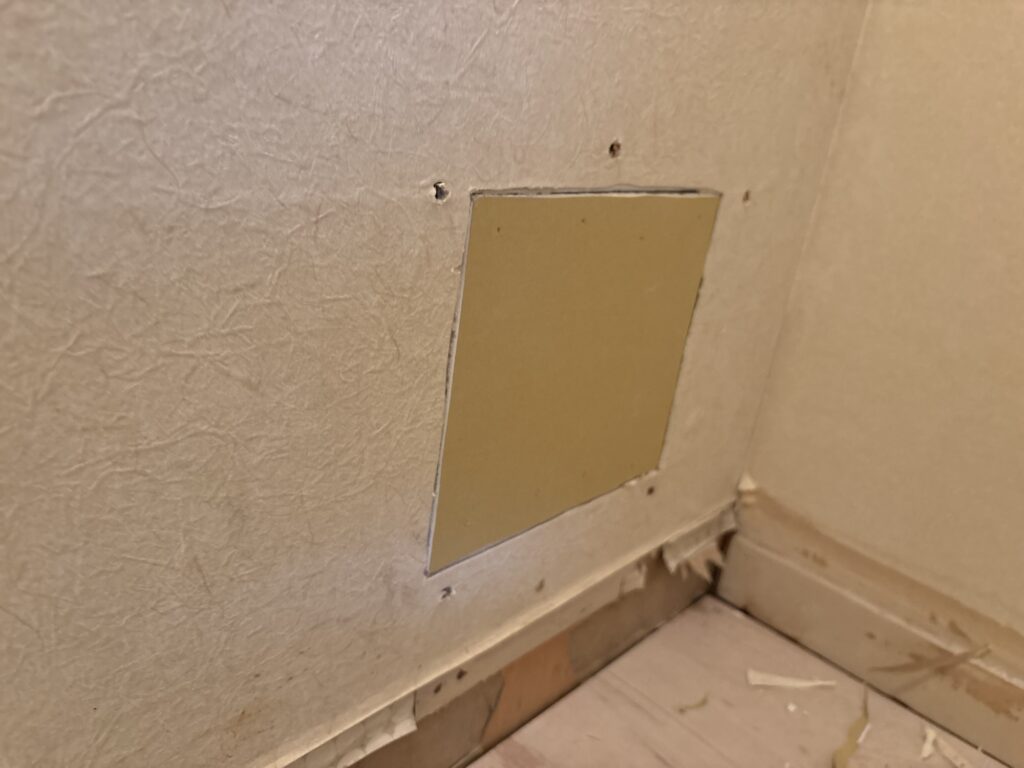
This simple step reduces the amount of compound needed later.
If a large difference in level is left untreated, it can make applying the compound more difficult and may eventually create an uneven surface.
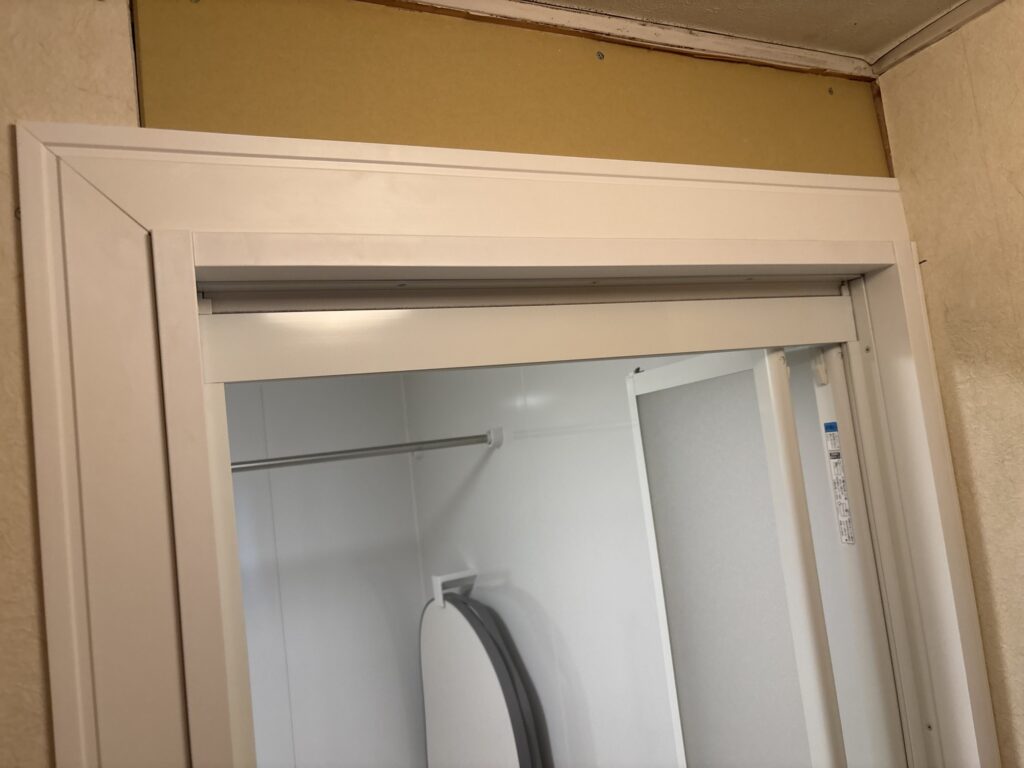
Proper surface preparation is especially important when new gypsum board meets existing board.
2. Applying Base Joint Compound
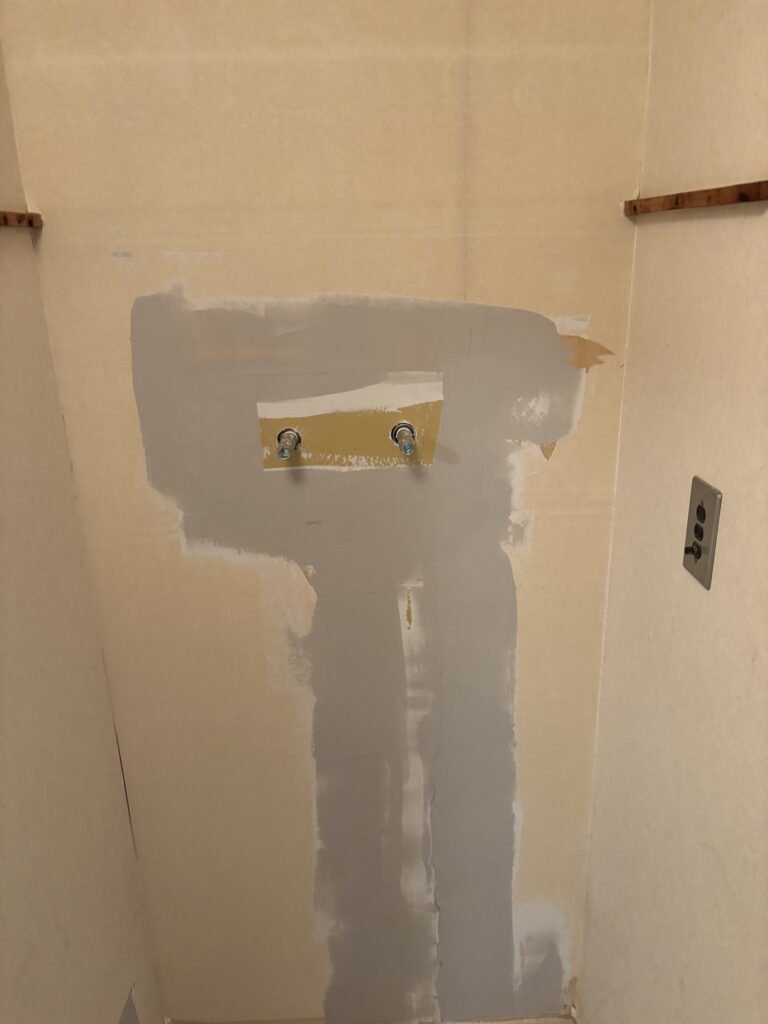
After leveling the gypsum board, I applied the base joint compound approximately three times.
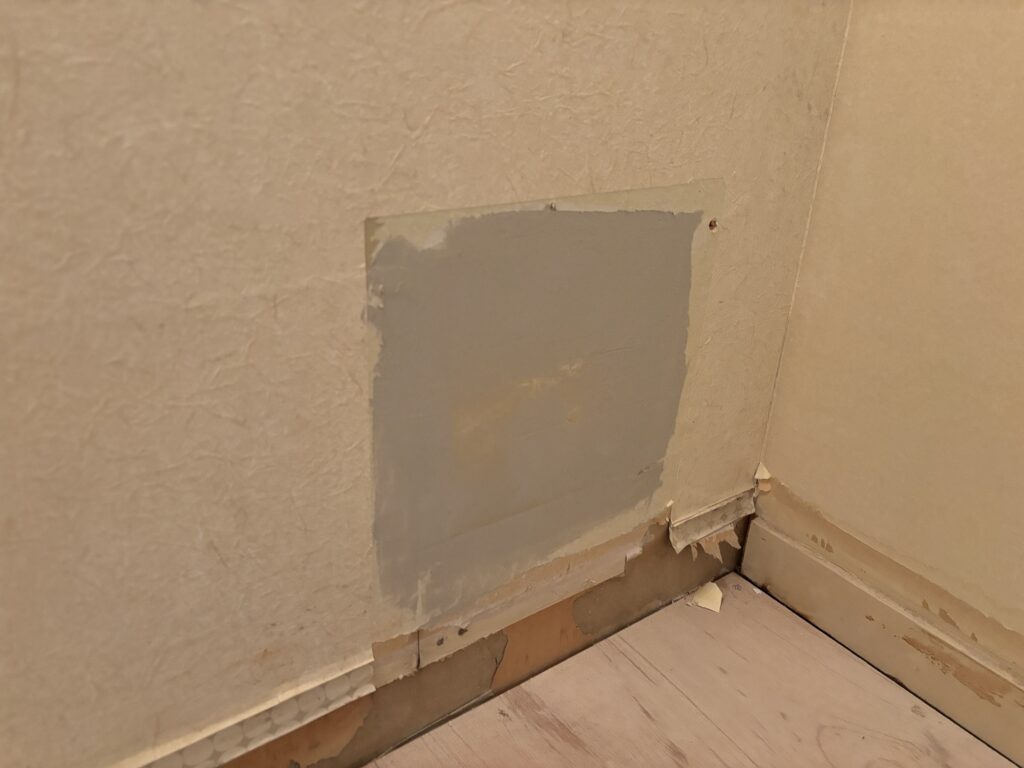
Because the compound needs to dry between applications, I used a heat gun to speed up the drying process.
Before applying the finishing compound, I checked the surface by hand.
If I could no longer feel a depression in the area where the base compound had been applied, the surface was ready for the finishing coat.
The purpose of the two types of compound is slightly different.
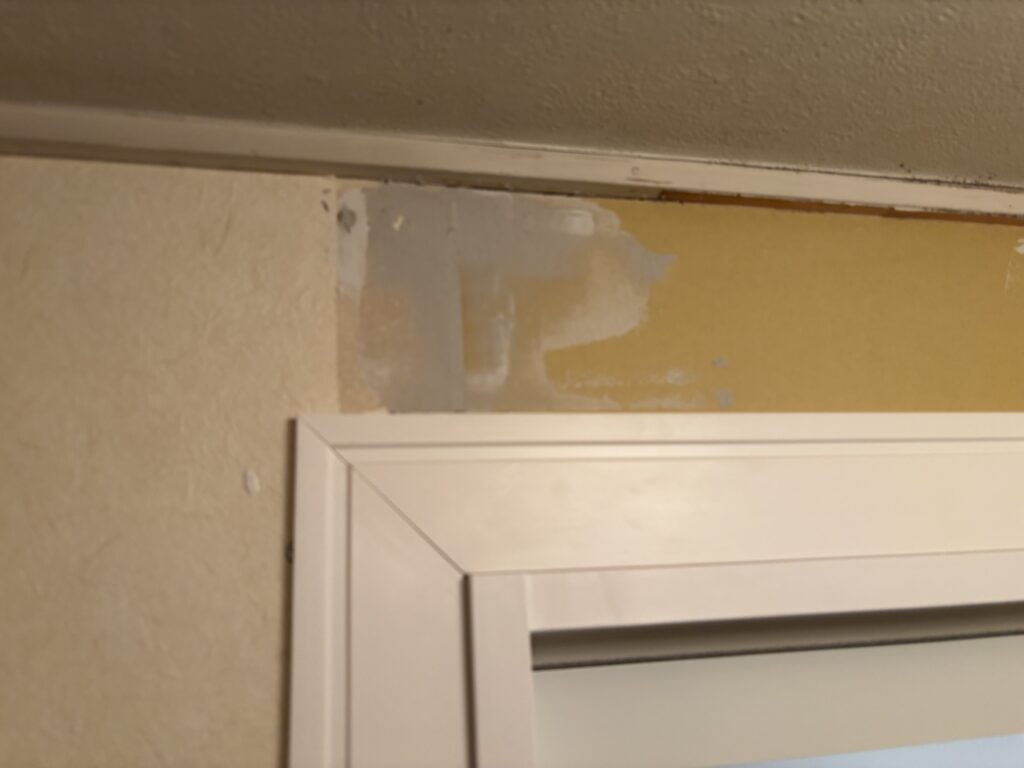
The base compound is mainly used to fill deeper imperfections, while the finishing compound is used to smooth out smaller imperfections and create a surface suitable for wallpaper installation.
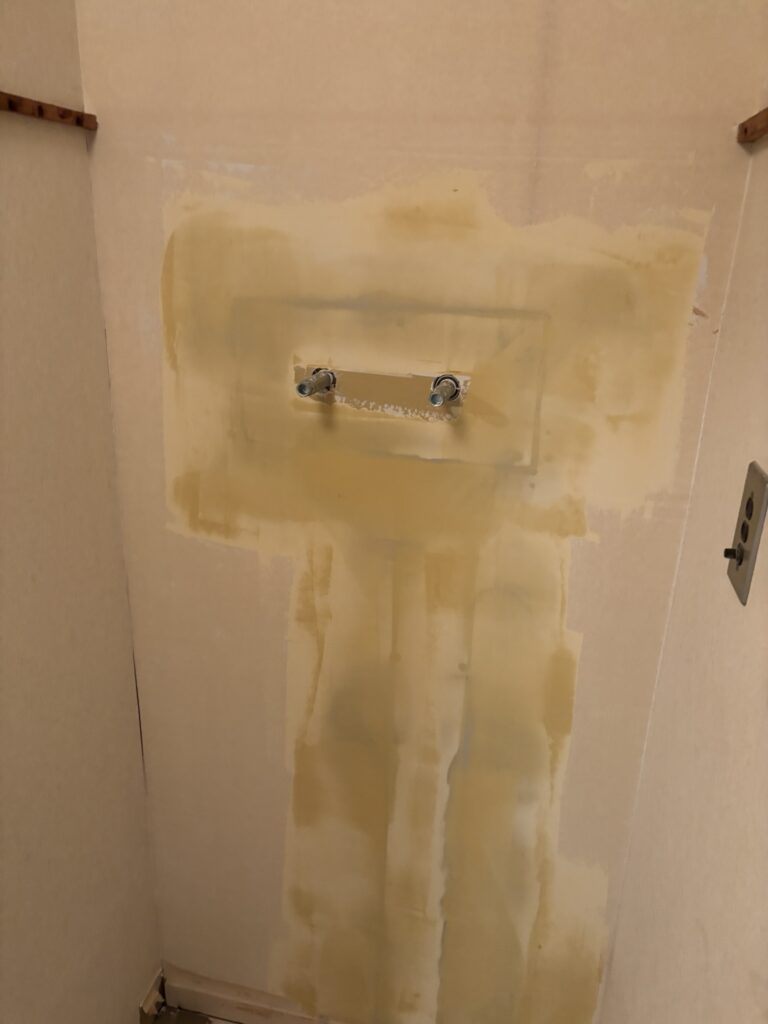
If a depression is too deep, finishing compound alone may not be enough. In that case, additional base compound is necessary.
3. Preparing the Floor
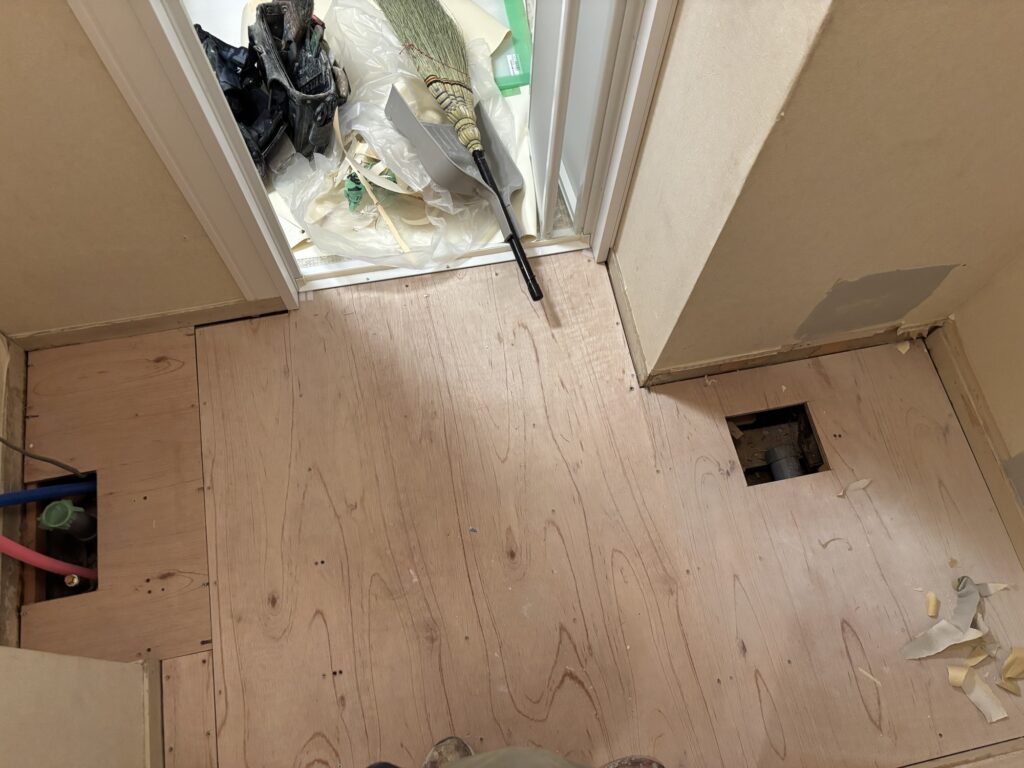
Once the wall preparation was complete, I moved on to the floor.
The plywood subfloor had gaps at the joints and around the corners, so I applied filler to these areas.
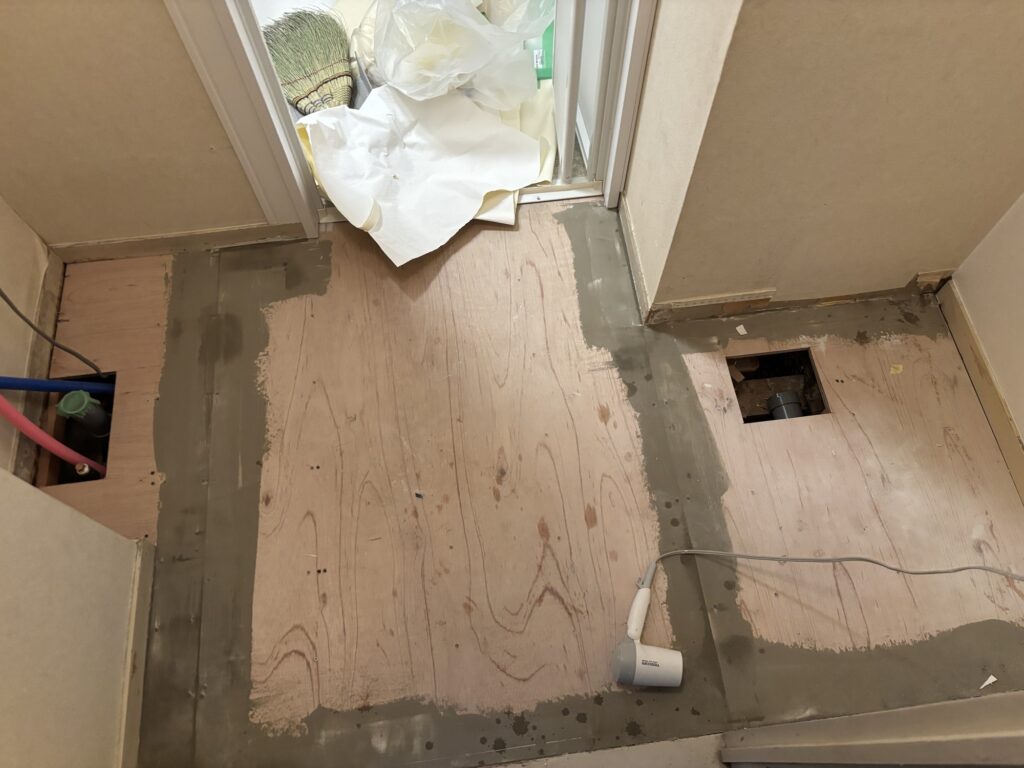
Normally, a gap of around 1 mm at a corner may not require filling. However, the gaps on this floor were slightly larger, so they needed to be filled.
This is important when installing cushion flooring.
If a large gap is left underneath the flooring, the cushion flooring can sink into the gap at the edge. This can create a visible depression and make the finished floor look uneven.
4. Cutting and Installing Reused Wallpaper
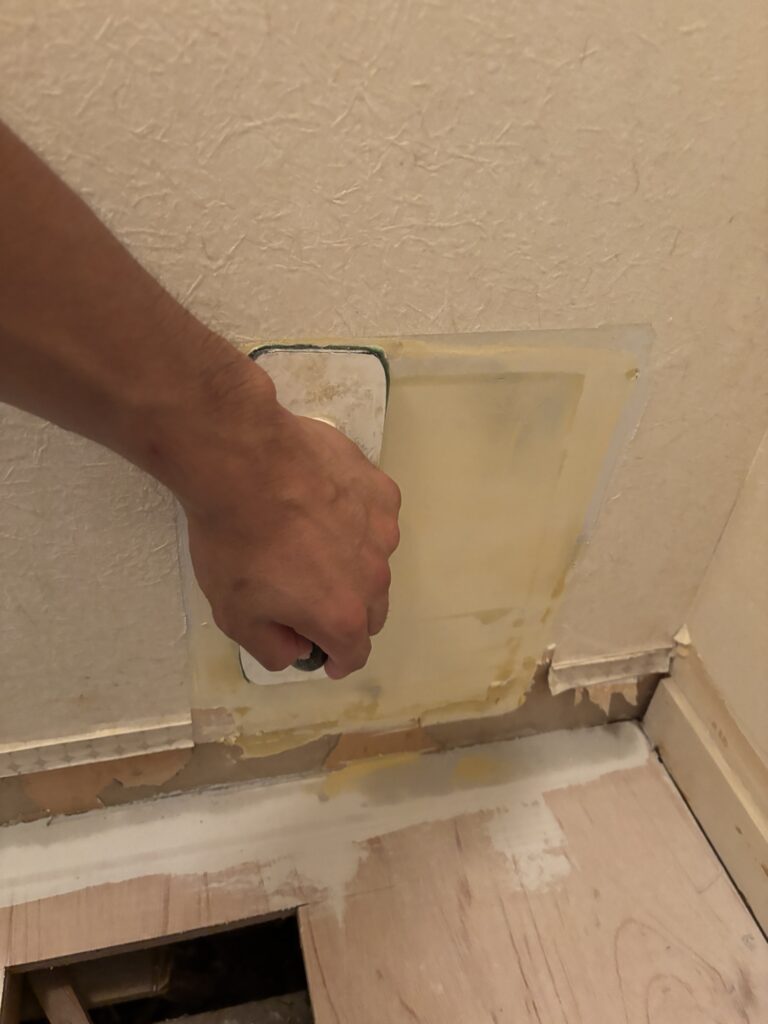
Next, I installed the reused pieces of the old wallpaper.
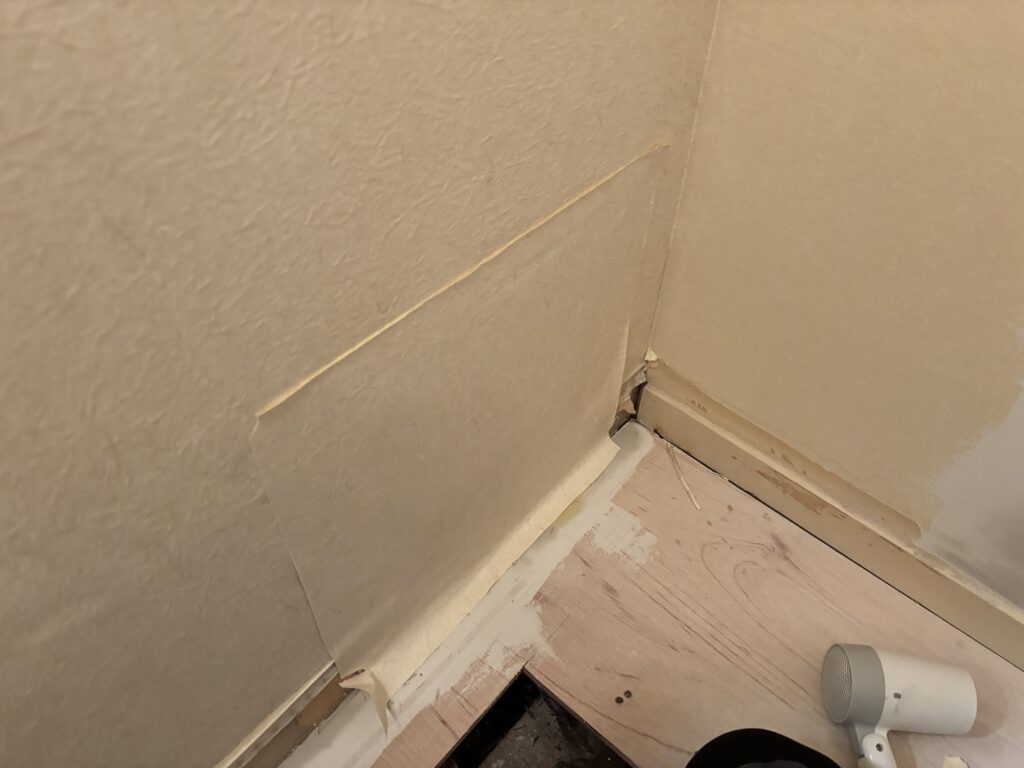
Because I was working with pieces that had already been removed, I had to be especially careful when cutting them.
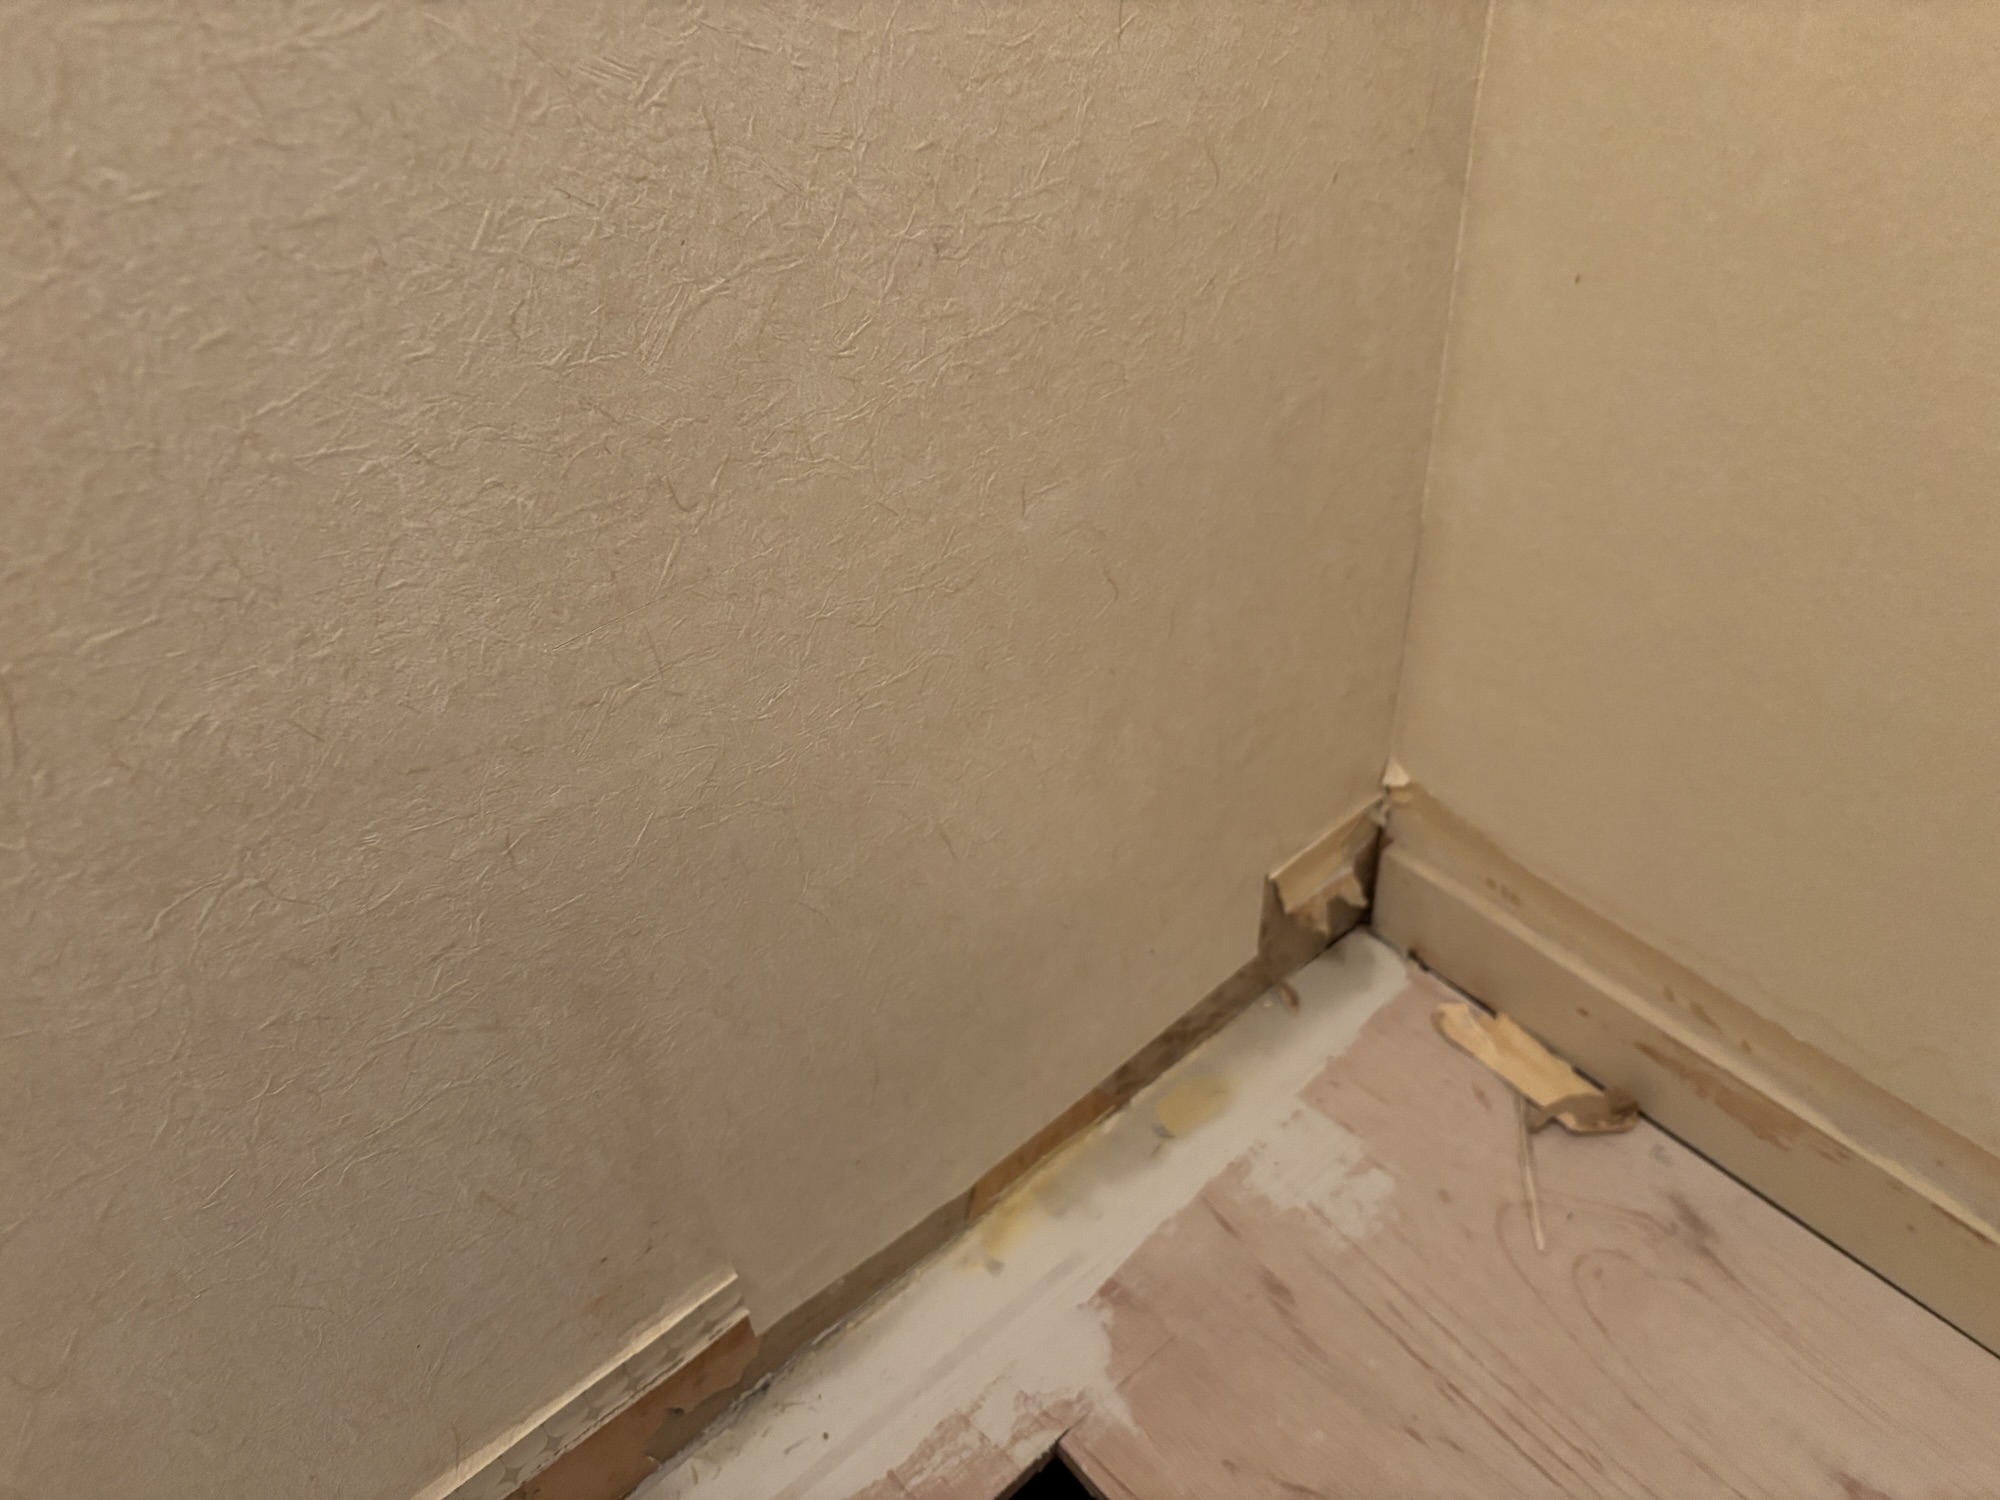
When making a cut, I avoided applying too much pressure and tried to cut only through the surface wallpaper.
If too much pressure is applied, the blade can cut into the backing paper underneath.
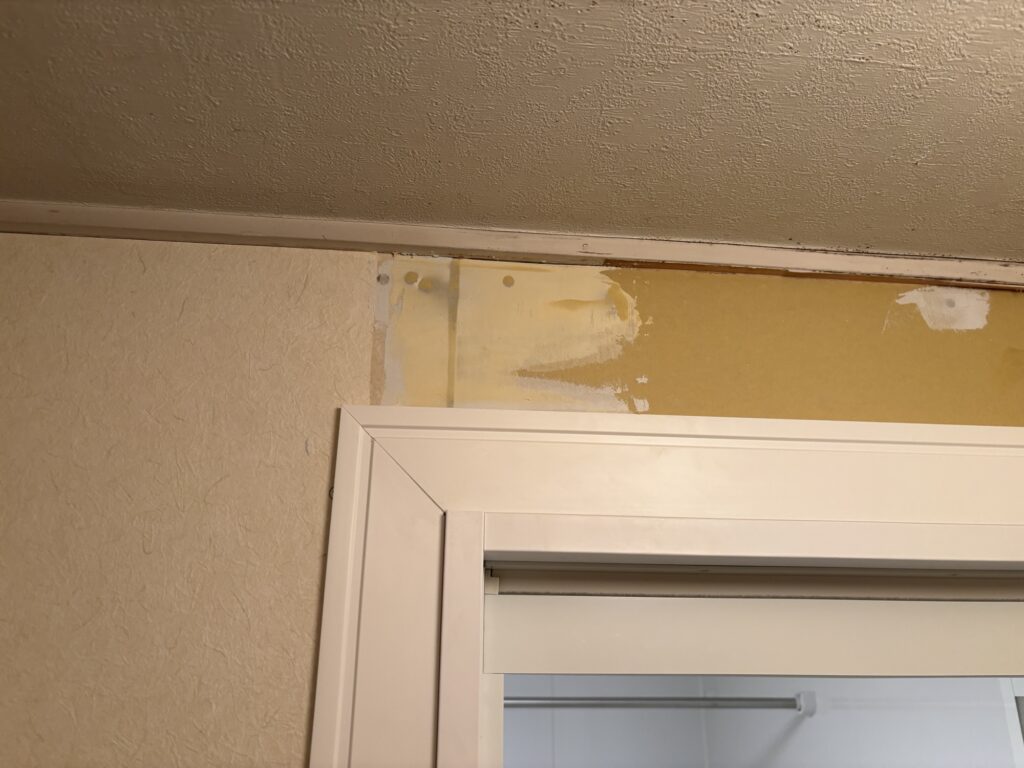
In some cases, this can cause the backing paper to peel away.
If the backing paper comes off, it can create a difference in thickness between the existing wallpaper and the replacement piece. This can make the repair noticeable after installation.
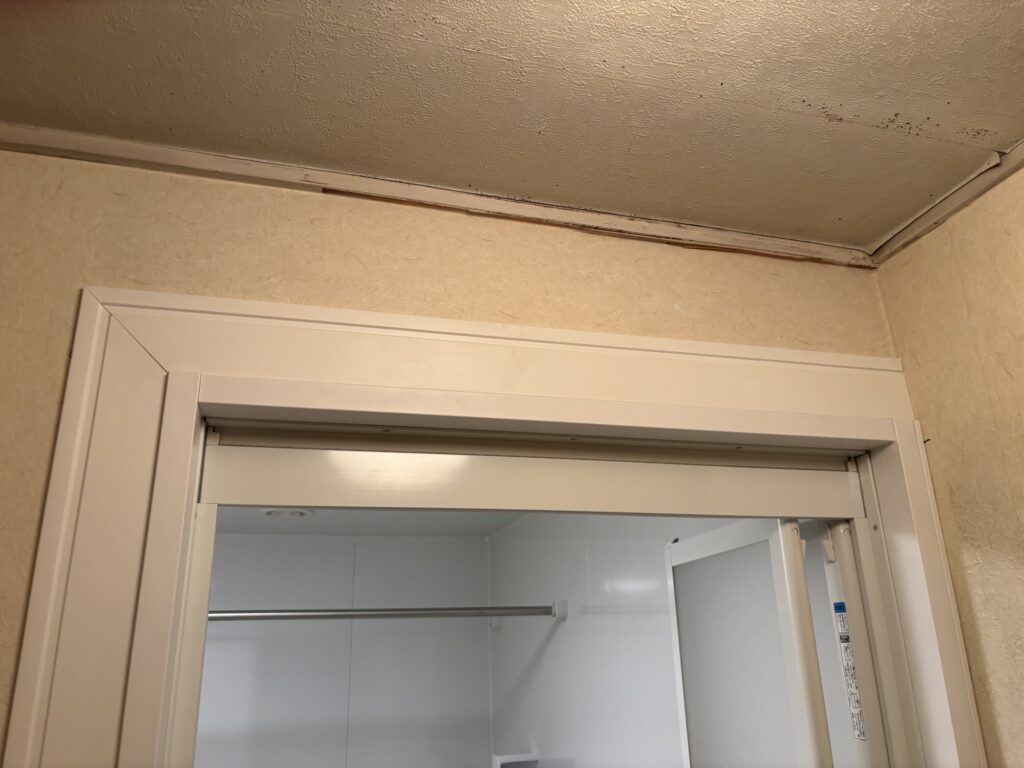
After making the cuts, I applied wallpaper paste and installed the pieces.
I then used a seam roller to carefully press and smooth the joints.
5. Installing Wallpaper Behind the Washing Machine
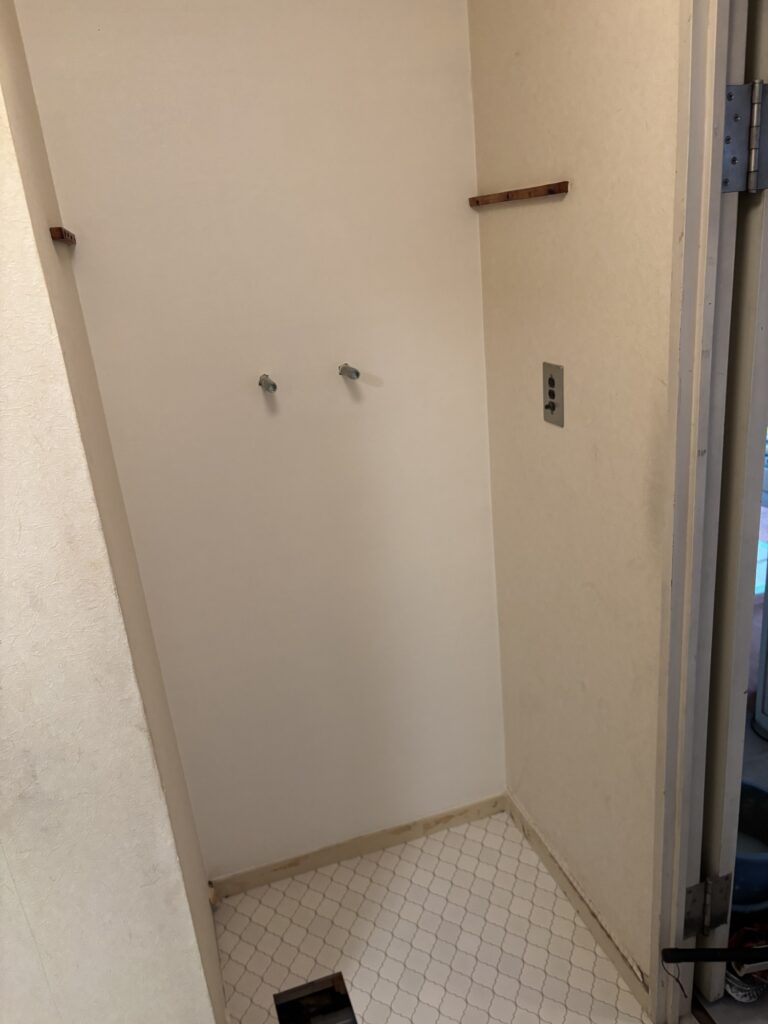
The front wall of the washing machine area received a completely new sheet of wallpaper.
The water supply valve in the center of the wall created an obstacle because it protruded from the surface.
To install the wallpaper around it, I made several small cuts around the valve, creating a shape similar to flower petals.
This allowed the wallpaper to pass around the protruding valve while maintaining a clean finish.
It is important not to force the wallpaper over the fitting without making the necessary cuts.
Trying to stretch the wallpaper around the protrusion without relief cuts can cause the material to tear.
After completing the wallpaper installation, I moved on to the floor.
6. Installing the Cushion Flooring
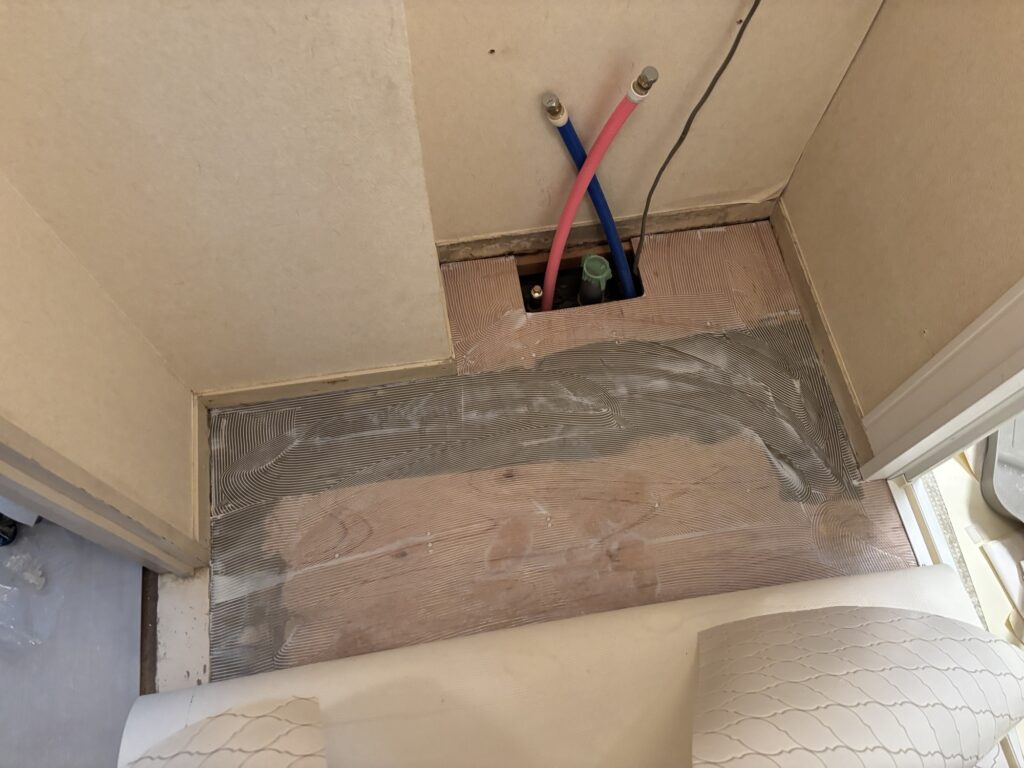
The next step was installing the cushion flooring.
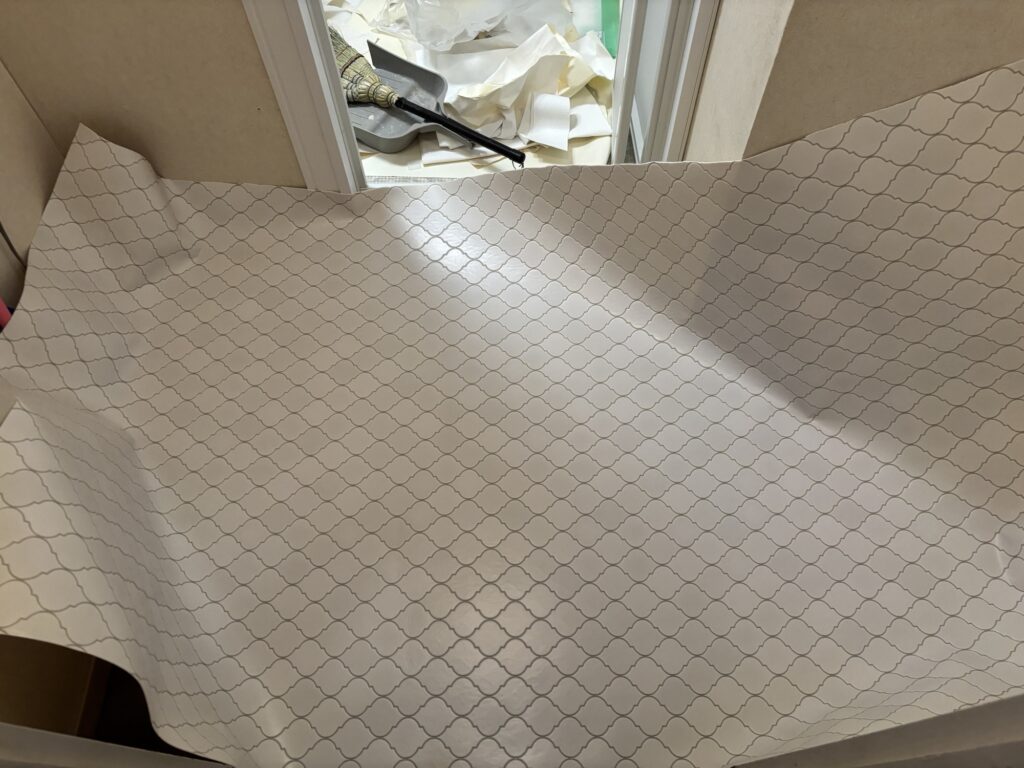
This project used a patterned cushion flooring material, so accurate positioning was especially important.
With patterned materials, even a slight angle can become very noticeable after installation.
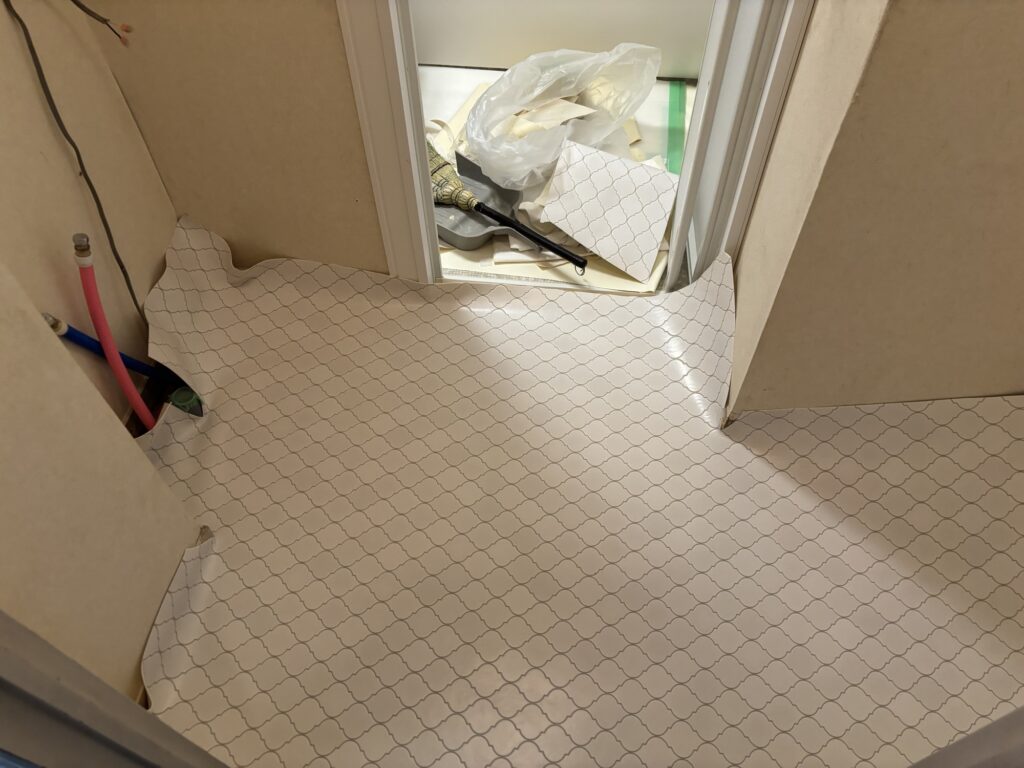
I used the bottom of the door frame at the washroom entrance as a reference point and established a straight installation line.
I then applied adhesive to half of the floor and positioned that section first. After confirming the alignment, I applied adhesive to the remaining half and completed the installation.
Installing the flooring in two sections has a major advantage when working alone: it makes it much easier to adjust the position.
If adhesive is applied to the entire floor at once, the cushion flooring can quickly stick to the adhesive, making it difficult to move and adjust.
7. Finishing Around the Wooden Baseboard
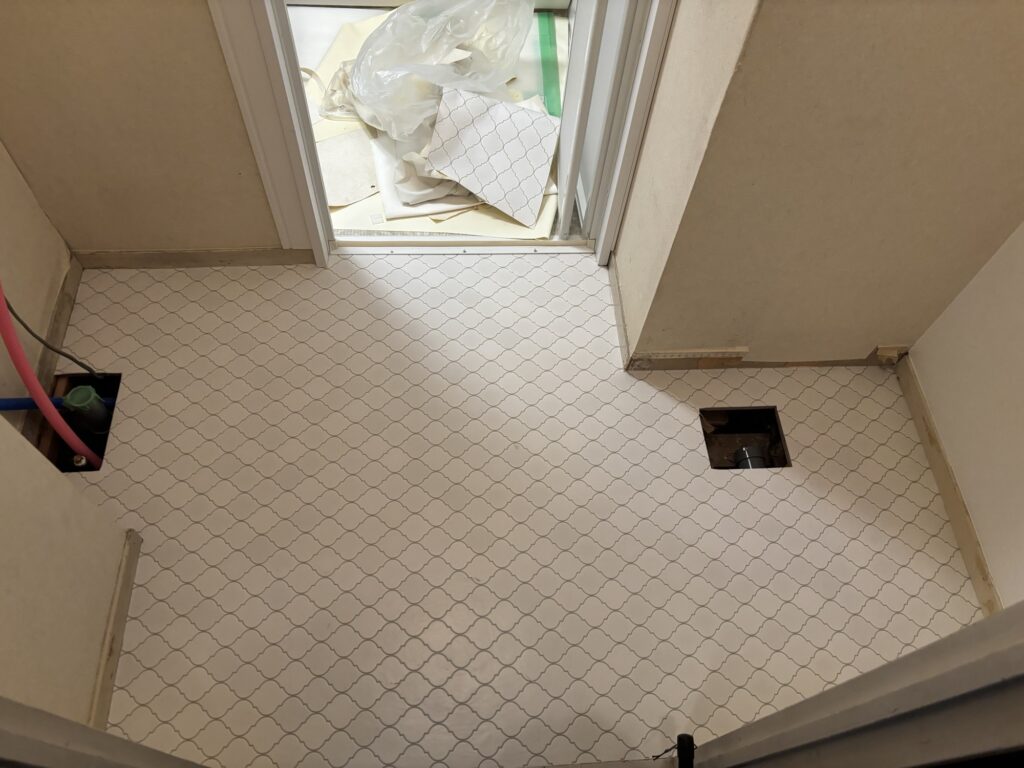
The existing wooden baseboard was not being replaced, so I had to be particularly careful when trimming the cushion flooring.
I avoided cutting too much material away at once.
Instead, I trimmed the flooring little by little until it fit neatly against the baseboard without leaving a visible gap.
Finally, I used a thin putty knife to carefully push the edge of the cushion flooring underneath the wooden baseboard.
This created a cleaner and more finished appearance.
Although patterned cushion flooring can be difficult to position accurately, I was able to install it straight and maintain the pattern alignment.
8. Final Cleanup
After completing the wallpaper and cushion flooring installation, I cleaned the work area and put away all tools and materials.
Because the apartment was occupied, keeping the workspace organized throughout the job was important.
The entire project was completed in approximately 3.5 hours.
Related Project
Replacing Cushion Flooring in a Toilet and Washroom After Water Damage
Tools Used
The main tools and equipment used for this project included:
- Utility knife
- Wallpaper cutting tools
- Wallpaper seam roller
- Putty knives
- Sanding tools
- Heat gun
- Measuring tools
- Cushion flooring installation tools
- Wallpaper adhesive
- Joint compound
The exact tools required can vary depending on the condition of the existing walls and floor.
Professional Tips
1. Level New Gypsum Board Before Applying Too Much Compound
If new gypsum board is sticking out beyond the existing surface, remove the excess material first.
It is usually better to correct the level mechanically than to try to compensate with a thick layer of compound.
2. Check the Surface by Touch
When preparing a wall, visual inspection alone is not always enough.
Run your hand over the surface. If you can still feel a depression, more base compound may be necessary.
3. Be Careful When Cutting Reused Wallpaper
When reusing old wallpaper for patch repairs, avoid cutting too deeply.
Damaging or removing the backing paper can create an unwanted difference in thickness.
4. Plan Around Obstacles
When installing wallpaper around valves, pipes, or other protrusions, make relief cuts rather than forcing the wallpaper into position.
This reduces the risk of tearing.
5. Use Reference Lines for Patterned Flooring
Patterned cushion flooring makes alignment errors easier to see.
Before applying adhesive, establish a reliable reference line and use it throughout the installation.
6. Install Flooring in Sections When Working Alone
Applying adhesive and installing cushion flooring in two sections can make positioning much easier for a single installer.
Common Mistakes to Avoid
Applying too much joint compound:
Trying to compensate for a large difference in level with compound can make surface preparation unnecessarily difficult.
Skipping corner gaps:
Large gaps in the plywood subfloor can cause the cushion flooring to sink at the edges.
Cutting wallpaper too aggressively:
Cutting through the backing paper can cause it to peel and create uneven joints.
Forcing wallpaper around protruding fixtures:
Without proper relief cuts, wallpaper can tear around valves and other obstacles.
Applying adhesive to the entire floor immediately:
When working alone, this can make the cushion flooring difficult to reposition.
Cutting too much flooring at once:
Small, gradual cuts make it easier to achieve a tight fit around existing baseboards.
What I Learned From This Project
One of the biggest lessons from this project was the importance of preparation and material planning.
Because the amount of new wallpaper was limited, I could not simply replace every damaged section with new material. I had to decide where new wallpaper would have the greatest visual impact and where reused wallpaper could be used effectively.
The condition of the substrate was also important. By removing the protruding gypsum board before applying joint compound, I was able to reduce the amount of filler needed and make the surface easier to prepare.
The cushion flooring also reminded me how important alignment is when working with patterned materials. A small positioning error can become much more obvious once the entire floor is installed.
Even relatively small washroom repairs require careful preparation, accurate cutting, and good material management.
FAQ
1. How long did this project take?
The entire project took approximately 3.5 hours.
2. Did you work alone?
Yes. I completed the entire project by myself while the apartment was occupied.
3. Why was only part of the wallpaper replaced?
The amount of new wallpaper available for the project was limited, so I used new material for the most visible area and reused sections of the old wallpaper for smaller repairs.
4. Why did you cut the gypsum board before applying joint compound?
Some of the new gypsum board was sticking out beyond the existing board. Removing the excess first made it easier to create a level surface and reduced the amount of compound required.
5. How do you know when the base compound is ready for finishing compound?
I check the surface by hand. If I can no longer feel a depression in the repaired area, it is generally ready for the finishing compound.
6. Why are two types of joint compound used?
Base compound is mainly used to fill deeper imperfections, while finishing compound is used to smooth smaller imperfections and prepare the surface for wallpaper.
7. Why did you fill the gaps in the corners of the plywood?
The gaps were larger than usual. If they had been left open, the cushion flooring could have sunk into them and created visible depressions.
8. Why did you make petal-shaped cuts around the water valve?
The cuts allowed the wallpaper to fit around the protruding valve without putting excessive stress on the material and risking a tear.
9. Why did you install the cushion flooring in two sections?
Working in two sections made it easier to position and adjust the flooring while working alone.
10. Why is accurate alignment important with patterned cushion flooring?
A crooked installation is much easier to notice when the flooring has a visible pattern. Establishing a straight reference line before installation helps maintain a professional appearance.
Related Project
Replacing Wallpaper, Vinyl Flooring, and Baseboards in an Occupied Laundry Room
Conclusion
This project was a relatively small washroom renovation, but it required careful attention to detail.
The main challenges were preparing the new gypsum board, making the best use of limited wallpaper material, repairing the floor substrate, working around the washing machine water valve, and accurately aligning the patterned cushion flooring.
By carefully preparing the surfaces, making gradual adjustments, and using reliable reference points, I was able to complete the wallpaper and flooring work cleanly.
The entire project was completed in approximately 3.5 hours by one installer, including final cleanup.
Small repair jobs may look simple from the outside, but good results depend heavily on preparation, material control, accurate cutting, and attention to detail.


Comments