
Project and Job Site Details
Project Type: Commercial store renovation
Location: Tokyo, Japan
Floor: 6th floor of an 8-story building
Work: Wallpaper replacement and vinyl tile replacement
Crew: 3 workers
Working Time: Approximately 7.5 hours
Flooring Type: Raised access floor (OA floor)
Introduction
Today, I worked on another stage of a commercial store renovation project on the 6th floor of an 8-story building in Tokyo, Japan.
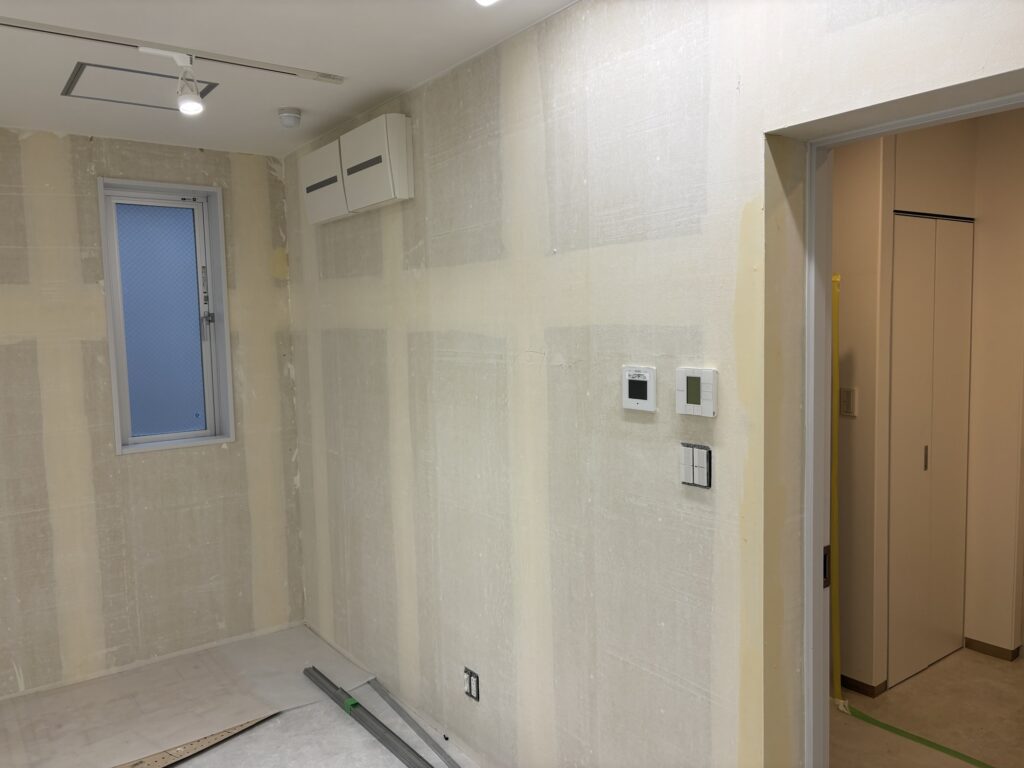
This was a continuation of a project I had already been working on. During the previous visit, we had been working on the ceiling and wall wallpaper.
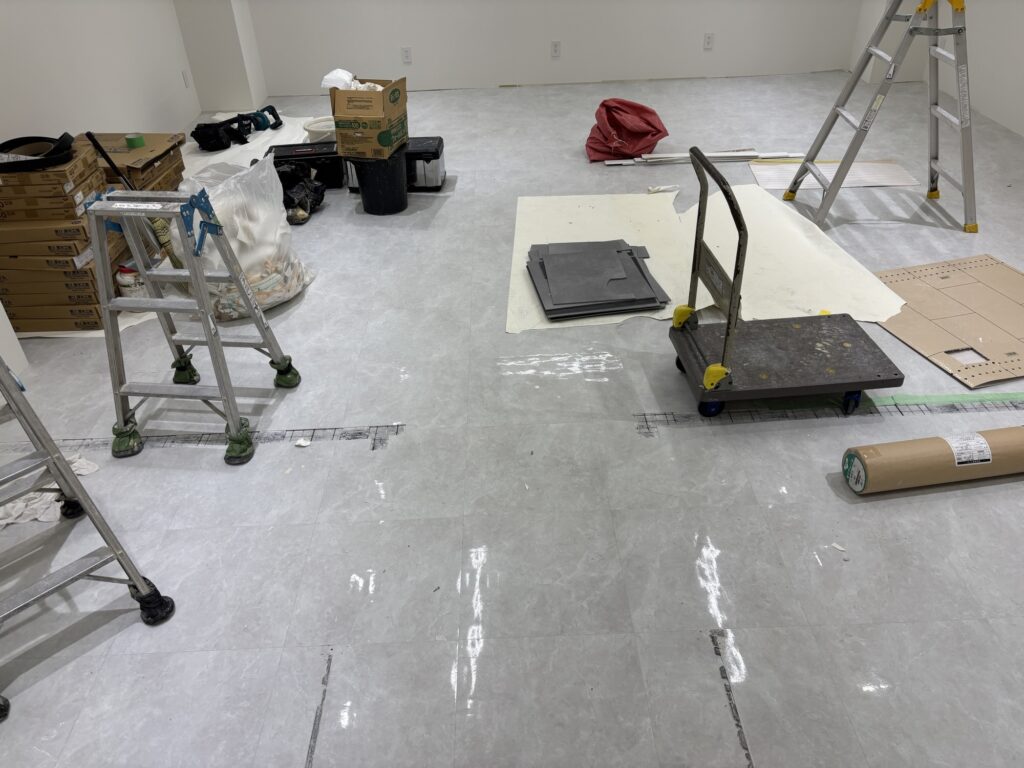
This time, our three-person crew worked on both the remaining wall wallpaper and the replacement of the vinyl floor tiles.
One worker continued installing the remaining wallpaper, while the other two workers focused on the floor.
When we removed the old vinyl tiles, we discovered a raised access floor underneath.
This type of flooring is commonly used in offices and commercial buildings because it creates a space underneath the finished floor where electrical cables, LAN cables, and other wiring can be neatly stored.
Related Project
Commercial Restoration Work in Japan: Wallpaper Installation and Toilet Tile Replacement
Job Site Report: Wallpaper and Vinyl Tile Replacement
Removing the Old Vinyl Tiles
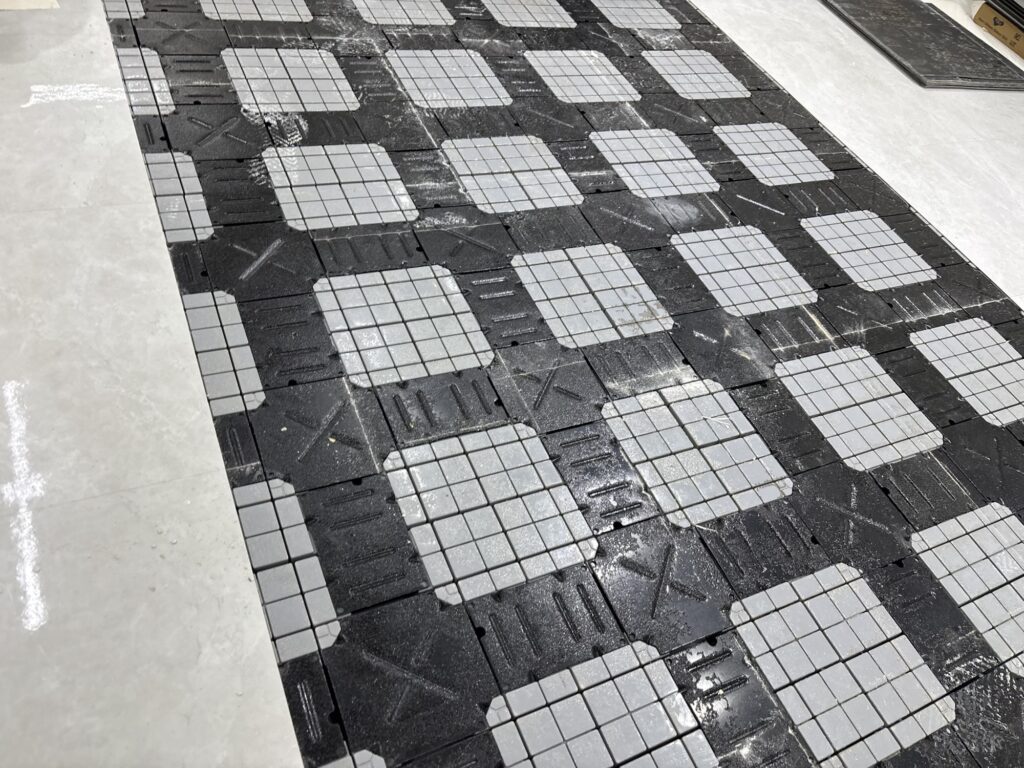
We began by removing the existing vinyl tiles from the floor.
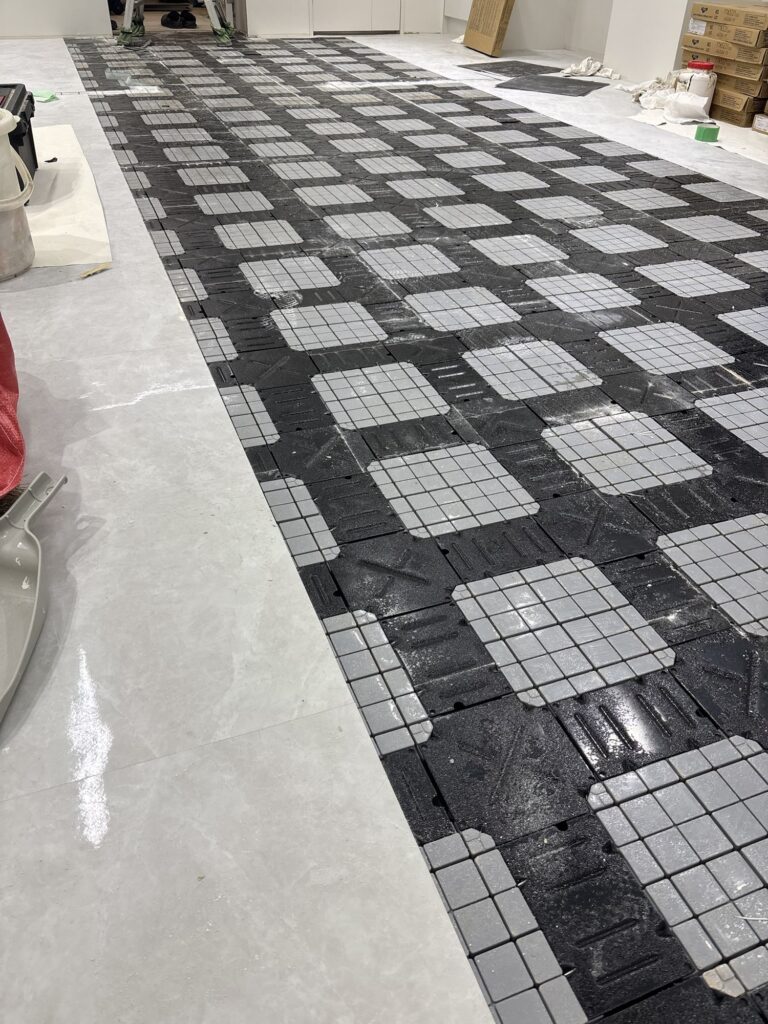
Once the old tiles were removed, we found that the floor underneath was an OA floor, also known as a raised access floor.
An OA floor is a double-layer flooring system that creates a space between the finished floor and the building’s structural floor. This space can be used to route LAN cables, electrical wiring, and other services.
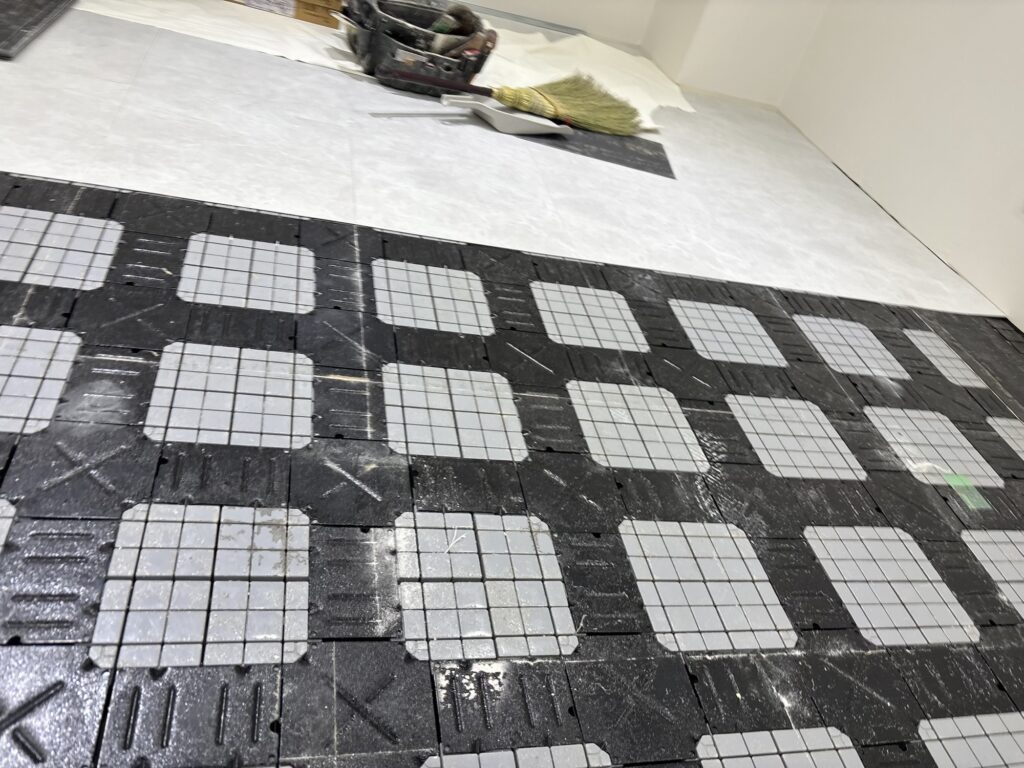
You have probably seen this type of slightly raised floor in an office before.
From the surface, it can look like an ordinary floor, but underneath, the wiring can be organized neatly and kept out of sight.
This type of flooring has several advantages.
Advantages of an OA Floor
Improved Safety
Because cables are kept underneath the floor instead of being exposed on the surface, the risk of people tripping over cables is greatly reduced.
It also helps protect cables from being stepped on or damaged.
This is especially useful in busy offices where people need to move around safely.
Better Appearance
Keeping cables underneath the floor eliminates exposed wiring.
As a result, the entire office can have a cleaner and more organized appearance.
Easy Layout Changes
Another major advantage is that wiring can be moved relatively easily when the office layout changes.
Desks and work areas can be rearranged without having to deal with exposed cables running across the floor.
This makes OA flooring especially useful for offices that may need to change their layout in the future.
Working With a Raised Access Floor
This project used a removable panel-type OA floor.
When we removed the old vinyl tiles, some of the panels underneath came up with the tiles.
We carefully removed those panels and returned them to their original positions before continuing with the flooring work.
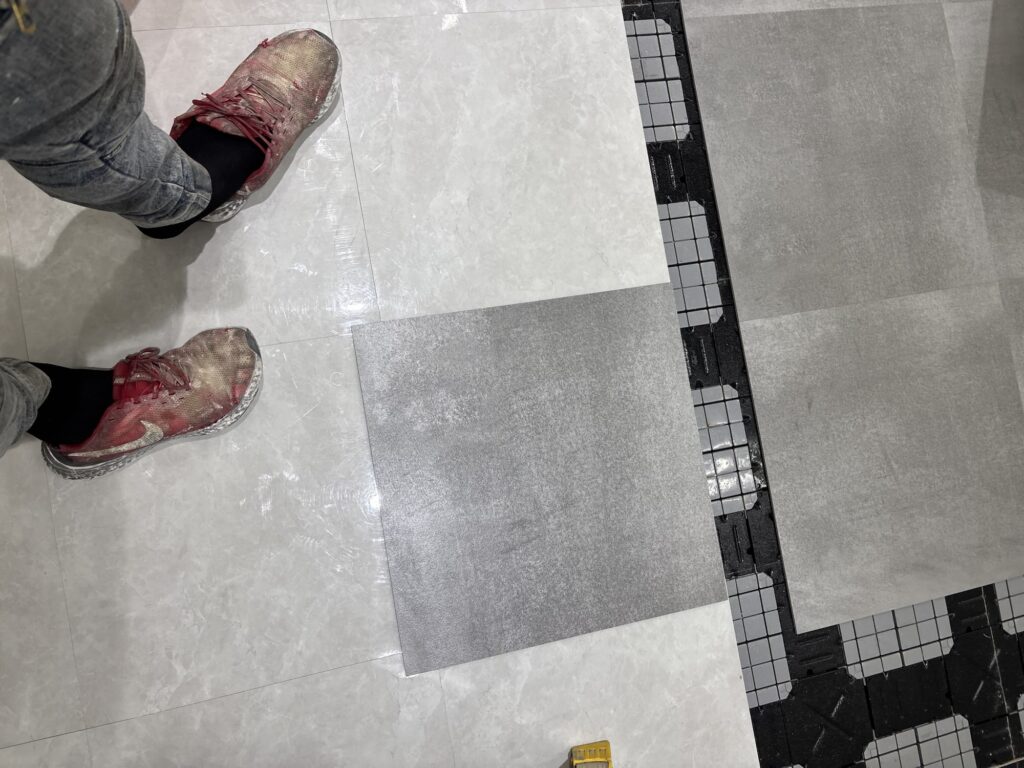
The new vinyl tiles were slightly larger than the old tiles.
Because of this difference in size, we measured the distance from the existing tiles to the walls again and adjusted the starting position of the new tiles.
If the new tiles were exactly the same size as the old ones, we could simply remove the old tiles and install the new ones in the same position.
However, because the dimensions were slightly different this time, establishing the correct starting point was important.
Establishing the Starting Line
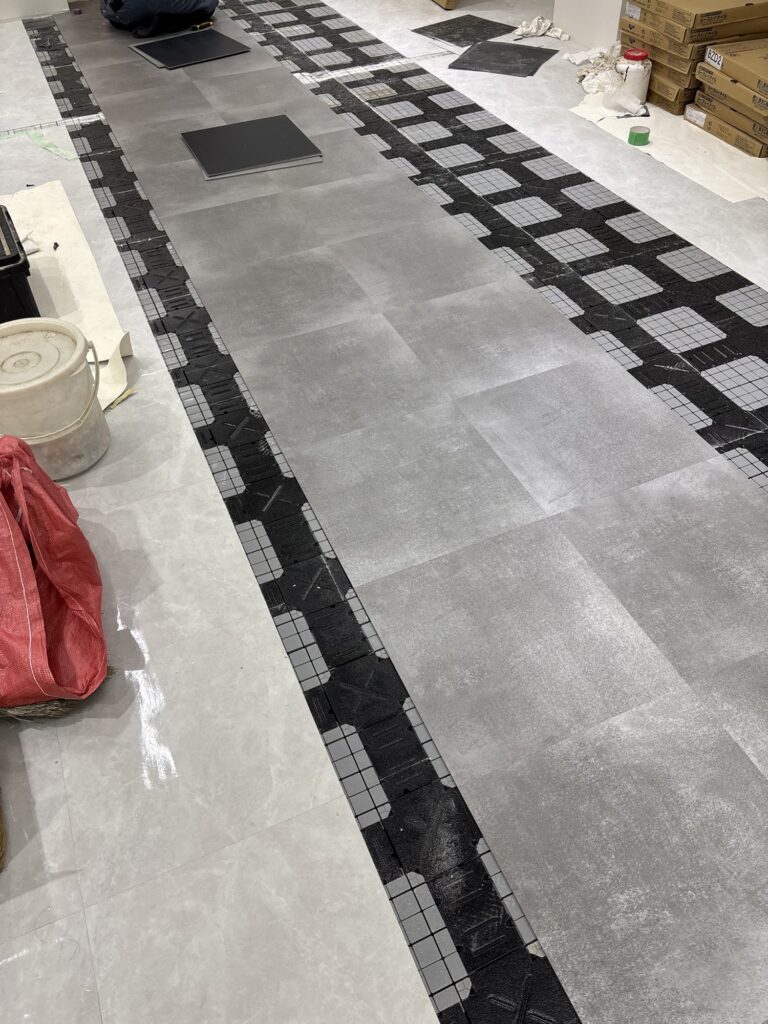
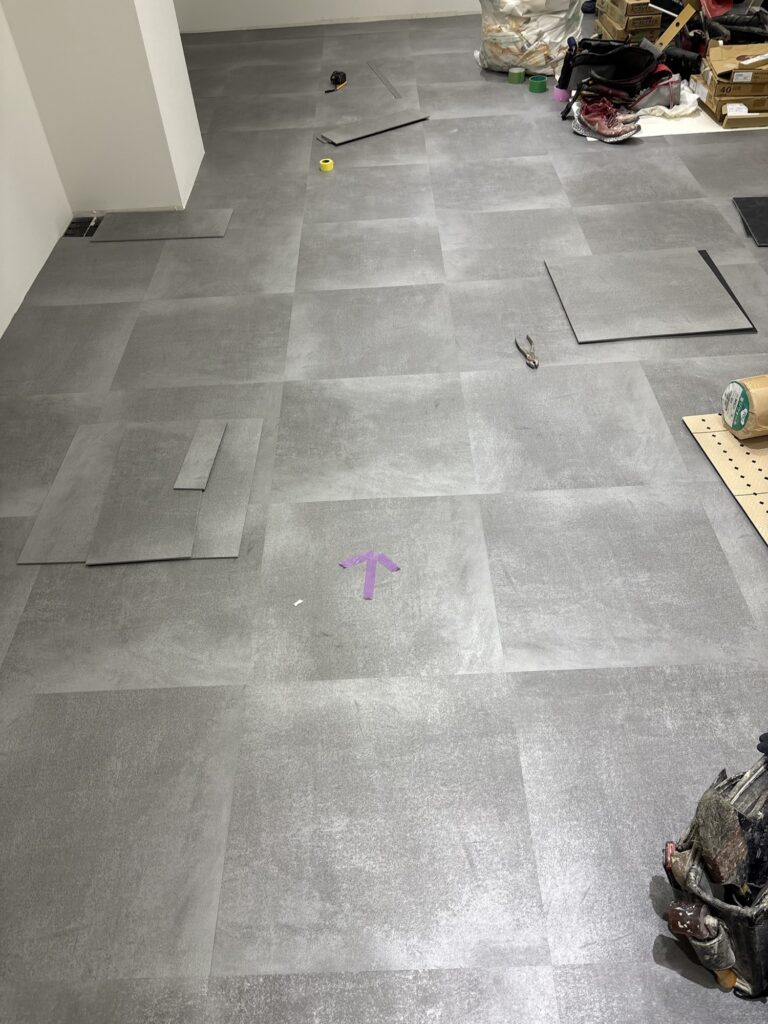
After removing approximately three rows of the old tiles, we started laying the new tiles from the predetermined starting position.
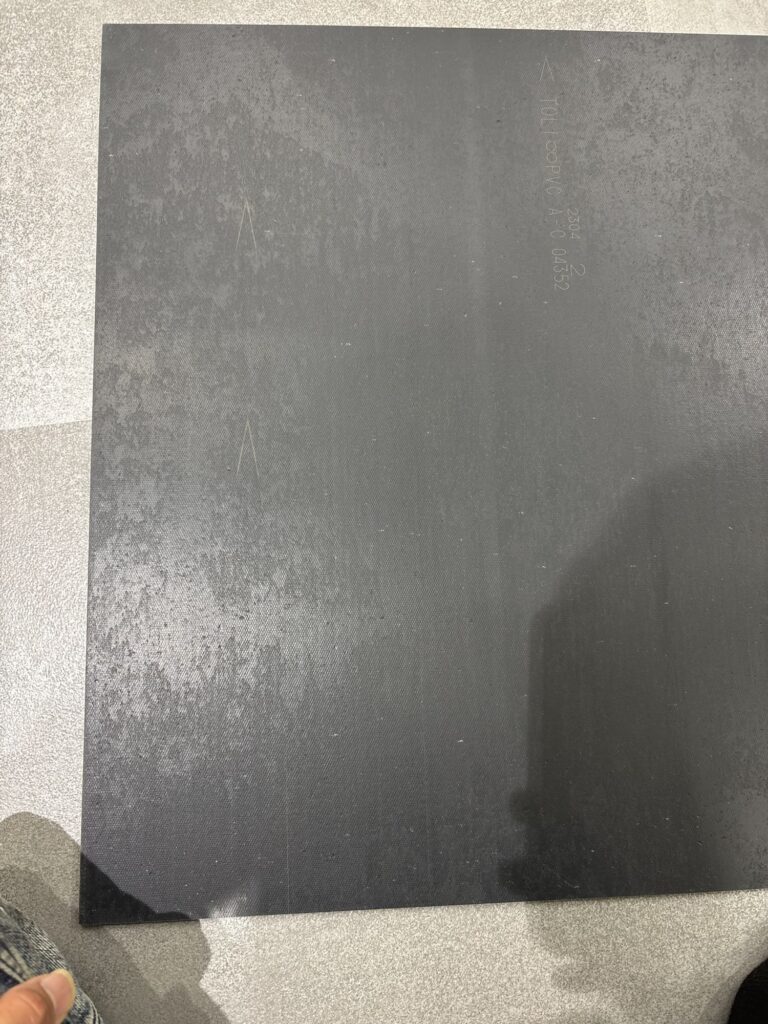
There were arrows printed on the back of the tiles.
These arrows indicated the direction of the tile pattern, so we installed the tiles in alternating directions rather than placing the arrows in the same direction next to each other.
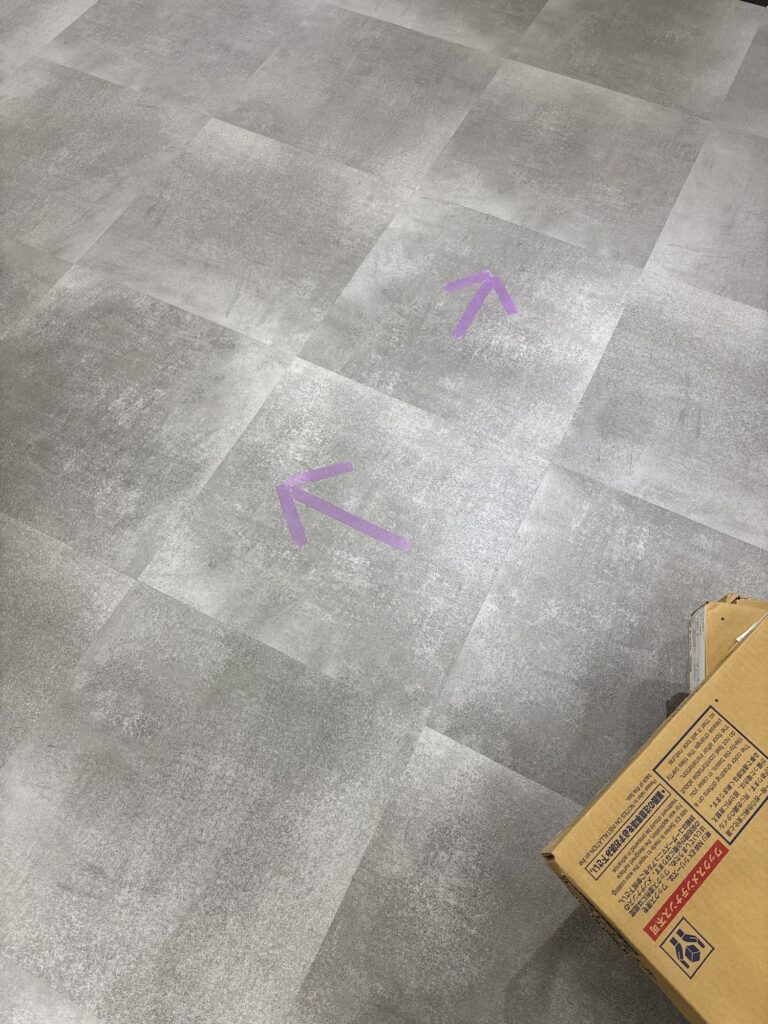
While laying the tiles, we paid close attention to keeping the lines straight and avoiding unnecessary gaps between the tiles.
Just like wallpaper installation, the first line is extremely important.
If the first tiles are installed at an angle, that mistake can gradually continue across the entire floor.
By the time you reach the opposite wall, the tiles may be misaligned and you may even end up with an insufficient amount of space for the final tiles.
Cutting the Tiles at the Edges
Once we reached the walls and other edges of the room, the tiles needed to be cut to fit.
For straight cuts, we used a large utility knife, a straightedge, and a full-size tile as a cutting guide.
First, we placed the tile to be cut in the correct position, next to the tile that had already been installed.
Then, we placed a full-size tile on top of it so that the edge of the full-size tile touched the wall.
The edge of the full-size tile could then be used as a guide.
We scored the vinyl tile with a large utility knife along this line.
After making the score, the tile could be bent slightly along the cut line and then broken cleanly along the scored line.
This method worked well for making straight cuts.
Cutting Around Columns and Other Obstacles
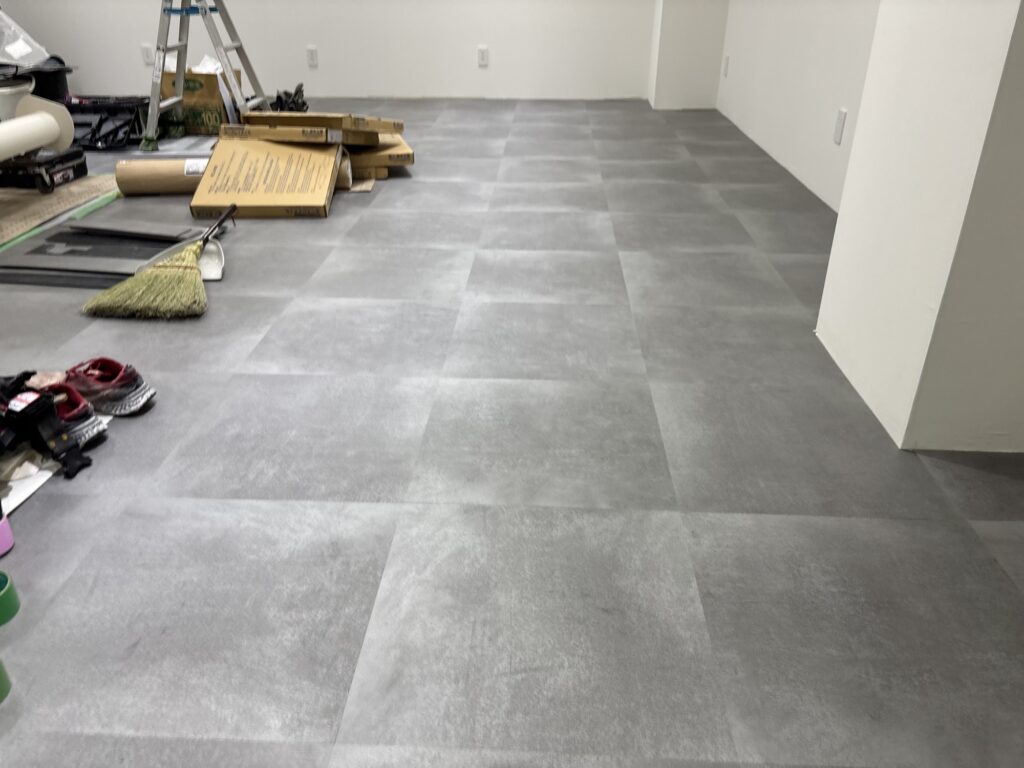
Some areas required both vertical and horizontal cuts because of columns and other obstacles.
For these areas, we used a full-size tile as a template whenever possible.
When the space was too small to use a full-size tile, we measured the required dimensions with a straightedge and carefully cut the tile to fit.
One useful tip is to leave approximately a 1 mm clearance when cutting tiles for tight areas.
If the cut tile is too large, it may fit too tightly against the surrounding surfaces.
That pressure can cause the tile to lift later.
For this reason, making the cut slightly smaller can help the tile sit properly.
Dealing With Uneven Floor Panels
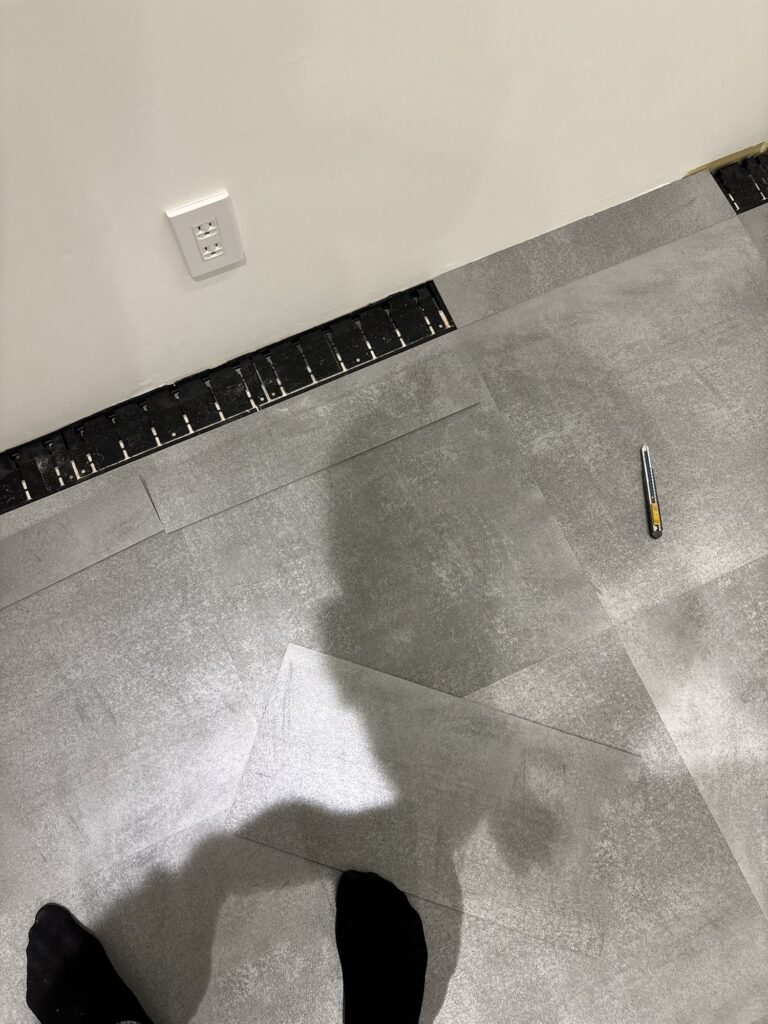
Near the edge of the room, some of the final tiles became quite narrow.
Because the underlying OA floor panels had become slightly warped over time, the narrow tiles followed some of that unevenness and created a small difference in height.
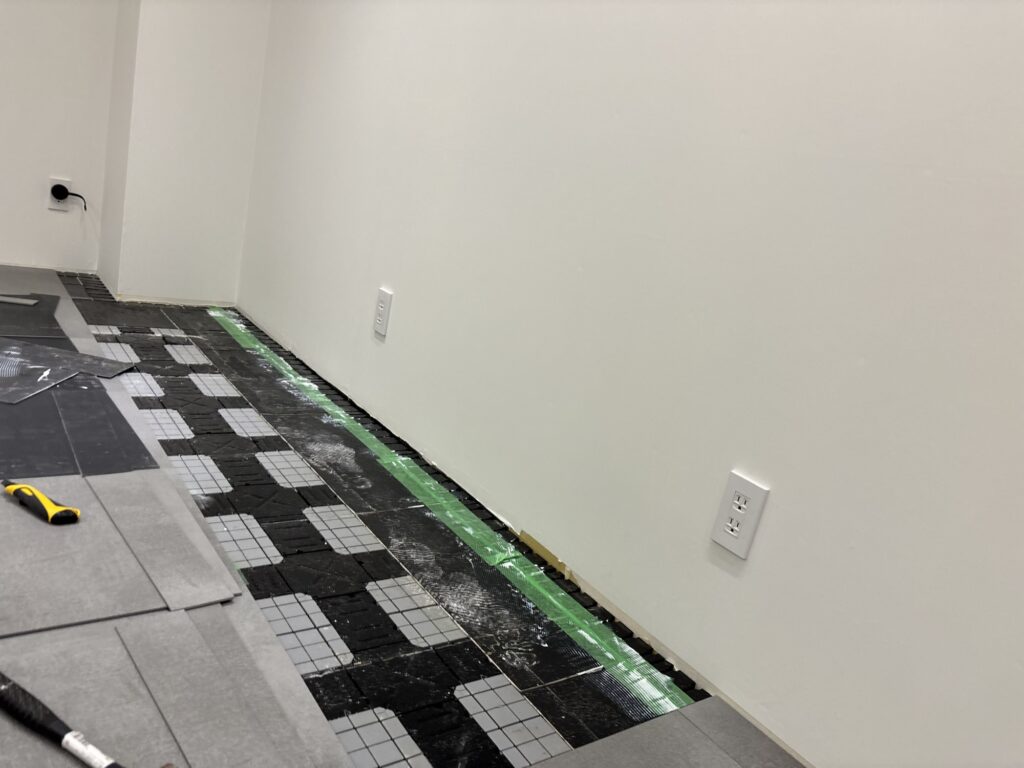
When a larger tile is installed, it can span across uneven areas more effectively.
However, narrow pieces are more likely to follow the shape of the uneven substrate.
In this area, we temporarily secured the panel with duct tape, applied the adhesive, and then carefully installed the tile.
This helped keep the panel in position while we completed the flooring.
Finishing the Flooring Work
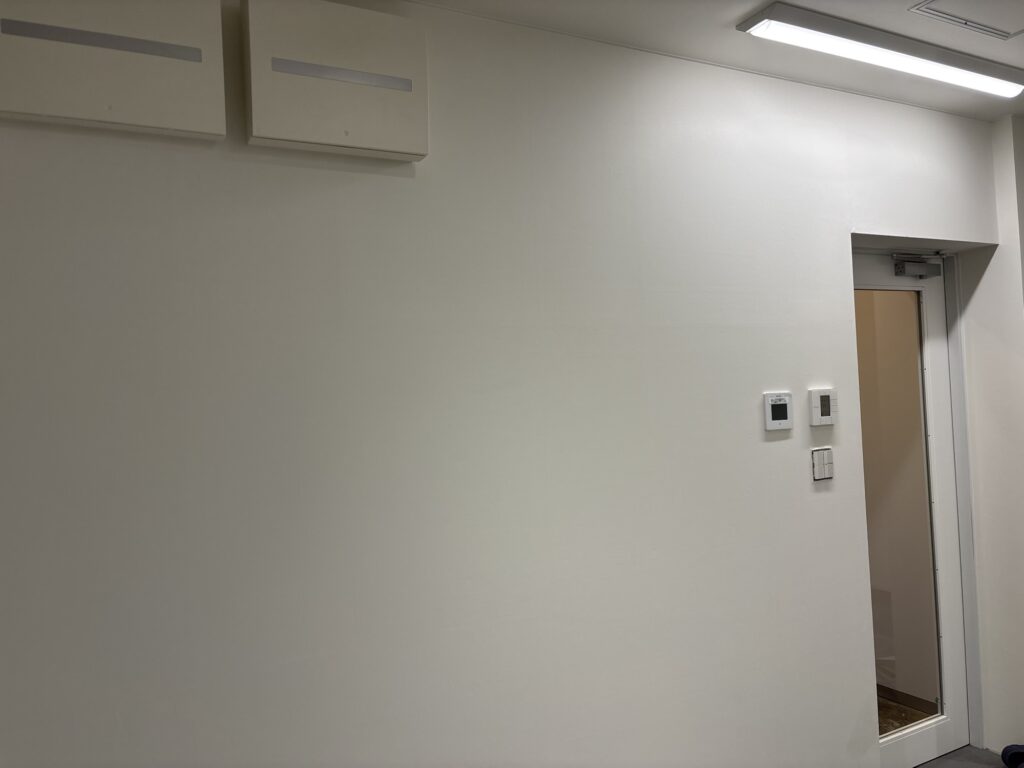
After all the tiles had been installed and the necessary cuts had been completed, the main flooring work was finished.
At the same time, the remaining wall wallpaper installation was also progressing with the third worker.
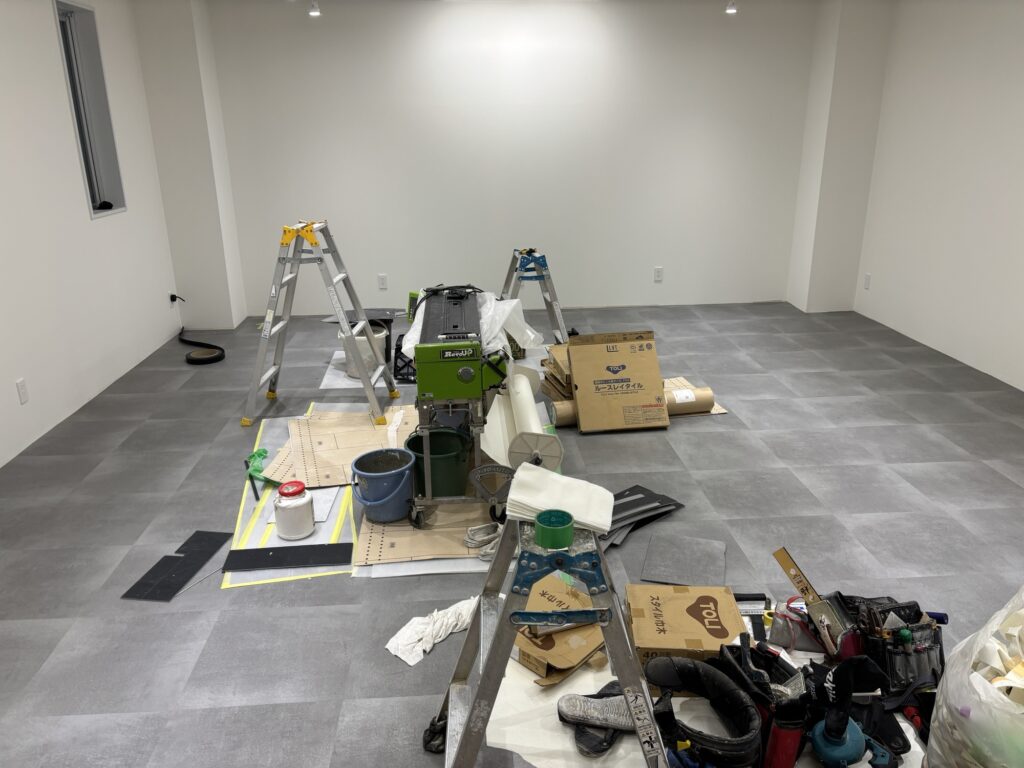
After approximately seven and a half hours of work, we completed the day’s work at the site.
Related Project
Ceiling Wallpaper Replacement on the 8th and 6th Floors of a Commercial Building
Tools Used
- Large utility knife
- Straightedge
- Full-size vinyl tile for marking and cutting
- Measuring tools
- Adhesive application tools
- Duct tape for temporarily securing the floor panels
Professional Tips
Establish the Starting Point Carefully
The starting position is one of the most important parts of a flooring installation.
If the first row is slightly out of alignment, the error can continue across the entire room.
Always check the measurements from the walls before beginning.
Keep the Tile Lines Straight
Do not rely only on the previous tile when installing a large number of tiles.
Regularly check the overall alignment and make sure the rows remain straight.
Leave a Small Clearance When Cutting
For edge pieces, cutting the tile slightly smaller can make installation easier.
A piece that is too large can become tight and may lift after installation.
Approximately 1 mm of clearance can help the tile fit properly.
Pay Attention to the Subfloor
Even a good flooring material cannot completely hide an uneven substrate.
When working over an OA floor, check the condition of the panels before installation.
Older panels may have warped or shifted over time.
Common Mistakes to Avoid
Starting Without Checking the Measurements
If you begin laying tiles without checking the dimensions of the room, you may end up with very narrow or awkward pieces at the opposite wall.
Measure first and determine the best starting position.
Installing the First Row at an Angle
A small mistake at the beginning can become a much larger problem as you continue across the room.
Make sure the first row is straight before moving forward.
Cutting Edge Pieces Too Large
A tile that is too large may be difficult to install and can become tight against the surrounding surfaces.
This can cause the tile to lift later.
Ignoring the Condition of the OA Floor
If the panels underneath are warped or unstable, the finished flooring may not sit properly.
Always check the substrate before installing the new tiles.
Related Project
First Time Removing a Toilet: Preparing a Commercial Bathroom for Floor Tile Installation
What I Learned From This Project
This project reminded me that flooring installation is not simply about sticking tiles to the floor.
The preparation and layout before installation are just as important as the actual installation.
The difference in size between the old and new tiles meant that we could not simply follow the original layout.
We had to measure the room again and establish a new starting position.
I also learned once again how important the condition of the substrate is.
Even when the finished tiles look good, uneven or warped panels underneath can create problems, especially when narrow pieces are installed near the walls.
Working with an OA floor also reminded me that commercial flooring often requires a different approach from ordinary residential flooring.
Understanding what is underneath the floor is essential before beginning the installation.
FAQ
1. What is an OA floor?
An OA floor, also called a raised access floor, is a flooring system that creates a space underneath the finished floor. This space can be used to route electrical cables, LAN cables, and other wiring.
2. Where are OA floors commonly used?
OA floors are commonly used in offices, commercial buildings, computer rooms, and other spaces where many cables and electrical connections are required.
3. Why are OA floors useful?
They keep cables hidden underneath the floor, improve safety and appearance, and make future office layout changes easier.
4. Can vinyl tiles be installed over an OA floor?
Yes, vinyl tiles can be installed over an OA floor when the substrate is suitable and properly prepared for the flooring material.
5. Why is the starting position important when installing vinyl tiles?
The starting position determines the alignment of the entire floor. If the first row is crooked, the error can continue across the room and create problems at the opposite wall.
6. Why are arrows printed on the back of some vinyl tiles?
The arrows can indicate the recommended direction of installation. Following the manufacturer’s installation pattern can help create a consistent appearance.
7. How do you cut vinyl tiles?
For straight cuts, a large utility knife and a straightedge can be used to score the tile. The tile can then be bent slightly along the score line and separated along the cut.
8. Why should edge tiles be cut slightly smaller?
If an edge tile is too large, it may fit too tightly and can lift later. Leaving a small amount of clearance can help the tile fit properly.
9. What happens if the OA floor panels are warped?
Warped panels can cause the finished flooring to become uneven. Narrow pieces of vinyl tile are especially likely to follow the shape of an uneven substrate.
10. How long did this project take?
The work described in this article took approximately seven and a half hours. Three workers were involved in the project, with one worker installing wallpaper and two workers installing the vinyl tiles.
Conclusion
Today’s work was another stage of an ongoing commercial store renovation project.
We replaced the remaining wall wallpaper while two workers installed new vinyl tiles over a raised access floor.
The project required careful planning because the new tiles were slightly larger than the old ones.
We had to establish a new starting position, maintain straight lines, carefully cut the tiles around walls and columns, and deal with some uneven OA floor panels.
Small details such as the starting line, tile direction, cutting size, and condition of the substrate can have a major effect on the final result.
After approximately seven and a half hours, we completed the day’s work and left the site ready for the next stage of the renovation.


Comments