
Project Data
Project Type: Detached House Washroom Renovation
Location: Japan
Work Area: Washroom
Workers: 2
Work Performed: Wallpaper and cushion flooring installation
Working Time: Approximately 7 hours
Introduction
Today, I worked on a washroom renovation in a detached house in Japan.
The homeowner was replacing the existing washbasin with a new one and installing a new unit bathroom. As part of the renovation, the wallpaper and cushion flooring in the washroom also needed to be replaced.
There were two workers on site: myself and a site supervisor who also helped with the work.
When we arrived, the old wallpaper and cushion flooring had already been removed.
The main challenge was preparing the existing surfaces properly before installing the new materials.
For this project, I focused especially on surface preparation, because good preparation is one of the most important parts of a high-quality wallpaper installation.
Related Project
Wallpaper and Cushion Flooring Replacement in a Washroom
Job Site Report
Preparing the Walls
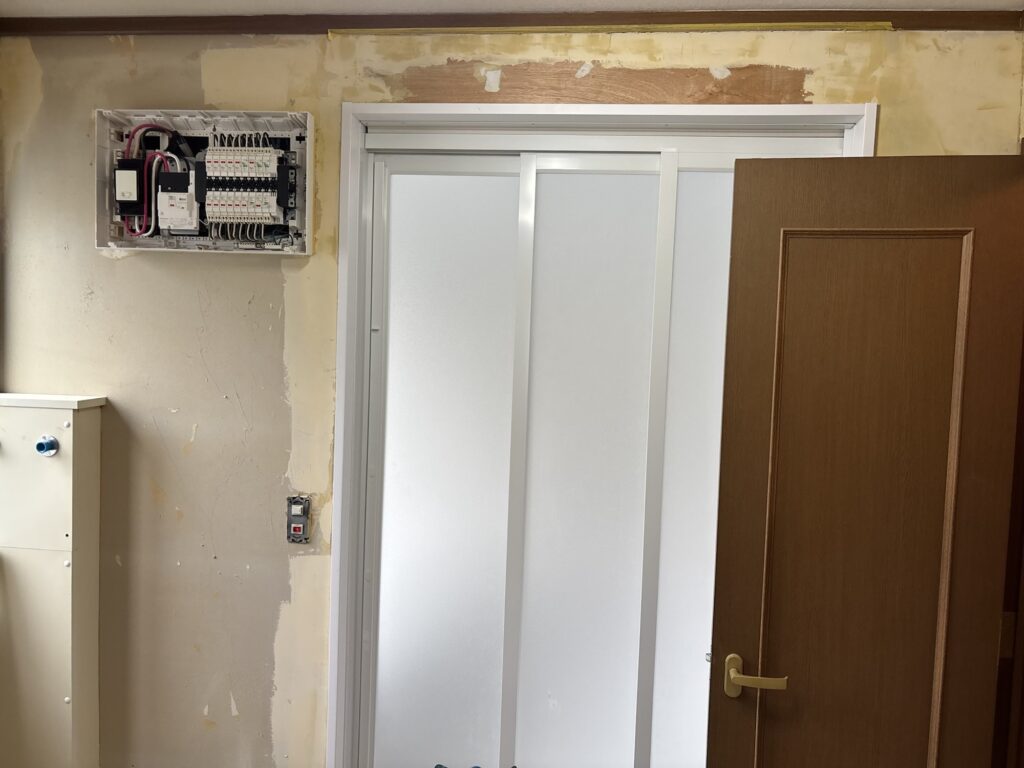
When we arrived, some of the old wallpaper backing paper was still attached to the walls.
Instead of simply covering it with new wallpaper, I carefully removed the remaining backing paper.
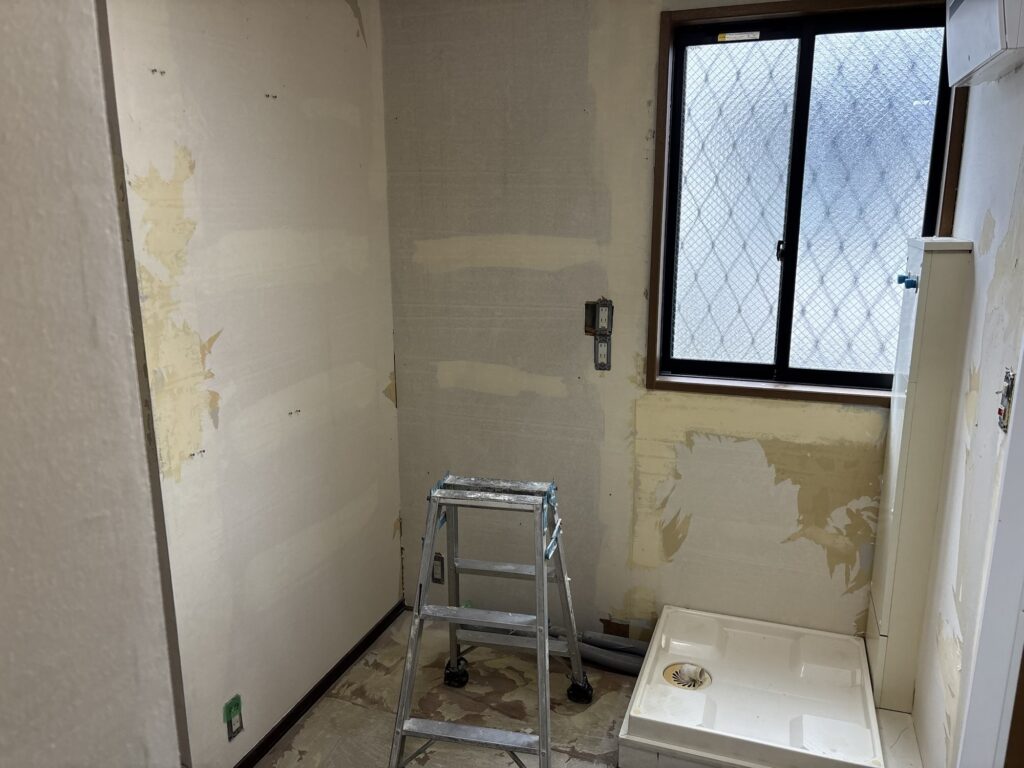
After that, I used a sander to smooth the entire surface.
Sanding is useful because it can remove small areas of old backing paper and also smooth out uneven areas caused by old joint compound underneath the backing paper.
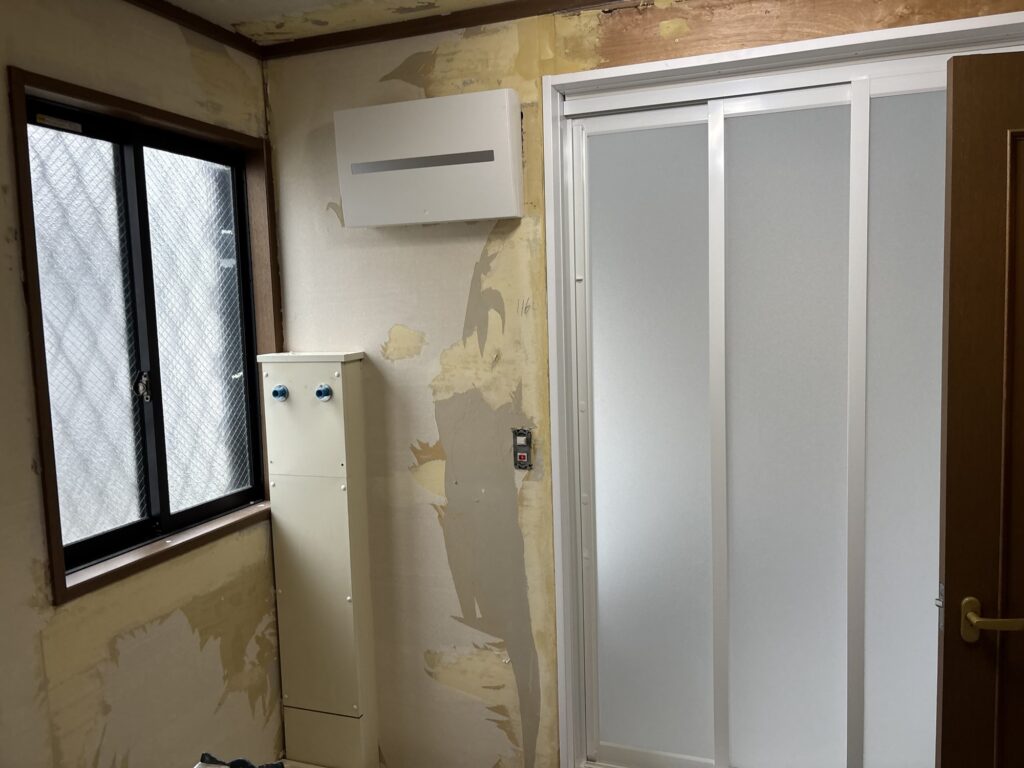
This can create a surface that is flat enough to install new wallpaper without applying additional joint compound.
This saves time because there is no need to wait for new joint compound to dry.
I believe one of the most effective forms of surface preparation is creating a condition where you do not need to use joint compound before installing the wallpaper.
For me, joint compound should be the last resort.
If you rely too much on joint compound and skip the process of properly removing old backing paper, you can create unnecessary work and spend more time waiting for the surface to dry.
At the same time, surface preparation can become endless if you try to make everything absolutely perfect.
Knowing when to stop and move on within the available working time is also an important skill.
Applying Joint Compound
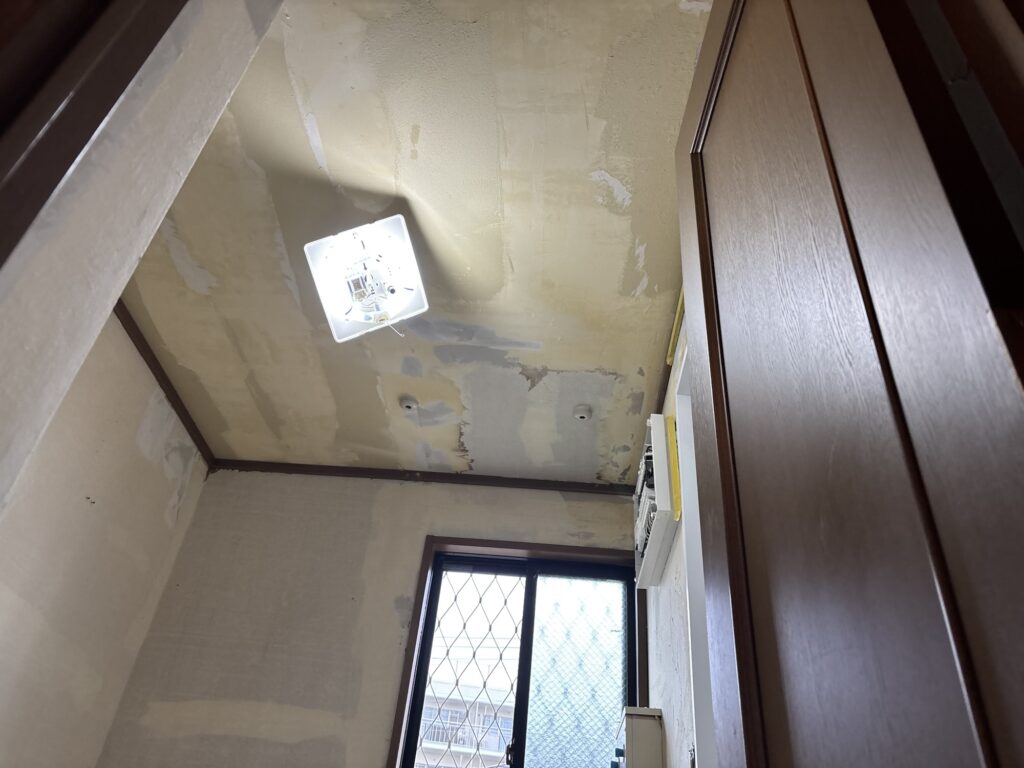
After the initial surface preparation was finished, I applied new joint compound around the newly installed door frame at the bathroom entrance and around areas where the walls had previously been opened and repaired.
Some areas had relatively deep grooves, so I applied two coats of base joint compound.
Finally, I applied a finishing coat.
While the joint compound was drying, I measured the ceiling and walls and prepared the wallpaper using a wallpaper pasting machine.
Measuring and Preparing the Wallpaper
The ceiling required two pieces:
- 249 cm × 1 piece
- 215 cm × 1 piece
The walls required:
- 234 cm × 7 pieces
- 27 cm × 2 pieces
- 44 cm × 1 piece
- 97 cm × 1 piece
- 70 cm × 1 piece
The wallpaper was a slightly colored, relatively thick material designed for restoration work. I had previously used the same type of wallpaper on another project.
Installing the Ceiling Wallpaper
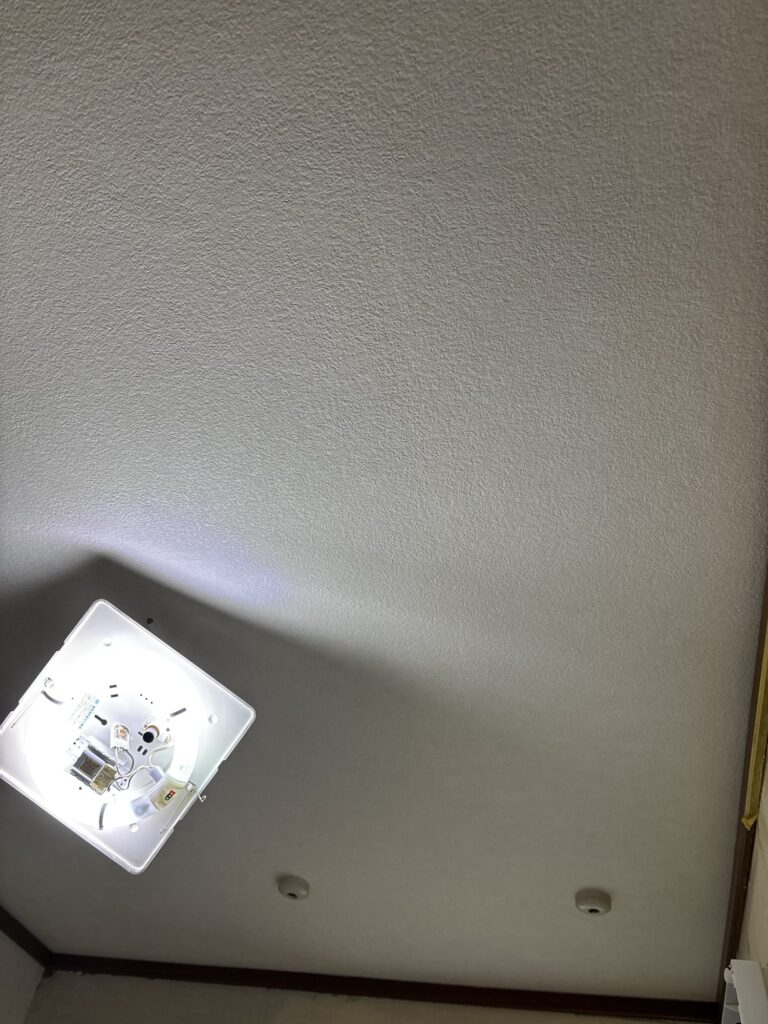
I installed the ceiling wallpaper by myself.
Before starting, I marked the starting position with a chalk line.
There was a fixture for hanging a clothes-drying pole that could not be removed, so I planned the joint position carefully.
I marked the ceiling so that the joint would run through the center of the fixture.
This made the wallpaper easier to install and helped me work around the existing fixture.
I installed the first sheet as straight as possible and used a wallpaper smoother to push out air bubbles from the center toward the edges.
For the second sheet, I aligned it with the edge of the first sheet.
After positioning the two sheets, I used a seam roller at the joint and carefully brought the two sides together.
It is important not to force the joint from only one side.
If you push the wallpaper toward the joint from one side only, too much pressure can be applied to the material and the joint may become uneven.
I gradually worked from both sides to create a clean and natural joint.
Installing Wallpaper Around the Cabinet
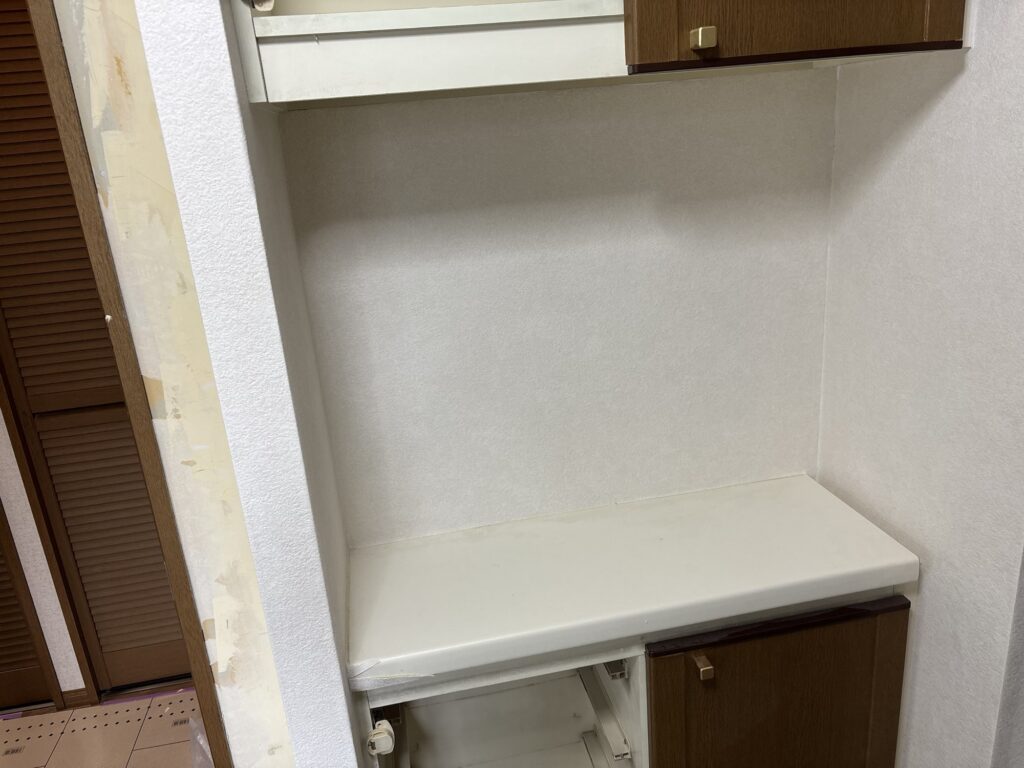
The walls had several difficult areas, including an existing cabinet and an electrical distribution panel.
Because of these obstacles, the wall installation took a little more time.
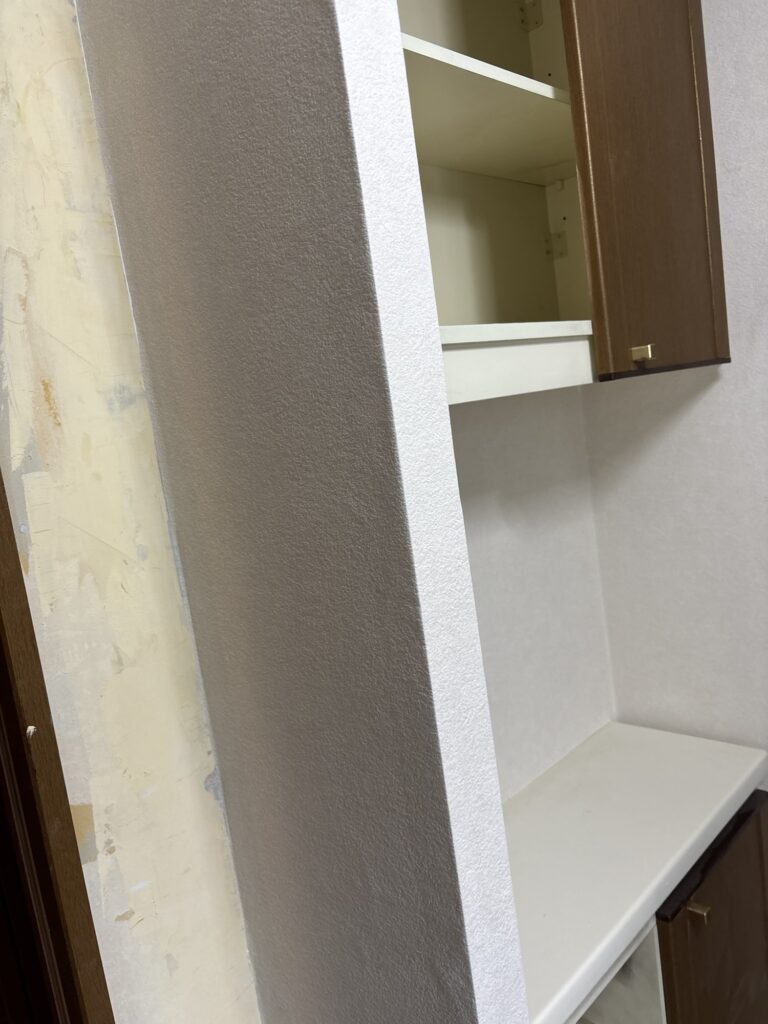
One particularly difficult area was the column next to the cabinet.
I used a wet sponge to gently smooth the wallpaper while forming a clean corner.
I then wrapped the wallpaper around the corner and continued installing it toward the cabinet.
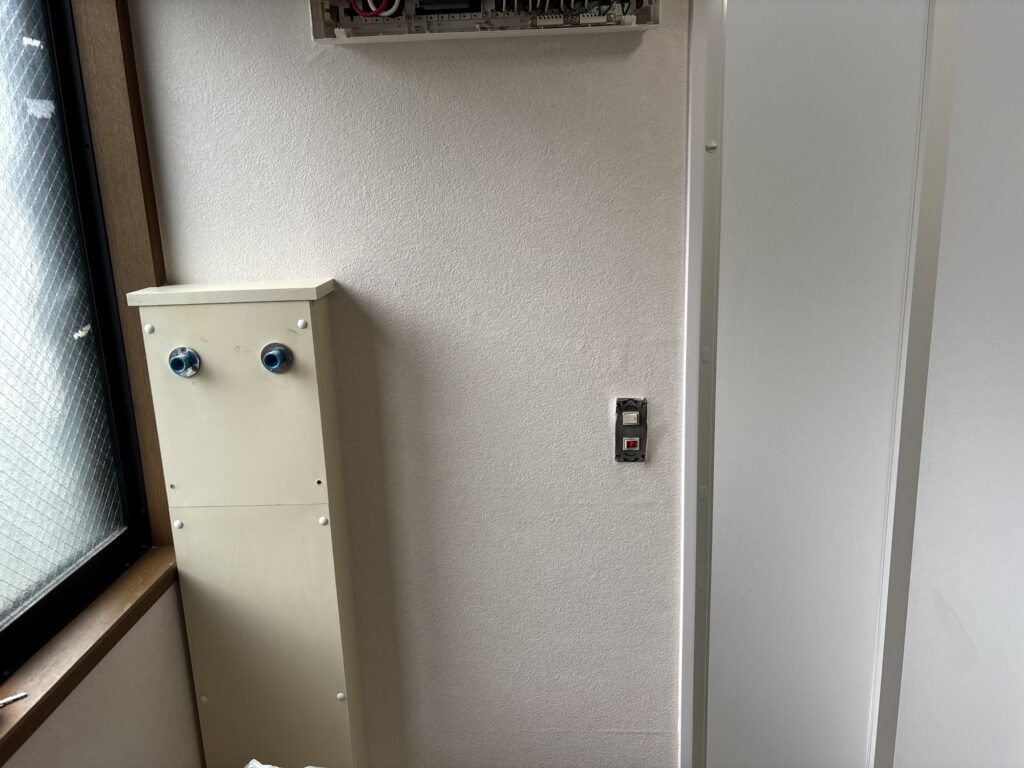
When bringing the wallpaper toward the cabinet, I made small relief cuts so the material could spread around the corner without tearing.
I carefully pressed around the cut area while opening it up.
When trimming the wallpaper, I also made sure not to cut away too much material.
If you cut too much, you can end up with a gap and not have enough wallpaper to cover the surface properly.
Careful cutting is especially important around cabinets, corners, fixtures, and other obstacles.
Installing the Cushion Flooring
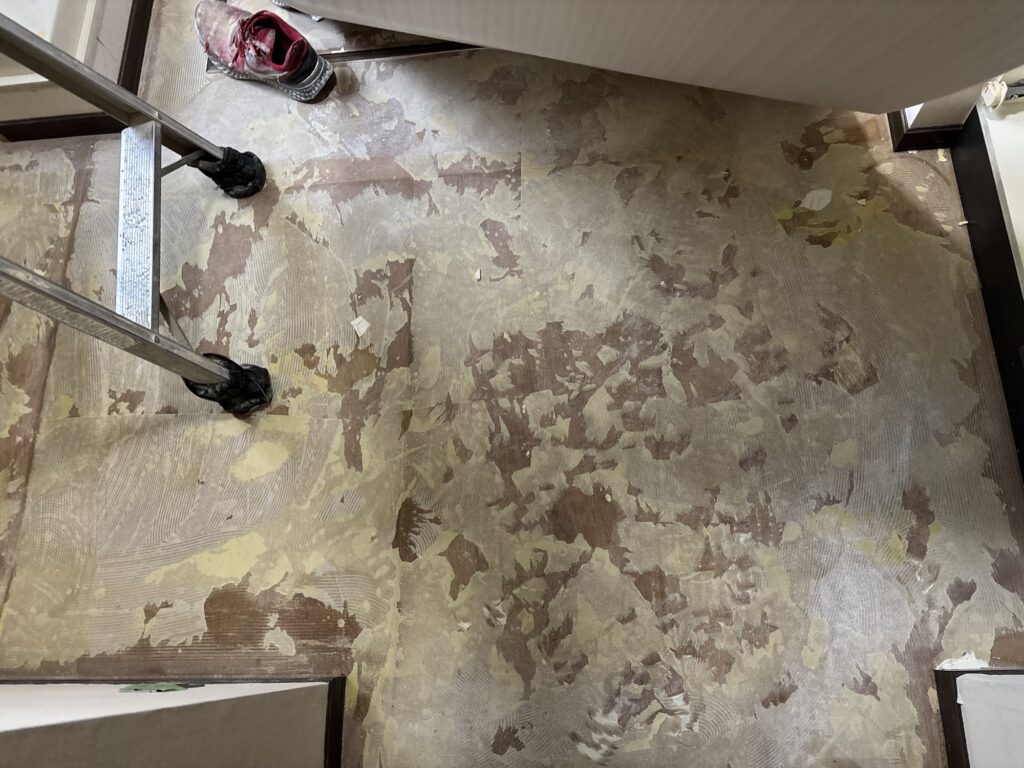
After finishing the wallpaper, we moved on to the floor.
There was still a small amount of old backing paper on the floor, so I removed it using a utility knife and a scraper.
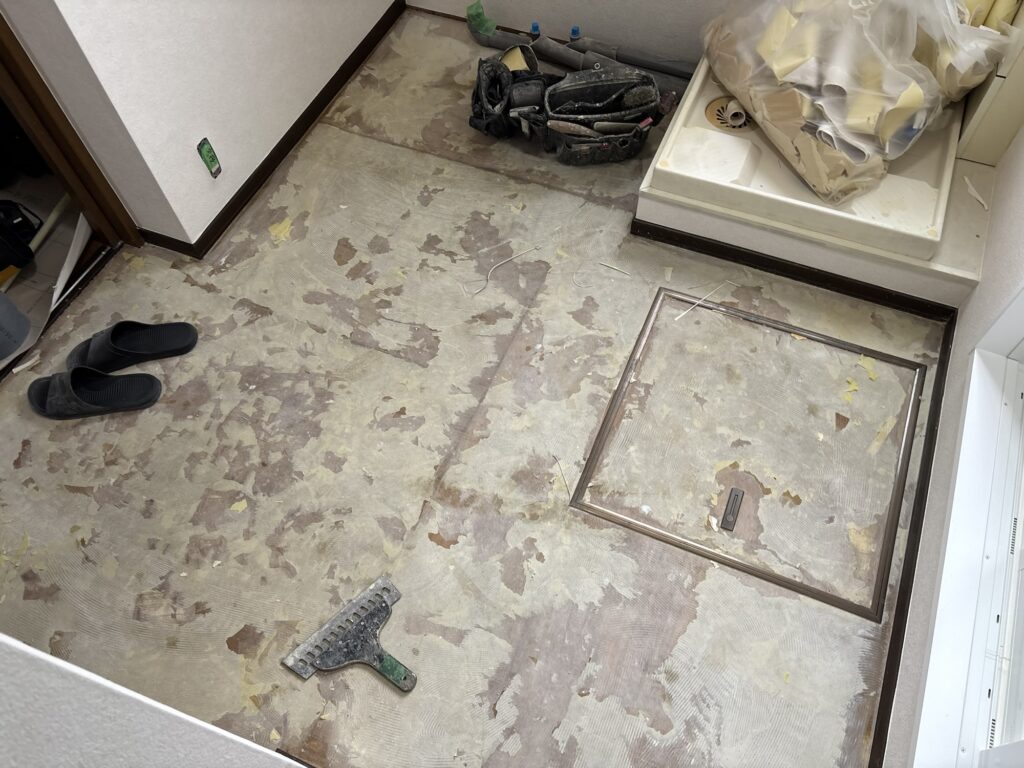
I then used a sander to smooth the surface.
The new cushion flooring was a relatively thick, slightly gray material, and the existing surface was already smooth enough that no additional joint compound was necessary.
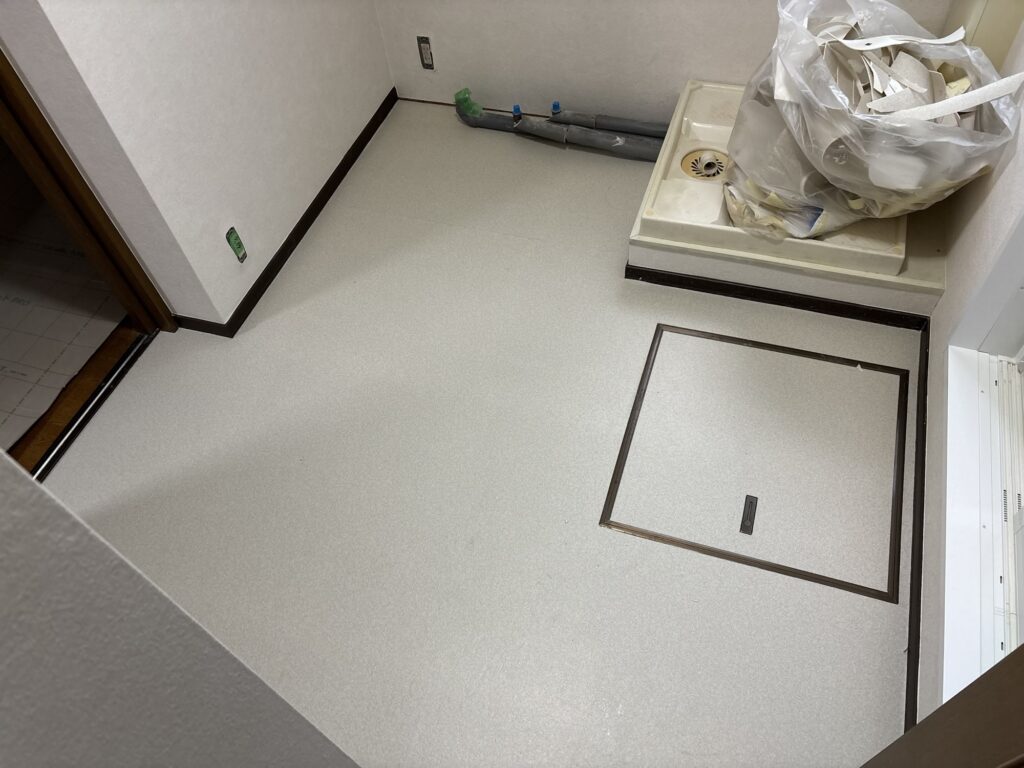
The cushion flooring material was supplied as one piece measuring approximately 250 cm long and 180 cm wide.
A new washbasin would be installed next to the washing machine area.
Because of this, I decided to place the flooring joint in an area that would eventually be hidden by the washbasin.
When installing cushion flooring, I try to position joints in areas that are less likely to be stepped on and receive heavy pressure.
Constant pressure on a joint can eventually cause the joint to open.
After positioning the cushion flooring, I cut away the excess material.
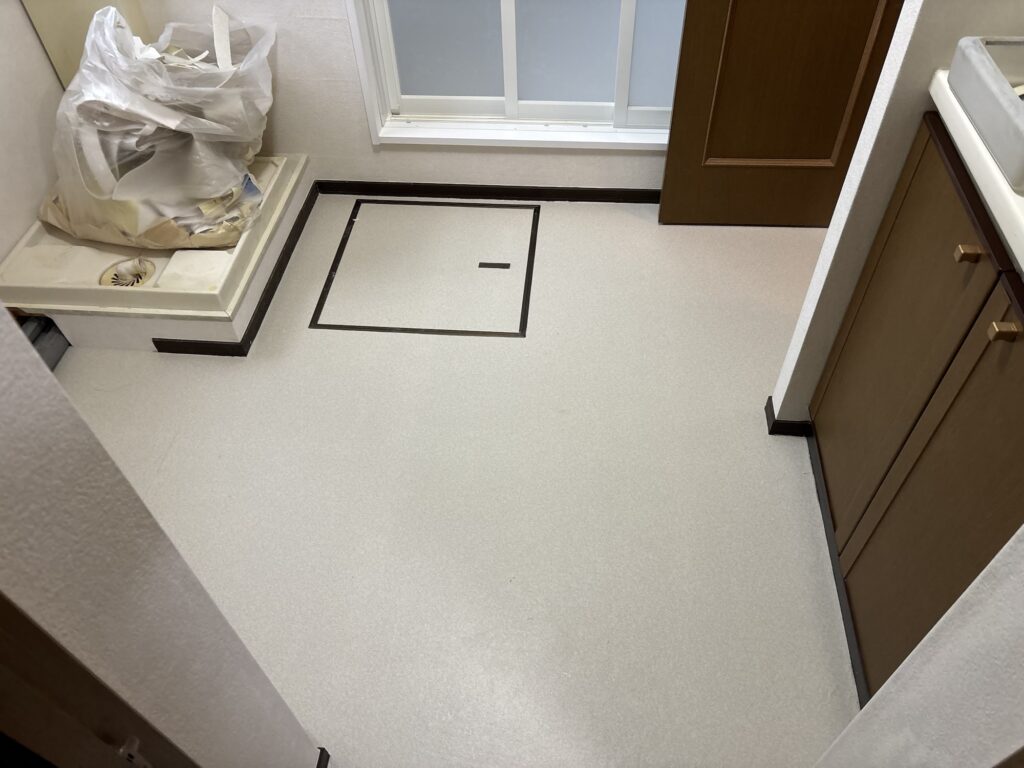
I then folded back one half of the material, applied adhesive, and installed that section.
I repeated the same process on the other half.
For the inspection hatch, I placed the utility knife against the edge of the frame and carefully cut along the rail.
This allowed me to make a clean and accurate opening.
Finishing the Job
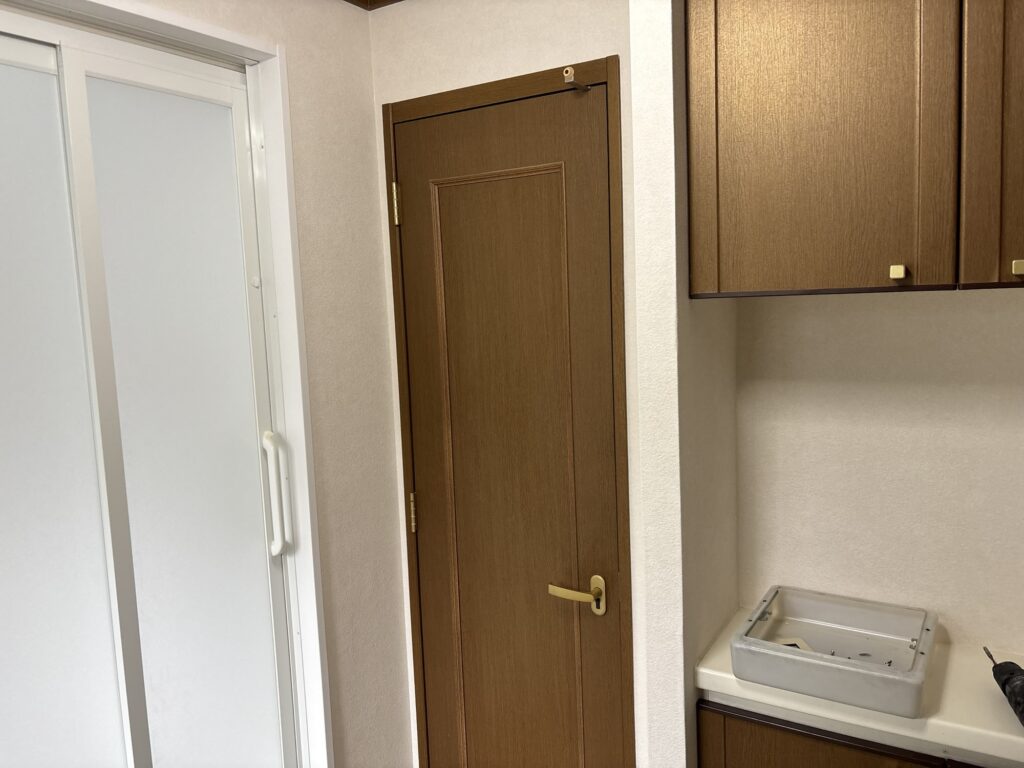
Flooring work requires a lot of bending and kneeling, so it can be physically demanding on the lower back.
Personally, I often find floor installation more tiring than wallpaper installation because of the posture required for the work.
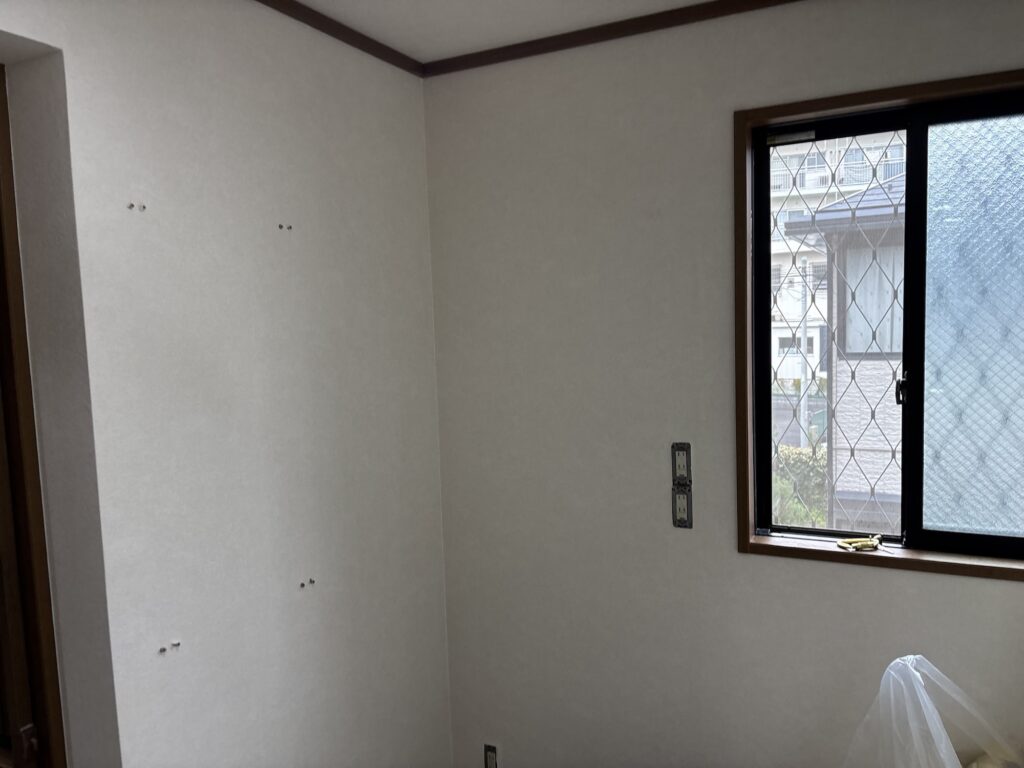
After completing the wallpaper and cushion flooring, we cleaned the entire work area.
The project was completed in approximately seven hours.
Related Project
Wallpaper and Cushion Flooring Installation in a Detached House Washroom
Tools Used
- Wallpaper pasting machine
- Wallpaper smoother
- Seam roller
- Utility knife
- Scraper
- Sanding machine
- Chalk line
- Measuring tape
- Joint compound tools
- Wet sponge
- Basic cleaning tools
Professional Tips
1. Remove Old Backing Paper Properly
Do not simply cover remaining old backing paper with new wallpaper.
If the backing paper is loose or uneven, it can affect the finished surface.
Remove what needs to be removed and create a stable, smooth substrate before installation.
2. Use Sanding to Reduce Unnecessary Joint Compound Work
A sander can be very useful for removing small amounts of old backing paper and smoothing old joint compound ridges.
If the substrate can be made sufficiently flat through sanding, additional joint compound may not be necessary.
This can save both material and drying time.
3. Treat Joint Compound as a Tool, Not a Shortcut
Joint compound is important when the substrate genuinely needs filling or leveling.
However, applying more joint compound is not always the best solution.
Good preparation often starts with removing the problem rather than simply covering it.
4. Plan Joints Around Existing Fixtures
When a fixture cannot be removed, think about where the wallpaper joint will be before starting.
In this project, I positioned the ceiling joint through the center of the clothes-drying pole fixture.
Planning the joint in advance made the installation easier.
5. Bring Wallpaper Toward a Joint From Both Sides
When joining two sheets of wallpaper, avoid forcing one side toward the other.
Work from both sides and gradually bring the material together.
This helps reduce excessive pressure and makes it easier to create a clean joint.
6. Choose a Low-Traffic Location for Cushion Flooring Joints
A flooring joint should ideally be placed somewhere that receives less foot traffic and less direct pressure.
In this project, I placed the joint where the new washbasin would hide it.
Common Mistakes to Avoid
Leaving Old Backing Paper Behind
Small areas of old backing paper can create unevenness under the new wallpaper.
Always inspect the substrate carefully before installation.
Using Too Much Joint Compound
More joint compound does not always mean a better surface.
If the old backing paper or uneven material can be removed mechanically, that may be a faster and more effective solution.
Cutting Wallpaper Too Short
Be especially careful when trimming around cabinets, corners, and fixtures.
Cutting too much material away can leave a gap that is difficult to repair.
Forcing Wallpaper Joints From One Side
Applying too much pressure from one direction can make the joint difficult to control.
Work gradually from both sides.
Placing Flooring Joints in High-Traffic Areas
A joint that receives frequent pressure may be more likely to open over time.
Whenever possible, choose a location with less foot traffic or one that will be covered by furniture or fixtures.
What I Learned From This Project
This project reminded me that good surface preparation is often more important than the actual wallpaper installation.
There is a tendency to think that applying joint compound is the standard solution whenever a surface is uneven.
However, sometimes the better approach is to remove old material and smooth the existing surface instead.
If you can create a sufficiently smooth substrate without applying new joint compound, you can save both material and drying time.
I also learned again how important it is to make decisions based on the actual conditions at the job site.
You cannot always remove every fixture, make every surface perfect, or spend unlimited time on preparation.
A professional installer needs to understand what level of preparation is necessary, what can be improved, and when the surface is good enough to move on to the next stage.
Frequently Asked Questions
1. Why is surface preparation important before installing wallpaper?
Good surface preparation helps create a smooth and stable base for the new wallpaper. It can also prevent old backing paper, unevenness, and other defects from showing through the finished surface.
2. Can wallpaper be installed without using joint compound?
Yes, depending on the condition of the substrate. If the existing surface is already sufficiently smooth after removing old material and sanding, additional joint compound may not be necessary.
3. Why do you use a sander before wallpaper installation?
A sander can remove small amounts of old backing paper and smooth uneven areas of old joint compound. It can help create a flatter surface before wallpaper installation.
4. Why should wallpaper joints be planned around fixtures?
Planning the joint location can make difficult areas easier to install. It can also help reduce the number of difficult cuts around fixtures.
5. How do you install wallpaper around a cabinet?
The wallpaper needs to be carefully shaped around the cabinet and surrounding corners. Small relief cuts can help the wallpaper spread around the corner without tearing.
6. Where should a cushion flooring joint be placed?
Whenever possible, place the joint in an area that receives less foot traffic and less direct pressure. A location hidden under a cabinet or washbasin can also be practical.
7. Why can cushion flooring joints open?
Repeated pressure, foot traffic, improper installation, or insufficient adhesive can contribute to a joint opening over time. Choosing a suitable joint location is one way to reduce the risk.
8. How long did this project take?
The entire wallpaper and cushion flooring project took approximately seven hours.
9. What type of wallpaper was used?
I used a slightly colored, relatively thick wallpaper designed for restoration work.
10. What was the most important lesson from this project?
The most important lesson was that careful surface preparation can save time later. Removing old material properly and creating a smooth substrate can sometimes be more effective than simply adding more joint compound.
Conclusion
This washroom renovation was a good example of how much preparation goes into a professional wallpaper and cushion flooring installation.
The old wallpaper and flooring had already been removed when we arrived, but there was still some preparation work required.
By carefully removing the remaining backing paper, sanding the surfaces, and using joint compound only where necessary, we were able to create a suitable substrate for the new materials.
The wallpaper installation included several challenging areas around cabinets, fixtures, corners, and an electrical distribution panel.
The cushion flooring also required careful planning, especially when deciding where to place the joint.
After approximately seven hours of work, the wallpaper and cushion flooring installation was completed and the work area was cleaned.
For me, the biggest takeaway from this project is simple: good preparation makes the installation easier, faster, and more reliable.


Comments