
Project and Work Details
Project Type: Apartment interior renovation
Location: Tokyo, Japan
Floor: 11th floor
Layout: 1LDK
Work Area: Approximately 18 square meters
Work: Ceiling and wall wallpaper replacement
Crew: 3 wallpaper installers and 1 site supervisor
Working Time: Approximately 7 hours
Condition: Vacant apartment
Introduction
Today, I worked on a wallpaper replacement project in an apartment on the 11th floor of a condominium building in Japan.
The project involved replacing the ceiling and walls in the living room of a 1LDK apartment. The total working area was approximately 18 square meters.
The apartment was vacant, so there were very few belongings inside. This made it much easier for us to move around and work efficiently.
There had previously been a water leak from piping running above the ceiling. The piping had been repaired, and part of the ceiling and wall had been opened and restored so that the repair work could be completed.
This meant that we needed to carefully prepare the repaired areas before installing the new wallpaper.
Related Project
Job Site Report
Removing the Old Wallpaper
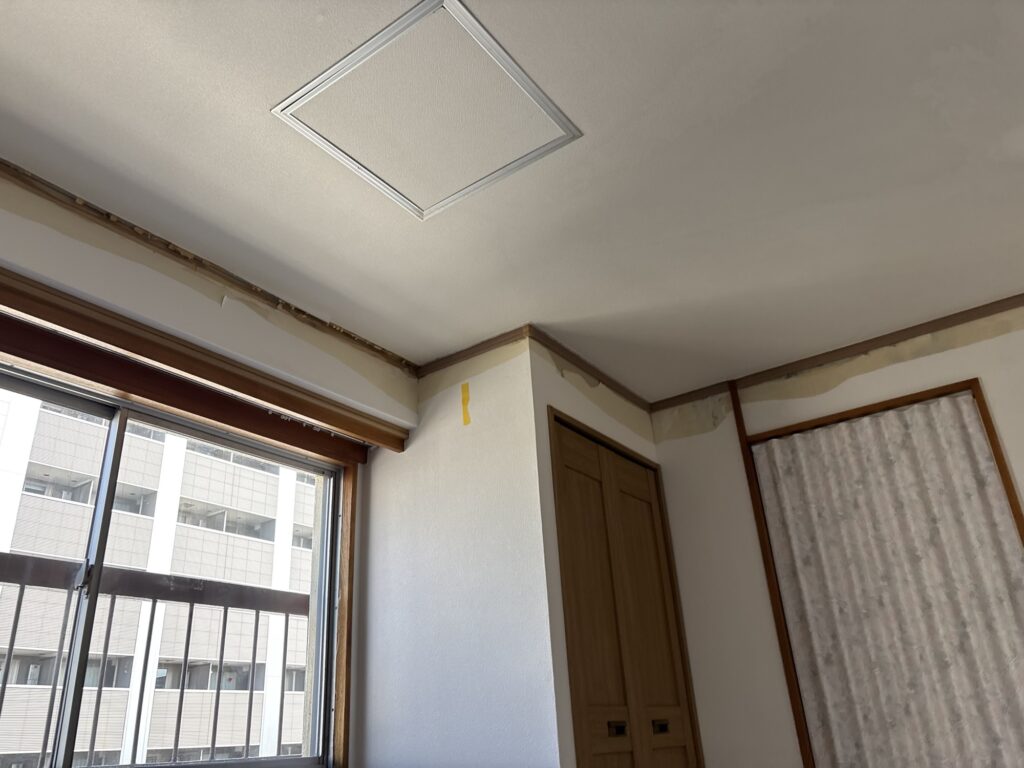
After arriving at the site, we started by removing the existing wallpaper from the ceiling and walls.
Fortunately, the substrate was generally in good condition. The backing paper was firmly attached in most areas and was not bubbling or lifting.
There were some areas where the substrate was mortar. In one of these areas, some backing paper remained attached, so we carefully removed it to create a clean surface for the new wallpaper.
Preparing the New Gypsum Board
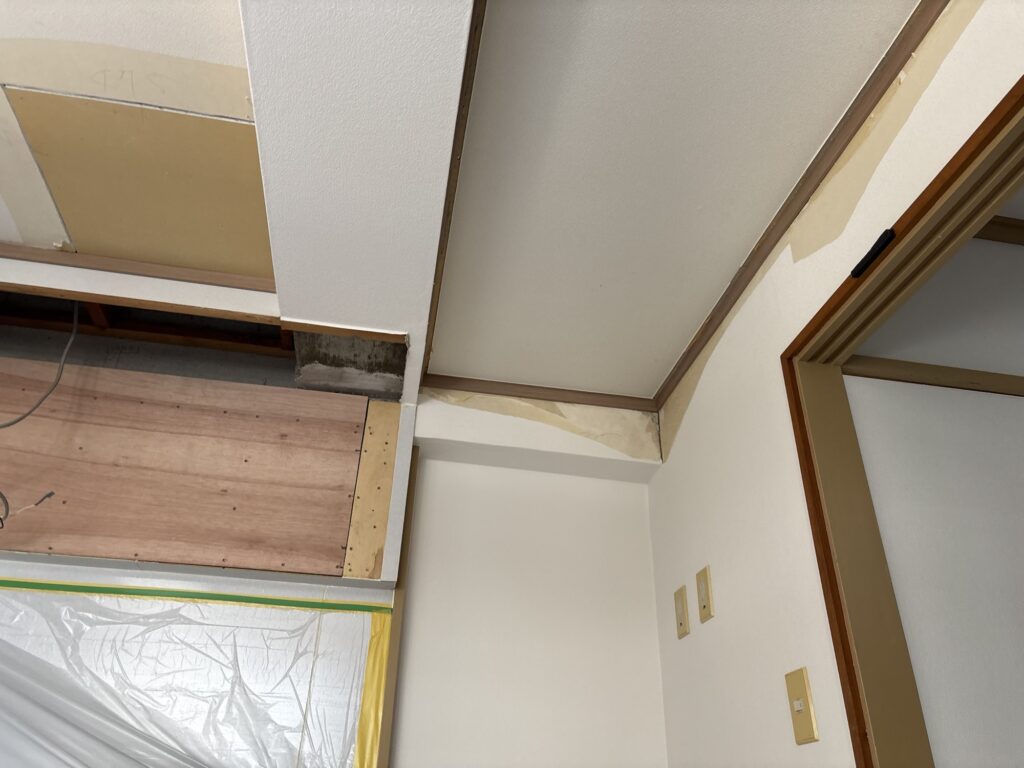
Some areas had new gypsum board installed as part of the previous ceiling and wall repair.
However, the edges of the new gypsum board had not been chamfered.
I used a utility knife to shave the edges of the gypsum board and create a proper chamfer.
This is an important step because if the edges are not chamfered, it can be difficult for joint compound to properly fill the joint.
If the gypsum board is not securely fixed and moves slightly, the joint compound can crack.
Movement in the substrate can eventually cause the wallpaper joint to move as well, potentially creating a visible gap between wallpaper sheets.
Applying Joint Compound
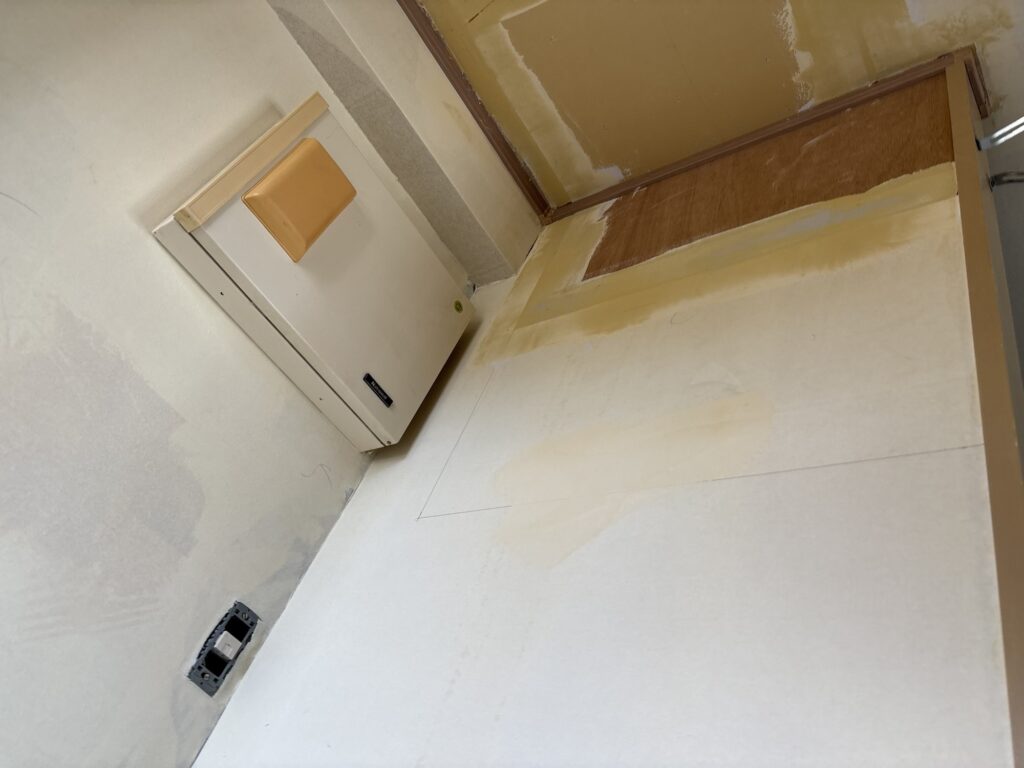
After completing the initial substrate preparation, we applied joint compound to the deeper joints and uneven areas.
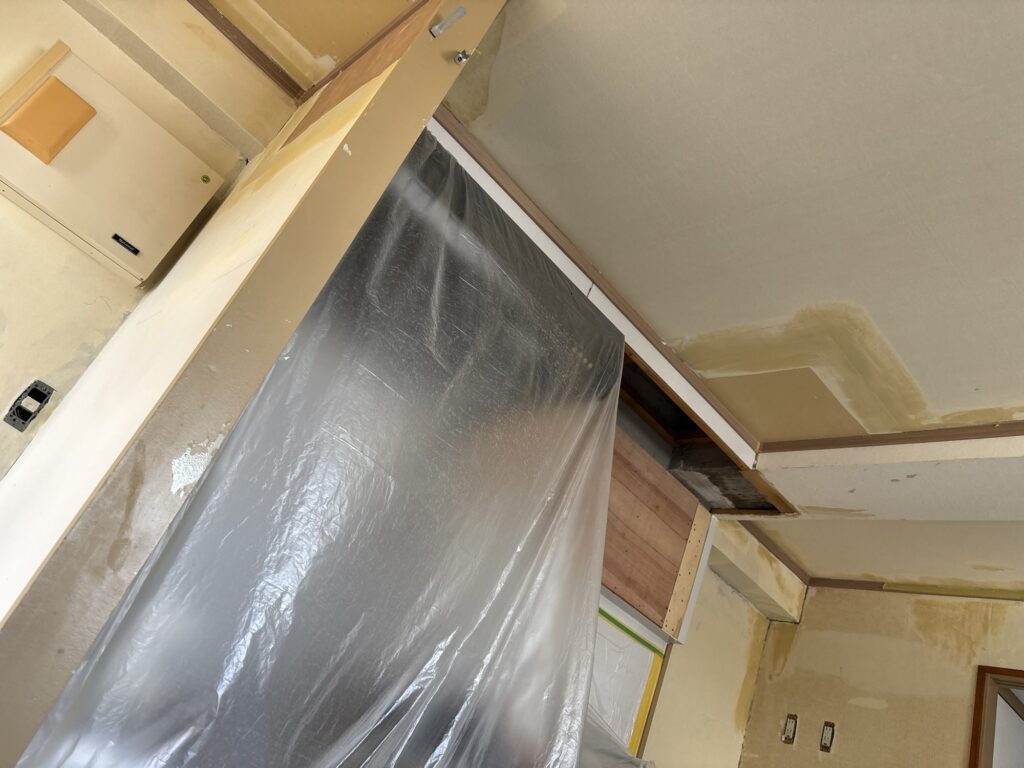
The newly installed gypsum board areas received two applications of base joint compound.
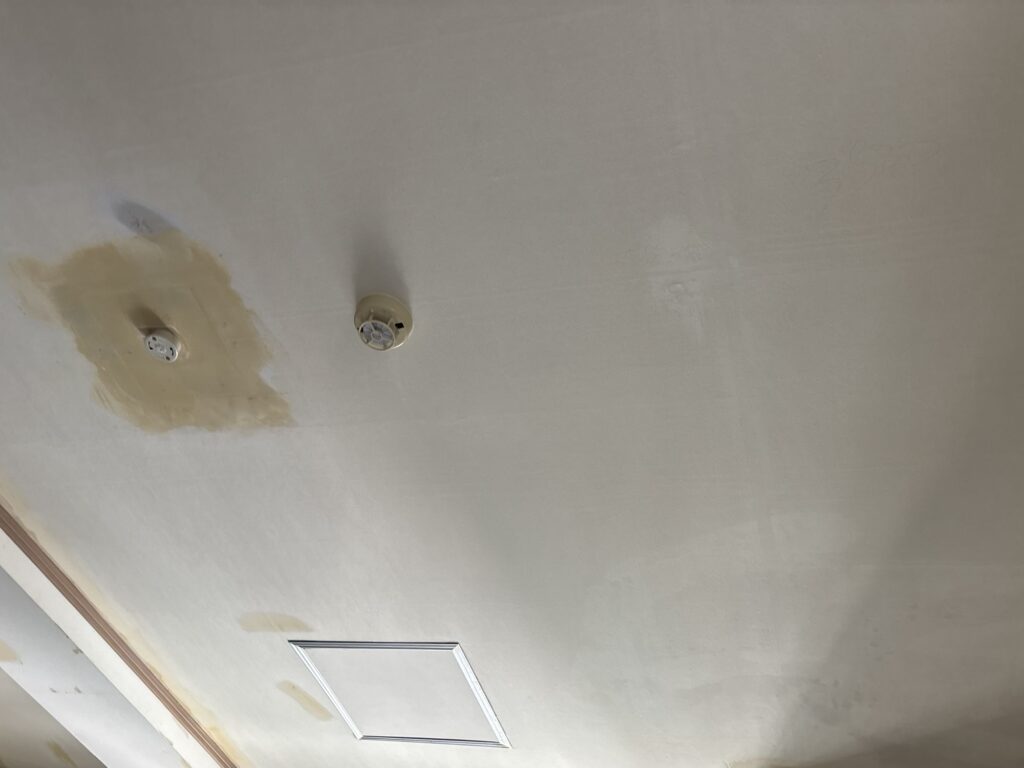
Areas with smaller differences in level only required finishing compound.
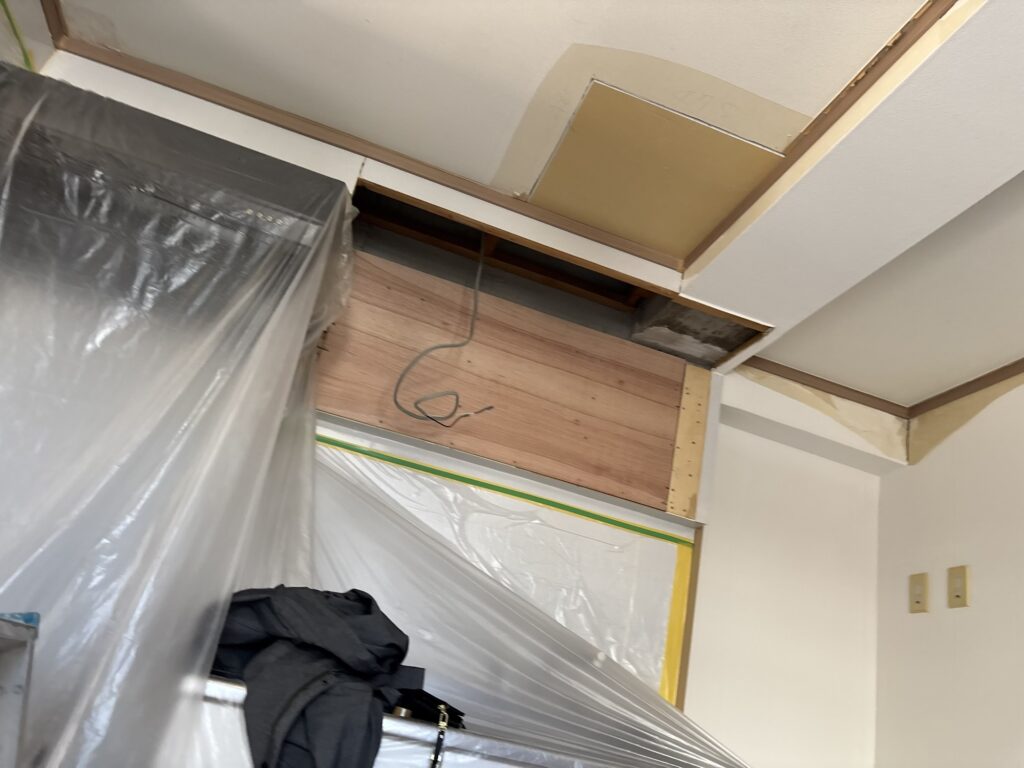
We allowed the compound to dry before continuing with the wallpaper installation.
Measuring and Preparing the Wallpaper
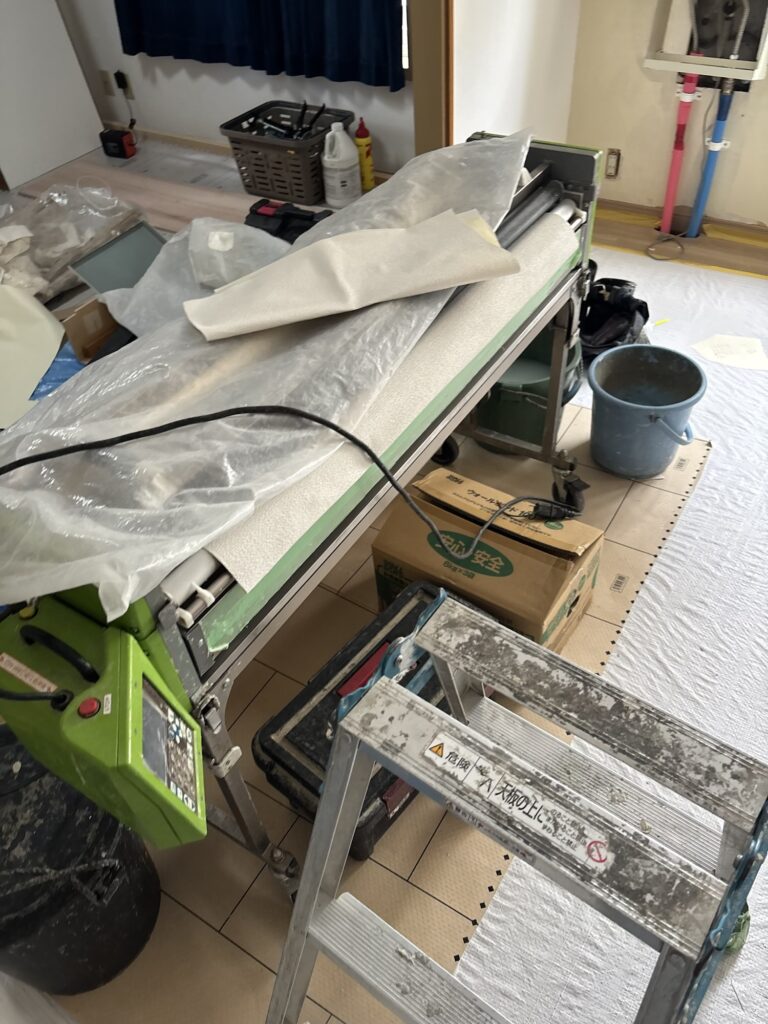
While the joint compound was drying, we measured the ceiling and walls and prepared the wallpaper using our wallpaper pasting machine.
For this project, we used a thick white wallpaper with a grid pattern.
The longest ceiling section was approximately 420 centimeters.
For the walls, we prepared seven pieces measuring approximately 198 centimeters each, along with several additional pieces with smaller measurements.
Because the ceiling pieces were long and difficult to handle, all three workers worked together to install them.
Installing the Ceiling Wallpaper
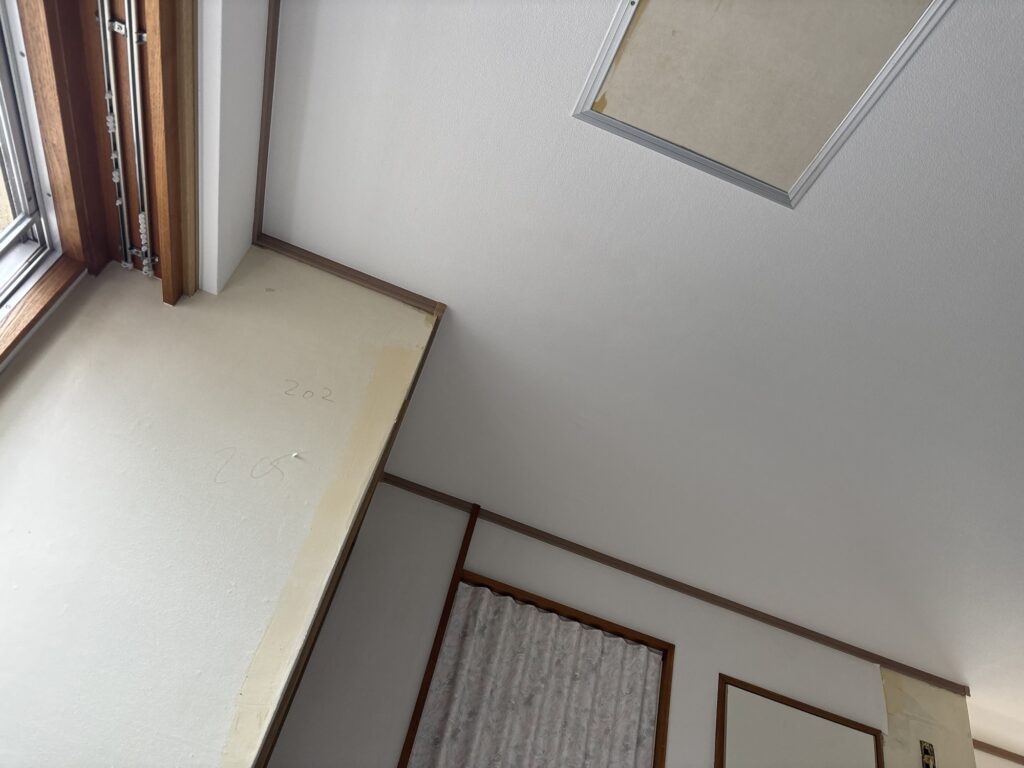
Before starting the first sheet, we marked a guideline on the ceiling.
This is especially important when installing patterned wallpaper.
If the first sheet is installed at an angle, the error can become more noticeable as the following sheets are installed.
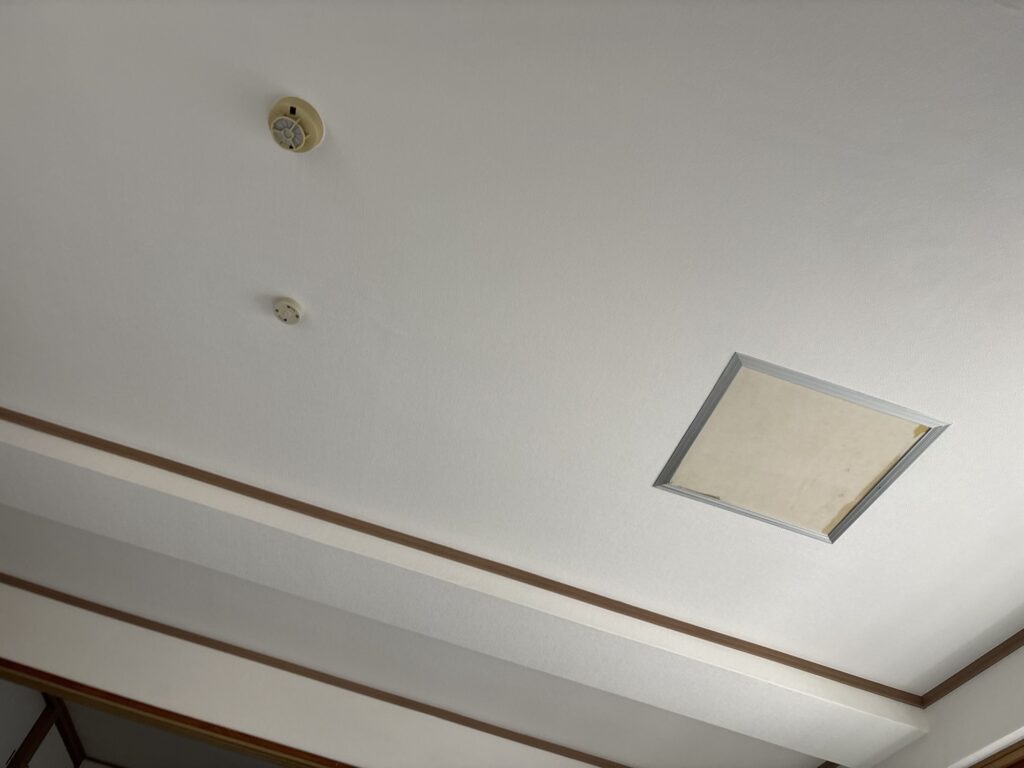
We therefore established the starting position carefully before applying the first sheet.
Once the wallpaper was positioned, we used a wallpaper smoother to push air bubbles out from the center toward the edges.
We then trimmed the excess wallpaper with a spatula and utility knife.
Cutting Around Ceiling Fixtures
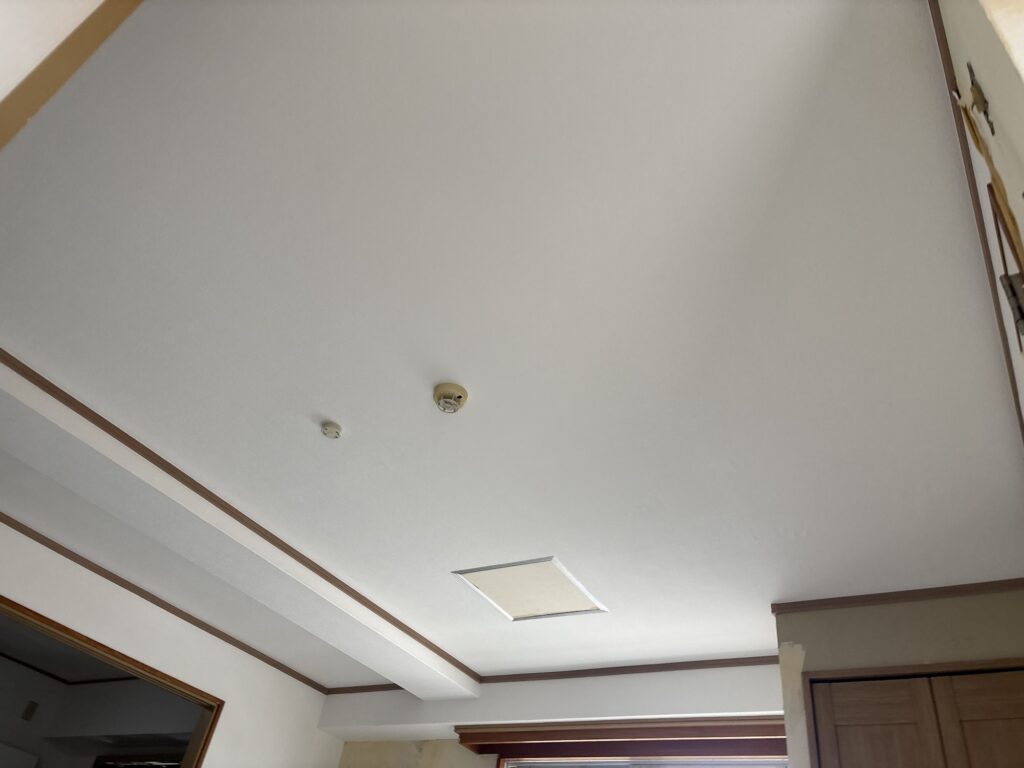
There were several ceiling fixtures, including a smoke alarm and other equipment.
For these fixtures, we made multiple cuts in the wallpaper around the fixture opening, creating a flower-petal-like shape.
After passing the fixture through the opening, we carefully trimmed the excess wallpaper.
We made approximately ten cuts around the opening.
It is important to make enough cuts around circular or irregular fixtures. If there are too few cuts, the wallpaper can become overly stretched and may tear.
Sealing the Gap Along the Ceiling
After completing the ceiling wallpaper installation, we noticed small gaps between the wallpaper and the molding in some areas.
We filled these gaps with white caulking.
This is especially useful when installing white wallpaper because even a small gap can appear dark and become very noticeable.
Keeping white caulking available can be very useful when finishing white wallpaper installations.
Installing the Wall Wallpaper
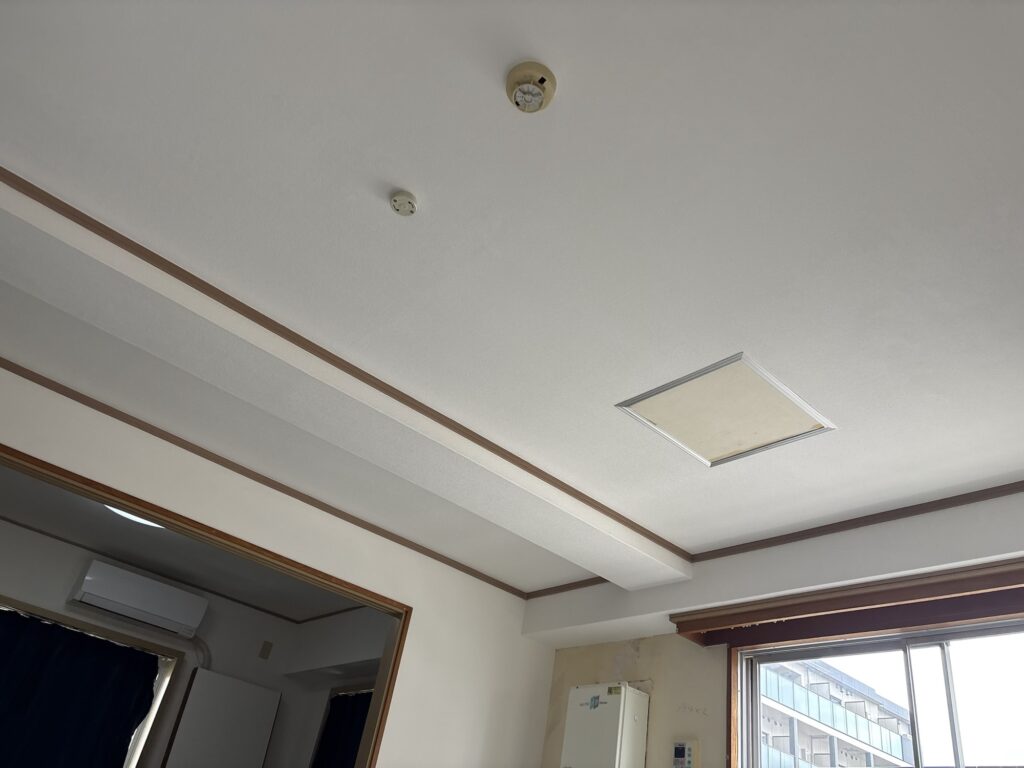
Once the ceiling was finished, the three workers divided the wall installation between them.
The walls were relatively easy to reach because we did not need to use a three-foot stepladder for this particular area.
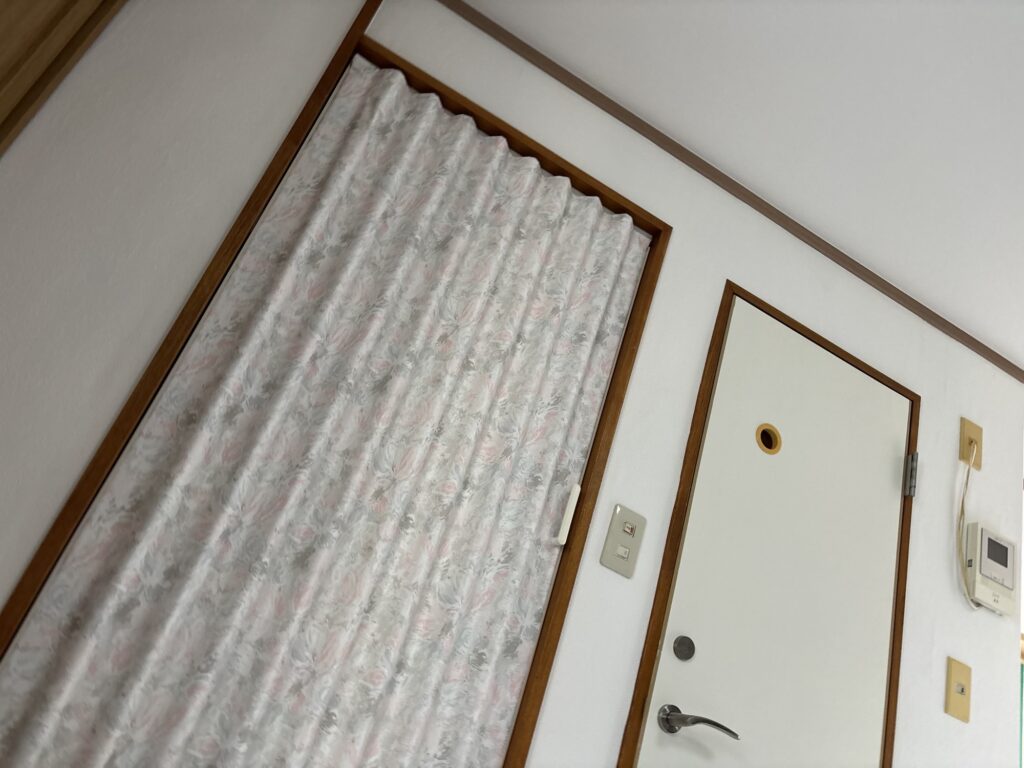
This made the work more comfortable and efficient.
Not having to repeatedly climb up and down a stepladder made a noticeable difference during the installation.
Final Cleanup
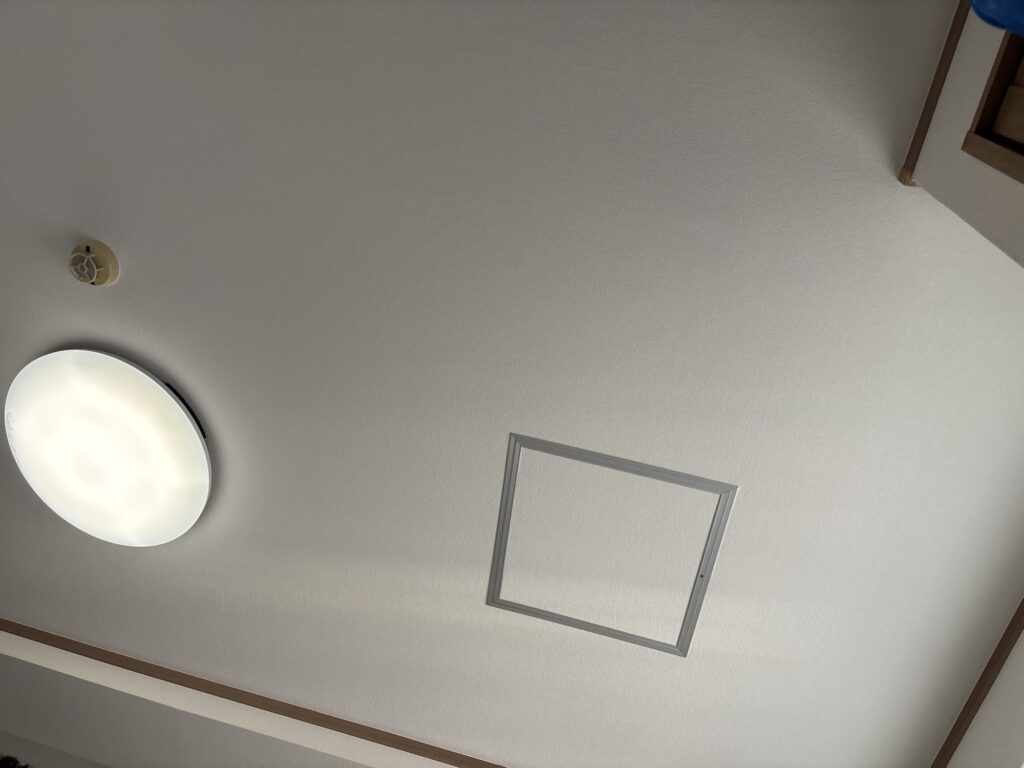
After all of the wallpaper had been installed, we cleaned the work area.
We removed leftover materials, cleaned the floor and surrounding areas, and organized our tools and equipment.
Once everything was clean and organized, the project was complete.
The entire job took approximately seven hours.
Related Project
Water-Damaged Ceiling Board Replacement and Navy Wallpaper Installation in a 20 m² Apartment
Tools Used
Wallpaper Pasting Machine
We used a wallpaper pasting machine to apply an even layer of adhesive and prepare the wallpaper efficiently.
Utility Knife
A utility knife was used for trimming wallpaper and chamfering the edges of the gypsum board.
Wallpaper Smoother
A wallpaper smoother was used to remove air bubbles and press the wallpaper firmly against the substrate.
Spatula
A spatula was used for trimming wallpaper around edges and corners.
Measuring Tools
We used measuring tools to accurately determine the required wallpaper lengths for the ceiling and walls.
Caulking Gun
A caulking gun was used to apply white caulking along small gaps between the wallpaper and ceiling molding.
Professional Tips
Always Check the Substrate Before Installing Wallpaper
Even when the old wallpaper comes off easily, it is important to inspect the substrate underneath.
Look for loose backing paper, uneven areas, cracks, damaged gypsum board, and other problems that could affect the finished surface.
Chamfer New Gypsum Board Edges
When new gypsum board has been installed, check whether the edges have been properly chamfered.
Creating a proper chamfer gives joint compound enough space to fill the joint and helps create a more stable surface.
Establish the Starting Line Carefully
When installing patterned wallpaper, the first sheet is particularly important.
A small angle at the beginning can become more noticeable as additional sheets are installed.
Taking time to establish a straight starting line can make the entire installation easier.
Keep Matching Caulking Available
When installing white wallpaper, white caulking can be useful for finishing small gaps around the edges.
Small dark gaps can stand out against a white surface, so a clean caulking finish can make the completed installation look much better.
Common Mistakes to Avoid
Installing Wallpaper Over Loose Backing Paper
Loose backing paper can cause problems after the new wallpaper is installed.
Always remove loose or damaged material before applying the new wallpaper.
Skipping Gypsum Board Edge Preparation
Installing wallpaper over poorly prepared gypsum board joints can lead to cracking or uneven areas.
Make sure the board edges and joints are properly prepared before applying joint compound.
Starting Without a Reference Line
Starting the first ceiling sheet without establishing a straight reference line can make the following sheets increasingly difficult to align.
Always check the starting position before applying the first sheet.
Making Too Few Cuts Around Fixtures
When wallpaper needs to be installed around ceiling fixtures, too few cuts can place excessive tension on the material.
Making enough small cuts allows the wallpaper to fit around the fixture more smoothly and reduces the risk of tearing.
What I Learned From This Project
This project reminded me how important proper substrate preparation is for a clean wallpaper installation.
The actual wallpaper installation is only one part of the job. The condition of the surface underneath can have a major effect on the final result.
I also found that the working environment can have a significant impact on efficiency.
Because this apartment was vacant and the walls were easy to reach without repeatedly using a stepladder, the installation was more comfortable than many other projects.
Even small details, such as keeping the correct color of caulking nearby, can make the finishing work easier.
After working on many different sites, I continue to find that careful preparation before installing the wallpaper saves time and prevents problems later.
Frequently Asked Questions
How large was the working area?
The total working area was approximately 18 square meters.
How many workers were on the project?
There were three wallpaper installers and one site supervisor.
How long did the project take?
The entire project took approximately seven hours.
Why had part of the ceiling and wall been opened?
There had been a water leak from piping running above the ceiling. Part of the ceiling and wall had been opened so the piping could be repaired and then restored.
Was the substrate in good condition?
Yes. Overall, the substrate was in good condition, and most of the backing paper was firmly attached.
Why did you chamfer the gypsum board?
The new gypsum board edges had not been chamfered. We chamfered them with a utility knife so that the joint compound could properly fill the joints and create a more stable surface.
How many coats of joint compound did the new gypsum board areas receive?
The newly installed gypsum board areas received two applications of base joint compound. Areas with smaller differences in level only received finishing compound.
Why did you make many cuts around the ceiling fixtures?
We made approximately ten cuts around the fixtures to reduce tension in the wallpaper and help prevent the material from tearing.
Why did you use white caulking?
The wallpaper was white, so dark gaps between the wallpaper and molding would have been noticeable. White caulking helped create a cleaner finish.
Was a stepladder necessary?
For the wall installation, we did not need a three-foot stepladder because the walls were low enough to reach comfortably. This made the work easier because we did not have to repeatedly climb up and down.
Conclusion
This 11th-floor apartment project involved replacing the ceiling and wall wallpaper in an approximately 18-square-meter living room.
The previous water leak had required part of the ceiling and wall to be opened and repaired, so careful substrate preparation was an important part of the job.
We repaired and prepared the substrate, applied joint compound, measured and prepared the wallpaper, and installed the ceiling and walls as a team of three.
The thick white grid-pattern wallpaper was relatively easy to handle, but careful alignment was especially important on the ceiling.
After completing the installation, we filled small gaps with white caulking, cleaned the entire work area, and organized our tools.
The project was completed in approximately seven hours.
For me, this project was another reminder that good wallpaper installation starts with good preparation. A clean final result depends not only on how the wallpaper is installed, but also on how carefully the substrate is prepared beforehand.


Comments