
Project Data
Project Type: Residential Renovation – Laundry Area & Storage Shelf Restoration
Location: Japan
Area: Laundry Room / Washing Machine Space and Adjacent Storage Shelf
Work: Demolition, Drywall Replacement, Framing Repair, Plywood Installation, Surface Preparation for Wallpaper
Working Time: 1 Day
Occupied Home: Yes
Crew: 3 Workers (2 Installers + 1 Assistant)
⸻
Introduction
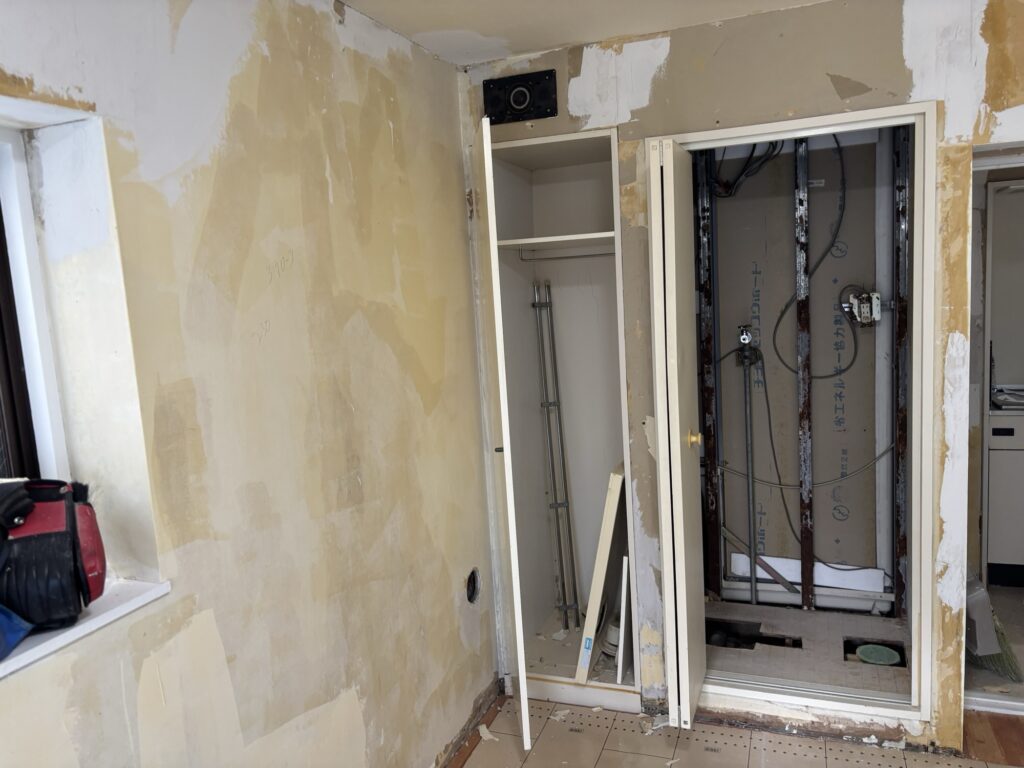
Today’s project took place at a house where we had previously installed wallpaper.
After returning for additional renovation work, we discovered that the washing machine area had suffered significant moisture damage.
The shelves, drywall, and surrounding materials had deteriorated due to prolonged exposure to humidity.
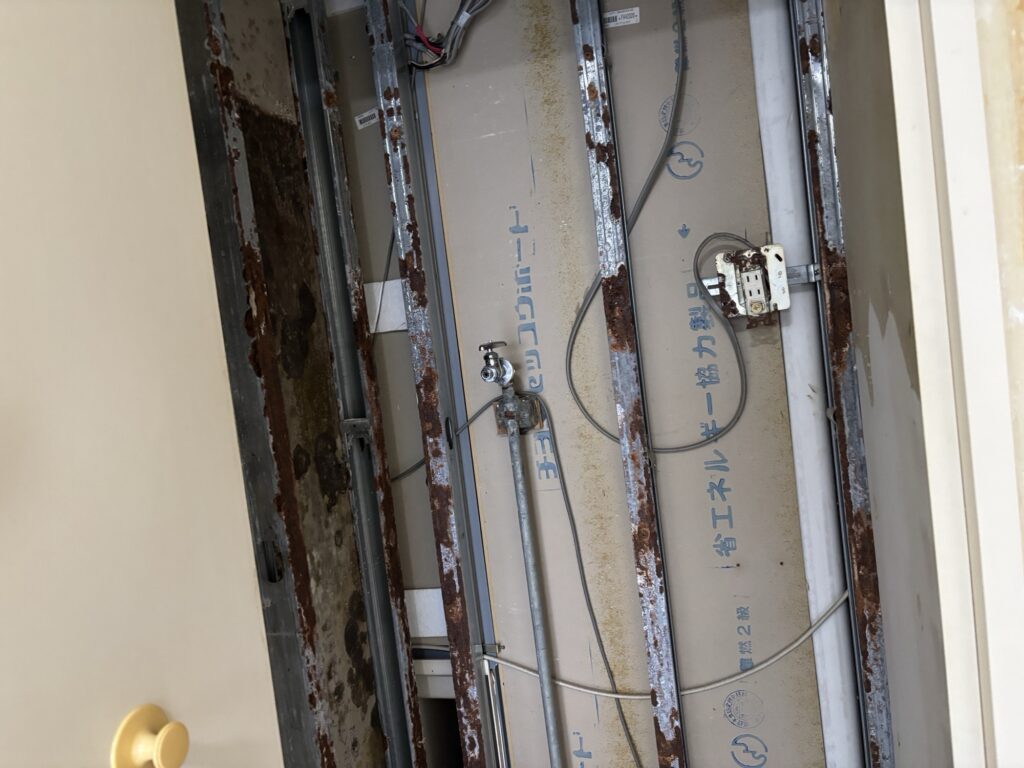
Our task was to completely remove the damaged materials, rebuild the wall substrate, and prepare the surfaces so new wallpaper could be installed on a future visit.
The storage shelf next to the laundry area showed similar damage, so it was also included in today’s renovation.
⸻
Project Report (Step-by-Step)
Demolishing the Damaged Walls
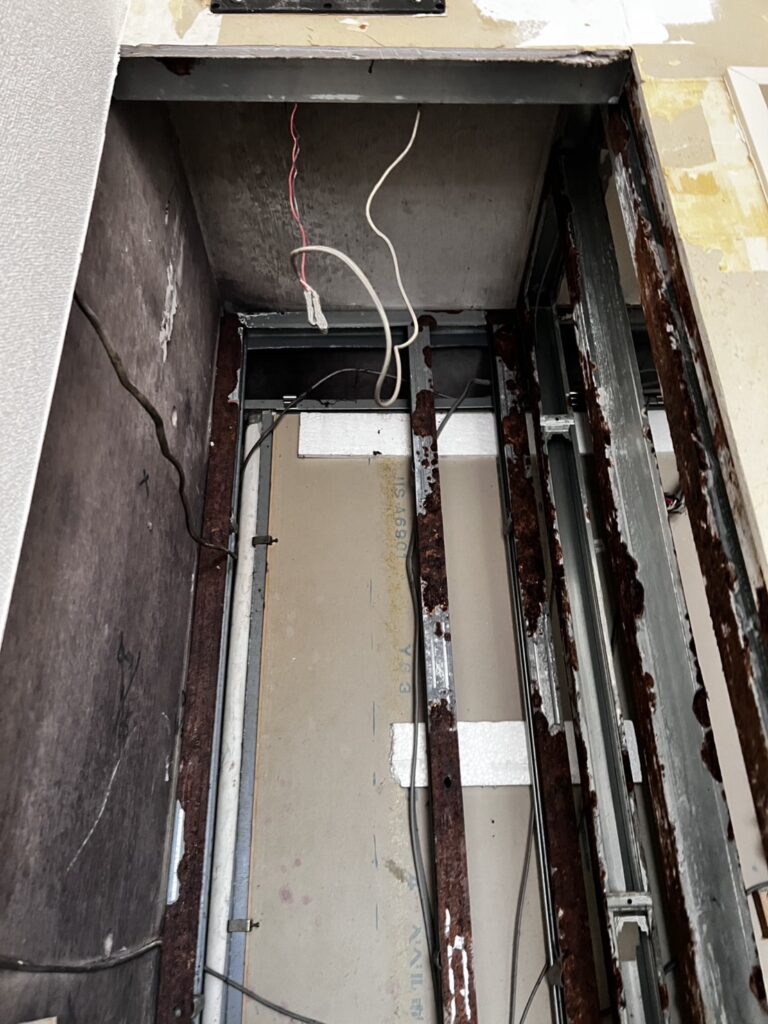
The first step was demolishing the deteriorated drywall and shelving using hammers and pry bars.
The inside of the walls was covered with mold and moisture damage, making this one of the dirtiest demolition jobs I’ve worked on recently.
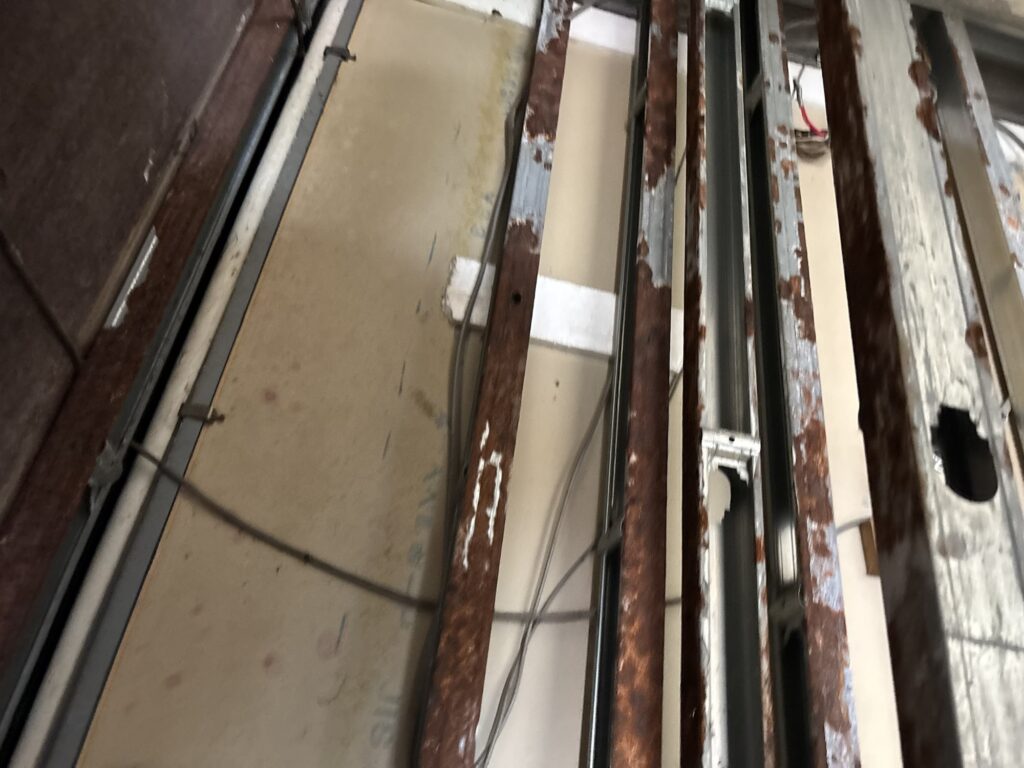
When working in these conditions, wearing a mask and gloves is absolutely essential.
Protecting yourself from mold spores, dust, and contaminated materials is just as important as completing the construction work itself.
Taking care of your health is part of being a professional.
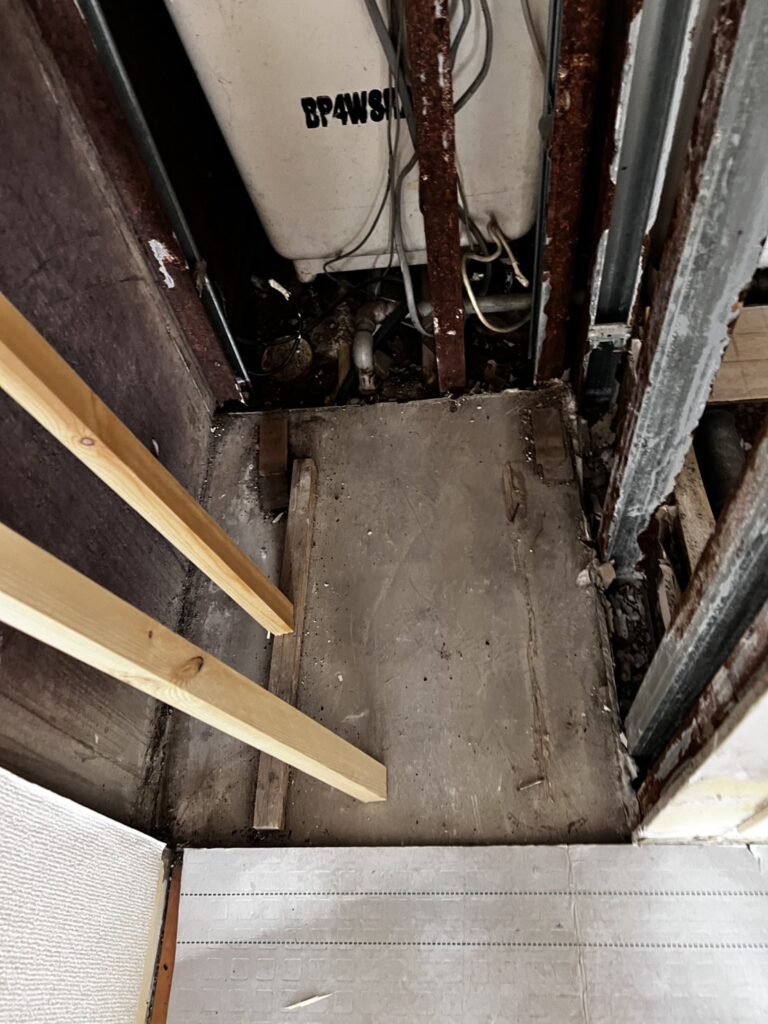
I’ve performed demolition work on many remodeling projects, and in my experience, demolition is the most physically demanding and time-consuming part of a renovation.
Installing wallpaper or vinyl flooring is actually more than twice as easy physically.
However, finishing work requires much more precision, experience, and craftsmanship, which is what makes it enjoyable.
⸻
Checking for Hidden Electrical Wiring
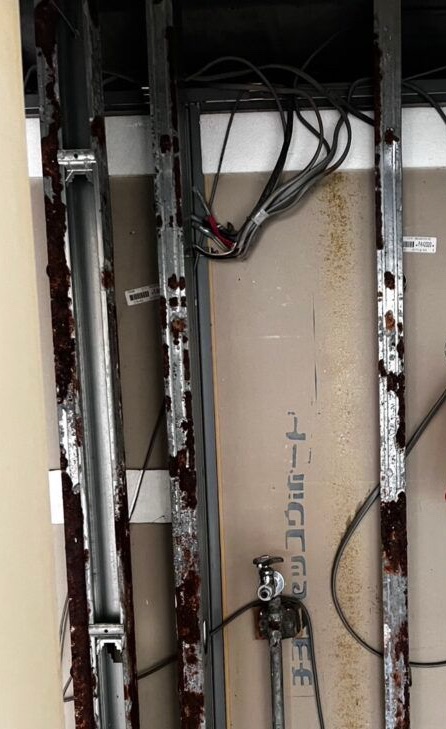
During demolition, it’s important to remember that electrical wiring may be hidden behind the drywall.
Carelessly cutting into the wall can easily damage cables, creating expensive repairs and potential safety hazards.
Taking your time during demolition is always better than rushing.
⸻
Removing Old Screws
The original drywall had been fastened to light-gauge steel framing.
After removing the drywall, every screw was carefully removed before installing the new boards.
Leaving old screws behind prevents new drywall from sitting flat and can cause uneven surfaces later.
Whether installing drywall or wallpaper, proper preparation determines the quality of the finished project.
⸻
Installing the New Drywall Efficiently
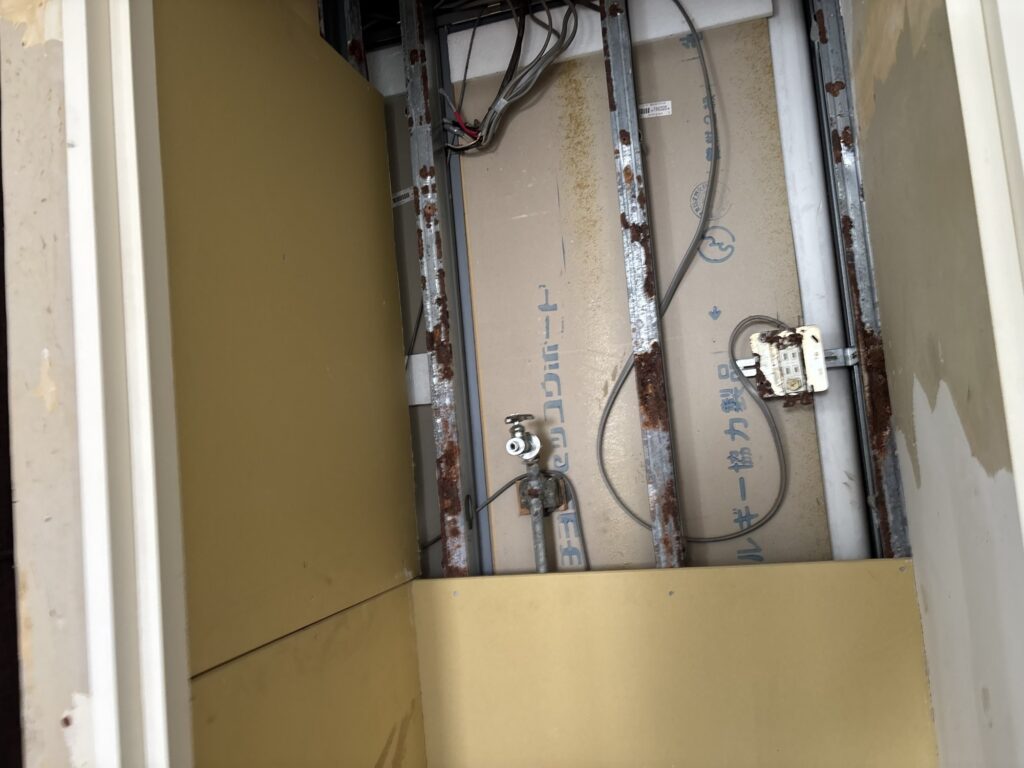
Our crew worked as a team.
One installer rebuilt the storage shelf.
Another installed drywall in the washing machine area.
The third worker assisted both installers throughout the day.
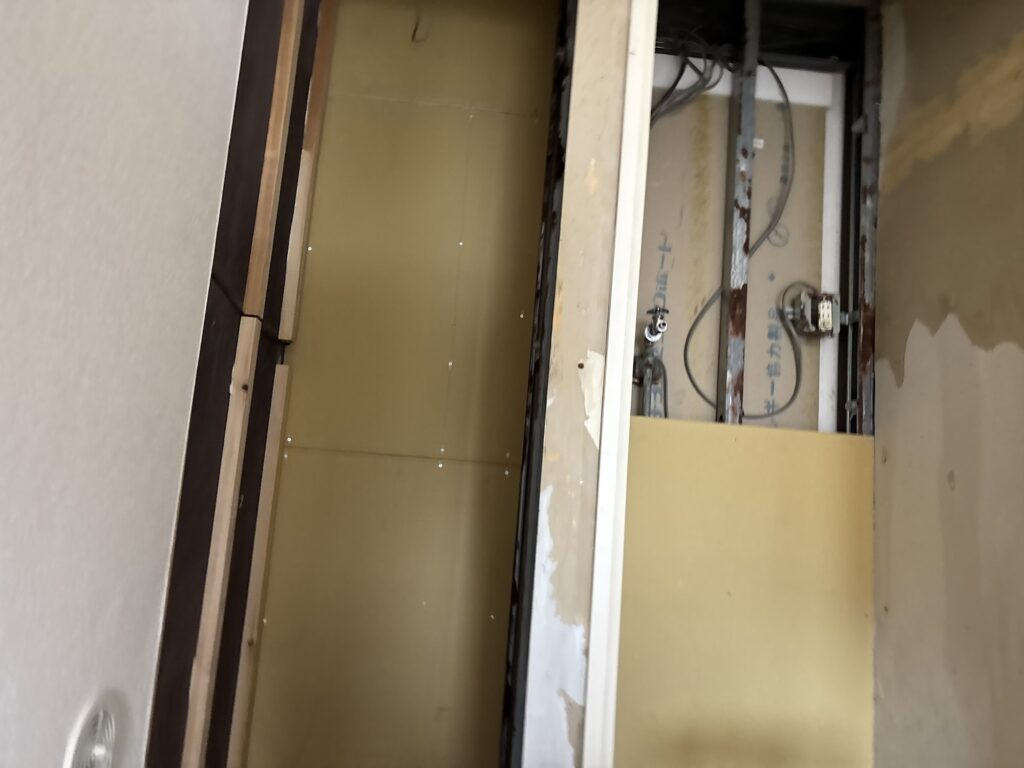
The laundry wall measured approximately 200 cm high and 65 cm wide.
Instead of trying to install one full 90 × 180 cm drywall sheet in such a tight space, we cut the drywall into 90 × 65 cm sections and installed the shorter pieces horizontally.
Although this creates additional joints, it makes measuring easier, improves efficiency, and is much less physically demanding because each piece is lighter.
This technique was taught to me by a carpenter with more than 30 years of experience, and I’ve found it to be extremely practical.
⸻
Thinking Ahead to Wallpaper Installation
Whenever installing drywall, I always think about the wallpaper installation that comes afterward.
One thing wallpaper installers dislike is filling large gaps around ceiling corners, inside corners, and around door frames.
Large gaps require much more joint compound, which takes longer to dry and slows the entire project.
To avoid this, each drywall panel was carefully cut to minimize gaps.
Of course, avoiding mistakes is always the goal.
However, if a drywall panel is accidentally cut slightly too small, it’s often better to leave a small gap at the drywall joint while keeping the corners tight.
This makes finishing with joint compound much easier.
If the gap becomes too large, however, replacing the drywall is the only professional solution.
Planning for possible mistakes before they happen is an important part of professional construction work.
⸻
Removing Plumbing Fixtures and Electrical Outlets
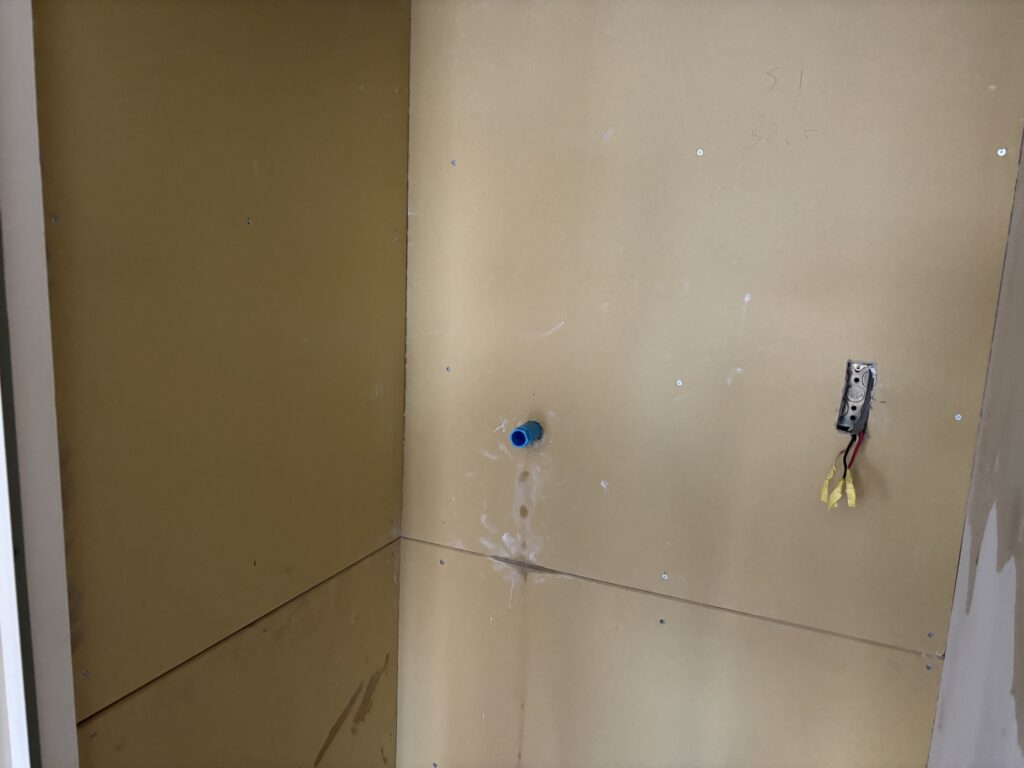
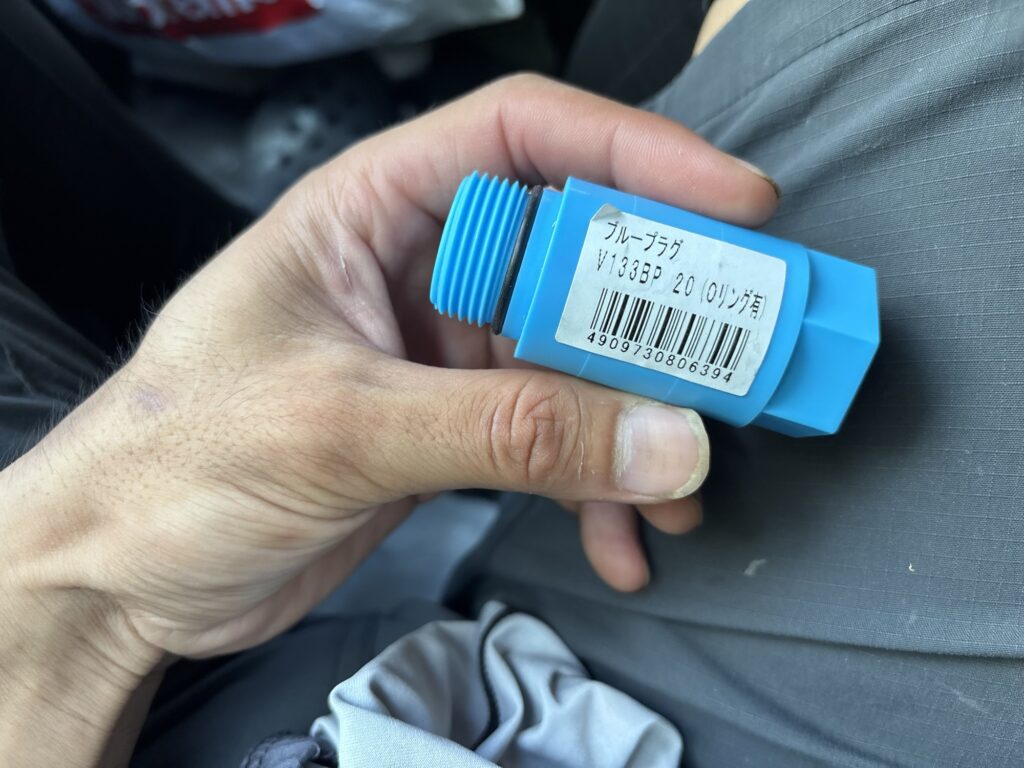
The water faucet was removed and capped with a shut-off valve before installing the drywall.
The electrical outlet was also removed to allow clean installation.
Trying to cut drywall around these fixtures often results in oversized openings and poor workmanship.
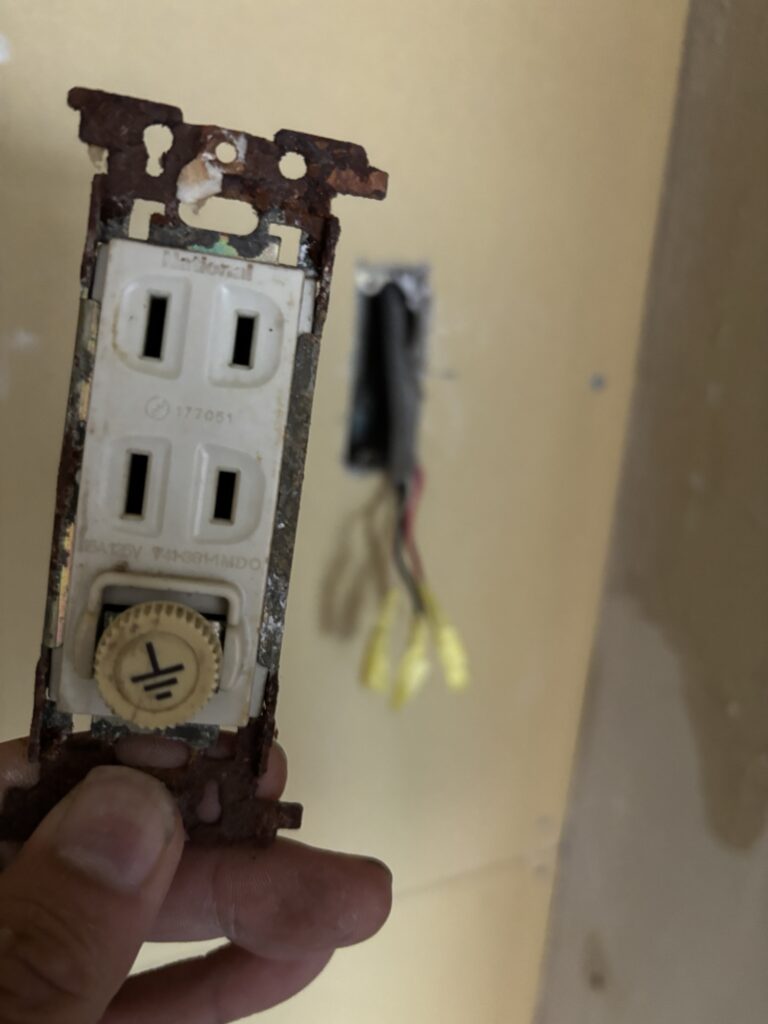
In Japan, disconnecting electrical wiring from an outlet requires a licensed electrician.
Fortunately, I hold an electrician’s license, so I was able to safely perform this work myself.
⸻
Creating Stronger Framing for the Shelf
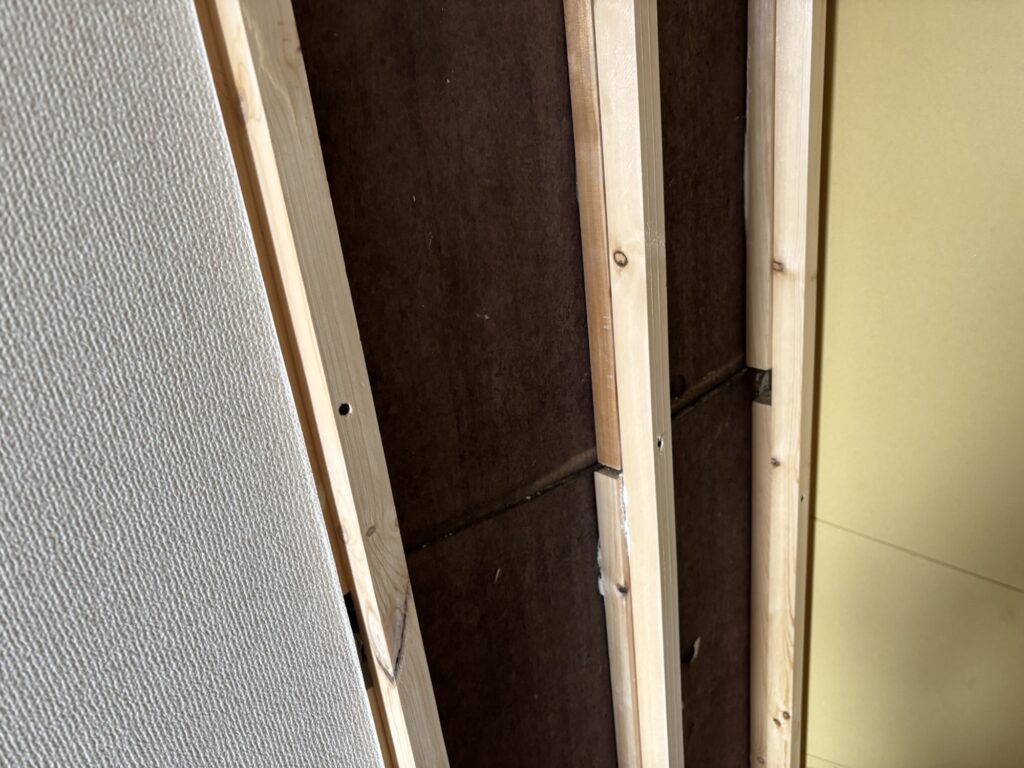
The left side of the storage shelf was a mortar wall, so there was no framing available to fasten drywall.
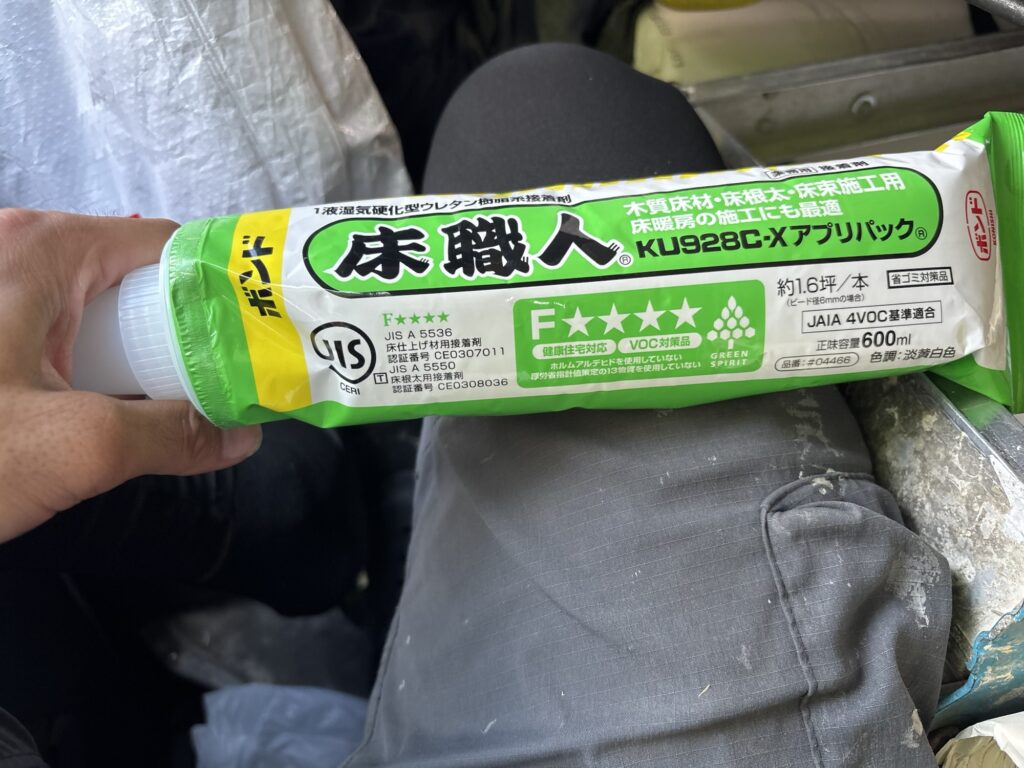
To solve this, we installed wood battens using construction adhesive to create a secure base.
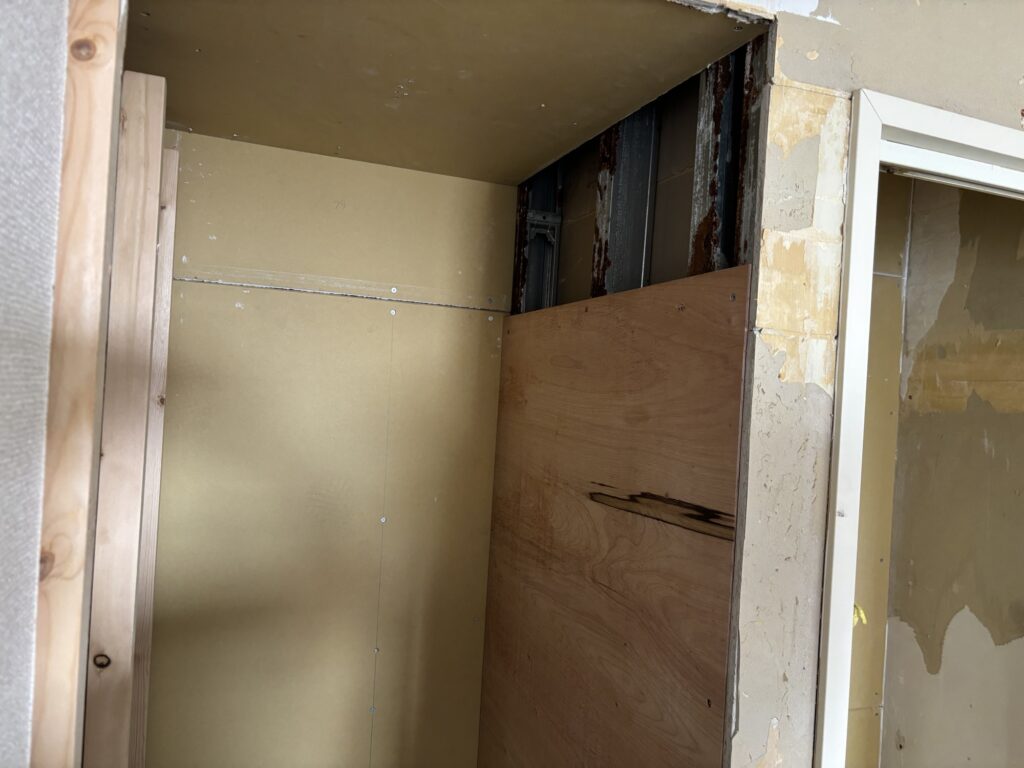
Because adjustable shelving standards would later be installed, we used 12 mm plywood instead of drywall.
Plywood provides much stronger screw holding strength, allowing shelves to be mounted almost anywhere without worrying about weak fastening points.
⸻
Preparing for the Next Visit
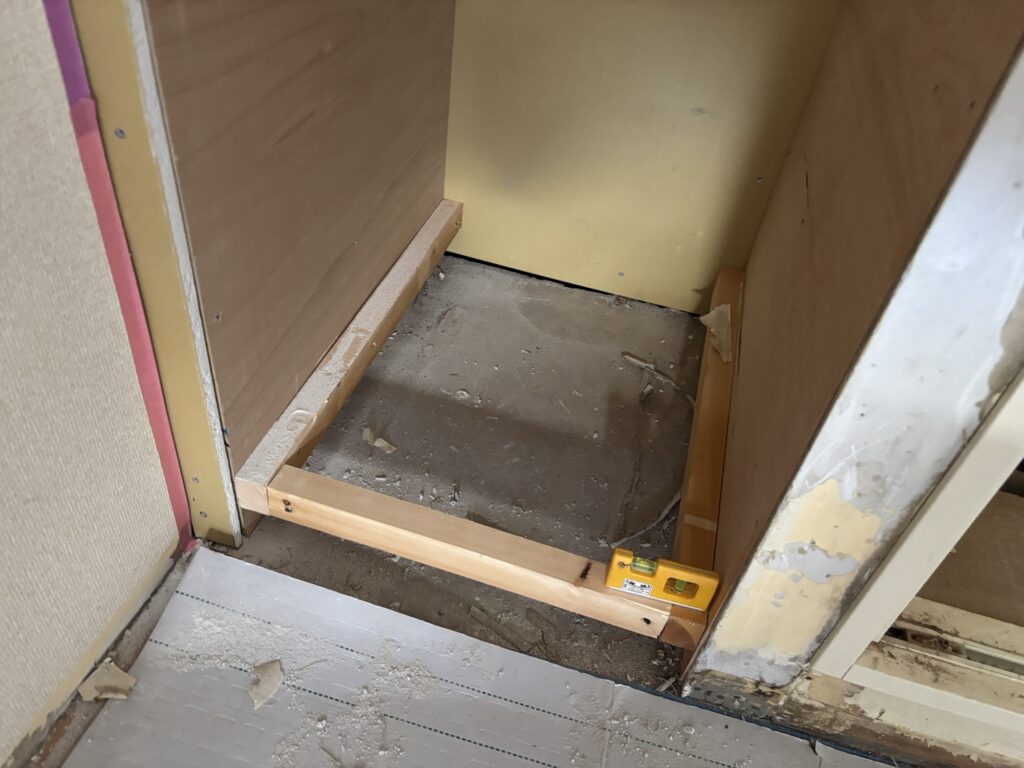
The shelf floor was also rebuilt with new framing and plywood.
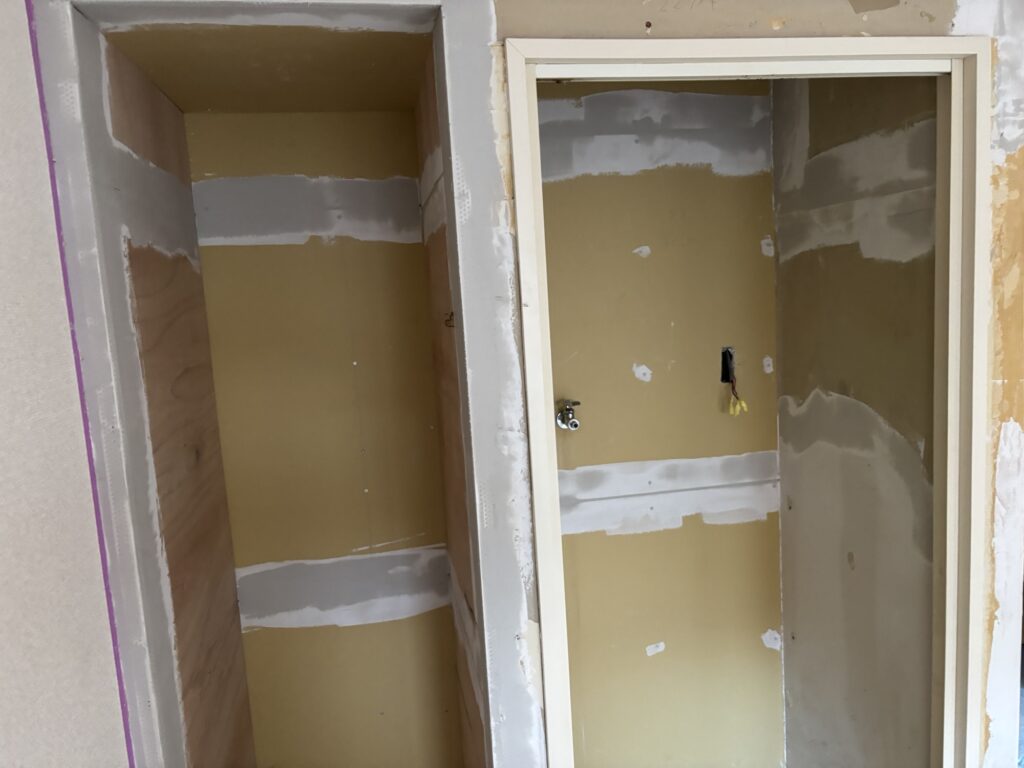
Once all structural work was complete, we applied the first coat of joint compound to prepare the walls for wallpaper installation during our next visit.
⸻
An Unexpected Problem
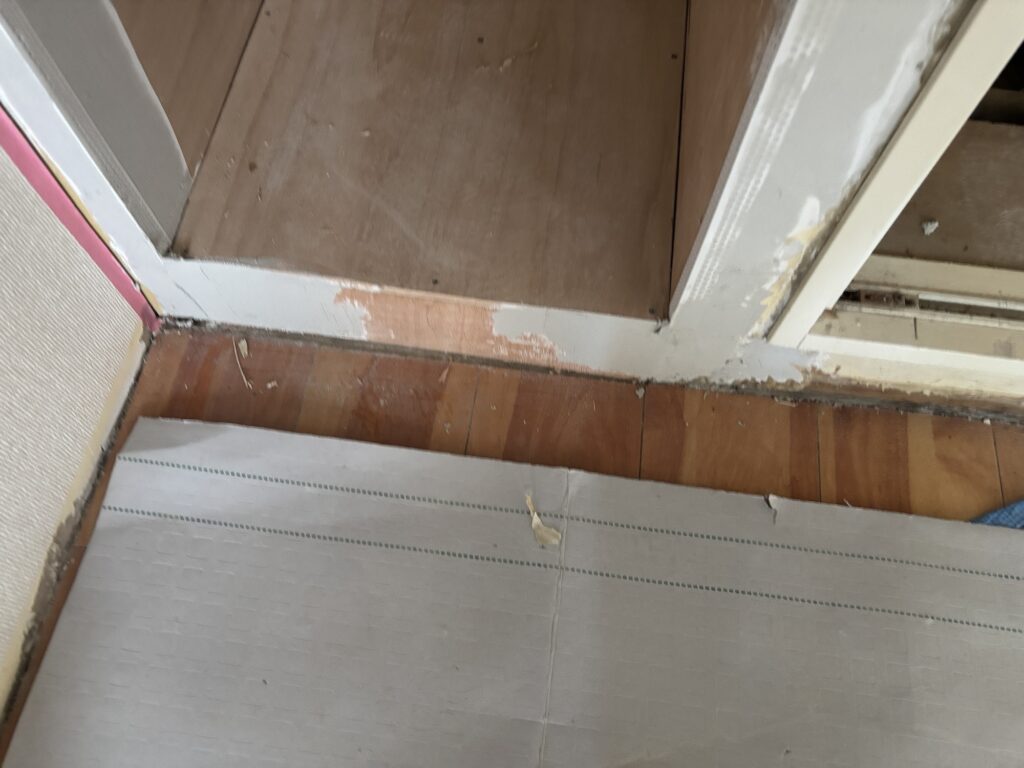
Just before finishing, we removed the protective floor coverings.
That’s when we noticed an unexpected gap between the floor tile and the newly rebuilt shelf wall.
The original shelf had projected farther into the room.
Since we rebuilt the wall flush with the surrounding walls, the floor tile no longer reached the new wall location.
The gap was too wide to hide with a baseboard, and matching floor tiles were no longer available.
After discussing possible solutions, we decided that installing a transition trim would provide the cleanest finish.
Unexpected situations like this happen on remodeling projects, and every challenge becomes another valuable learning experience.
⸻
Cleaning Up
At the end of the day, we thoroughly cleaned the work area, organized our tools, and left the site ready for the next stage of the renovation.
Final Finishing Work
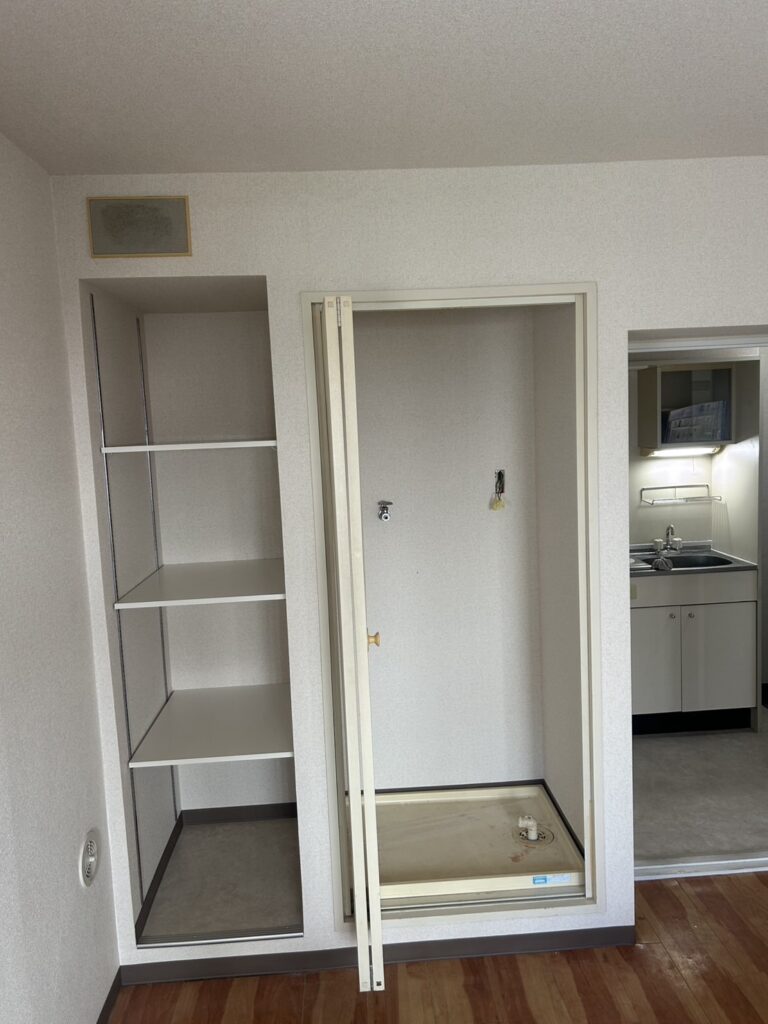
After the drywall and plywood work was completed, I was not on site for the final finishing stage.
On a later visit, another member of the renovation team completed the remaining work, including installing wallpaper on the laundry area walls and inside the storage shelf.
The cushion flooring was also installed to complete the floor.
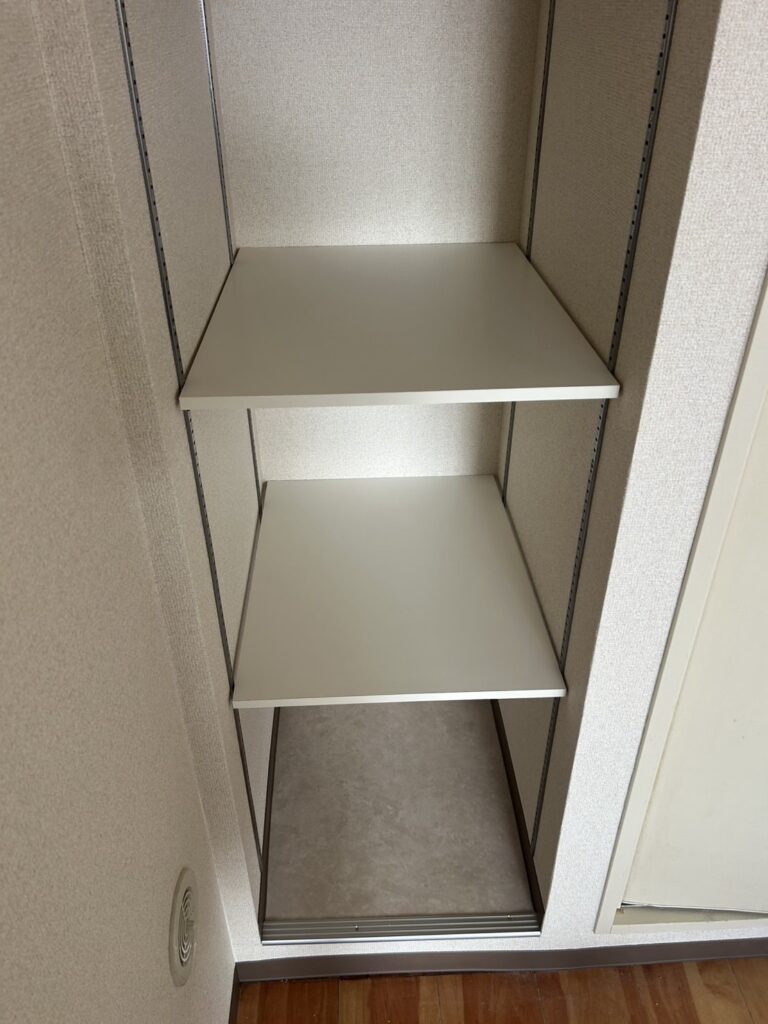
Although I wasn’t present for this final stage, I wanted to include the finished result to show how the space looked after the renovation was completed.
The combination of the new wall substrate, fresh wallpaper, and new cushion flooring gave the laundry area and storage shelf a clean and refreshed appearance.
This project was a good reminder that every stage of a renovation—from demolition and substrate preparation to the final finish—plays an important role in achieving a professional result.
⸻
Tools Used
- Hammer
- Pry Bar
- Utility Knife
- Drywall Saw
- Tape Measure
- Screw Gun / Impact Driver
- Construction Adhesive (Nejibond)
- Drywall Screws
- 12 mm Plywood
- Drywall Panels
- Joint Compound
- Putty Knife
- Personal Protective Equipment (Mask & Gloves)
- faucet sockets
⸻
Professional Tips
- Always wear gloves and a quality mask when removing mold-damaged materials.
- Check carefully for hidden electrical wiring before cutting into walls.
- Remove every old screw before installing new drywall.
- Think about the wallpaper installation while rebuilding the substrate.
- Keep drywall corners tight to reduce the amount of joint compound required.
- Remove plumbing fixtures and electrical outlets before installing drywall for cleaner, more accurate cuts.
- In narrow spaces, smaller drywall pieces are often safer, faster, and easier to install than full sheets.
- Use plywood instead of drywall where heavy shelving will be installed.
⸻
Common Mistakes to Avoid
Even experienced remodelers can run into problems if proper preparation is skipped.
Here are some of the most common mistakes to avoid during this type of renovation.
1. Skipping Personal Protective Equipment (PPE)
Never underestimate the health risks of mold and demolition dust. Always wear gloves, eye protection, and a high-quality dust mask or respirator when removing water-damaged materials.
⸻
2. Demolishing Too Aggressively
Hidden electrical wiring or plumbing may be located behind the drywall.
Removing materials too quickly can damage these systems and create expensive repairs.
Demolition should always be done carefully.
⸻
3. Leaving Old Screws Behind
After removing the damaged drywall, inspect the steel framing and remove every old screw.
Even one remaining screw can prevent the new drywall from sitting flat, resulting in an uneven wall surface.
⸻
4. Using Full-Size Drywall Sheets in Tight Spaces
Trying to install a large drywall sheet in a narrow laundry area often makes the job more difficult.
Cutting the board into smaller sections improves handling, reduces fatigue, and allows for more accurate installation.
⸻
5. Creating Large Gaps Between Drywall Panels
Large gaps require more joint compound, take longer to dry, and increase the risk of visible imperfections after wallpaper installation.
Measure carefully and keep gaps as small as possible.
⸻
6. Cutting Around Fixtures Instead of Removing Them
Leaving faucets, shut-off valves, or electrical outlets in place often results in oversized openings and poor workmanship.
Whenever possible, remove these fixtures before installing the new drywall.
⸻
7. Forgetting About the Next Stage of the Project
Drywall installation should always be done with the finishing work in mind.
A well-installed substrate makes wallpaper installation faster, cleaner, and produces a much better final result.
⸻
8. Ignoring Unexpected Problems
Older homes often reveal hidden issues once demolition begins.
Moisture damage, mold, or unexpected gaps may require changes to the original plan.
Staying flexible and solving problems professionally is part of every successful renovation.
⸻
What I Learned From This Project
Every renovation presents unexpected challenges.
This project reminded me that even after careful planning, hidden issues can appear at the very end of the job.
Instead of seeing these situations as failures, I treat them as opportunities to improve my problem-solving skills.
Experience isn’t gained only when everything goes according to plan—it’s built by successfully handling the unexpected.
⸻
FAQ
Why was the drywall replaced instead of repaired?
The existing drywall had extensive moisture damage and mold growth, making replacement the safest and most durable solution.
Why use smaller drywall pieces?
Smaller panels are easier to handle in confined spaces, reduce installer fatigue, and make fitting the drywall more accurate.
Why was plywood used inside the shelf?
Plywood provides much better screw holding strength than drywall, making it ideal for future shelving installations.
Why remove outlets and plumbing fixtures first?
Removing fixtures allows cleaner cuts and prevents oversized openings that would be difficult to hide later.
Is demolition harder than wallpaper installation?
Physically, yes. Demolition is often the most exhausting stage of a remodeling project, while wallpaper installation requires greater precision and technical skill.
⸻
Conclusion
This project involved much more than simply replacing damaged drywall.
Successful renovations begin with careful demolition, proper preparation, and planning for the next stages of construction.
By rebuilding the damaged laundry area with future wallpaper installation in mind, we created a stronger, cleaner, and more professional foundation.
Although we encountered an unexpected flooring issue at the end of the day, solving problems like these is part of professional remodeling—and every project adds another lesson that improves future work.
Want to see more professional renovation projects? Explore my latest articles below.
Repairing Mold-Damaged Drywall in a 25 m² Apartment Before Installing New Wallpaper


Comments