
Project Data
- Project Type: Residential Toilet Renovation
- Location: Japan
- Building Type: Condominium Apartment
- Floor: 2nd Floor
- Work: Toilet Replacement, Wallpaper Replacement, Vinyl Flooring Installation
- Crew: 2 Workers
- Working Time: Approximately 3.5 hours
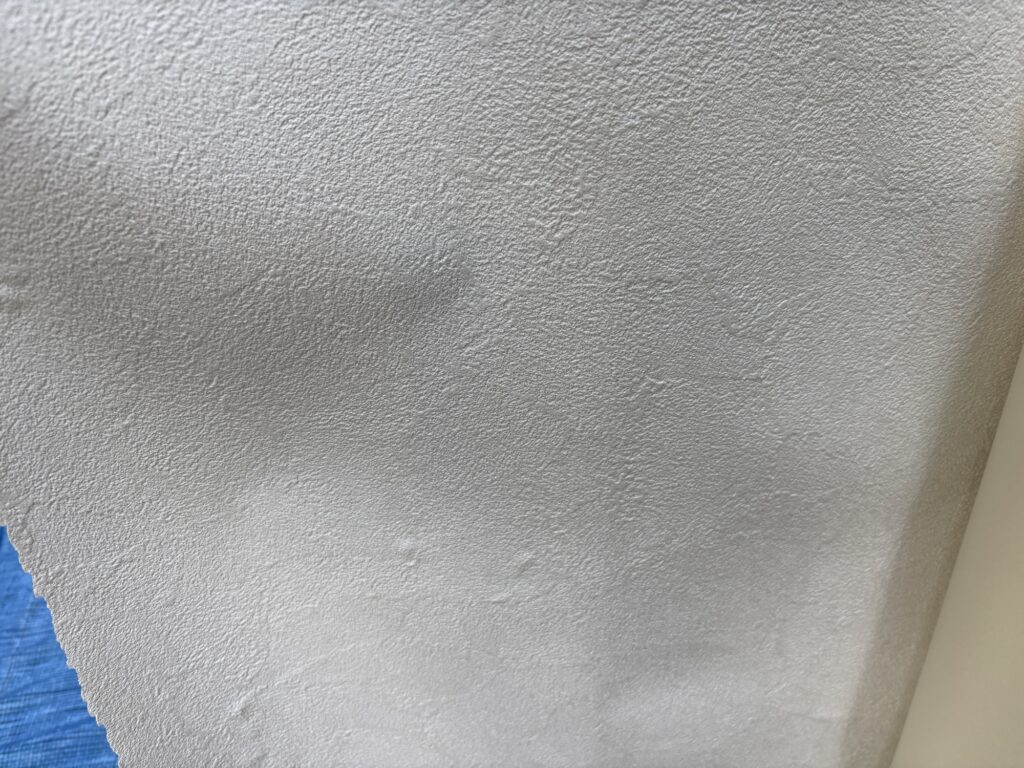
- Wallpaper: Thick embossed stone-pattern wallpaper
- Vinyl Flooring Area: Approximately 140 cm × 65 cm
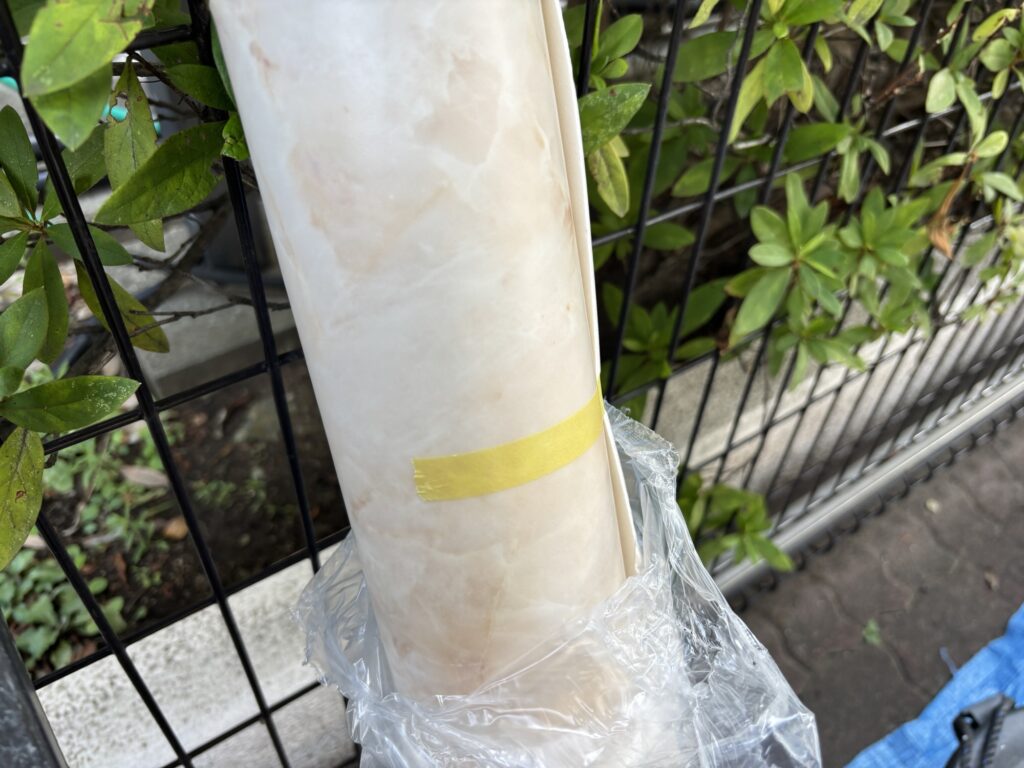
- Wallpaper Width: 90 cm
Introduction
Today’s project was a small toilet renovation in a condominium apartment on the second floor.
The work included replacing the toilet, removing and replacing the wallpaper on the ceiling and walls, and installing new vinyl flooring.
There were two workers on site. One worker was responsible for removing and reinstalling the toilet, while I handled the wallpaper and flooring installation.
Because the toilet room was very small, only one person could work inside at a time.
When I arrived at the site, the other worker was already removing the old toilet. Since I could not work inside the room while he was working, I used that time efficiently by measuring the ceiling and walls and preparing the wallpaper with a wallpaper pasting machine.
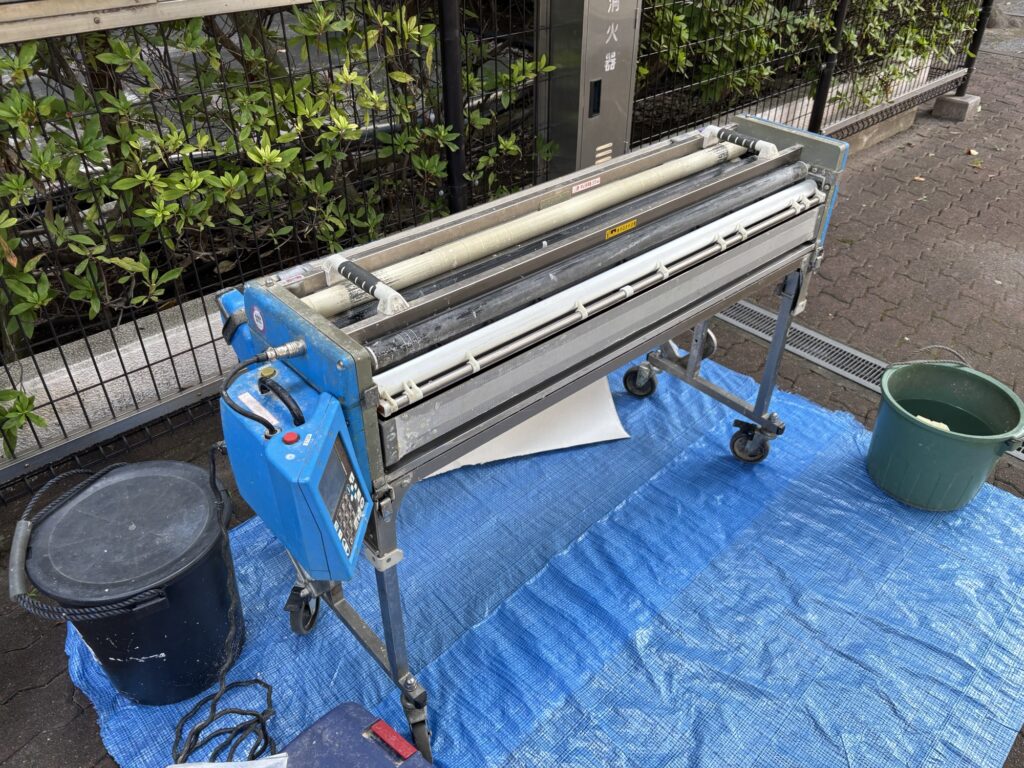
The ceiling required one piece measuring 153 cm in length.
For the walls, I prepared:
- One piece at 20 cm
- One piece at 40 cm
- Five pieces at 205 cm
All pieces were 90 cm wide.
The wallpaper was a thick, embossed stone-pattern material. It was relatively easy to handle and was suitable for restoration and renovation work.
Work Flow – Site Report
1. Deciding Whether to Remove the Second Layer of Vinyl Flooring
While the other worker was removing the old wallpaper and vinyl flooring, he asked me an important question.
After removing one layer of old vinyl flooring, we found another layer underneath it.
He asked, “Should we remove this second layer as well?”
Before making that decision, I checked two things.
First, I checked whether the old vinyl flooring was firmly attached to the substrate.
If the old flooring is loose or has areas that are lifting, installing new vinyl flooring directly over it can cause the new flooring to lift or become uneven as well.
In that situation, there are generally two options:
- Remove the loose sections, repair the surface with filler, and prepare it for the new flooring.
- Remove the entire old layer.
Fortunately, the existing vinyl flooring was firmly bonded and was not lifting, so there was no need to remove the second layer.
2. Checking the Gap Under the Wooden Baseboard
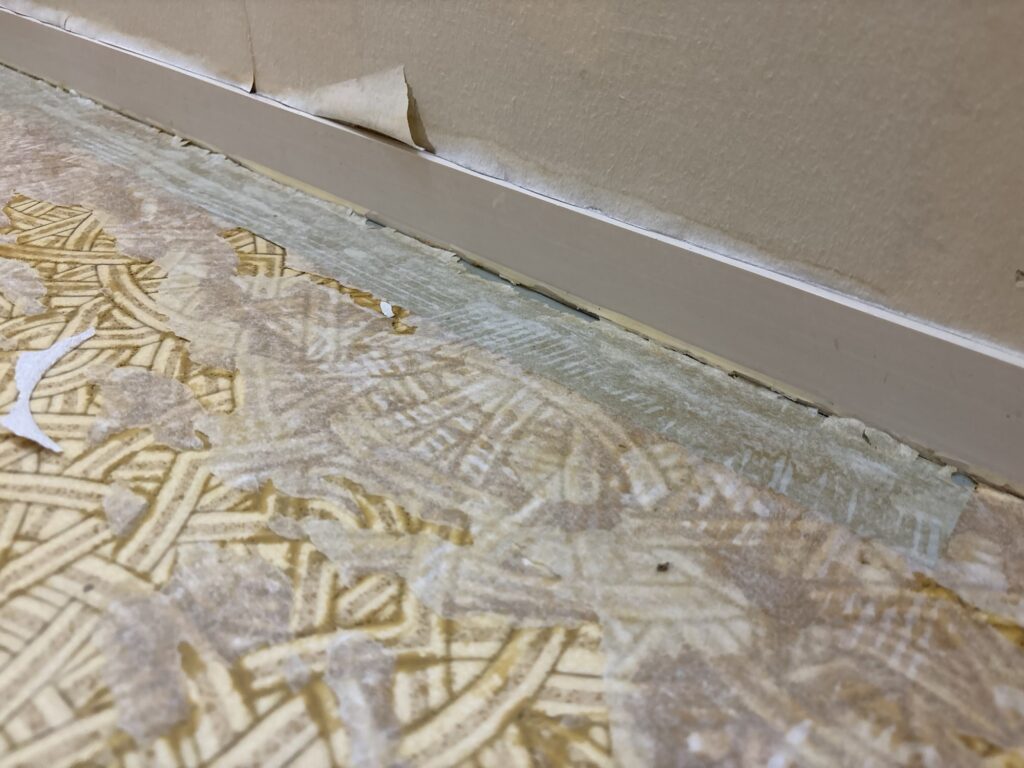
The second thing I checked was the gap underneath the wooden baseboard.
There was already a gap approximately equal to the thickness of one layer of vinyl flooring.
If we removed the second layer, the gap would become approximately twice as large.
After installing one new layer of vinyl flooring, there would still be a noticeable gap. We would then have to fill that gap with caulk, creating unnecessary additional work.
Since the existing flooring was firmly attached and the baseboard gap was already suitable, there was no reason to remove the second layer.
This is a good example of why it is important not to remove materials automatically just because they are old.
3. Checking the Wall Before Applying Filler
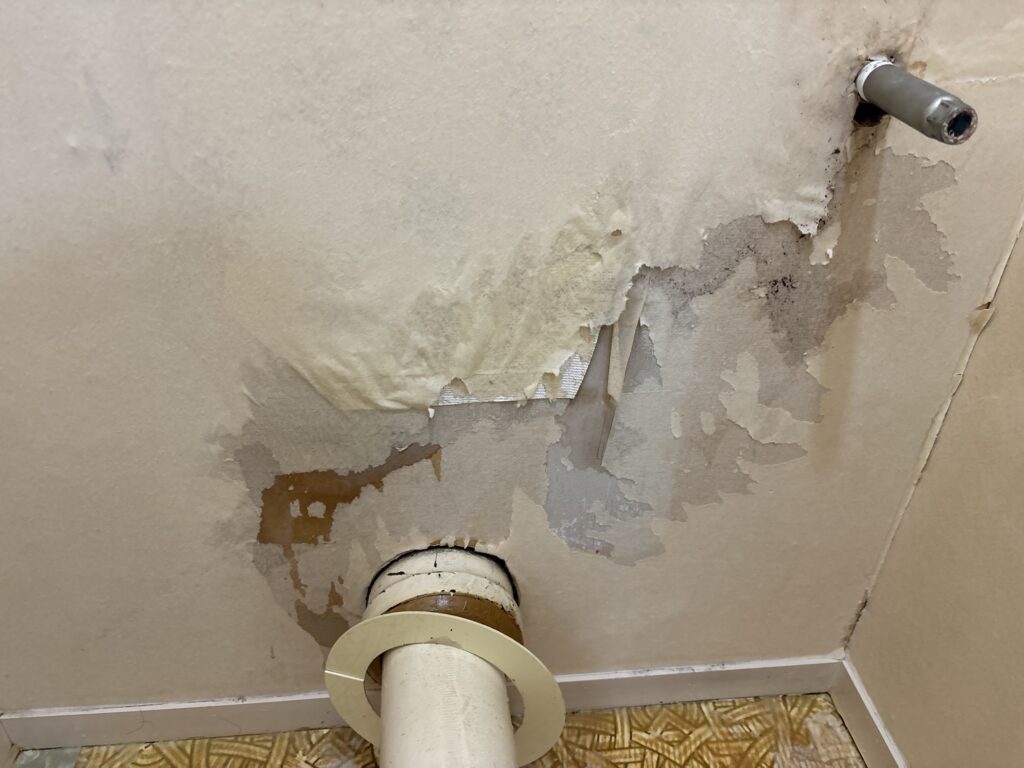
Once the other worker had finished removing the surface wallpaper and vinyl flooring, we switched places.
Now it was my turn to work inside the toilet.
One important thing I always keep in mind is this:
Never assume that the wall is ready for putty just because someone else has already removed the wallpaper.
I inspect the surface myself.
If the backing paper underneath the old wallpaper is loose, I remove it before applying filler.
If I simply trust that the previous worker has prepared the surface correctly and start installing wallpaper without checking it myself, any problems that appear later will ultimately become my responsibility.
Taking responsibility for the quality of your own work is one of the most important qualities a professional tradesperson should have.
4. Preparing the Walls
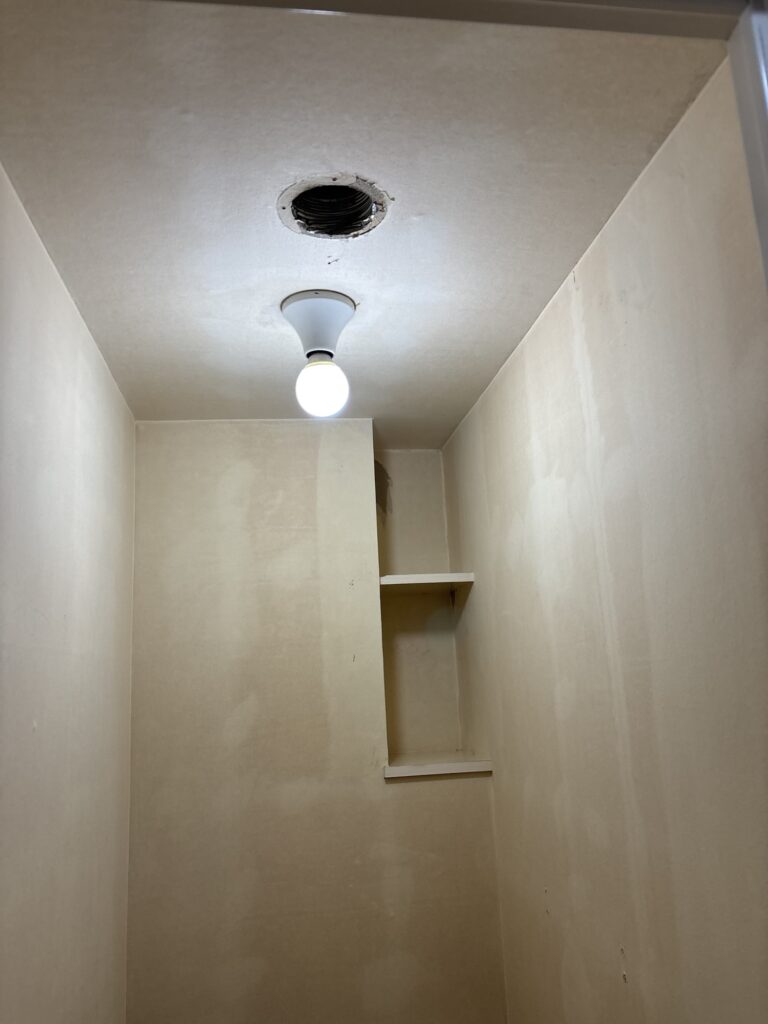
The ceiling looked fine, but there were several areas on the walls where the backing paper from the old wallpaper was loose.
I removed the loose sections and smoothed the surface with a sander.
After removing the loose backing paper, I checked the depth of the imperfections.
There were no particularly deep grooves or holes, so I applied one coat of base filler.
After allowing it to dry, I applied one coat of finishing filler.
This was enough to create a smooth surface suitable for the new wallpaper.
5. Preparing the Floor
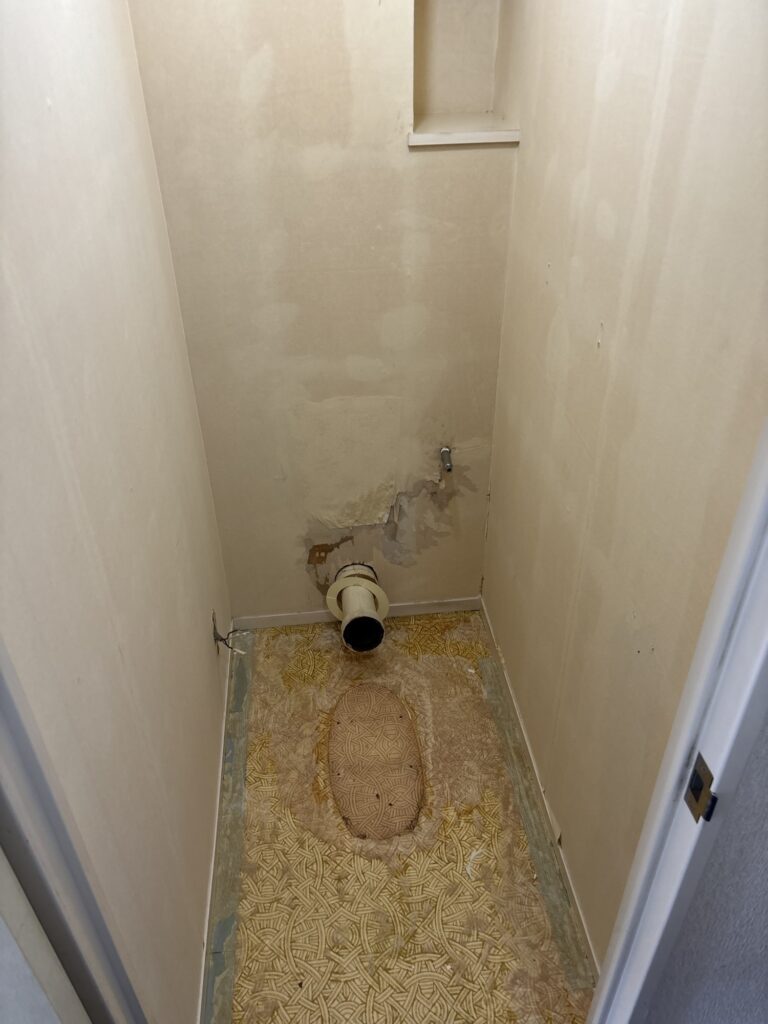
While the finishing filler on the walls was drying, I moved on to preparing the floor.
There were areas where the backing paper underneath the old vinyl flooring was loose, so I removed it using a utility knife and a putty knife.
This step is easy to overlook, but it is very important.
If loose backing paper is left underneath the new flooring, the finished vinyl floor can start to bubble or lift after installation.
After removing the loose material, I smoothed the surface with a sander and applied floor filler where necessary.
Once the floor preparation was complete, the filler on the walls and ceiling had also dried.
6. Installing the Ceiling Wallpaper
I started with the ceiling.
The light bulb was in the way, so I removed it before installing the wallpaper.
As a general rule, removing anything that can easily be removed makes wallpaper installation easier and usually results in a cleaner finish.
However, there are situations where it is not necessary to remove fixtures, especially when the fixture or cover will completely hide the surrounding area.
For this project, I removed only the light bulb and left the socket in place.
Because the socket had pointed sections, I made several cuts in the wallpaper around it, creating a petal-like pattern. I then passed the wallpaper around the socket and carefully cut out the opening to match its shape.
Next, I used a wallpaper smoother to push the air bubbles out from the center toward the edges.
Finally, I trimmed the excess wallpaper with a putty knife and utility knife.
The ceiling was complete.
7. Installing the Wall Wallpaper
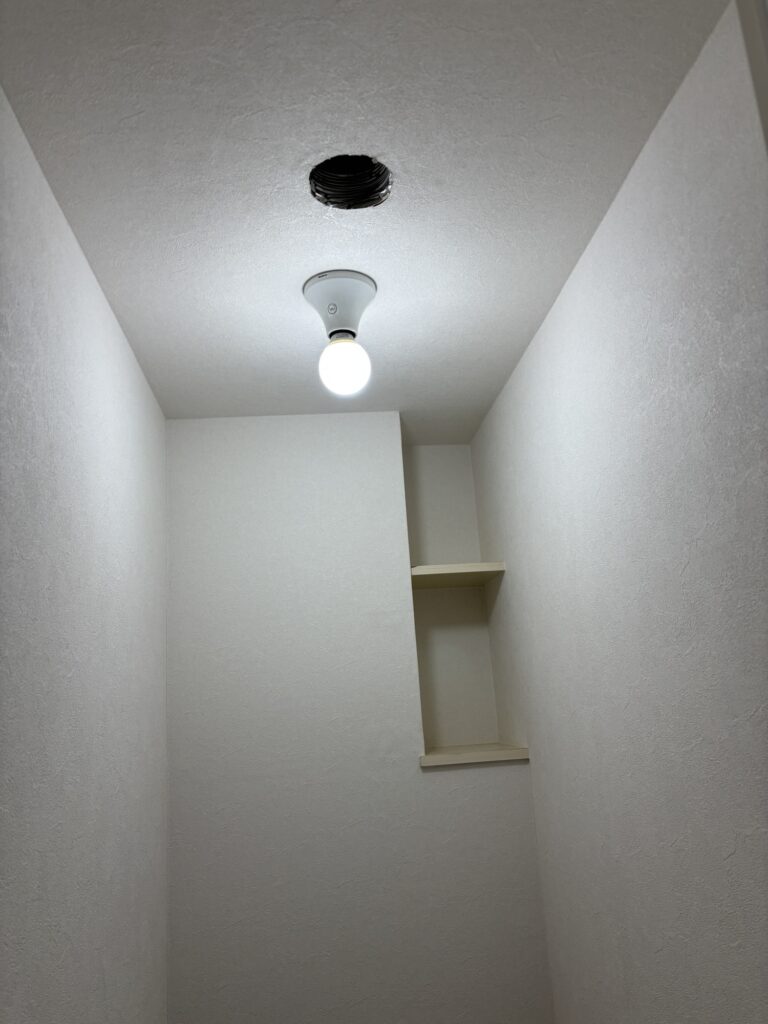
The wall installation went smoothly as well.
There was a slightly more difficult area around a shelf, but I was able to install the wallpaper cleanly without any major problems.
When installing wallpaper, I believe one of the most important things is to start with a perfectly straight first sheet.
If the first sheet is not straight, several problems can occur.
The wallpaper can become twisted, making it difficult to remove air bubbles properly.
It can also become difficult to wrap the wallpaper around outside corners without creating wrinkles.
Most importantly, the seams between sheets may not line up correctly.
Many wallpaper installation problems can ultimately be traced back to the wallpaper not being installed straight from the beginning.
For beginners, I recommend snapping a chalk line and using it as a guide for the first sheet.
Taking a little extra time to establish a straight starting point can make the rest of the installation much easier.
Related Project
Replacing Wallpaper, Vinyl Flooring, and Baseboards in an Occupied Laundry Room
8. Installing the Vinyl Flooring
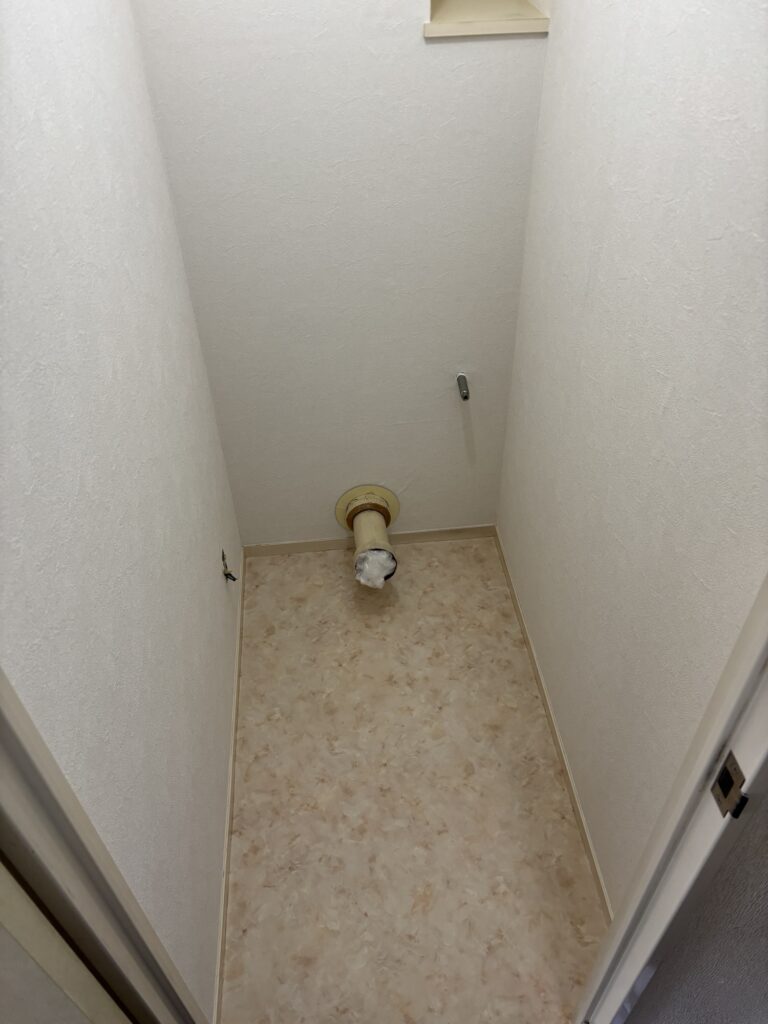
After completing the wallpaper, I moved on to the vinyl flooring.
The previous time I installed vinyl flooring in a washroom, the area was larger, so I applied the adhesive and installed the flooring in sections.
This toilet was much smaller, measuring approximately 140 cm long by 65 cm wide.
Because of the small size, I was able to apply adhesive over the entire floor and install the vinyl flooring in one piece.
I used the transition area near the entrance as a reference point and carefully positioned the flooring in a straight line.
As long as the adhesive has not completely dried, the flooring can usually be adjusted slightly after it has been placed.
This allows you to work without rushing.
Once the flooring was positioned correctly, I used a smoother to push out air bubbles from the center toward the edges, just as I did with the wallpaper.
Related Project
Replacing Wallpaper, Vinyl Flooring, and Soft Baseboards in a Bathroom Vanity Area
9. Cutting the Vinyl Flooring Under the Wooden Baseboard
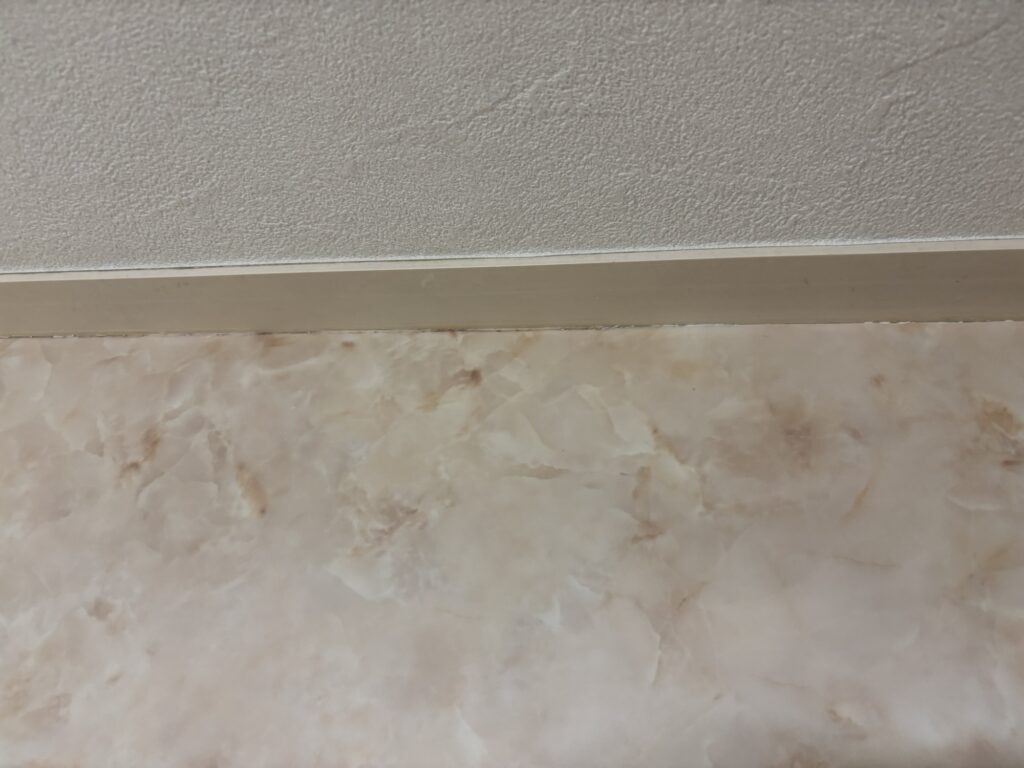
This toilet had a gap underneath the wooden baseboard that was approximately the thickness of one sheet of vinyl flooring.
Because of this, I cut the vinyl flooring approximately 3 mm longer than I normally would.
I pressed a putty knife against the edge and pushed the vinyl flooring underneath the wooden baseboard.
This created a clean finish and prevented the gap from becoming visible.
If I had cut the flooring to the usual length, the existing gap would have remained visible.
One important tip here is not to try to make the final cut perfectly in one attempt.
If you cut the flooring too short, you cannot put the material back.
Instead, cut it slightly longer and gradually trim it down until you achieve the correct fit.
Small adjustments are much safer than trying to make one perfect cut.
10. Final Cleanup
After completing all of the work, I cleaned the toilet room and organized the tools and materials.
The entire project was completed in approximately three and a half hours.
Although the room was small, there were several details that required careful judgment.
The final result was a clean, refreshed toilet space with new wallpaper and vinyl flooring.
Tools Used
The main tools used for this project included:
- Wallpaper pasting machine
- Utility knife
- Putty knife
- Wallpaper smoother
- Sander
- Filler / joint compound
- Chalk line
- Measuring tape
- Caulking tools
- Basic tools for removing the light bulb and toilet fixtures
The exact tools required can vary depending on the condition of the existing surfaces and the type of materials being installed.
Professional Tips
1. Do Not Remove Materials Without Checking First
Just because an old layer exists does not necessarily mean it needs to be removed.
Check whether it is firmly bonded and whether removing it will create additional problems.
2. Always Inspect the Surface Yourself
Even if another worker has already removed the wallpaper, inspect the surface before applying filler.
Loose backing paper and damaged substrate can cause problems after the new wallpaper is installed.
3. Start the First Sheet Perfectly Straight
A straight first sheet makes the rest of the installation much easier.
If the first sheet is crooked, problems can develop throughout the entire wall.
4. Remove Fixtures When Practical
Removing light bulbs and other easily removable objects can make wallpaper installation much easier.
However, fixtures do not always need to be removed if the finished wallpaper will be hidden by the fixture.
5. Do Not Rush the Vinyl Flooring Installation
If the adhesive has not fully dried, you may still be able to make small adjustments to the position of the flooring.
Use this time to make sure the flooring is straight.
6. Cut Flooring Slightly Long When Working Under a Baseboard
If there is a gap under the existing baseboard, cutting the vinyl flooring slightly longer can help create a cleaner finish.
Make small adjustments rather than cutting too short.
Common Mistakes to Avoid
Mistake 1: Removing Every Old Layer
Removing an additional layer without checking its condition can create unnecessary gaps and additional repair work.
Mistake 2: Applying Filler Without Inspecting the Backing Paper
Loose backing paper left underneath the new wallpaper can cause surface problems later.
Always check the entire surface before applying filler.
Mistake 3: Starting the Wallpaper Without Establishing a Straight Line
A crooked first sheet can lead to twisted wallpaper, difficult corner work, and poorly aligned seams.
Mistake 4: Leaving Loose Backing Paper Under Vinyl Flooring
If loose material remains underneath the new flooring, it can cause bubbles or lifting.
Mistake 5: Cutting Vinyl Flooring Too Short
Once material has been cut too short, there is no way to add the missing material.
Cut slightly long and trim gradually.
Mistake 6: Rushing the Job Because the Room Is Small
A small room does not necessarily mean an easy job.
Small spaces often require more precise cutting and positioning because there is less room to work.
What I Learned From This Project
One thing this project reminded me of is that professional work is not only about the actual installation technique.
There are many decisions that have to be made before installation begins.
For example, deciding whether to remove the second layer of vinyl flooring required me to look at the condition of the existing material and the gap underneath the baseboard.
If I had simply removed everything without checking, I could have created unnecessary work.
The same applies to wallpaper installation.
Even though another worker had already removed the old wallpaper, I still needed to inspect the surface myself before applying filler.
As a tradesperson, I believe taking responsibility for the final result is more important than simply completing the assigned task.
Good workmanship starts with good judgment.
FAQ
1. Why didn’t you remove the second layer of vinyl flooring?
The existing layer was firmly attached and was not lifting. Removing it would also have created a larger gap underneath the wooden baseboard, so there was no practical reason to remove it.
2. How do you know whether old vinyl flooring can remain underneath new flooring?
First, check whether the existing flooring is firmly attached. If it is loose, bubbling, or lifting, the loose sections should be removed and the surface repaired before installing the new flooring.
3. Why is loose wallpaper backing paper a problem?
Loose backing paper can move or lift underneath the new wallpaper. This can result in an uneven surface or bubbles after installation.
4. Why is the first sheet of wallpaper so important?
The first sheet establishes the direction for the rest of the installation. If it is crooked, the following sheets can also become misaligned, making seams and corners more difficult to finish properly.
5. Do you always remove light fixtures before installing wallpaper?
Not always. If a fixture or cover will hide the surrounding area, it may not be necessary to remove it. In this project, I removed only the light bulb and worked around the socket.
6. Why do you smooth wallpaper from the center toward the outside?
Working from the center toward the edges helps push trapped air toward the outside and reduces the chance of leaving bubbles underneath the wallpaper.
7. Why did you cut the vinyl flooring 3 mm longer?
There was a gap underneath the wooden baseboard. Cutting the vinyl flooring slightly longer allowed me to push it underneath the baseboard and create a cleaner finish.
8. Why shouldn’t you cut the vinyl flooring too short?
If you cut it too short, you cannot restore the missing material. It is safer to cut slightly long and gradually trim the edge until it fits correctly.
9. How long did this toilet renovation take?
The entire project took approximately three and a half hours, including surface preparation, wallpaper installation, vinyl flooring installation, and cleanup.
10. Can wallpaper and vinyl flooring be installed in a very small toilet?
Yes. In fact, small toilet spaces can often be completed efficiently, but they require careful measurements, precise cutting, and good control of the materials because there is limited working space.
Conclusion
This was a relatively small toilet renovation, but it required careful preparation and several important decisions.
The project included toilet removal and replacement, ceiling and wall wallpaper replacement, and new vinyl flooring installation.
The most important lessons from this job were to inspect the existing surface carefully, avoid unnecessary removal of materials, establish a straight starting line for wallpaper, and make gradual adjustments when cutting vinyl flooring.
Even a small toilet renovation can involve many details that affect the final quality.
For a professional tradesperson, the goal is not simply to finish the job. It is to understand the condition of the existing materials, make the right decisions, and leave the finished space clean and properly completed.


Comments