
Project Data
- Project Type: Residential Renovation – Wallpaper, Vinyl Flooring, and Soft Baseboard Replacement
- Location: Japan
- Area: Bathroom Vanity / Laundry Area
- Crew: 1 Wallpaper Installer
- Working Time: Approximately 6 hours
- Materials: Embossed Wallpaper, Vinyl Flooring, Soft Baseboards
- Work Included: Ceiling and Wall Wallpaper Replacement, Vinyl Flooring Installation, Soft Baseboard Installation
Construction Data
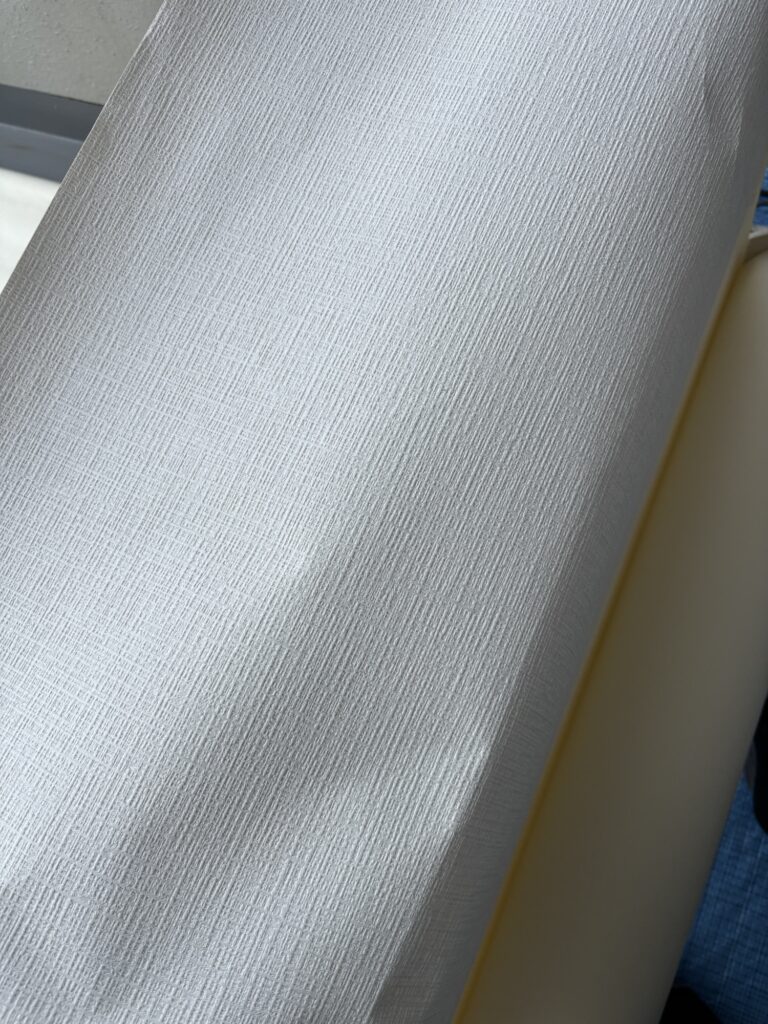
- Ceiling Wallpaper: 90 cm × 105 cm – 2 pieces, 90 cm × 75 cm – 1 piece
- Wall Wallpaper: 20 cm – 1 piece, 214 cm – 8 pieces
- Wallpaper: Thick embossed material
- Soft Baseboard Height: 6 cm
- Installation Method: One-person installation
Introduction
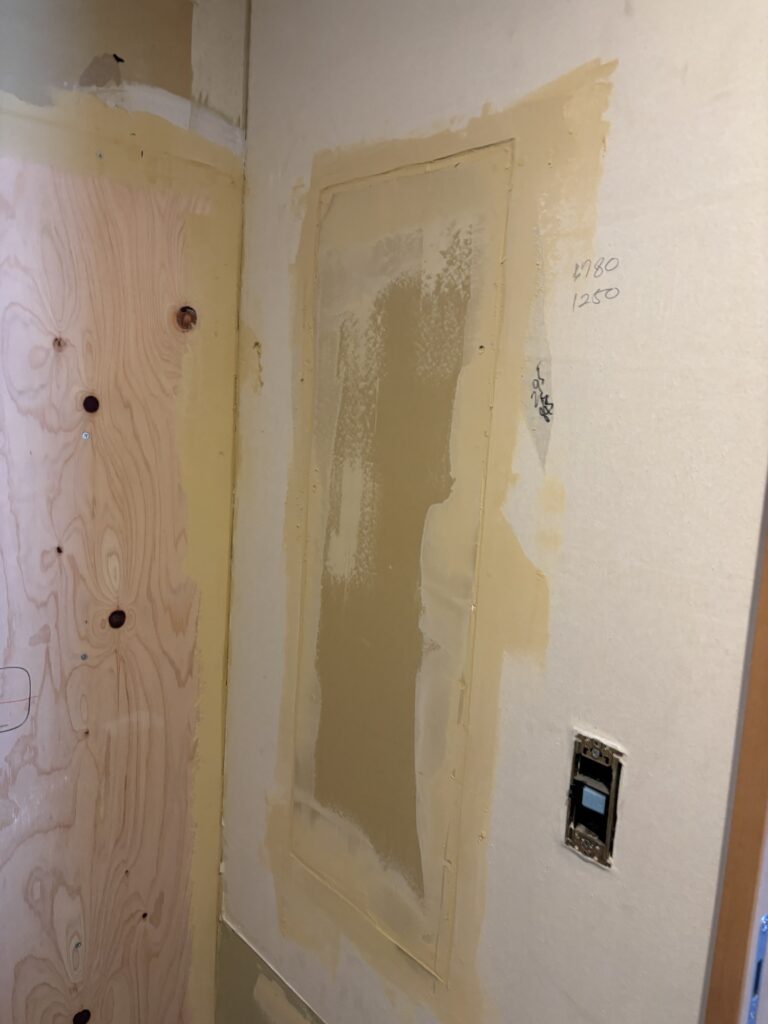
Today, I worked alone on a bathroom vanity and laundry area renovation.
The work included replacing the wallpaper on the ceiling and walls, installing new vinyl flooring, and installing soft baseboards.
The contractor had already removed and moved the washing machine and bathroom vanity the previous day. The old wallpaper, old vinyl flooring, and old soft baseboards had also been removed, and one coat of base filler had already been applied.
This made the work much easier to start.
However, there were several areas that required additional preparation before the new materials could be installed properly.
Work Flow – Site Report
1. Preparing the Walls
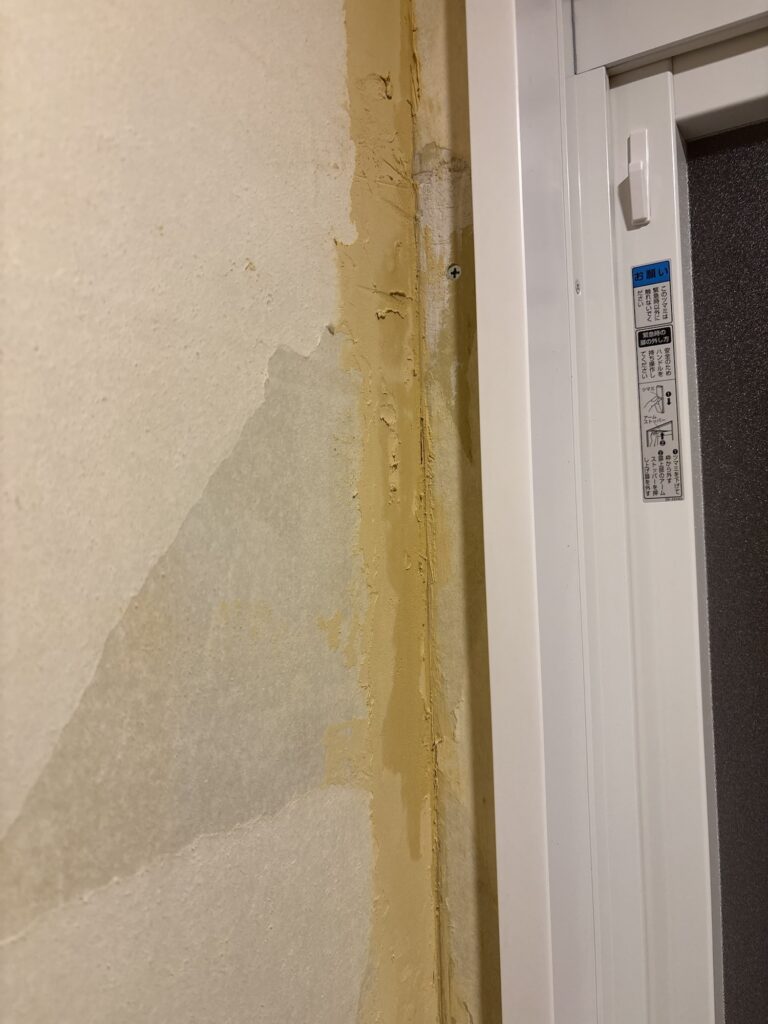
The first thing I noticed was that the previously applied filler had some uneven areas.
Instead of simply applying another layer of filler over the uneven surface, I sanded down the high areas with a sander.
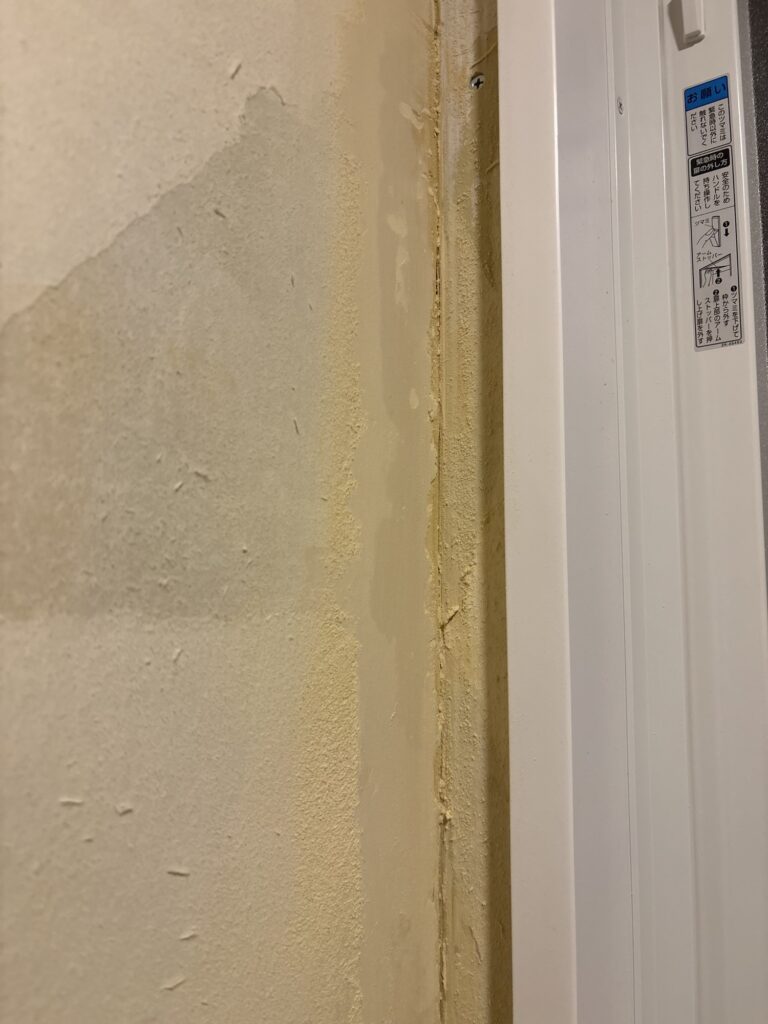
If you apply additional filler without removing the existing high spots, you may use more material than necessary. Depending on how the filler is applied, you can also create even larger uneven areas.
There were also some sections where the backing paper from the old wallpaper was loose. I carefully removed these areas as well.
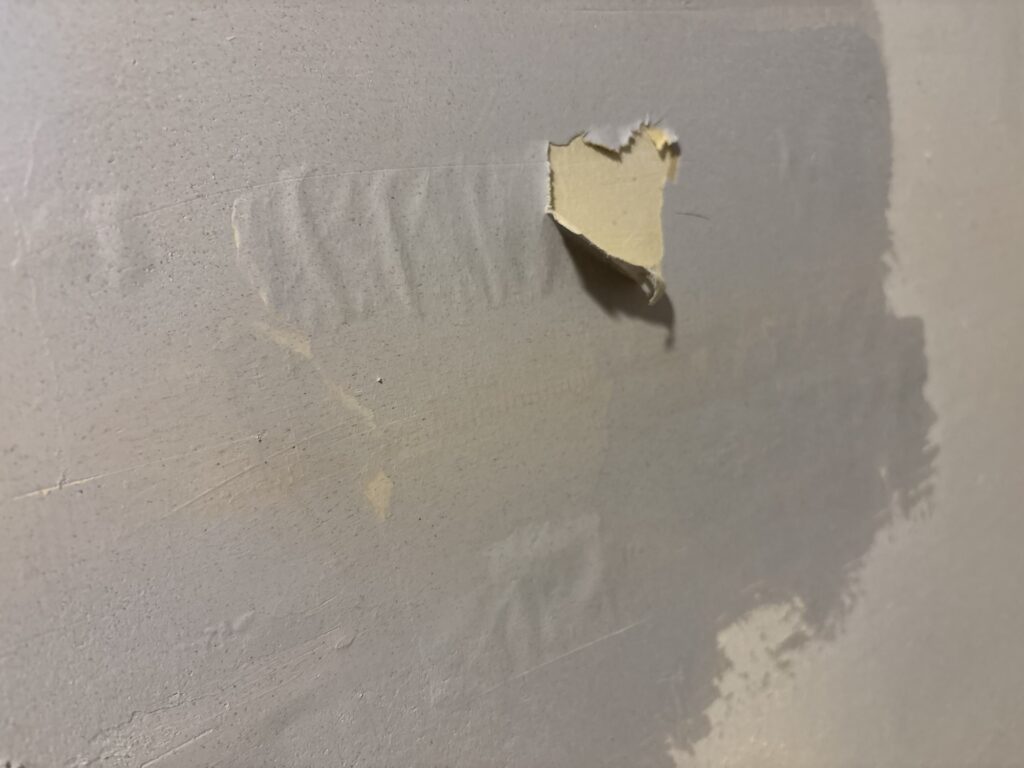
After preparing and applying the base filler, some of the remaining backing paper began to bubble as it absorbed moisture from the filler.
I removed the bubbling sections and applied filler again.
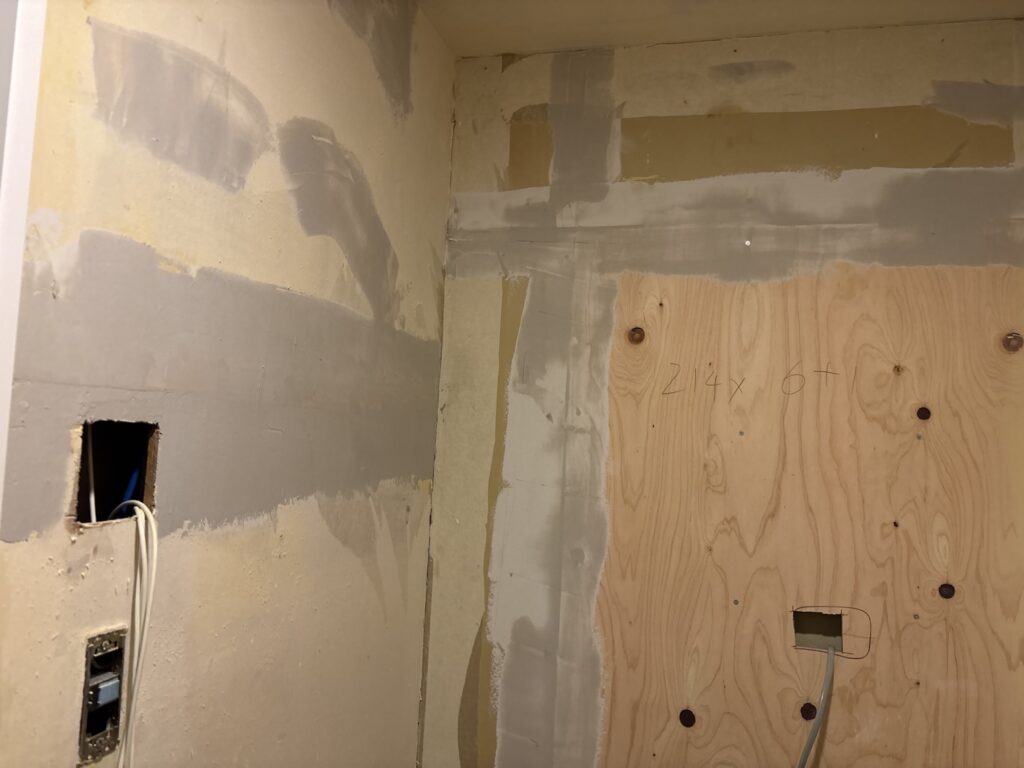
Loose backing paper is a sign that it is not properly bonded to the wall. Any loose areas that can be found before wallpaper installation should be removed and treated beforehand.
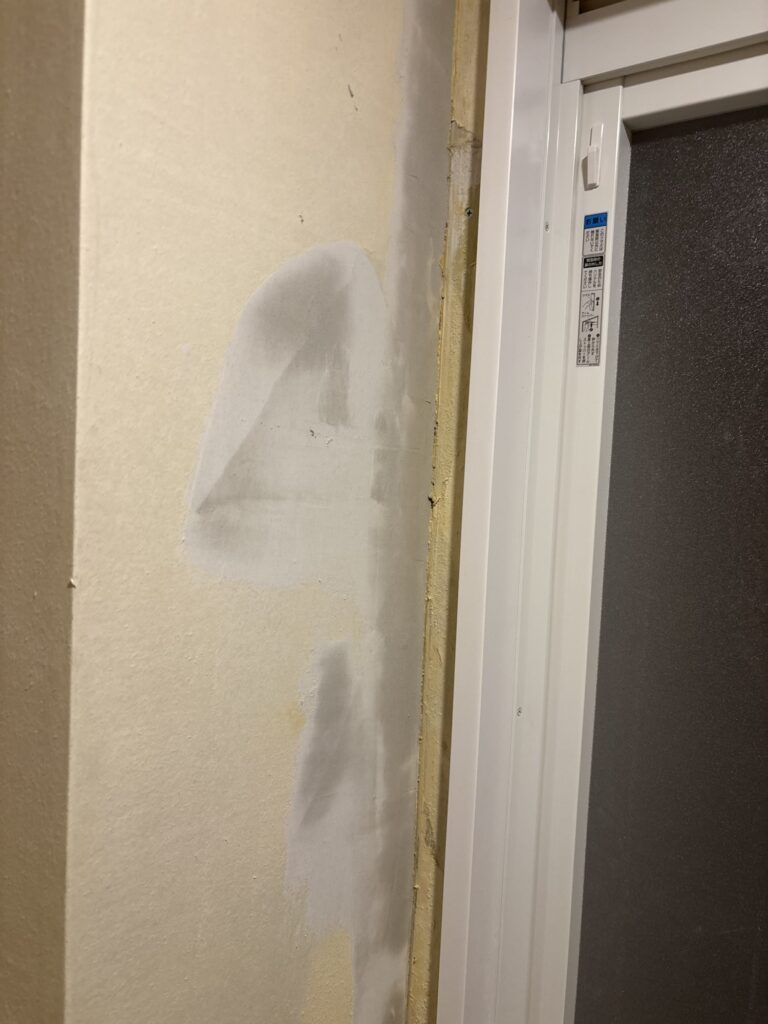
I applied two coats of base filler before moving on to the floor preparation.
2. Preparing the Floor
While the wall filler was drying, I started preparing the floor.
There were areas where the backing layer underneath the old vinyl flooring was loose, so I carefully removed it.
Just like loose wallpaper backing paper, loose material underneath vinyl flooring can cause the new flooring to lift or become uneven later.
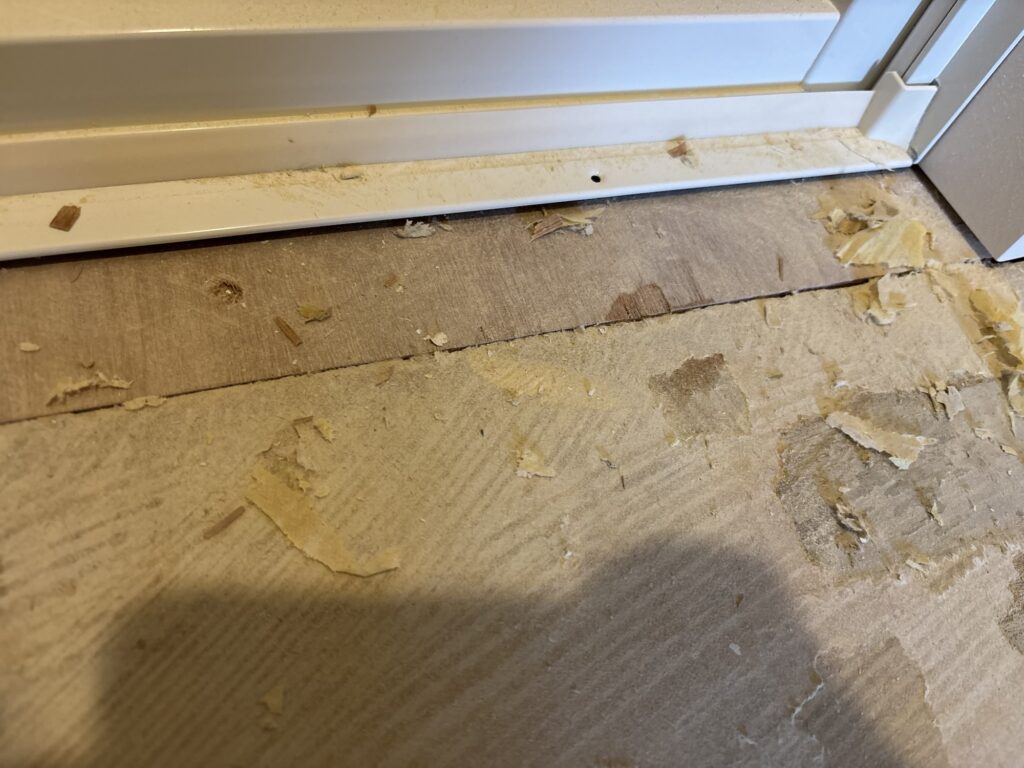
The entrance to the bathroom had also been repaired with a new plywood sheet, but there was a height difference between the new plywood and the surrounding floor.
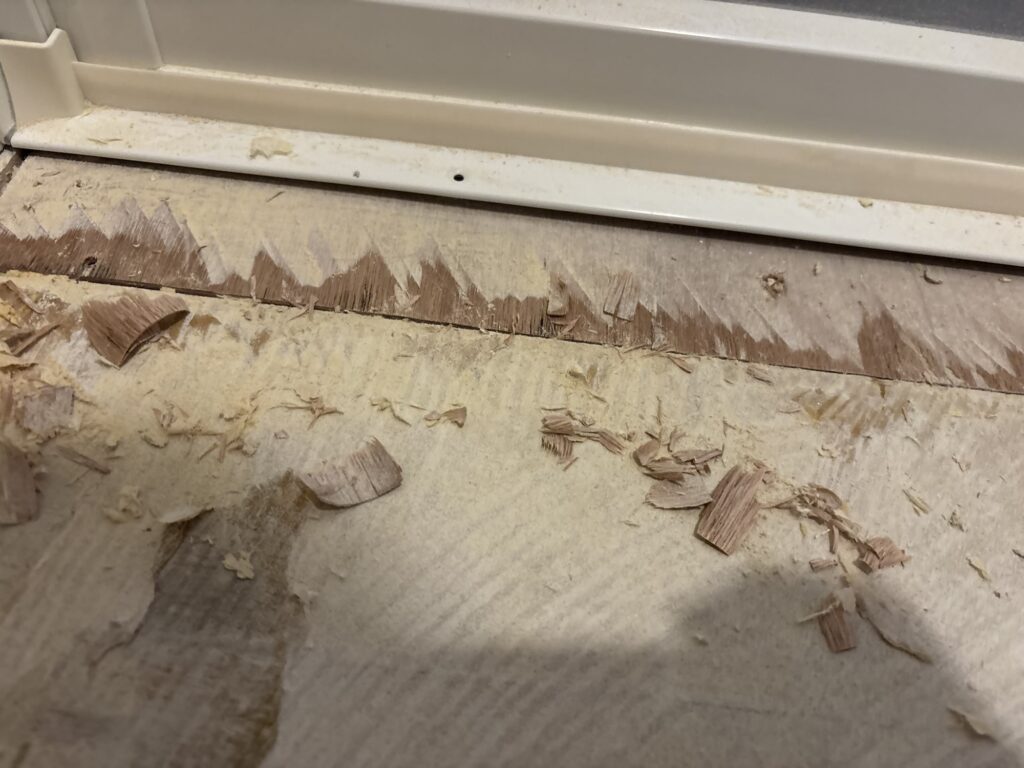
I shaved down the excess material with a utility knife and then used a sander to adjust the level.
This preparation makes the following filler work much easier.
If you apply filler without first removing unnecessary high spots, it is easier to create uneven areas and you will also end up using more filler than necessary.
3. Finishing the Wall and Ceiling Filler
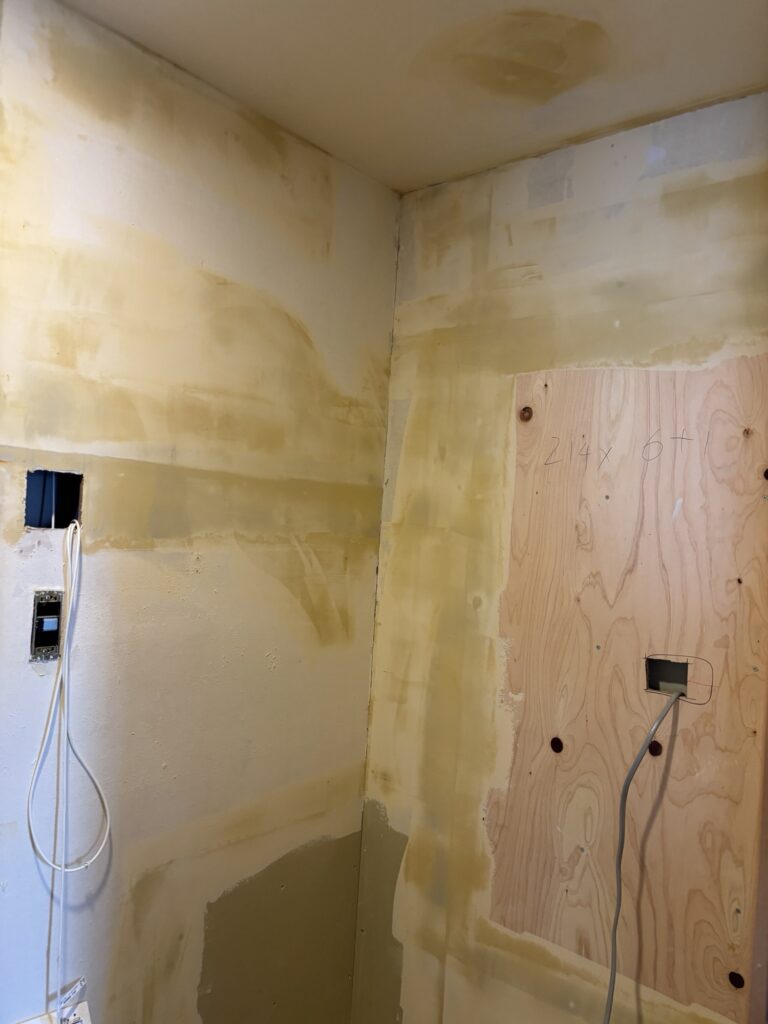
Once the floor preparation was finished, the wall and ceiling filler had dried enough to continue.
I applied the finishing filler to the ceiling and walls.
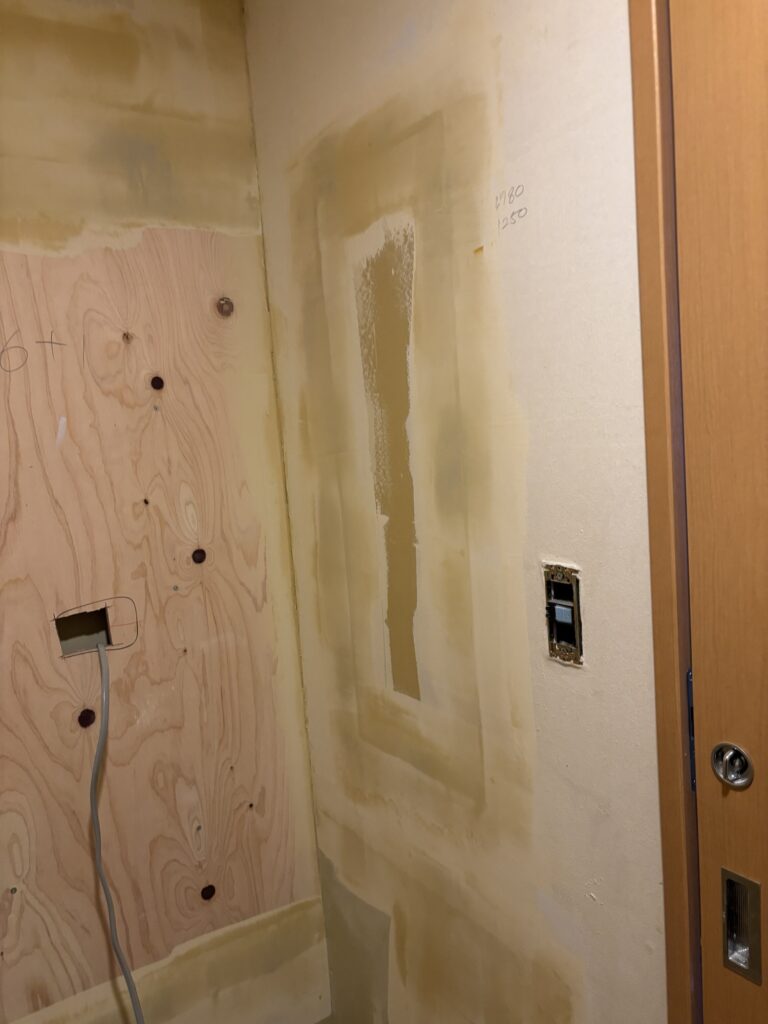
Because the base filler does not provide the best surface for wallpaper adhesive, I applied the finishing filler wider than the base filler.
After finishing the ceiling and wall filler, I moved on to the floor filler.
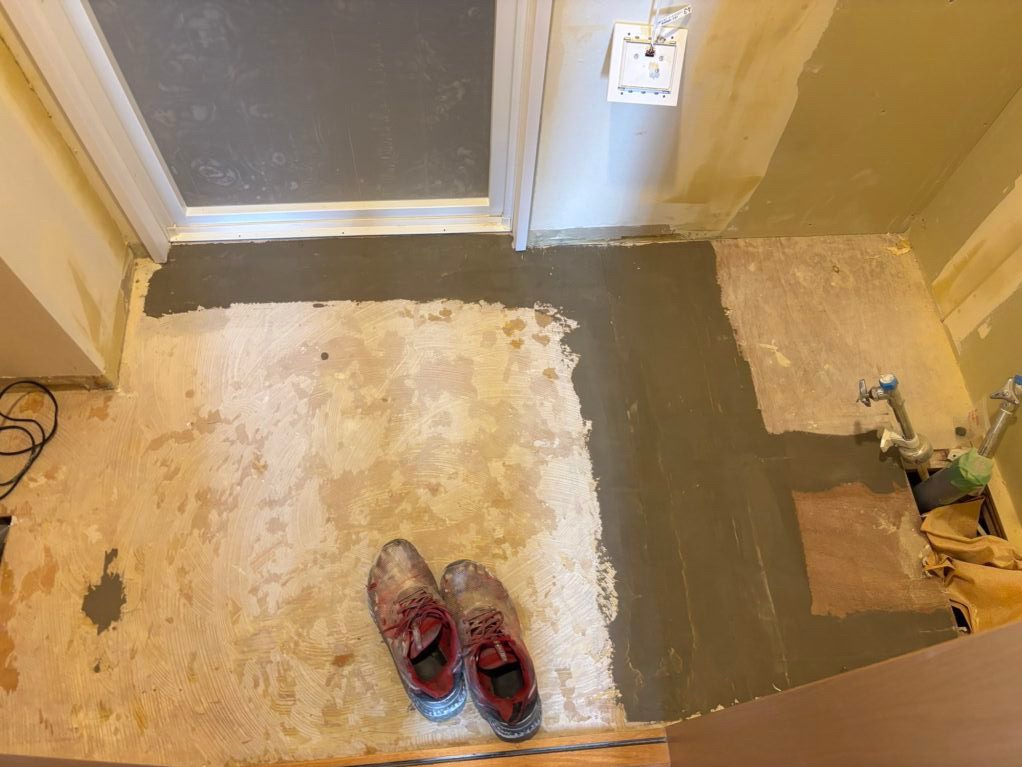
For the floor, I generally apply the filler about 1.5 times wider than I would for a typical wallpaper joint.
The floor receives pressure from people walking on it, so the surface preparation needs to be especially careful.
4. Measuring and Preparing the Wallpaper
While the filler on the ceiling, walls, and floor was drying, I measured and prepared the wallpaper.
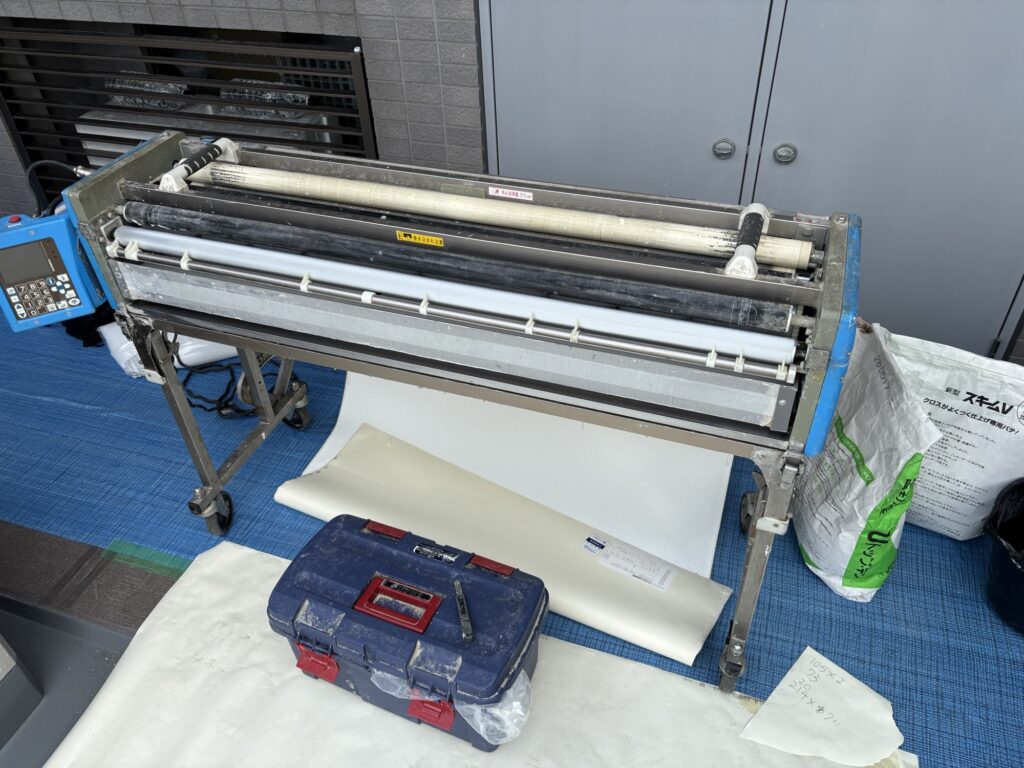
I used a wallpaper pasting machine to apply adhesive and prepare the sheets.
Since I was working alone, I decided to install the ceiling wallpaper across the shorter direction.
The ceiling pieces were:
- 90 cm × 105 cm – 2 pieces
- 90 cm × 75 cm – 1 piece
For the walls, I prepared:
- 20 cm – 1 piece
- 214 cm – 8 pieces
Seven pieces measuring 214 cm would have been enough, but I prepared one additional piece as a spare.
When working alone, I prefer to prepare a little extra material before cleaning and putting away the pasting machine.
If I suddenly discover that I am short on wallpaper, having one spare piece already prepared can save a lot of time.
Efficiency is especially important when working alone.
Personally, I find that working on another task while filler is drying helps keep the entire workflow moving smoothly.
5. Installing the Ceiling Wallpaper
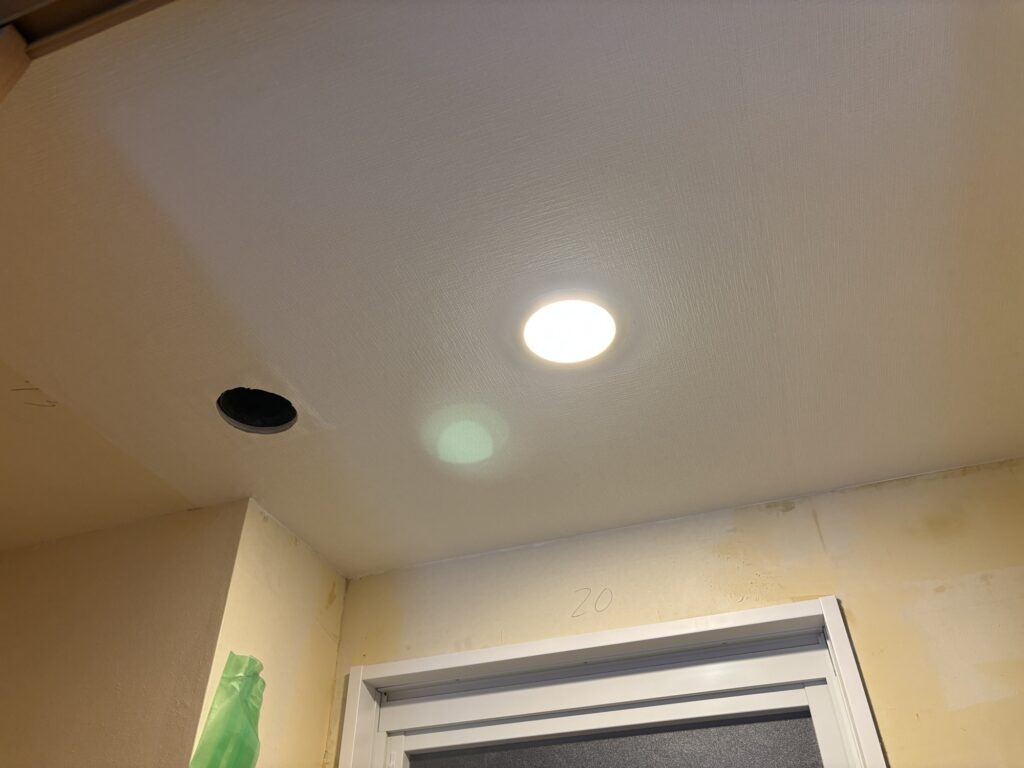
The wallpaper used for this project was relatively thick and had a pronounced embossed texture, which made it easier to handle.
When installing the ceiling wallpaper, I focused on keeping the sheet straight.
I checked the amount of wallpaper extending beyond the edges and worked out the air bubbles from the center toward the outside.
When cutting the inside corners, I first pressed the wallpaper firmly into the corner with a smoother.
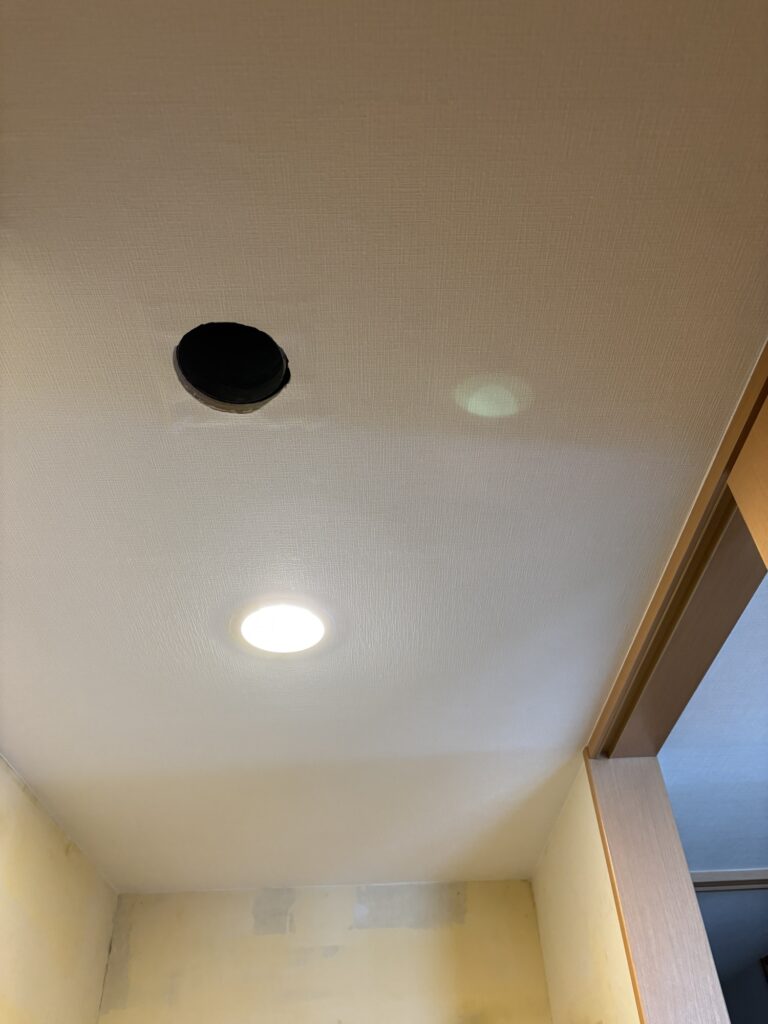
I then used a wallpaper spatula and a sharp utility knife to make the final cut.
I also changed the knife blade frequently to make sure I was always cutting with a fresh, sharp edge.
A sharp blade helps produce cleaner cuts and reduces the risk of tearing the wallpaper.
6. Installing the Wall Wallpaper
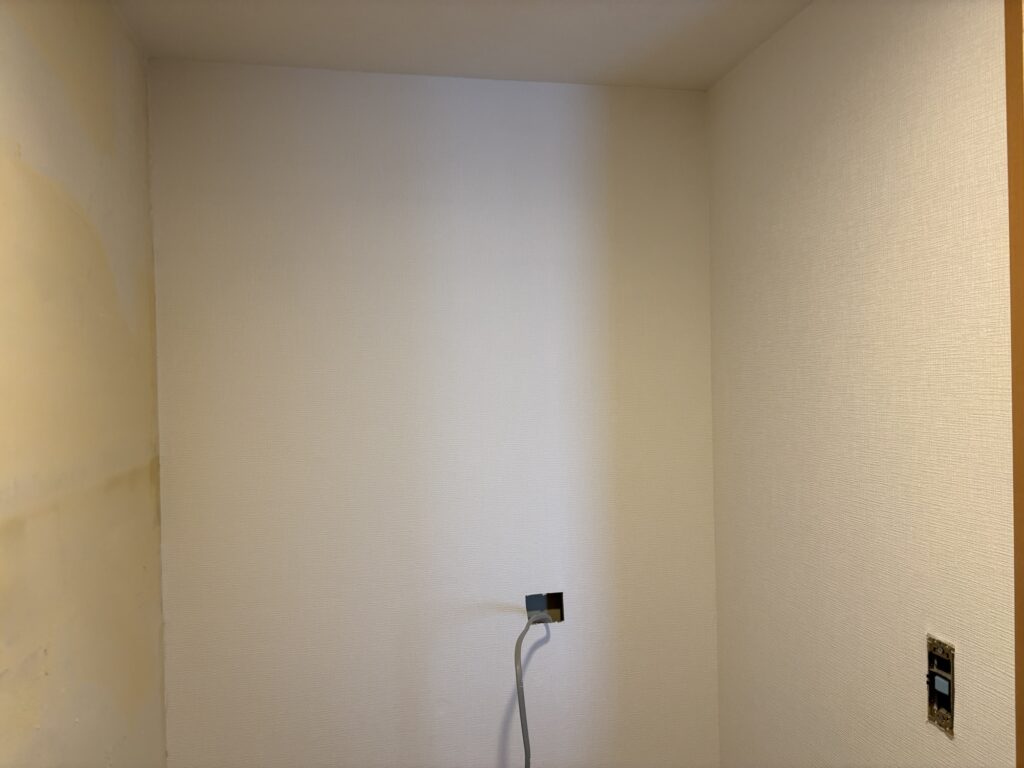
After finishing the ceiling, I moved on to the walls.
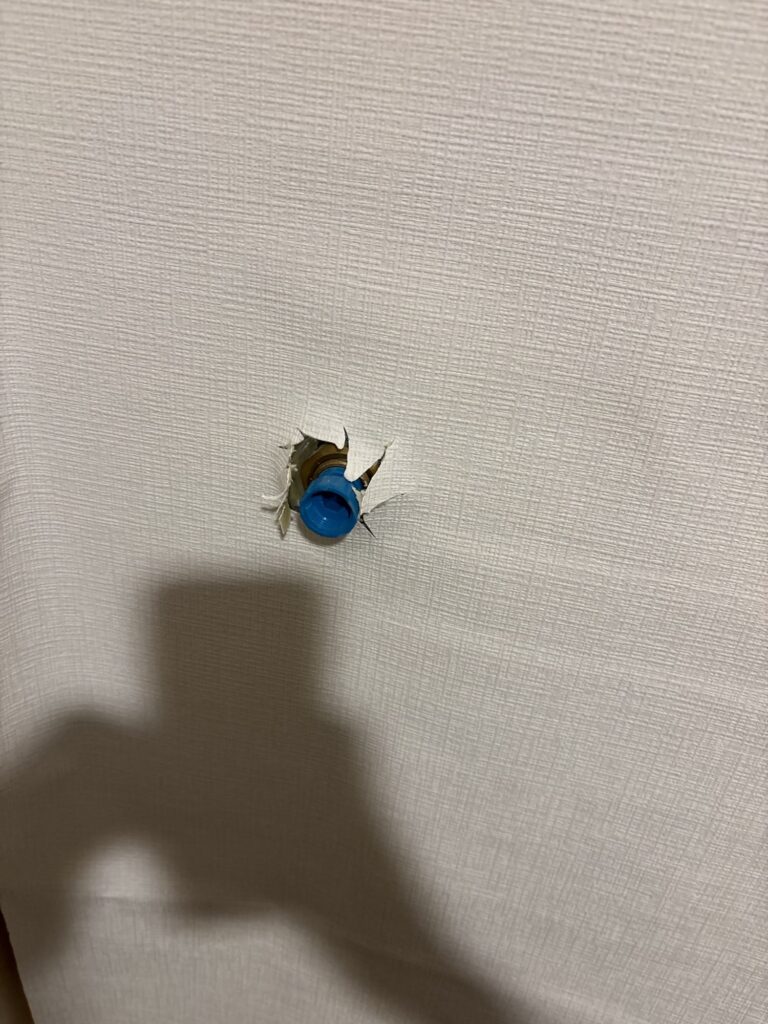
There was a water supply connection on the wall behind the washing machine.
Cutting wallpaper around this type of fitting requires a little technique.
First, I installed the wallpaper straight onto the wall.
When I reached the water supply connection, I lifted the wallpaper slightly and made several small cuts radiating outward from the center of the fitting, similar to the shape of flower petals.
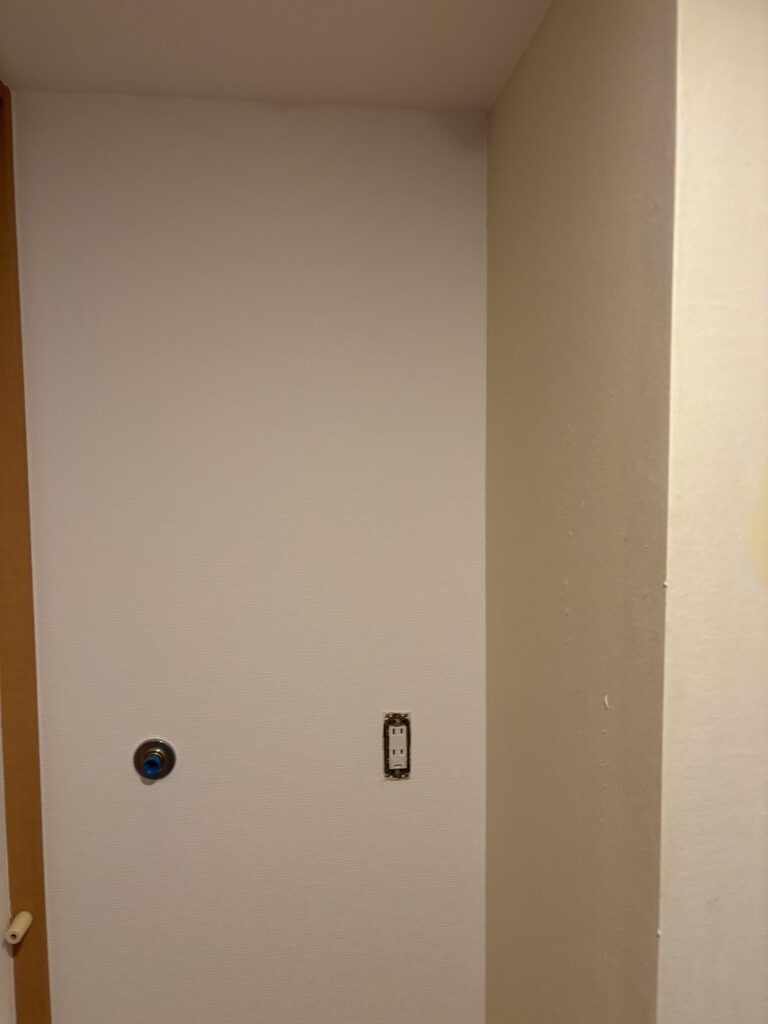
I then used a small wallpaper spatula and carefully trimmed away the excess material.
Trying to make one large cut can easily cause the wallpaper to tear.
Making several small cuts first allows you to gradually shape the wallpaper around the fitting and produce a cleaner finish.
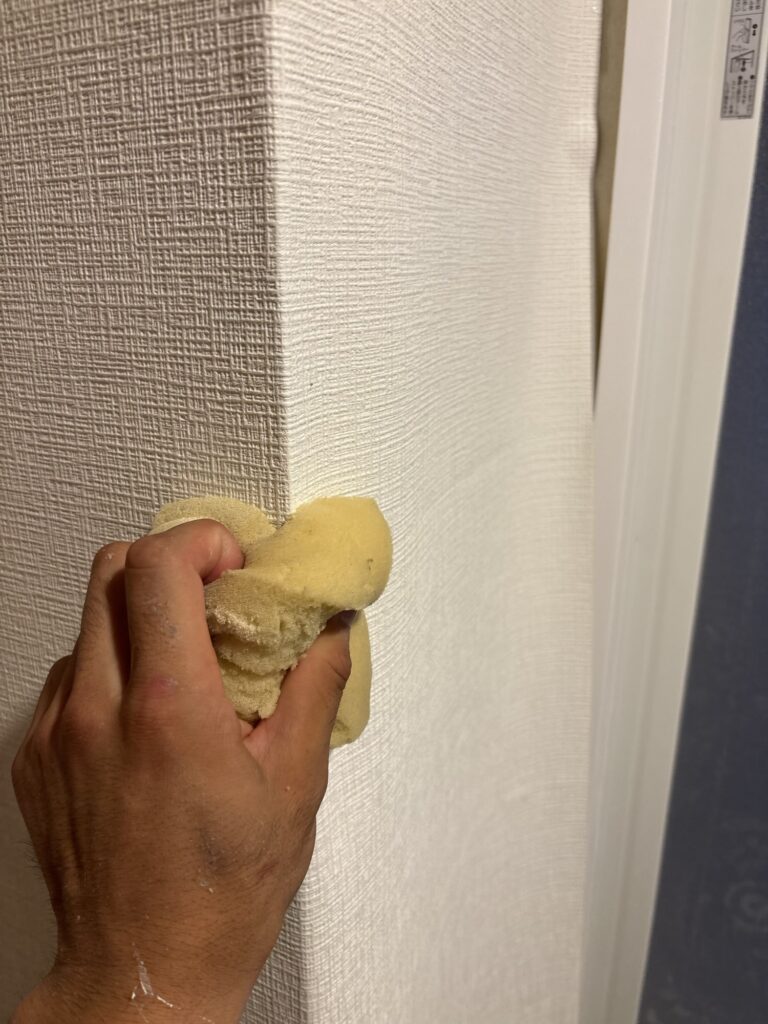
For outside corners, such as around a column or projecting wall, I used a damp sponge to help stretch the wallpaper tightly around the corner and prevent wrinkles.
Related Project
7. Installing the Vinyl Flooring
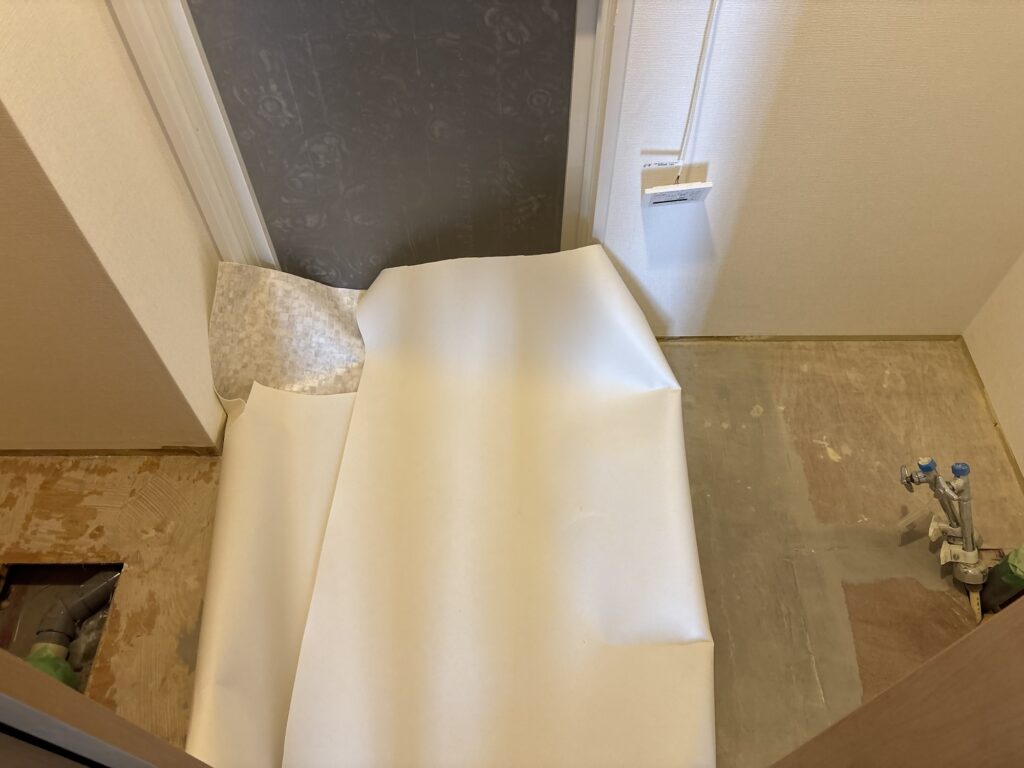
After completing the wallpaper installation, I moved on to the vinyl flooring.
I sanded the floor filler, thoroughly cleaned the surface, and then applied the flooring adhesive.
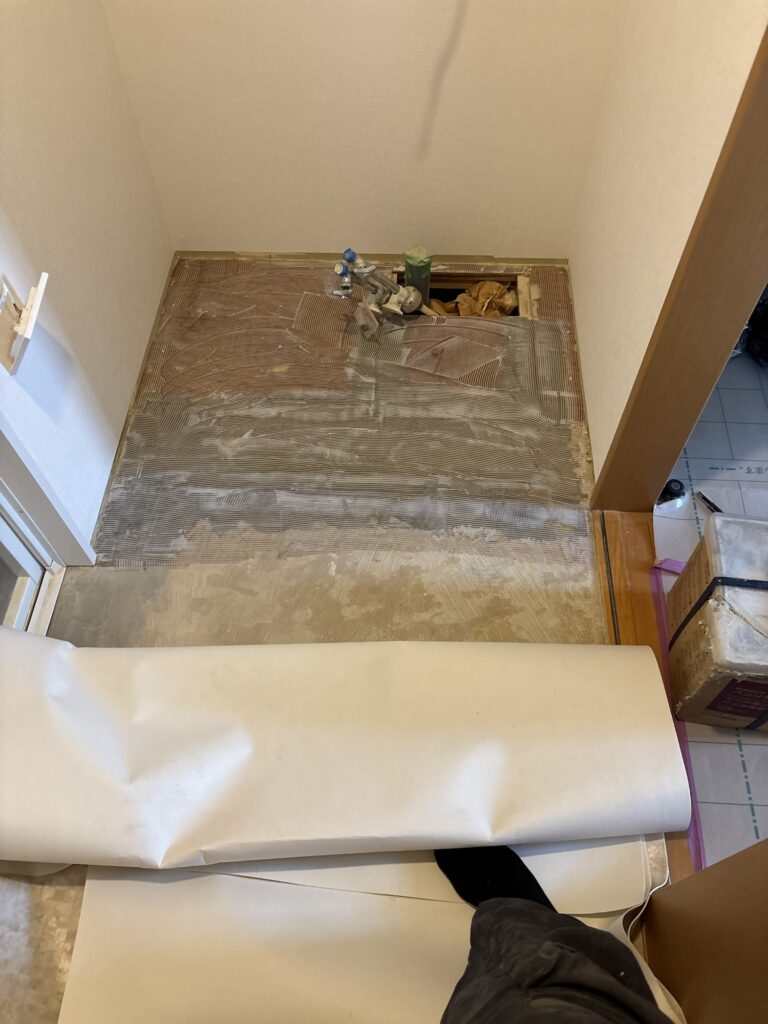
Because I was working alone, I decided not to spread adhesive over the entire floor at once.
Instead, I applied adhesive to approximately half of the floor, positioned and installed that section of vinyl flooring, and then worked on the remaining half.
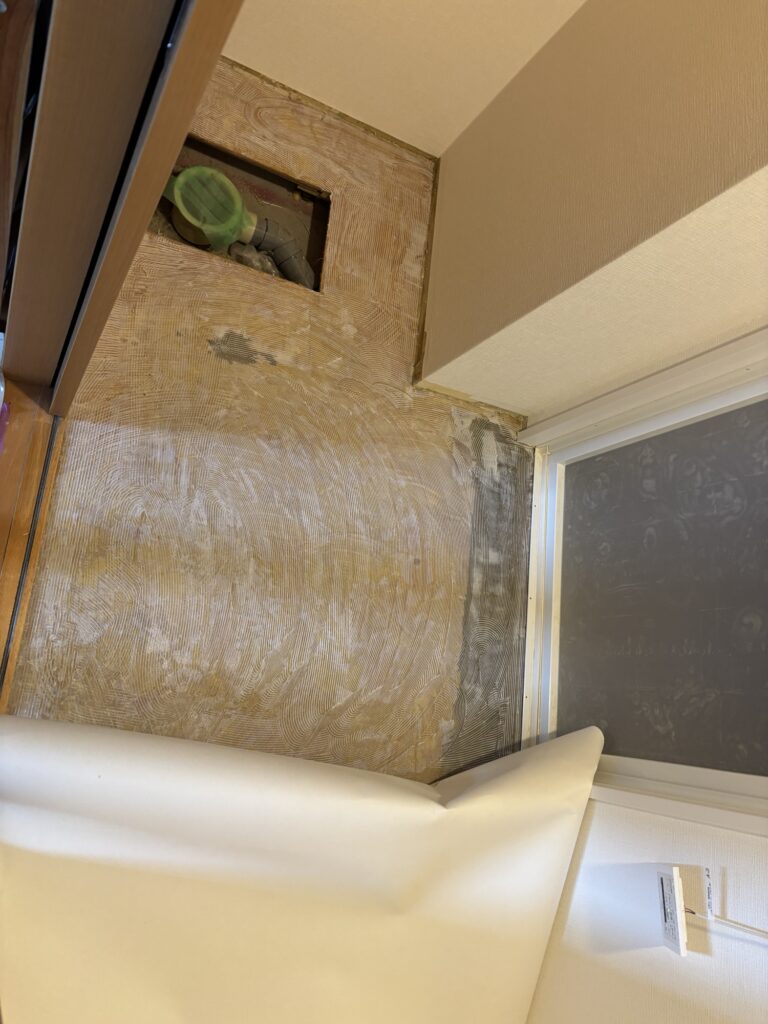
If you spread adhesive over the entire floor beforehand, it can be difficult to adjust the position of the vinyl flooring.
Moving the flooring around while trying to align it can also cause adhesive to get onto the walls or other surfaces.
For one-person installation, working in sections is often a more manageable approach.
As with wallpaper, I used a smoother to push air bubbles from the center toward the edges.
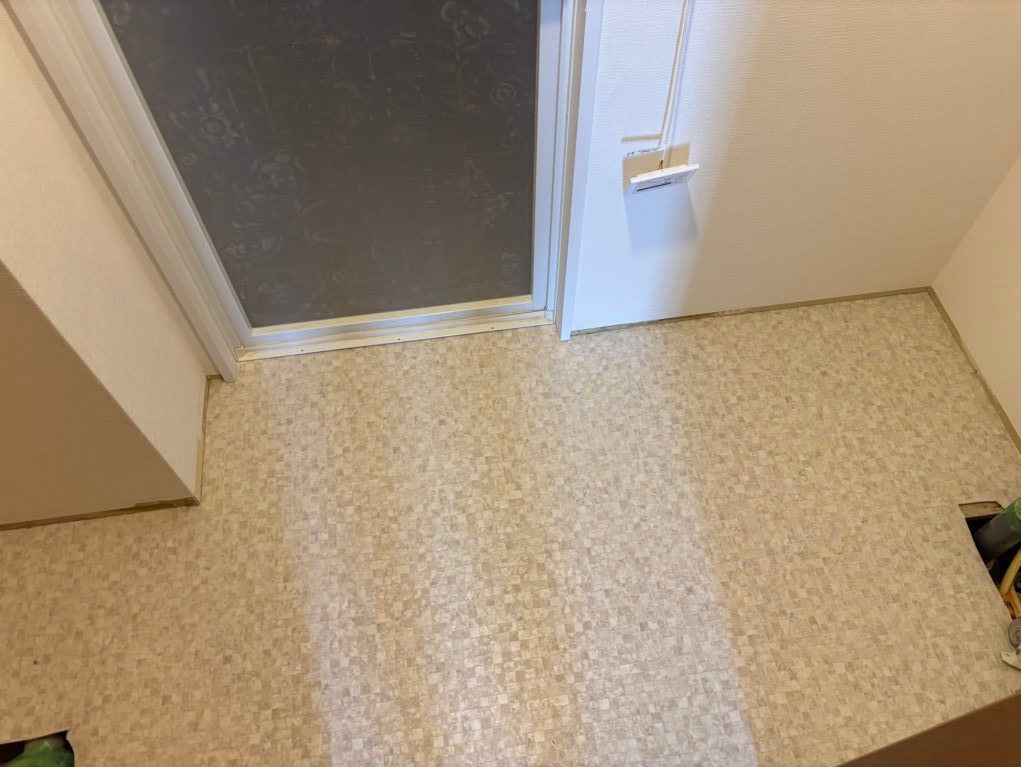
When trimming the vinyl flooring, I aimed to leave approximately a 1 mm gap rather than cutting it too tightly.
If the flooring is cut too long, it can buckle or create wrinkles.
Careful trimming is therefore important for achieving a clean finish.
Related Project
Installing Vinyl Flooring in an Occupied Kitchen: Professional Preparation Tips
8. Installing the Soft Baseboards
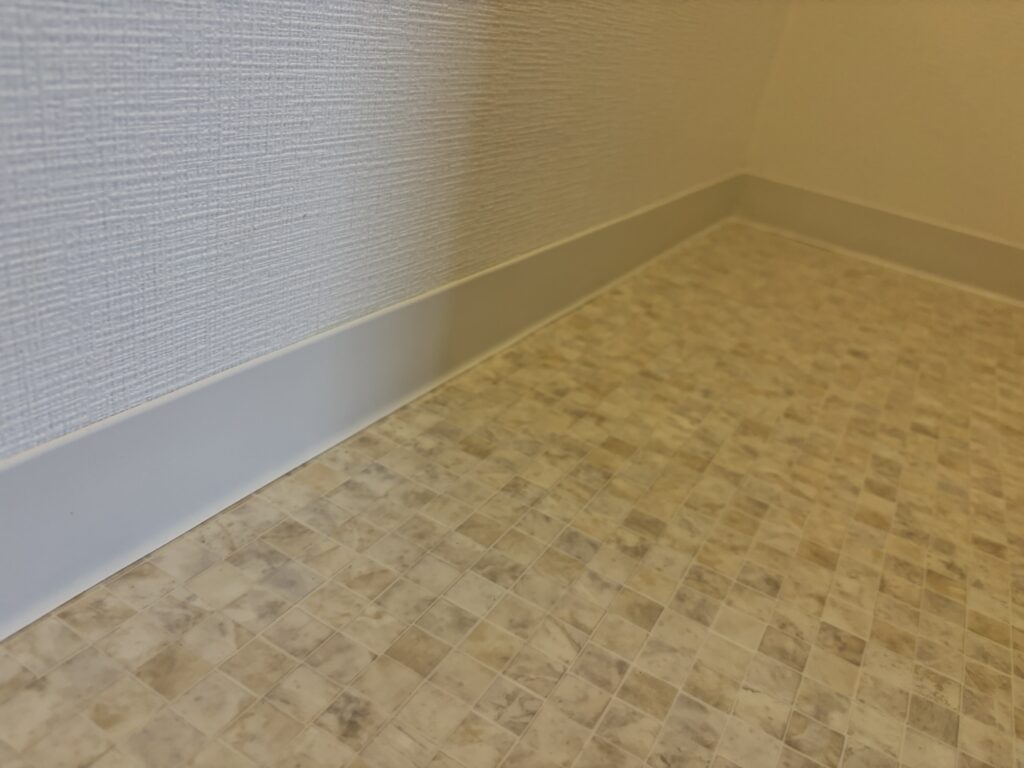
Once the vinyl flooring was installed, I moved on to the soft baseboards.
One area that required special attention was the outside corner.
If you wrap the soft baseboard over an outside corner while the wallpaper adhesive is still wet, the freshly installed wallpaper can move and develop wrinkles.
However, because I needed to complete the entire project in one day, I carefully trimmed the wallpaper around the outside corner.
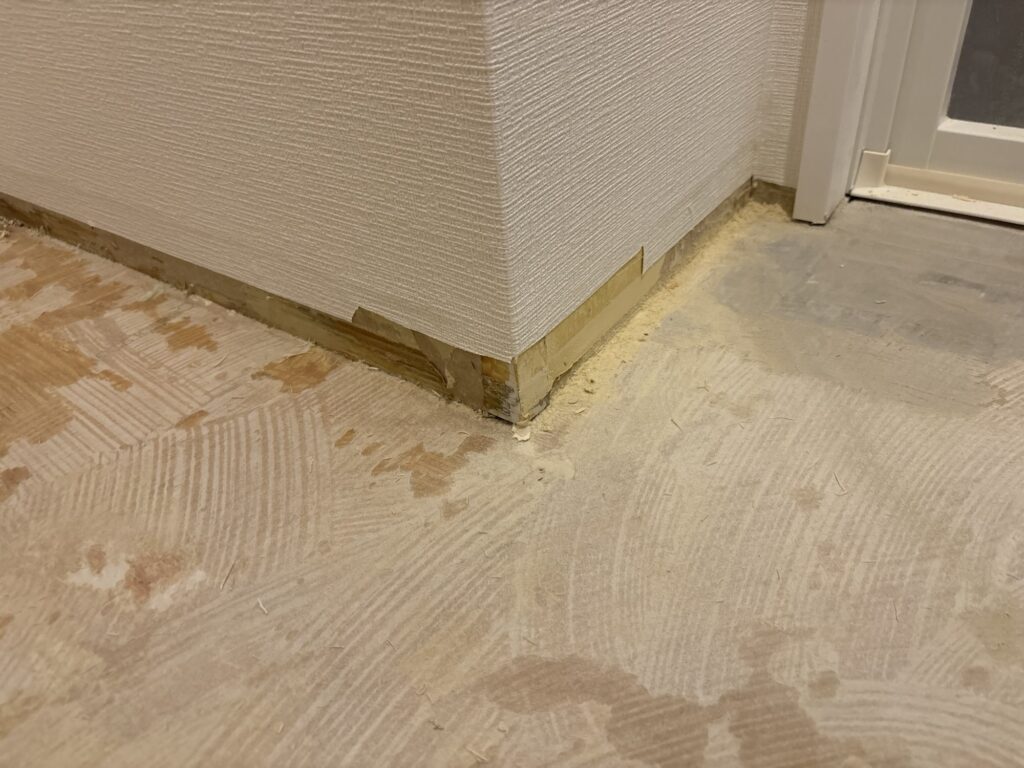
I cut the wallpaper only slightly above the 6 cm height of the soft baseboard.
By minimizing the area where the freshly installed wallpaper and the soft baseboard would come into direct contact, I could reduce the risk of wrinkles.
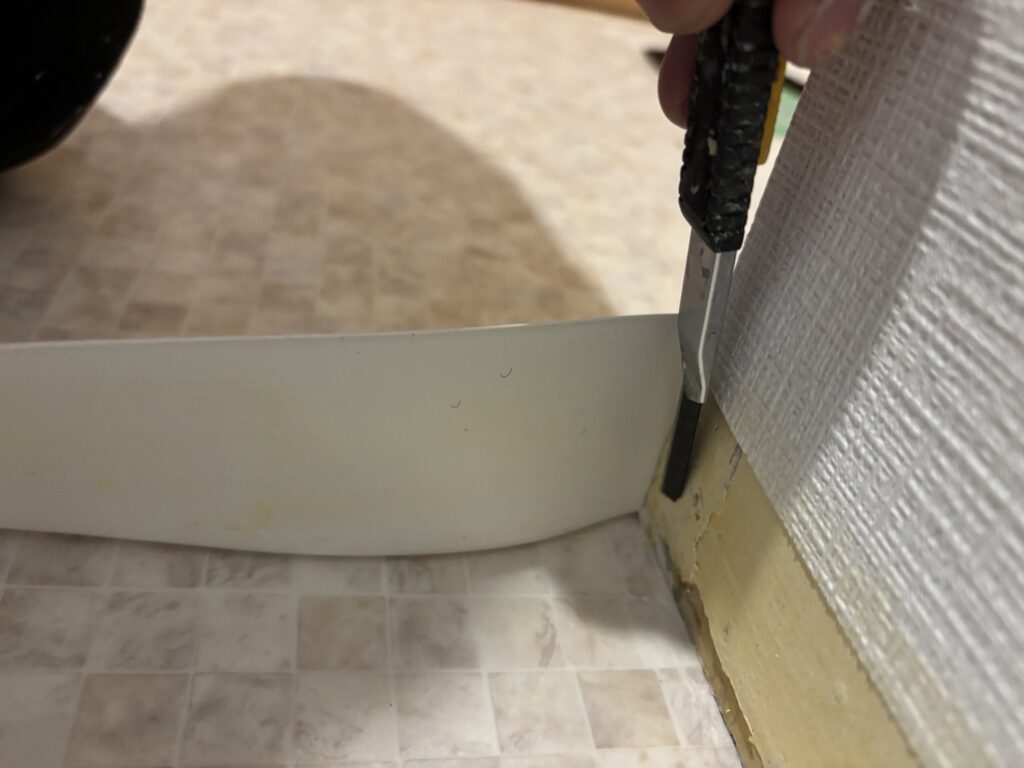
For the outside corner itself, I also made a light cut on the back of the soft baseboard with a utility knife.
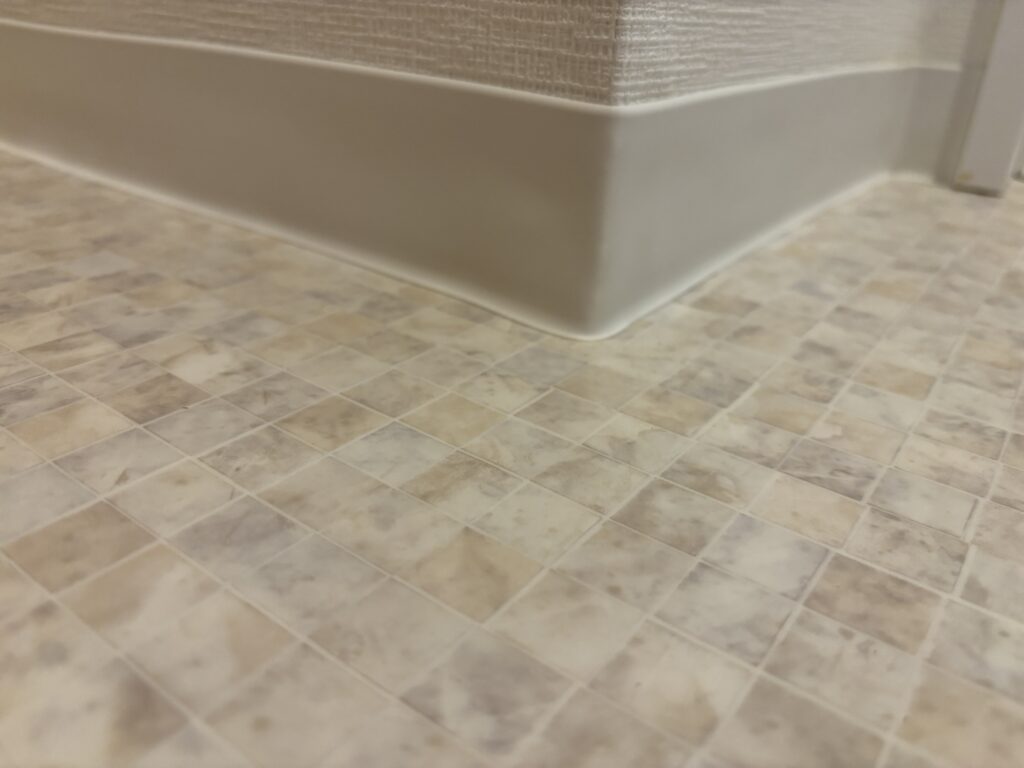
This makes it easier to wrap the baseboard neatly around the corner.
9. Final Cleanup
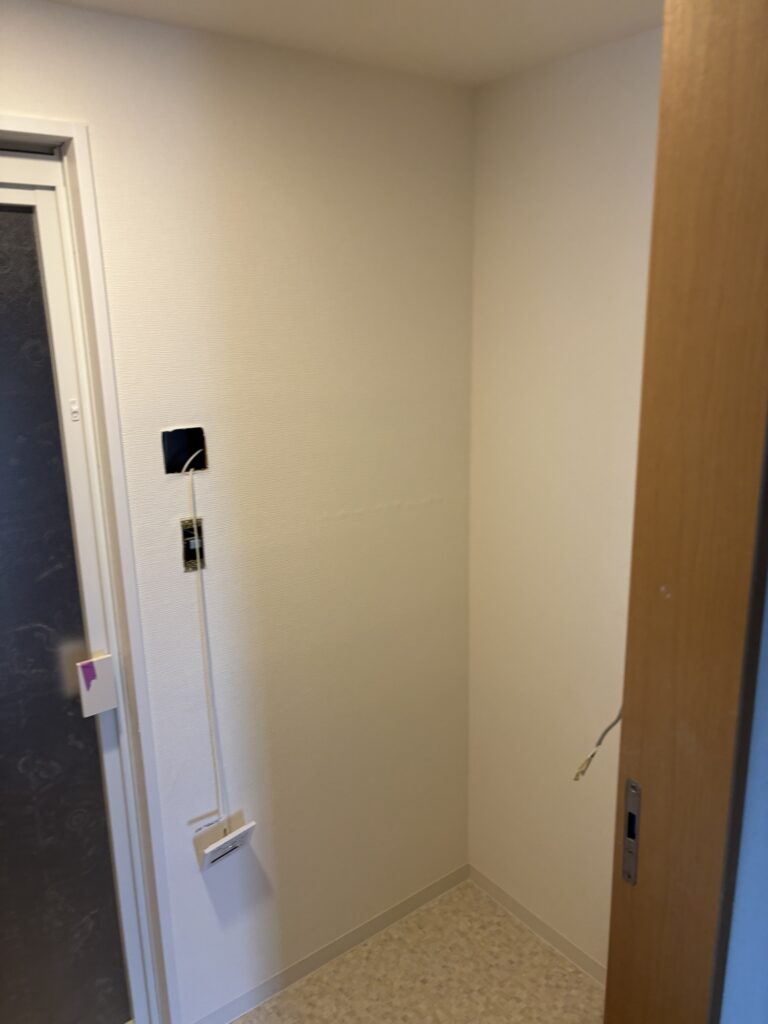
After completing the wallpaper, vinyl flooring, and soft baseboard installation, I cleaned the work area and put all tools and materials back in order.
The entire project was completed in approximately 6 hours.
Tools Used
- Wallpaper pasting machine
- Sander
- Utility knife
- Sharp replacement blades
- Wallpaper smoother
- Wallpaper spatula
- Small spatula
- Measuring tape
- Damp sponge
- Cleaning tools
Professional Tips
Remove High Spots Before Applying More Filler
If an existing filler layer has high spots, remove the excess material before applying another layer.
This saves filler and makes it easier to achieve a flat surface.
Remove Loose Backing Paper
Loose backing paper can bubble when it absorbs moisture from wallpaper adhesive or filler.
Removing it before installation helps prevent problems later.
Prepare the Floor Carefully
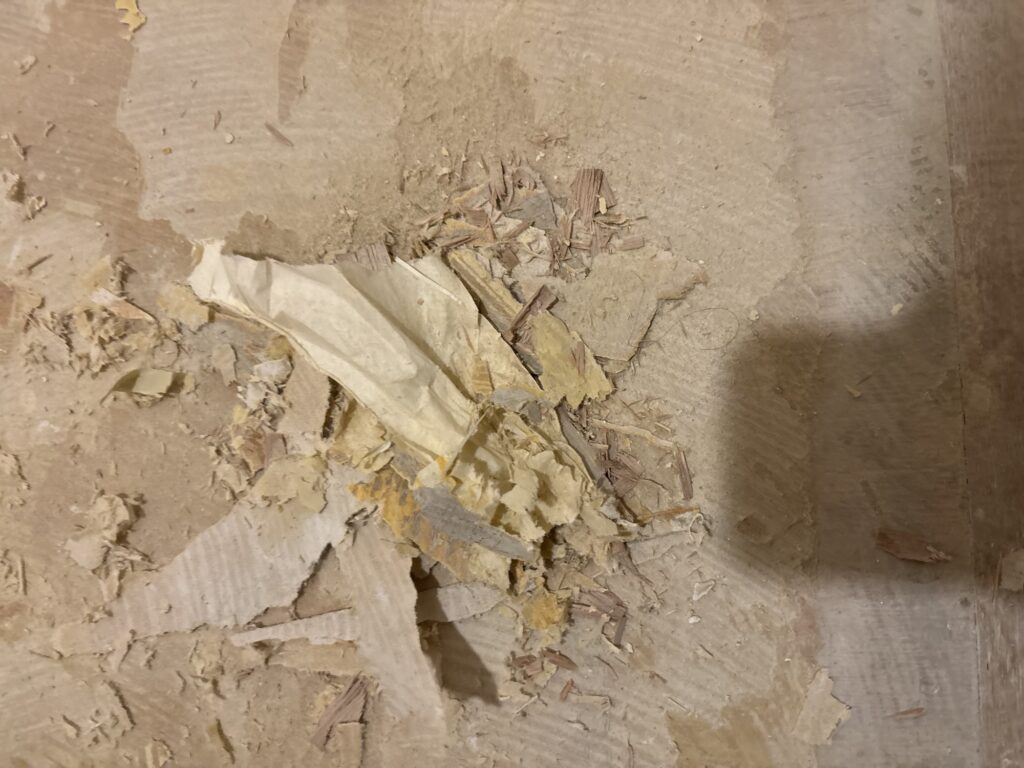
Vinyl flooring shows imperfections easily.
Any loose backing material, high spots, or uneven areas underneath can affect the final appearance.
Work in Sections When Installing Vinyl Flooring Alone
When working alone, applying adhesive and installing the flooring in sections makes positioning easier and reduces the risk of getting adhesive onto the walls.
Keep Your Knife Blade Sharp
A sharp blade makes cleaner cuts and reduces the risk of tearing wallpaper.
For detailed corner work, changing the blade frequently is worth the small additional cost.
Prepare Extra Wallpaper
When working alone, preparing one extra piece of wallpaper can save significant time if you make a mistake or discover that a piece is missing.
Common Mistakes to Avoid
Applying Filler Directly Over High Spots
Do not simply cover high spots with additional filler.
Remove excess material first whenever possible.
Leaving Loose Backing Paper
Loose backing paper can bubble and cause problems after the new wallpaper is installed.
Always check the surface carefully before applying new wallpaper.
Cutting Vinyl Flooring Too Long
Vinyl flooring that is cut too long can buckle or create wrinkles.
Take your time when making the final cuts.
Spreading All the Flooring Adhesive at Once
When working alone, spreading adhesive over the entire floor can make it difficult to position the flooring accurately.
Working in sections can make installation much easier.
Using a Dull Knife Blade
A dull blade can tear wallpaper and make corner cuts look rough.
Change the blade regularly, especially during detailed cutting.
Wrapping Soft Baseboard Over Fresh Wallpaper
If the wallpaper is still wet and the baseboard presses against it, the wallpaper can move and develop wrinkles.
Pay particular attention to outside corners.
What I Learned From This Project
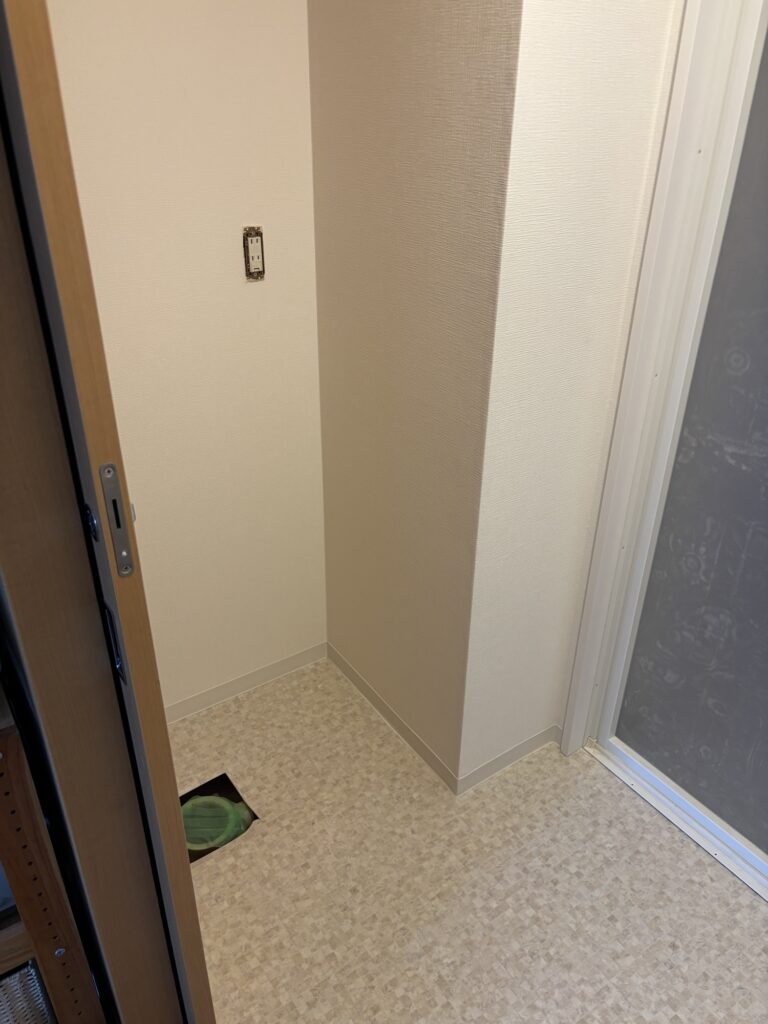
This project reminded me that good surface preparation is just as important as the actual installation.
The final appearance of wallpaper and vinyl flooring depends heavily on what is underneath them.
Loose backing paper, uneven filler, and small differences in floor height may not look like major problems at first, but they can become obvious after the new materials are installed.
I also found that working efficiently is especially important when working alone.
Instead of waiting for filler to dry, I used that time to prepare the floor and measure and prepare the wallpaper.
By working on different tasks in parallel, I was able to maintain a smooth workflow and complete the entire project in about six hours.
FAQ
1. How long did this wallpaper and flooring project take?
The entire project took approximately six hours, including surface preparation, wallpaper installation, vinyl flooring installation, soft baseboard installation, and cleanup.
2. Did you work alone?
Yes. I completed the entire installation by myself.
3. Why is surface preparation important before installing wallpaper?
Uneven surfaces and loose backing paper can cause bubbles, wrinkles, or visible imperfections after the new wallpaper is installed.
4. Why did you sand the existing filler?
The existing filler had some uneven areas. Sanding down the high spots created a flatter surface and reduced the amount of additional filler needed.
5. Why did you remove the loose backing paper?
Loose backing paper is not properly bonded to the wall. If it remains underneath the new wallpaper, it can bubble when exposed to moisture from adhesive or filler.
6. Why did you prepare one extra piece of wallpaper?
Seven pieces were enough for the main wall installation, but I prepared one additional piece as a spare. When working alone, having extra material ready can prevent delays if a mistake occurs.
7. Why did you install the ceiling wallpaper in the shorter direction?
Because I was working alone, installing the wallpaper across the shorter direction made it easier to control and position the sheet.
8. How do you cut wallpaper around a water supply connection?
I first position the wallpaper straight and then make several small cuts radiating outward from the center of the fitting. I then use a small spatula and carefully trim away the excess.
9. Why did you install the vinyl flooring in two sections?
Working in two sections made it easier to position the flooring accurately while working alone and reduced the risk of getting adhesive onto the walls.
10. Why is it difficult to install soft baseboards over freshly installed wallpaper?
Fresh wallpaper can still move because the adhesive has not fully dried. Pressure from the soft baseboard, especially around outside corners, can cause the wallpaper to wrinkle.
Conclusion
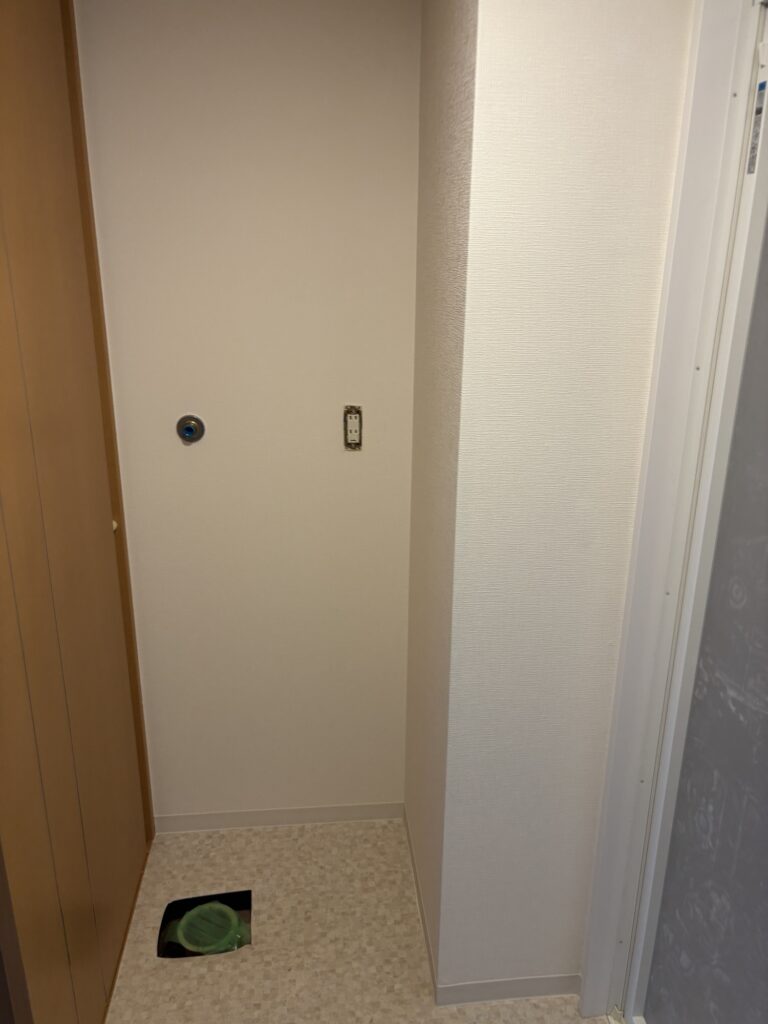
This bathroom vanity and laundry area renovation included wallpaper replacement, vinyl flooring installation, and soft baseboard installation.
Although the project was relatively small, careful surface preparation was essential.
Removing loose backing paper, correcting uneven filler, preparing the floor properly, and carefully handling the wallpaper around fittings and corners all helped produce a clean final result.
Working alone also required efficient time management. By using the drying time for filler to prepare other areas and by preparing the wallpaper in advance, I was able to keep the workflow moving throughout the day.
The project was completed in approximately six hours, including the final cleanup and organization of the work area.


Comments