
Project Information
- Project Type: Interior Renovation
- Location: Japan
- Building: Condominium, 4th Floor
- Room Type: 3-Bedroom, Living Room, Dining Room, and Kitchen (3LDK)
- Floor Area: Approximately 65 m²
- Crew: 2 Workers and 1 Site Supervisor
- Work Duration: 7 Hours (Day 1)
- Main Tasks: Removing Old Wallpaper, Partial Demolition, and Removing Unwanted Light Fixtures
- Planned Work: Installing New Wallpaper and Cushion Flooring
Introduction
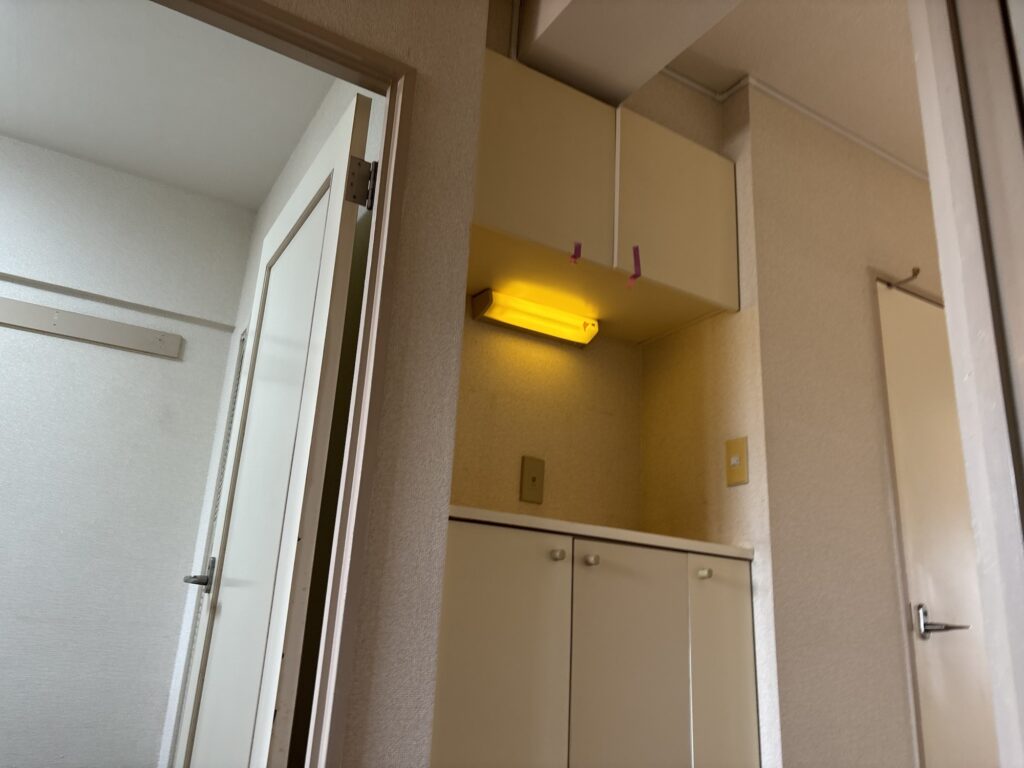
Today, I worked on an interior renovation project in a condominium on the fourth floor of a building in Japan. The apartment is approximately 65 square meters and has a 3LDK layout, which includes three bedrooms, a living room, a dining area, and a kitchen.
The renovation is scheduled to take several days. Our final goal is to install new wallpaper on the walls and new cushion flooring in the designated areas.
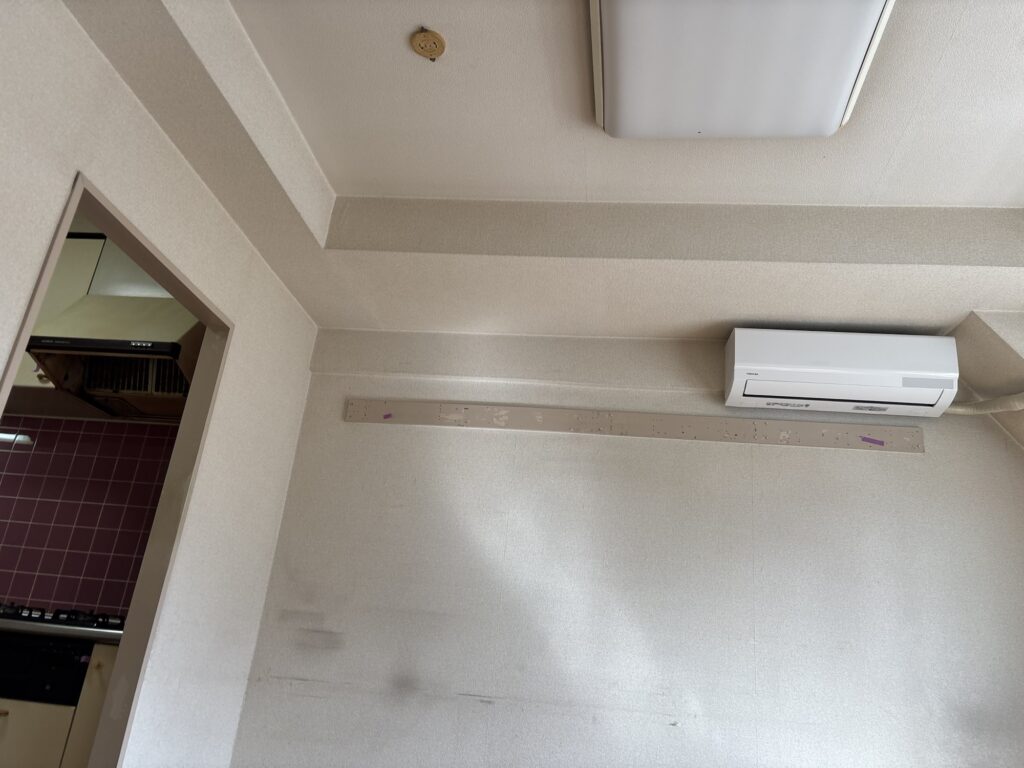
On the first day, our main tasks were removing old wallpaper, carrying out some minor demolition, and removing unwanted lighting fixtures and other interior components.
Two workers and one site supervisor worked together on this project.
Although removing old materials may seem like a simple job, careful preparation is essential for achieving a good finish during the installation stage.
Related Project
Repairing Mold-Damaged Drywall in a 25 m² Apartment Before Installing New Wallpaper
Job Site Report: Step-by-Step Work Process
1. Removing the Wooden Wall Rail
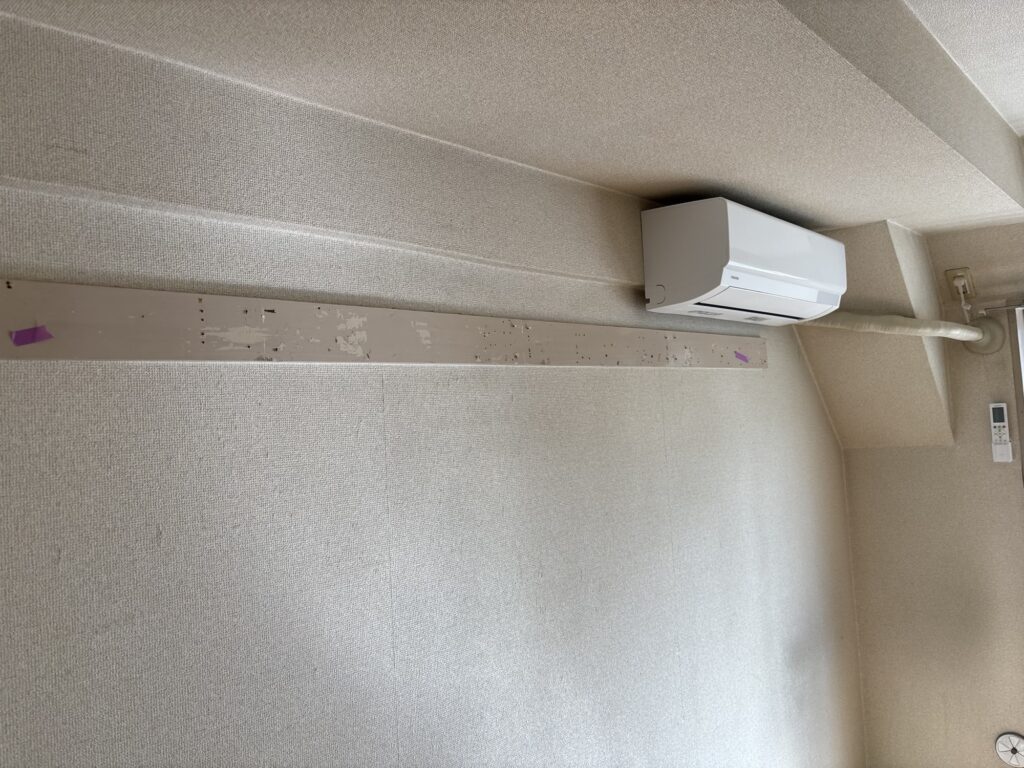
The first task was removing an unnecessary wooden wall rail called nageshi in Japanese.
Traditional Japanese rooms often have these wooden rails near the upper part of the walls. They were originally used for hanging items or supporting interior features. Today, they can also be used to hang clothes, photographs, and paintings.
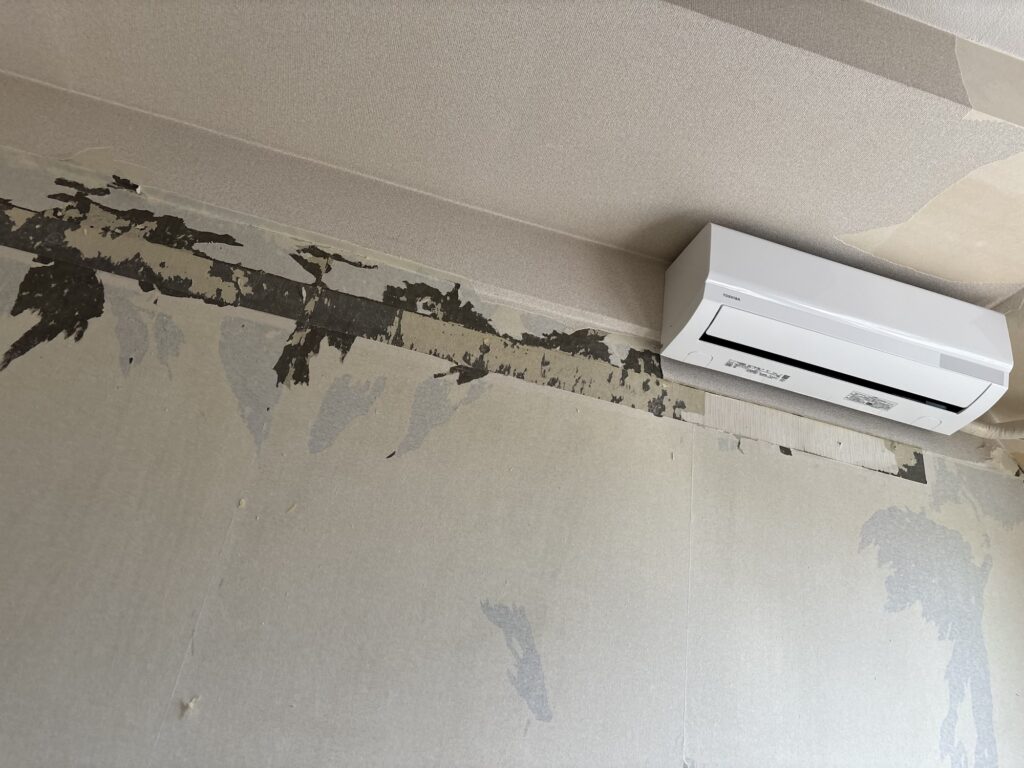
We used a pry bar to remove the rail. By inserting the tool into the gap and applying leverage, we were able to loosen and remove it without too much difficulty.
Removing unnecessary wooden components at the beginning helps prepare the room for the upcoming renovation work.
2. Removing the Kitchen Range Hood
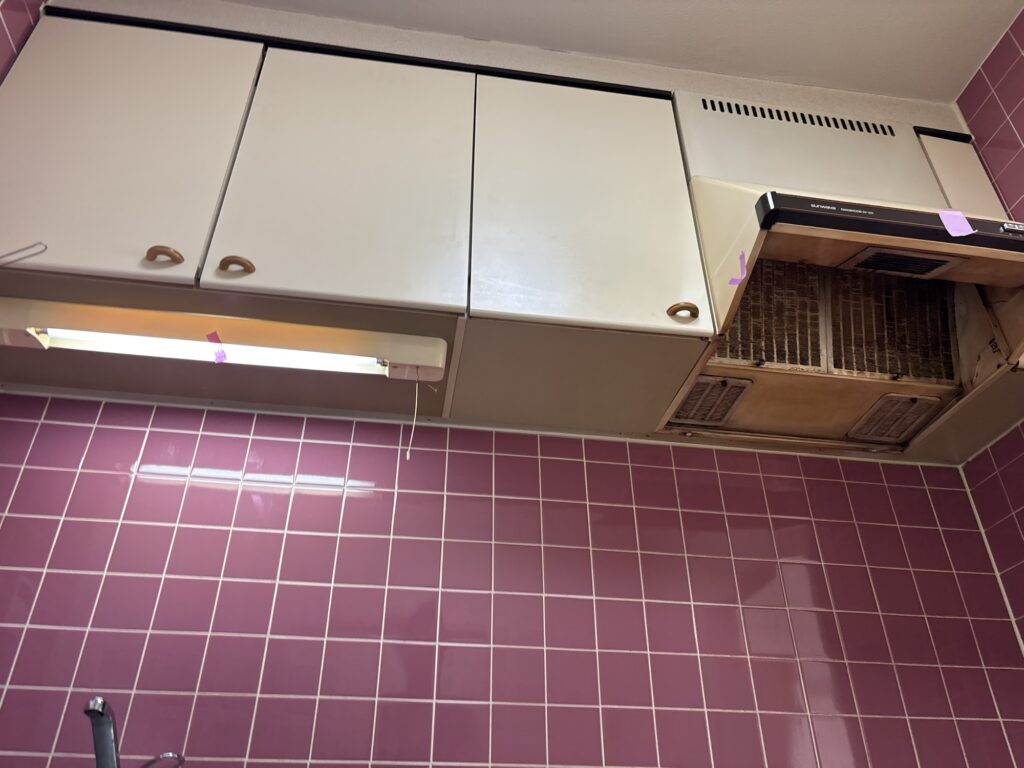
Next, we removed the kitchen range hood.
Before starting, we switched off the appropriate electrical breaker. We then disconnected the wiring and removed the mounting screws before carefully dismantling and taking down the unit.
The range hood had a significant amount of grease buildup, so wearing protective gloves was essential.
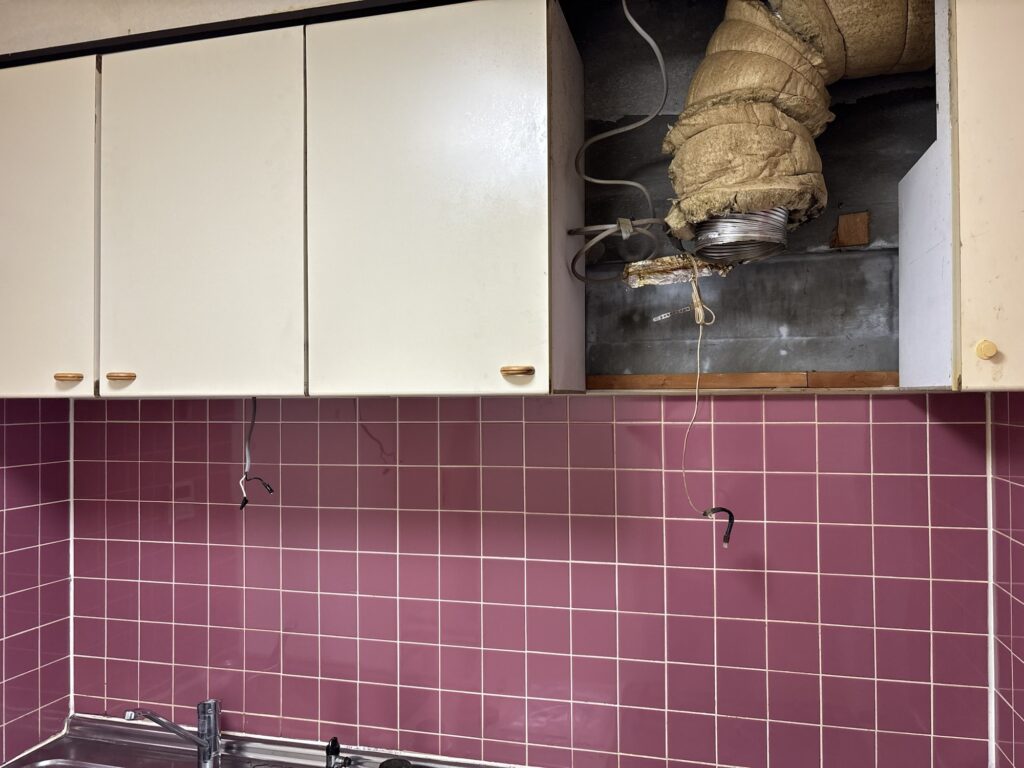
Grease can make surfaces slippery and dirty, so it is important to protect your hands and handle the equipment carefully during removal.
Electrical disconnection should only be performed by a properly qualified person in accordance with local regulations. Simply switching off a breaker does not, by itself, establish that wiring is safe to handle.
Related Project
Replacing Water-Damaged Drywall and Rebuilding a Laundry Area Before Wallpaper Installation
3. Removing the Ceiling Light Fixtures and Connectors
After removing the range hood, we moved on to the unwanted lighting fixtures and their ceiling connectors.
Because electrical components were involved, we ensured that the appropriate circuit was isolated before work began.
Electrical work can cause electric shock, short circuits, or other accidents if it is not handled correctly. In Japan, wiring and electrical equipment must be handled in accordance with applicable regulations, including qualification requirements.
For this reason, electrical disconnection and removal should be carried out by a qualified electrician whenever required.
We also removed the kitchen’s under-cabinet light using the same safety-first approach.
Once these fixtures were removed, the room was better prepared for the next stage of renovation.
4. Removing the Old Wallpaper
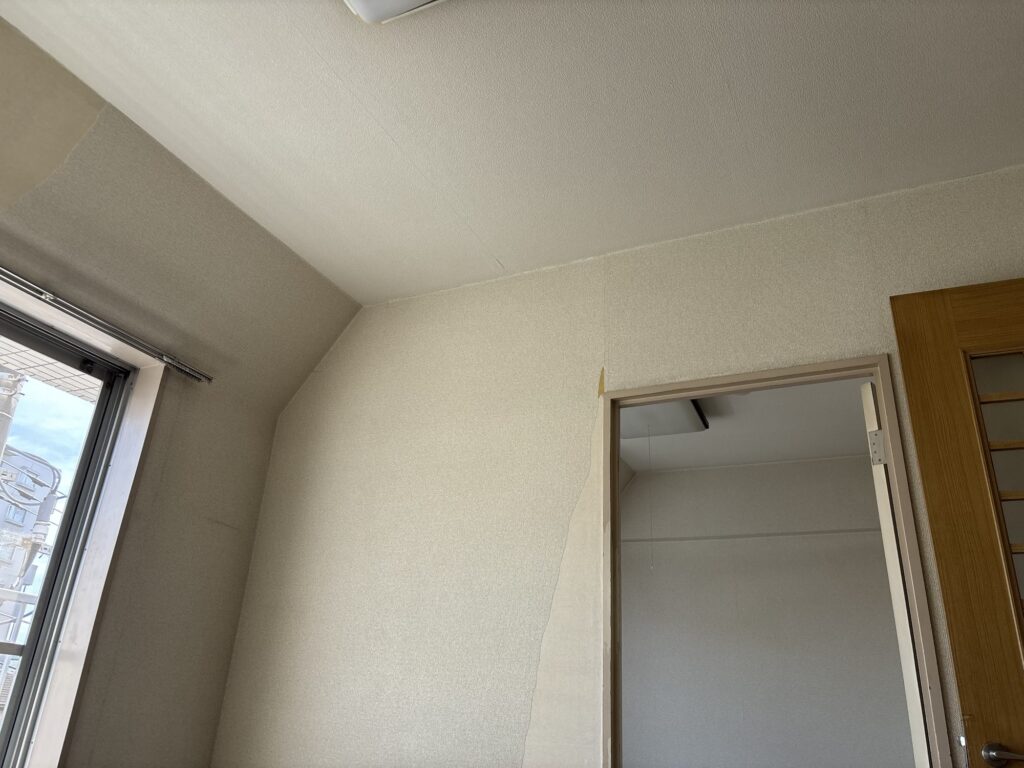
The next major task was removing the old wallpaper from the walls.
However, we did not remove every layer of the old wallpaper backing unnecessarily. The new wallpaper selected for this project was relatively thick and had a pronounced embossed texture.
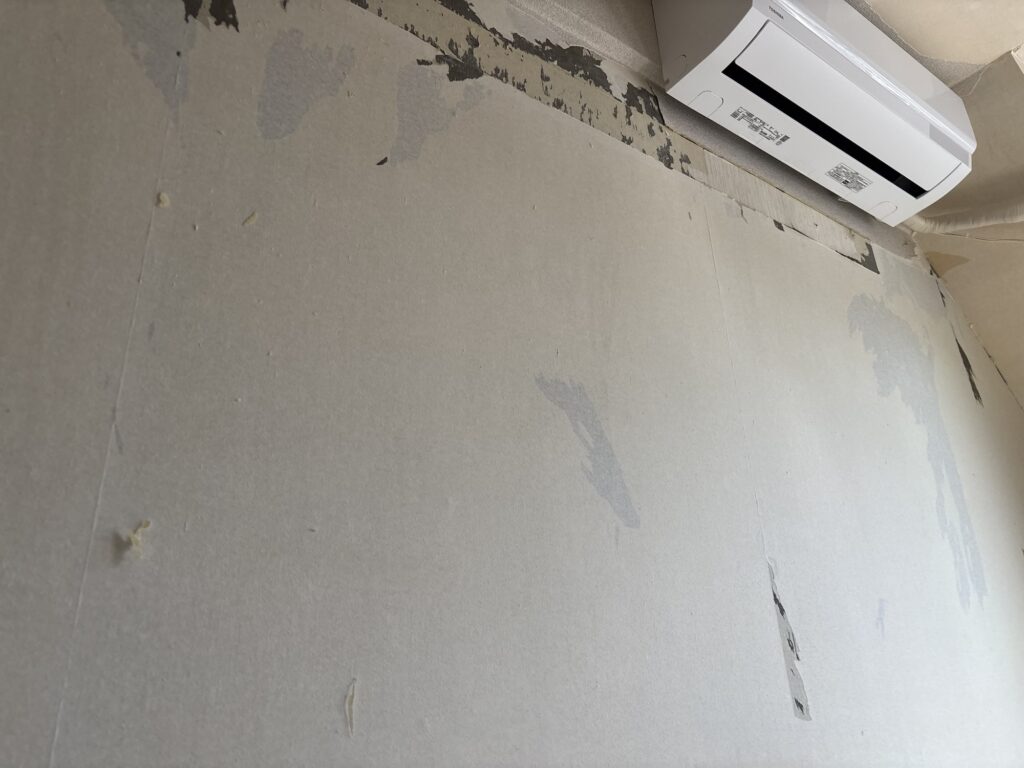
Because of this, we could leave firmly attached backing paper in place where the condition of the substrate allowed it.
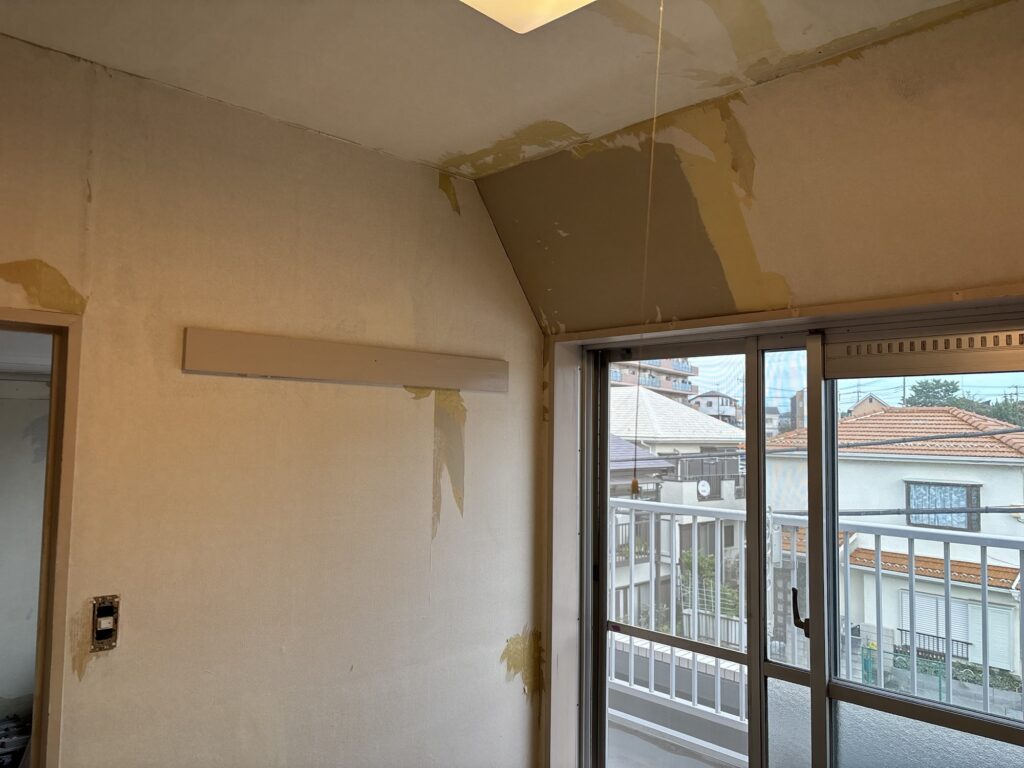
The most important thing to check was whether the remaining backing paper was firmly attached to the wall.
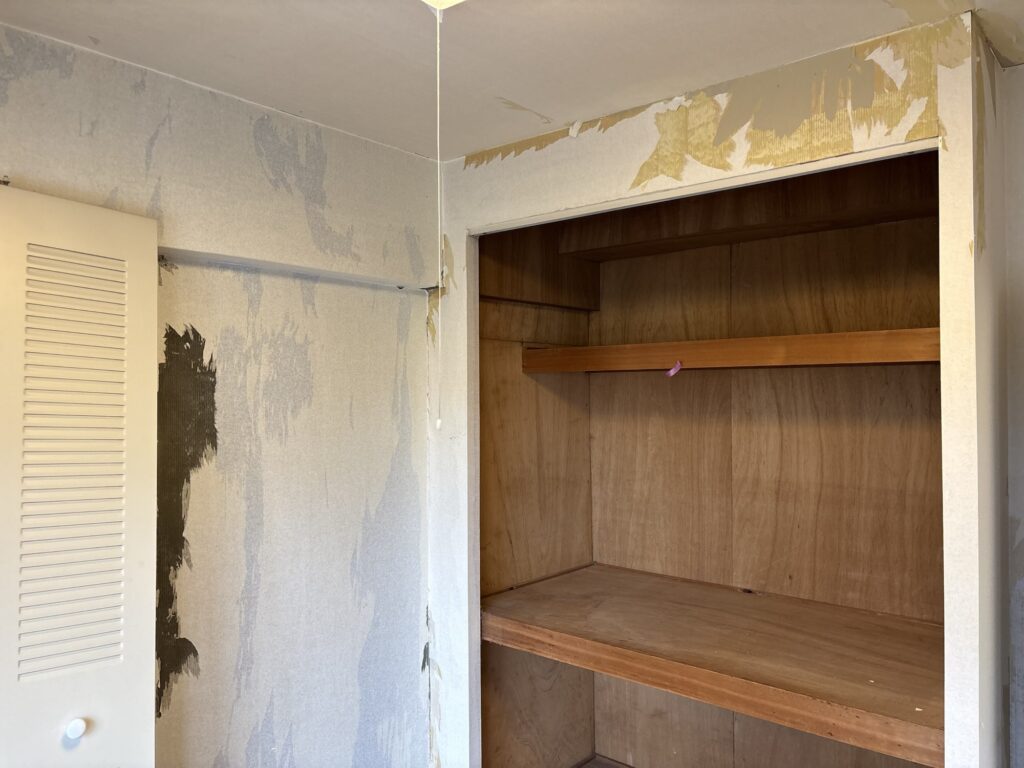
If the backing paper was loose, peeling, or bubbling, we needed to remove the affected sections. Leaving loose material underneath the new wallpaper could lead to an uneven finish or other installation problems.
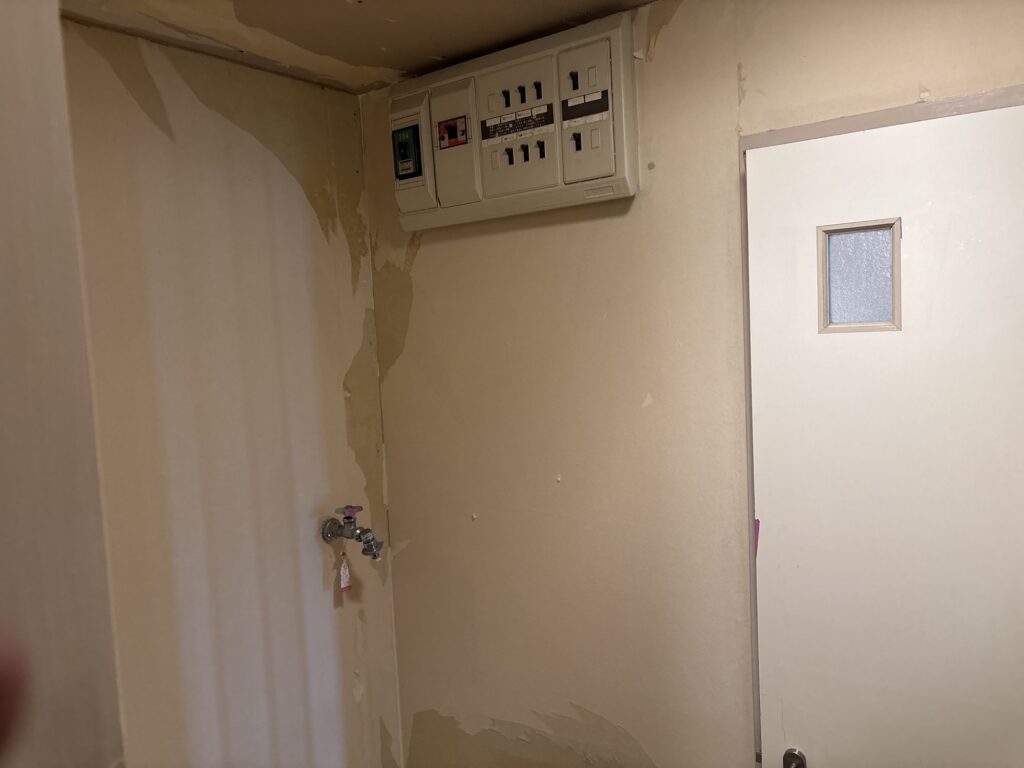
On the other hand, removing too much backing paper can expose the wall surface and create uneven areas. These areas may then require additional filling and smoothing with joint compound, known as putty in Japanese wallpaper installation.
That would create extra work that might otherwise be unnecessary.
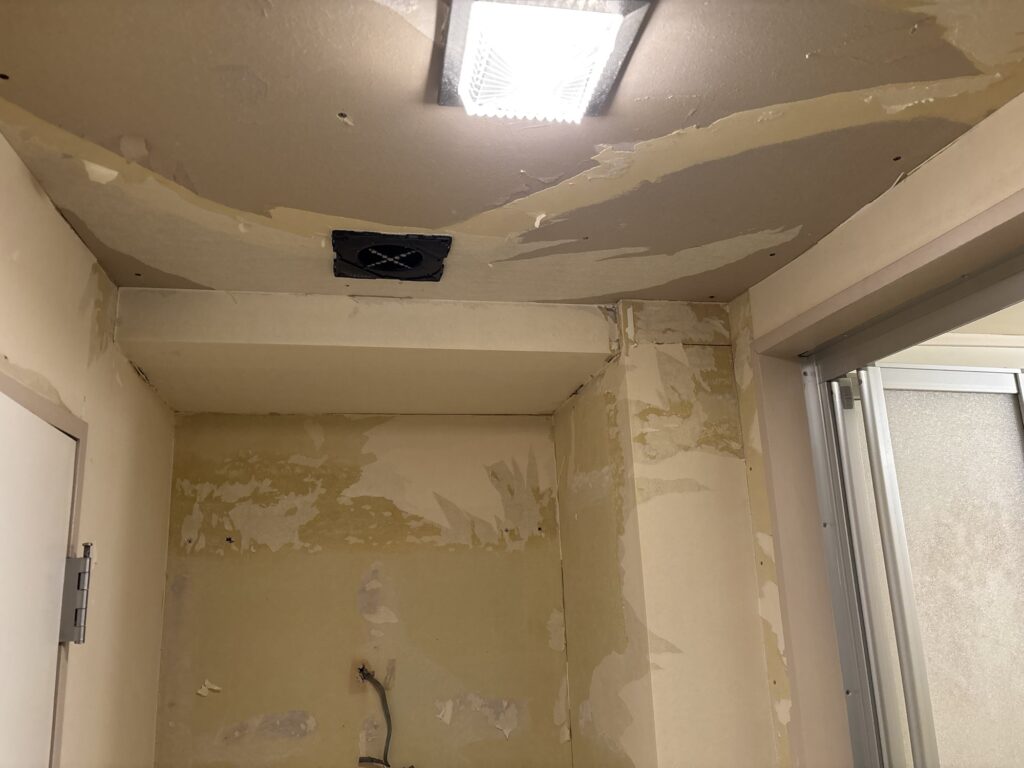
The correct amount of wallpaper to remove depends on the condition of the existing wall, the adhesion of the remaining backing paper, and the characteristics of the new wallpaper.
Rather than removing everything automatically, we inspected the surface and made decisions based on the actual conditions at the job site.
5. Finishing the Day’s Work
After removing the unnecessary fixtures and completing the wallpaper stripping, we finished the day’s work.
The next stages of the renovation will involve preparing the wall surfaces as needed, installing new wallpaper, and laying cushion flooring.
Today’s work took approximately seven hours.
Although this was mainly a preparation and removal day, careful work at this stage will help make the installation process smoother and improve the final result.
Tools Used
The main tools and equipment used or required for this type of work included:
- Pry bar: For removing the wooden wall rail and other fixed components.
- Screwdrivers and suitable hand tools: For removing mounting screws and dismantling fixtures.
- Wallpaper stripping tools: For peeling away old wallpaper.
- Protective gloves: For protecting hands, especially when handling greasy equipment.
- Safety equipment: Appropriate protective equipment for demolition, removal, and renovation work.
- Electrical testing equipment: Used by qualified personnel to verify electrical safety where necessary.
The exact tools required will depend on the existing fixtures, wall conditions, and the scope of the renovation.
Professional Tips for Wallpaper Removal
1. Check the Backing Paper Before Removing Everything
One of the most important parts of wallpaper removal is understanding the condition of the remaining backing paper.
If it is firmly attached and compatible with the new installation system, it may be possible to leave it in place.
However, loose, damaged, or poorly bonded areas should be removed and repaired as necessary.
2. Consider the Thickness and Texture of the New Wallpaper
The characteristics of the replacement wallpaper can influence how much preparation is necessary.
Thicker wallpaper with a pronounced embossed texture may conceal minor surface variations better than very thin, smooth wallpaper.
However, thick wallpaper cannot compensate for loose backing paper, major unevenness, or an unstable substrate.
Always follow the manufacturer’s installation instructions and prepare the surface to the required standard.
3. Avoid Creating Unnecessary Surface Damage
Removing too much material can expose the substrate and create additional areas that need repair.
Work carefully and inspect the wall as you go. The goal is not simply to remove as much wallpaper as possible, but to create a suitable surface for the next stage.
4. Remove Unwanted Fixtures Before Final Surface Preparation
Removing unnecessary wall components and fixtures before final wallpaper preparation can help prevent damage to the new finish.
Planning the sequence of work also makes it easier to identify areas that need patching or additional surface preparation.
5. Treat Electrical Safety as a Priority
Electrical fixtures and wiring must be handled carefully.
Use the correct isolation procedure, verify that the circuit is safe using appropriate testing equipment, and ensure that electrical work is performed by qualified personnel when required.
Never assume that a wire is safe simply because a light has been switched off.
Common Mistakes to Avoid
1. Removing All the Backing Paper Without Checking Its Condition
Not every section of backing paper needs to be removed automatically.
If it is firmly attached and suitable for the new installation, unnecessary removal may create additional surface preparation work.
2. Leaving Loose Backing Paper Behind
Loose backing paper can cause problems beneath new wallpaper.
Always inspect the wall carefully and remove unstable sections before proceeding.
3. Assuming Thick Wallpaper Will Hide Every Imperfection
Thick, embossed wallpaper can help conceal minor surface variations, but it will not solve every substrate problem.
Loose material, large bumps, damaged plasterboard, and significant depressions still need appropriate repair.
4. Rushing Fixture Removal
Trying to remove fixtures too quickly can damage surrounding surfaces or create unnecessary repair work.
Check how each component is secured and use the appropriate tools.
5. Neglecting Electrical Safety
Working on electrical fixtures without proper isolation and verification can result in serious injury.
Follow the applicable electrical safety procedures and qualification requirements before disconnecting or removing any wiring.
What I Learned From This Project
Today’s work reminded me that successful wallpaper installation begins long before the new wallpaper is applied.
Removing old materials is not just about stripping everything from the wall. It also requires judgment and an understanding of the condition of the existing surface.
In this project, the new wallpaper was thick and had a pronounced embossed texture. That influenced how much of the old wallpaper backing we needed to remove.
If we had removed too much, we might have created unnecessary work by exposing additional areas that required filling and smoothing.
At the same time, leaving loose backing paper could have caused problems with the final finish.
I also learned how important it is to organize the work in the correct order. Removing unnecessary fixtures and components first helps prepare the room for the next stages of renovation.
The project is not finished yet, but a well-prepared surface will be essential for achieving a clean and durable result.
Frequently Asked Questions (FAQ)
1. How long did the wallpaper removal and demolition work take?
The first day’s work took approximately seven hours. We removed the old wallpaper, dismantled several fixtures, and carried out minor demolition.
2. How large was the apartment?
The condominium was approximately 65 square meters and had a 3LDK layout, meaning three bedrooms plus a living room, dining area, and kitchen.
3. How many people worked on the project?
Two workers and one site supervisor were involved in the work.
4. Does all the old wallpaper backing paper need to be removed?
Not necessarily. Firmly attached backing paper may sometimes remain, depending on the substrate condition and the new wallpaper system. Loose or damaged areas should be removed and repaired as needed.
5. Why is loose backing paper a problem?
Loose backing paper can lead to an uneven surface and interfere with the quality of the new wallpaper installation. It should be dealt with before applying the replacement material.
6. Can thick embossed wallpaper hide wall imperfections?
It may conceal minor surface variations better than thin, smooth wallpaper. However, it cannot reliably hide major defects, unstable backing paper, or significant unevenness.
7. Why should you avoid removing too much backing paper?
Removing firmly attached backing paper unnecessarily may expose the substrate and create additional areas that require filling and smoothing. This can increase preparation time.
8. Why were the range hood and lighting fixtures removed before installing the new wallpaper?
Removing unnecessary fixtures beforehand helps prepare the room for renovation and reduces the risk of damaging the new finish during later work.
9. Is it safe to remove a range hood or ceiling light yourself?
Electrical fixtures may contain wiring that presents a risk of electric shock. Electrical disconnection and removal should follow proper isolation and testing procedures and must be performed by qualified personnel when required by local regulations.
10. What happens after the wallpaper removal stage?
The next steps typically include inspecting and repairing the wall surfaces, preparing the substrate, installing new wallpaper, and laying cushion flooring in the designated areas.
Conclusion
The first day of this condominium renovation focused on removing old wallpaper, dismantling unwanted fixtures, and preparing the rooms for the next stage of work.
The apartment was approximately 65 square meters, and the work was completed by two workers and one site supervisor over approximately seven hours.
One of the most important parts of the day was deciding how much of the old wallpaper backing paper to remove. By considering the condition of the wall and the characteristics of the new wallpaper, we aimed to avoid unnecessary preparation while ensuring a suitable surface for the new installation.
The next stage will involve preparing the walls as needed, installing new wallpaper, and laying cushion flooring.
I’ll continue documenting the renovation process, including the techniques, tools, and lessons learned along the way.
Thanks for reading, and see you in the next project report!


Comments