

Project Type: Interior Renovation / Wallpaper Replacement
Location: Tokyo, Japan
Property Type: Luxury Apartment
Floor: 6th Floor
Apartment Layout: 1LDK
Floor Area: Approximately 70 m²
Main Work: Wallpaper Removal and Wall Surface Preparation
Work Duration: 6.5 Hours
Work Status: In Progress
Introduction
Today, I worked on an interior renovation project in a luxury apartment building in Tokyo.
The apartment is located on the sixth floor and has a 1LDK layout with approximately 70 square meters of floor space.
The main task for this project was to replace the existing wallpaper. Today’s goal was to remove the old wallpaper and prepare the wall surfaces so that new wallpaper could be installed during our next visit.
I heard that the monthly rent for this property is around ¥700,000, which reflects its premium location and high-end residential environment.
Because this was a luxury apartment building, there were several procedures we had to complete before starting work. We needed to submit applications for construction work and bringing materials into the building.
We also protected the elevator with temporary covering to prevent scratches, dirt, and other damage during material transportation.
Working in a high-end property requires extra care, not only inside the apartment but also in shared areas of the building.
Job Site Report – Step-by-Step Work Process
1. Removing the Existing Wallpaper
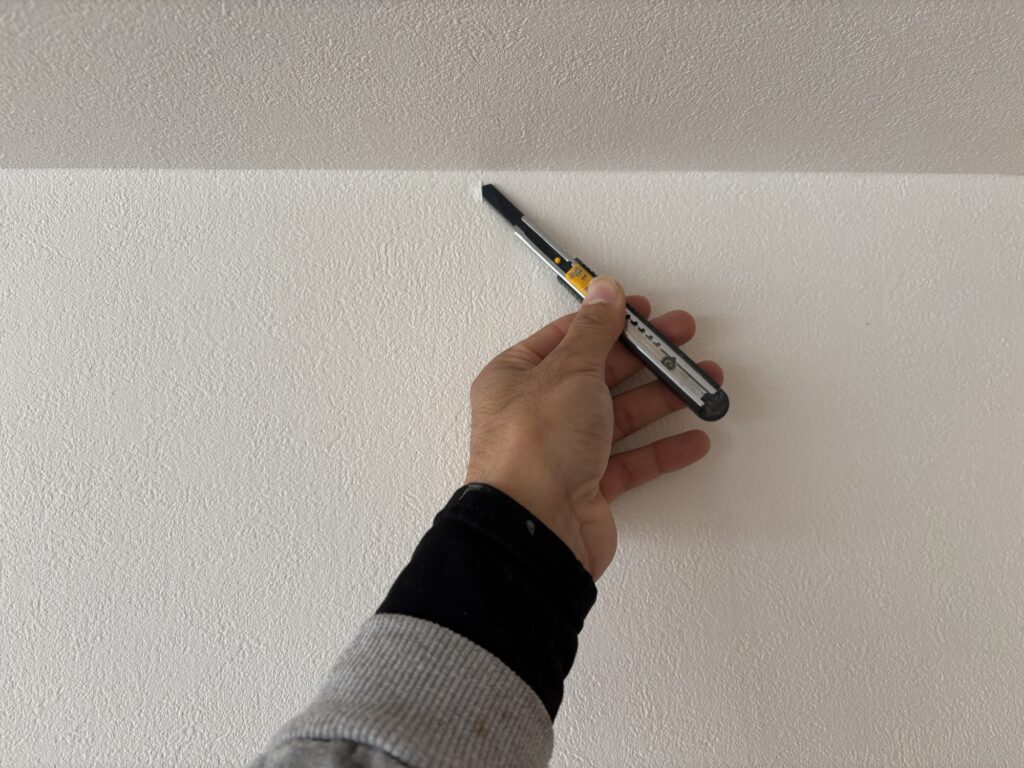
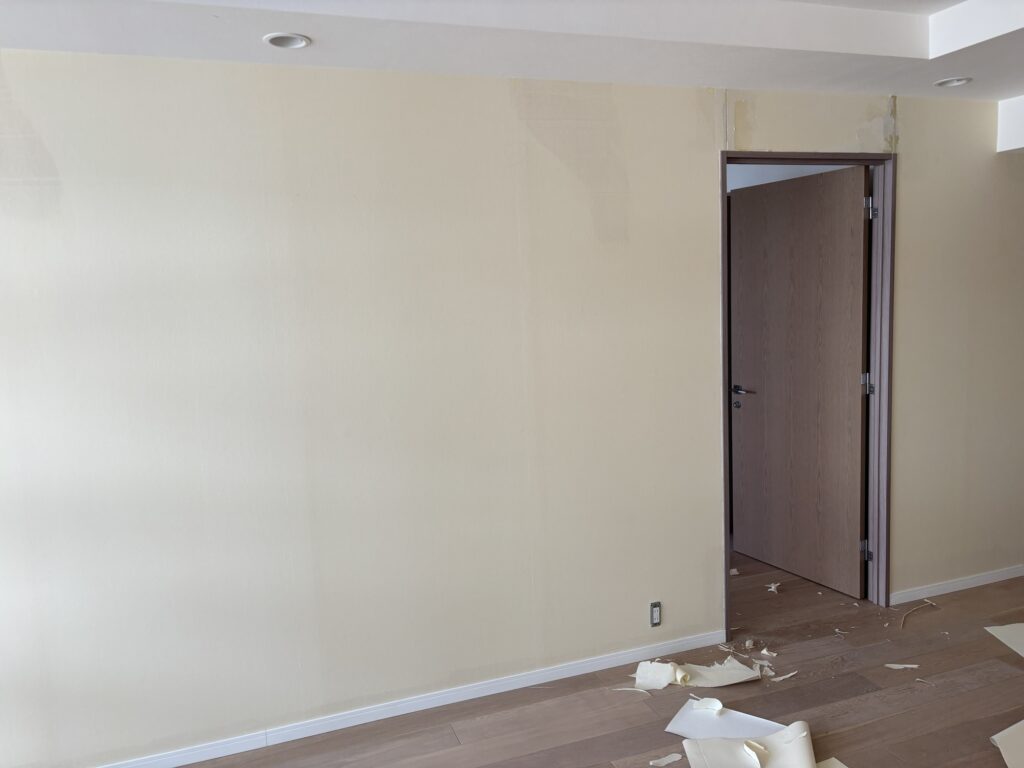
After entering the apartment, we started removing the old wallpaper from the walls.
In Japan, standard residential wallpaper is approximately 90 cm wide. This means that vertical seams, where two sheets meet, are usually spaced about 90 cm apart.
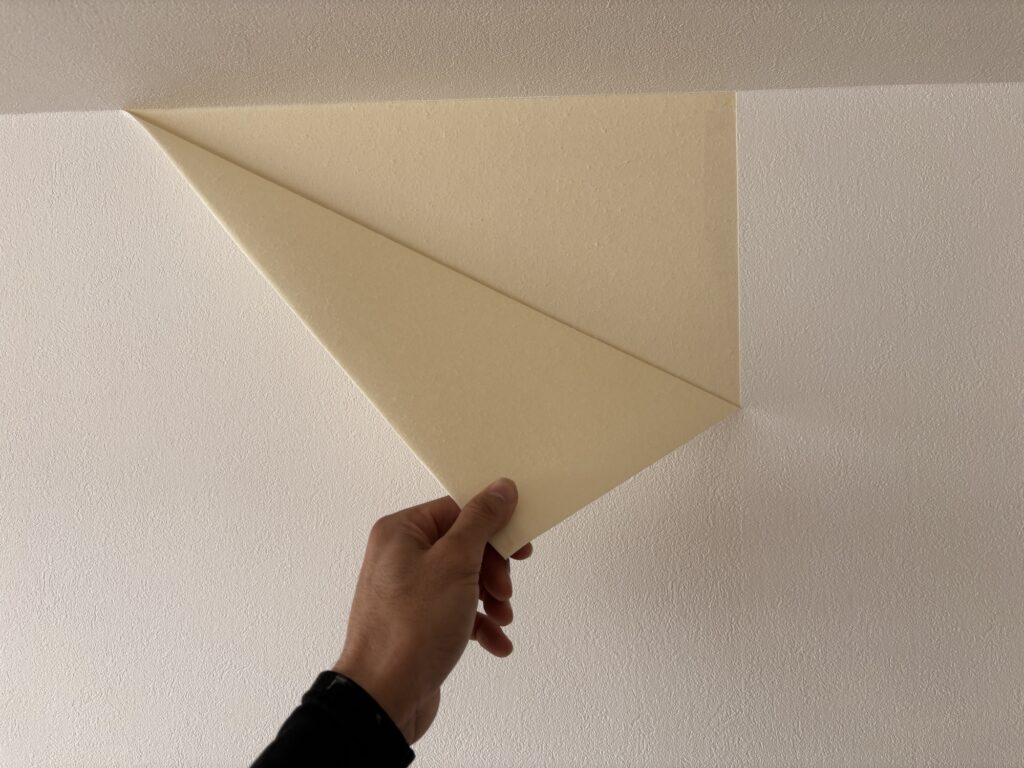
I located the seams and carefully inserted the tip of my utility knife between the wallpaper and the wall. Then, I used the opening to peel the wallpaper away.
When removing a full sheet cleanly, one useful technique is to apply even tension to both the left and right sides.
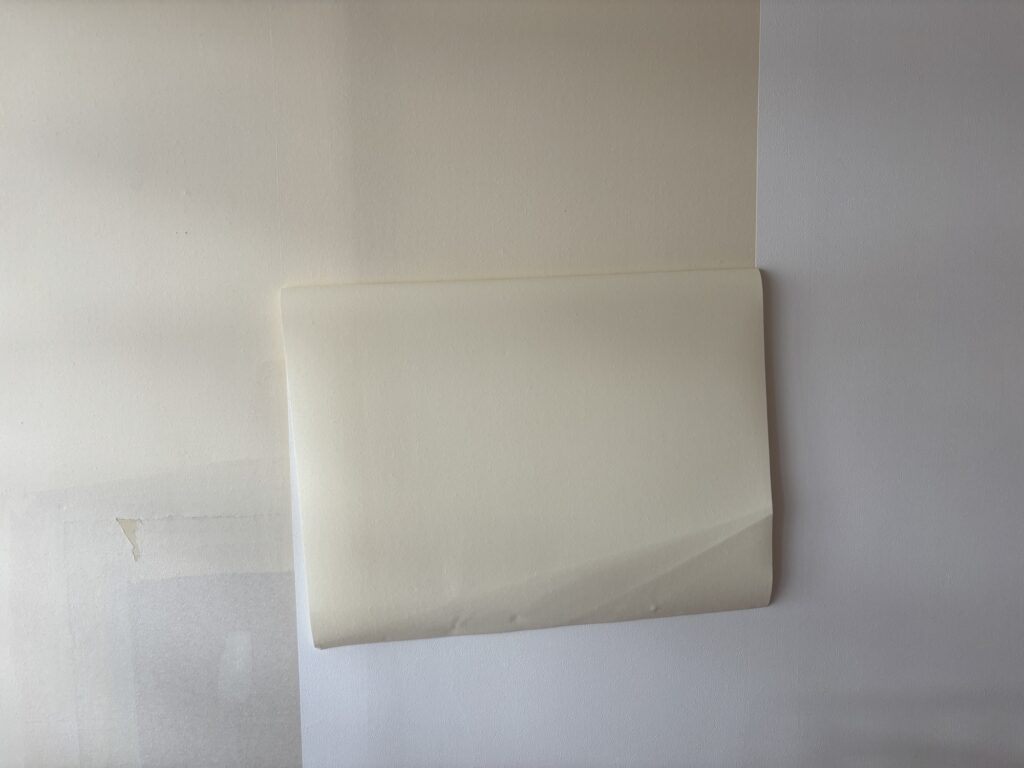
If you pull too hard on only one side, the wallpaper may tear halfway through. This makes removal more difficult and takes extra time.
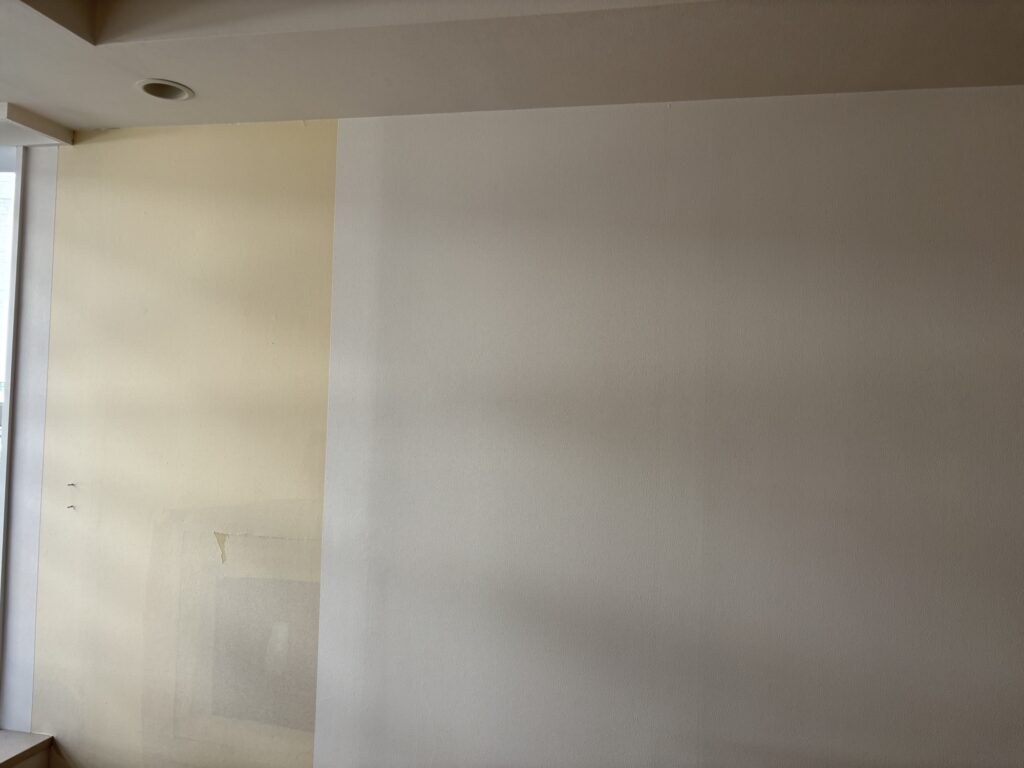
However, this technique does not always work perfectly. The condition of the existing wall surface and the adhesive can affect how easily the wallpaper comes off.
2. Finding and Preparing a Crack in the Wall
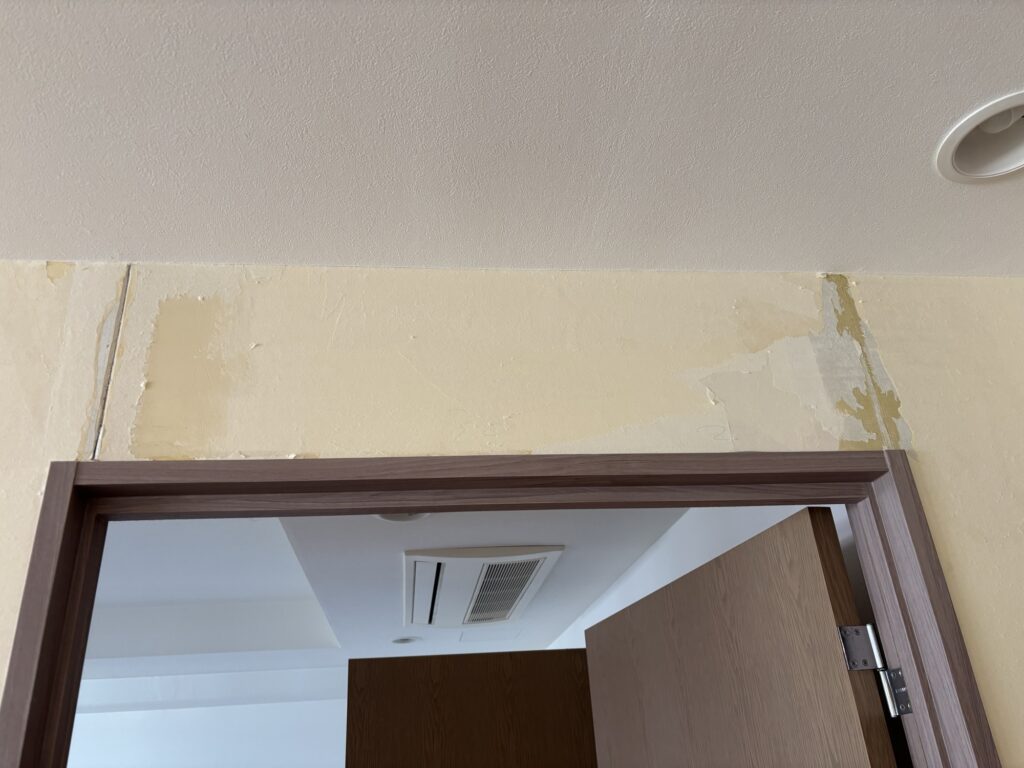
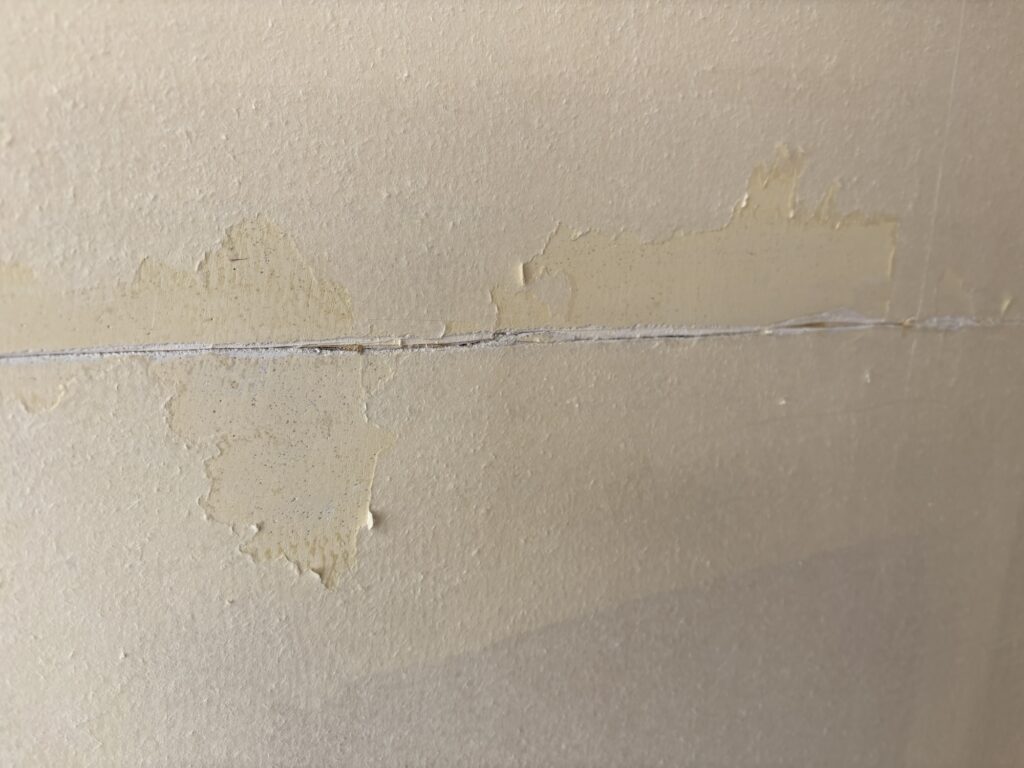
While removing wallpaper above a door frame, I noticed that part of the backing paper was swollen and lifting away from the wall.
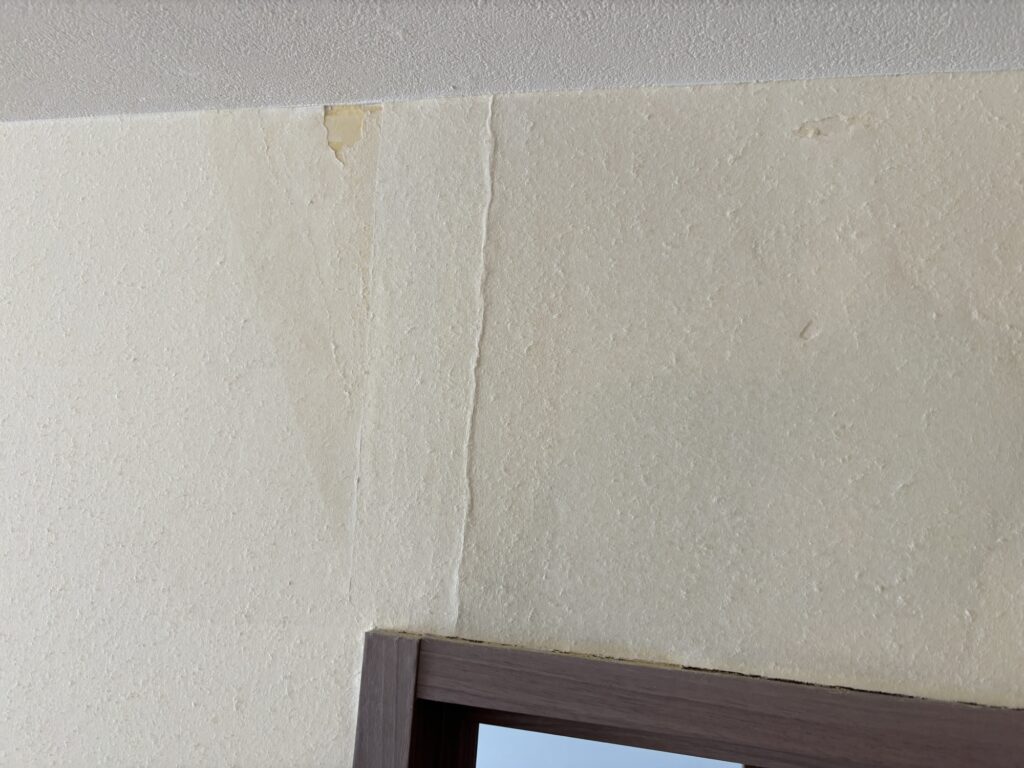
After removing the loose backing paper, I discovered a crack in the underlying wall surface.
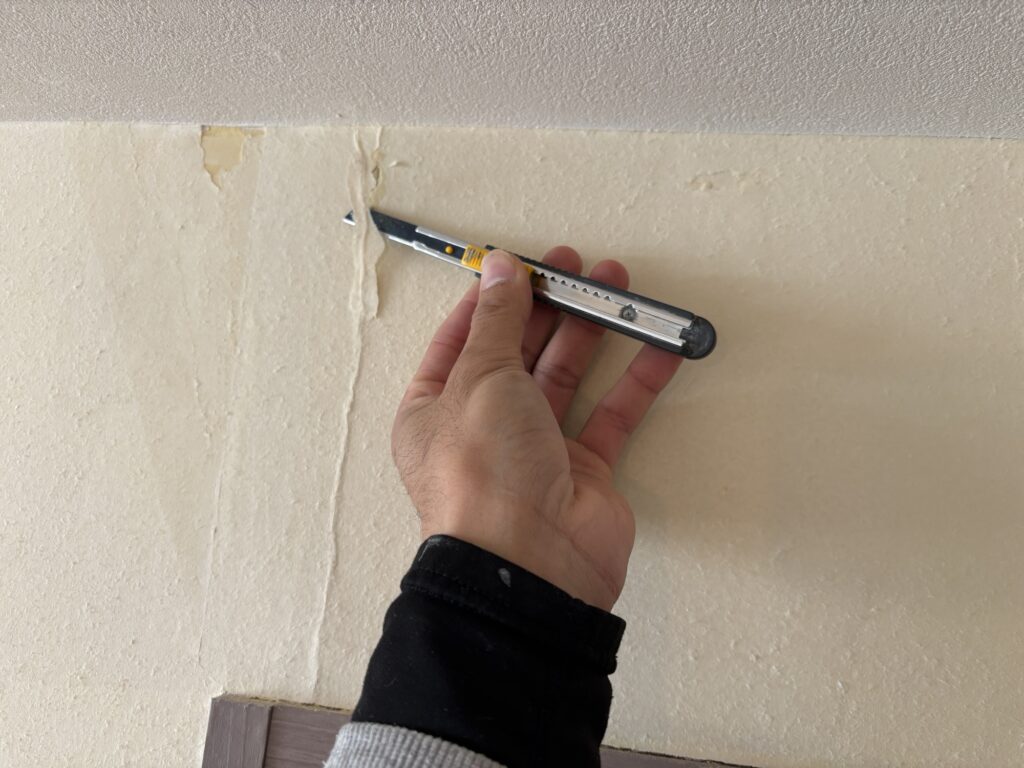
I used a utility knife to remove the damaged material around the crack and prepare the area for filling.
This step is important because the repair compound needs enough space to penetrate the crack properly.
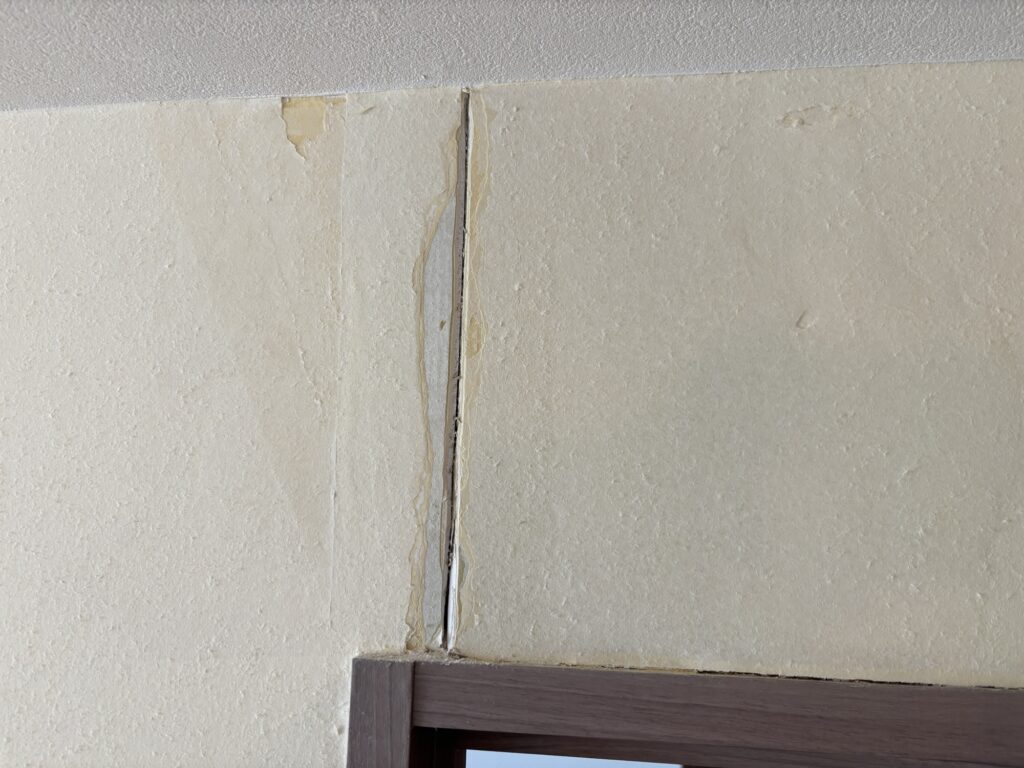
If you simply apply filler over a crack without preparing it, the compound may not reach deep enough into the damaged area.
As a result, the crack could appear again after the new wallpaper is installed.
Proper surface preparation helps reduce the risk of future cracking.
3. Checking for Previous Wall Repairs
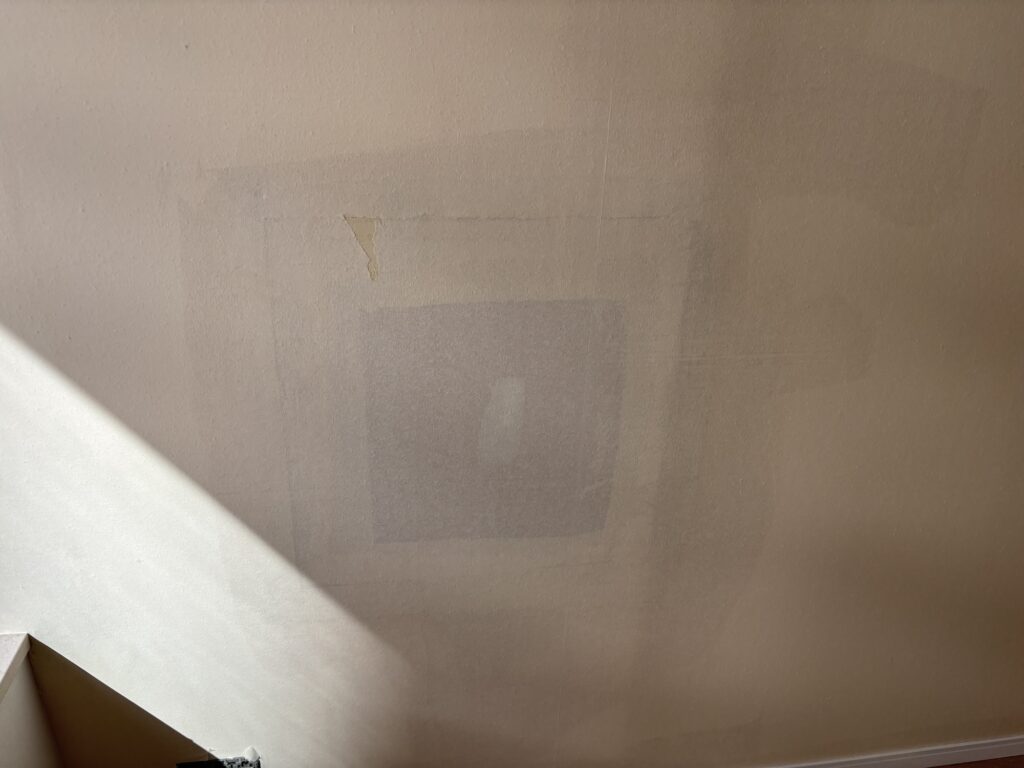
While continuing to remove the old wallpaper, I noticed an area where the outline of a previous drywall repair was visible through the backing paper.
This indicated that someone had previously cut an opening in the drywall and patched it.
Areas that have been repaired in the past should always be inspected carefully.
Depending on the condition of the drywall and the previous repair, the surface may have deteriorated or developed cracks.
If necessary, these areas should be repaired and leveled before installing new wallpaper.
Taking the time to inspect the entire wall helps prevent problems later.
4. Completing the Surface Preparation
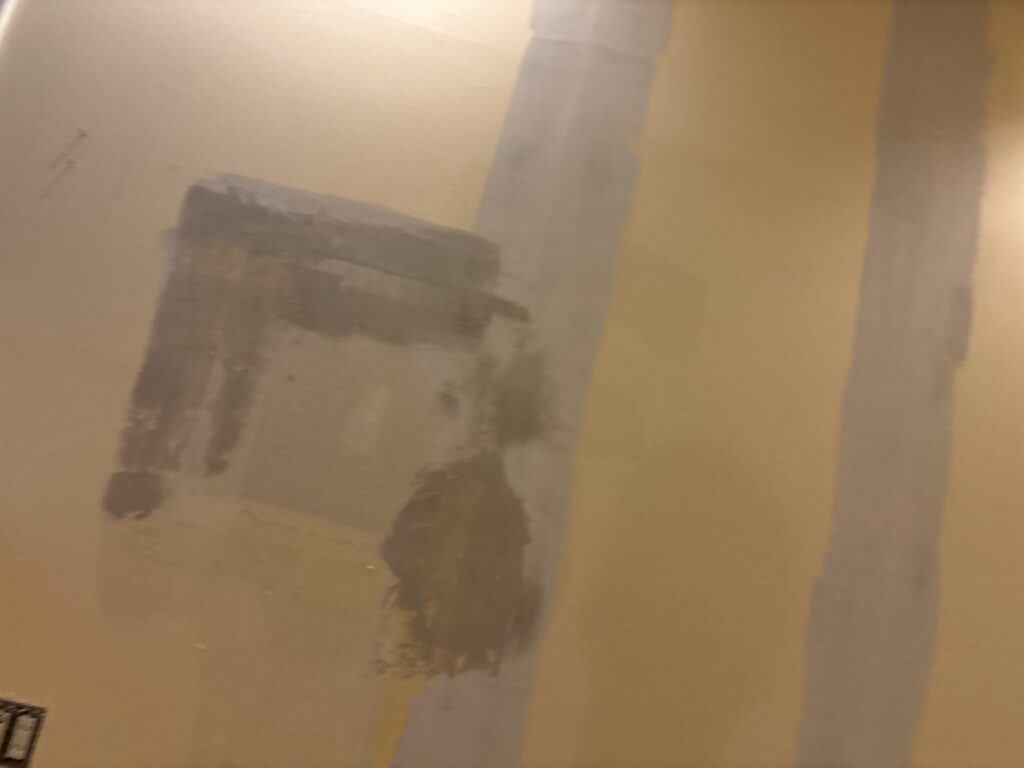
After removing the wallpaper from all rooms, we completed an initial round of joint compound application to prepare the damaged areas.
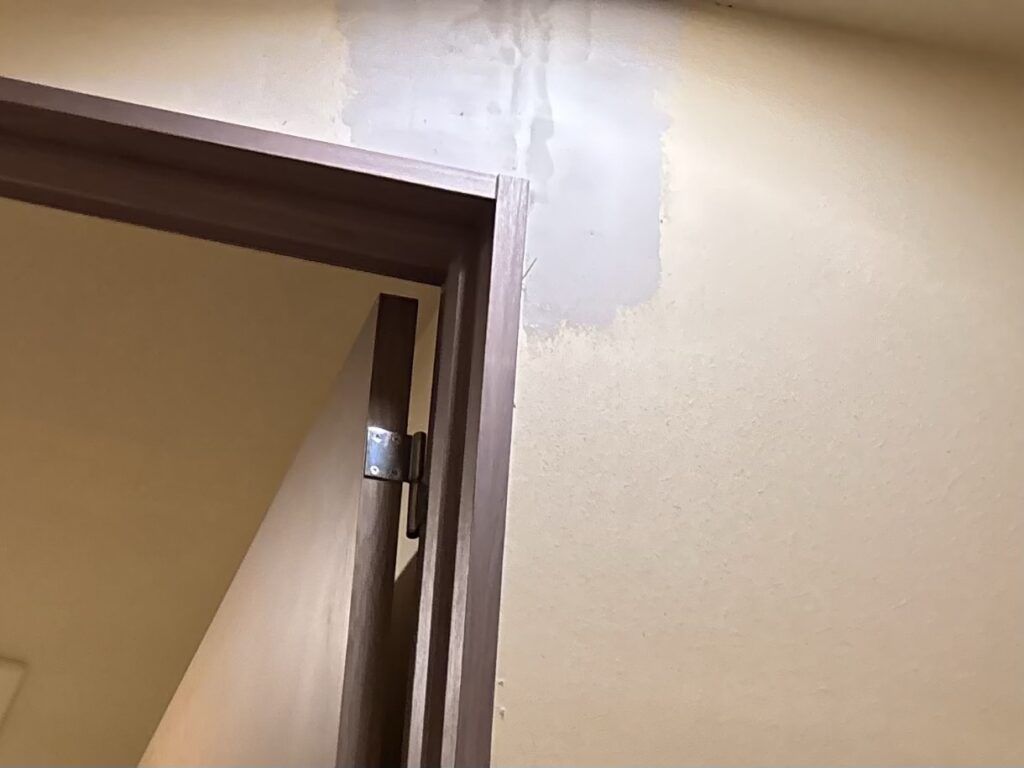
We applied one layer of filler to the areas that needed attention.
The next step will be to continue the preparation work, check the surface, and make any additional repairs required before installing the new wallpaper.
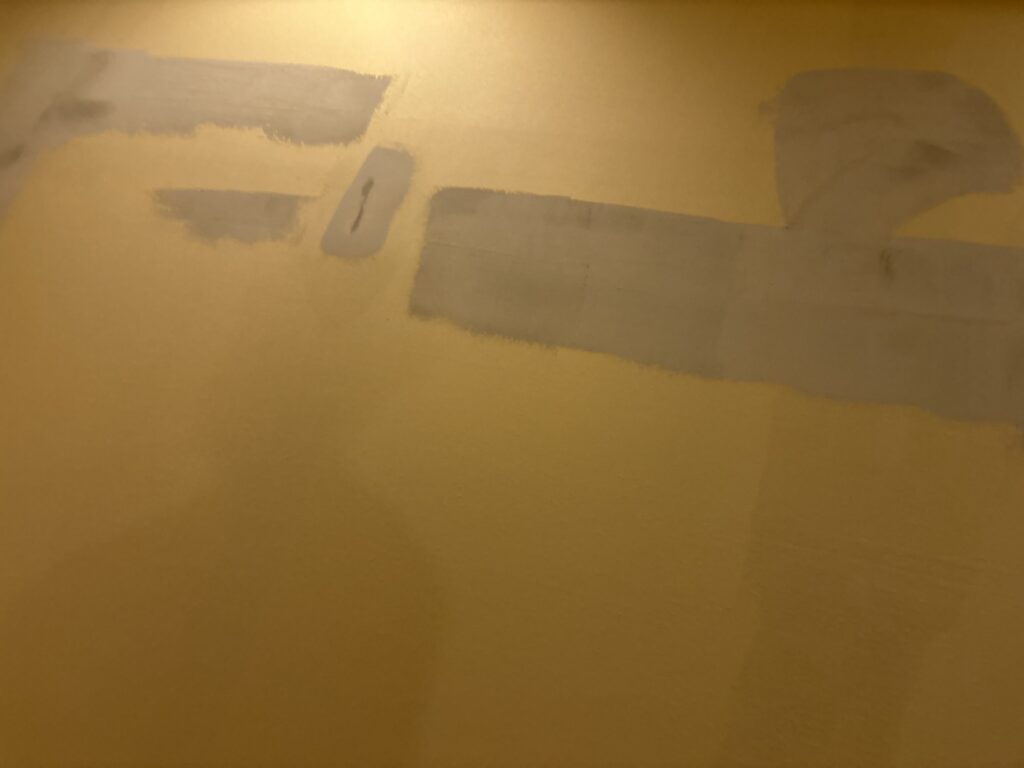
Today’s work took approximately six and a half hours.
We will return to the same apartment tomorrow and continue from where we left off.
Tools Used
The following tools were used during today’s work:
- Utility Knife: Used to locate wallpaper seams, peel off old wallpaper, and remove damaged wall material around cracks.
- Joint Compound / Wall Filler: Used to repair cracks and uneven areas on the wall surface.
- Scraper: Useful for removing loose wallpaper and backing paper.
- Protective Covering: Used to protect the elevator and shared areas of the building during construction work.
Professional Tips
1. Apply Even Tension When Removing Wallpaper
When peeling off a full sheet of wallpaper, try to distribute the pulling force evenly across both sides.
This can help prevent the wallpaper from tearing halfway through.
However, always adjust your technique according to the condition of the wall and the wallpaper.
2. Inspect the Backing Paper Carefully
Do not assume that the wall is in good condition just because the wallpaper looks smooth.
Swollen backing paper, bubbles, and unusual surface irregularities may indicate hidden damage.
Always inspect these areas after removing the wallpaper.
3. Prepare Cracks Before Applying Filler
When you find a crack, remove loose or damaged material around it before applying joint compound.
Creating a suitable space for the filler helps it penetrate the damaged area and improves the repair.
4. Pay Attention to Previous Repairs
Previously patched drywall areas can become weak or uneven over time.
Inspect these areas carefully and repair them if necessary before installing new wallpaper.
5. Protect Common Areas in Apartment Buildings
In luxury apartment buildings, protecting shared spaces is just as important as protecting the customer’s room.
Elevators, hallways, and floors should be properly covered to prevent damage during construction work.
Professional work includes keeping the entire building clean and safe.
Common Mistakes to Avoid
1. Pulling Wallpaper Too Hard on One Side
Pulling from only one side can cause the wallpaper to tear.
Try to apply even tension when removing a full sheet.
2. Ignoring Loose Backing Paper
Leaving swollen or loose backing paper underneath new wallpaper can lead to an uneven finish.
Remove any loose material and check the condition of the wall underneath.
3. Applying Filler Without Preparing the Crack
Simply covering a crack with filler may not provide a reliable repair.
Prepare the damaged area first so the compound can properly fill the crack.
4. Overlooking Previous Drywall Repairs
Old repair areas may have cracks, weak spots, or uneven surfaces.
Always inspect them rather than assuming they are in good condition.
5. Forgetting to Protect Shared Areas
Moving tools and materials through an apartment building can cause scratches and dirt.
Always follow the building’s construction rules and protect common areas before starting work.
Related Project
Ceiling Wallpaper Replacement on the 8th and 6th Floors of a Commercial Building
What I Learned From This Project
Today’s project reminded me how important proper wall preparation is before installing new wallpaper.
Removing the old wallpaper is only one part of the job. We also need to identify hidden cracks, inspect previous repairs, and make sure the wall surface is ready for the next stage.
I also realized that working in a luxury apartment requires more attention to detail outside the actual work area.
Following building procedures and protecting shared spaces are important parts of professional renovation work.
We completed the initial removal and preparation work today, and I look forward to continuing the project tomorrow.
Related Project
Hotel Interior Renovation: Wallpaper, Floor Tile, and Baseboard Installation
FAQ – Frequently Asked Questions
1. How wide is standard wallpaper in Japan?
Most standard residential wallpaper in Japan is approximately 90 cm wide. This is why vertical seams are commonly spaced about 90 cm apart.
2. Why is it important to remove old wallpaper before installing new wallpaper?
Removing old wallpaper allows installers to inspect the underlying wall surface and identify cracks, damage, and uneven areas that need repair.
3. Why does wallpaper sometimes tear during removal?
Wallpaper can tear because of uneven pulling force, strong adhesive, or the condition of the backing paper and wall surface.
4. What should you do if the backing paper is swollen?
Remove the loose backing paper and inspect the surface underneath. If there is damage or a crack, repair it before installing new wallpaper.
5. Why should cracks be prepared before applying joint compound?
Preparing the crack allows the filler to penetrate the damaged area more effectively. Simply covering the surface may result in the crack appearing again.
6. How can you identify previous drywall repairs?
Sometimes the outline of a previous repair can be seen through the wallpaper backing paper. Look for unusual lines, uneven areas, or differences in the surface texture.
7. How long did this project take?
Today’s work took approximately six and a half hours. The work included removing old wallpaper, inspecting the walls, and starting the surface preparation.
8. Why is elevator protection necessary during apartment renovation?
Elevators are shared spaces used by residents and visitors. Protective covering helps prevent scratches, dirt, and accidental damage while transporting tools and materials.
9. Can new wallpaper be installed immediately after removing the old wallpaper?
Not always. The wall surface must be inspected and properly prepared first. Cracks, holes, and uneven areas may need to be repaired before installation.
10. What is the most important part of wallpaper replacement?
Proper surface preparation is one of the most important parts of wallpaper replacement. Even high-quality wallpaper may not look good if the underlying wall surface is uneven or damaged.
Conclusion
Today, we worked on wallpaper removal and wall preparation in a luxury apartment in Tokyo.
The apartment had approximately 70 square meters of floor space, and we spent six and a half hours removing the existing wallpaper, inspecting the walls, and beginning the repair work.
Although removing wallpaper may seem like a simple task, it is important to pay attention to hidden cracks, loose backing paper, and previous drywall repairs.
Good preparation is essential for achieving a clean and professional wallpaper finish.
We will return to the same apartment tomorrow and continue preparing the walls for the new wallpaper installation.
Thank you for reading!
I will continue sharing real Japanese wallpaper installation and renovation projects here on The Japanese Wallpaper Craftsman.


Comments