

Project Type: Residential Wallpaper Replacement
Location: 4th-Floor Apartment, Japan
Work Area: Living Room Ceiling, Walls, and Storage Ceiling
Reason for Work: Water Damage from a Leaking Pipe
Materials: White Ceiling Wallpaper and Textured White Wall Wallpaper
Crew: 2 Workers, 1 Site Supervisor, and 1 General Contractor Representative
Project Duration: Approximately 3 Hours
Introduction
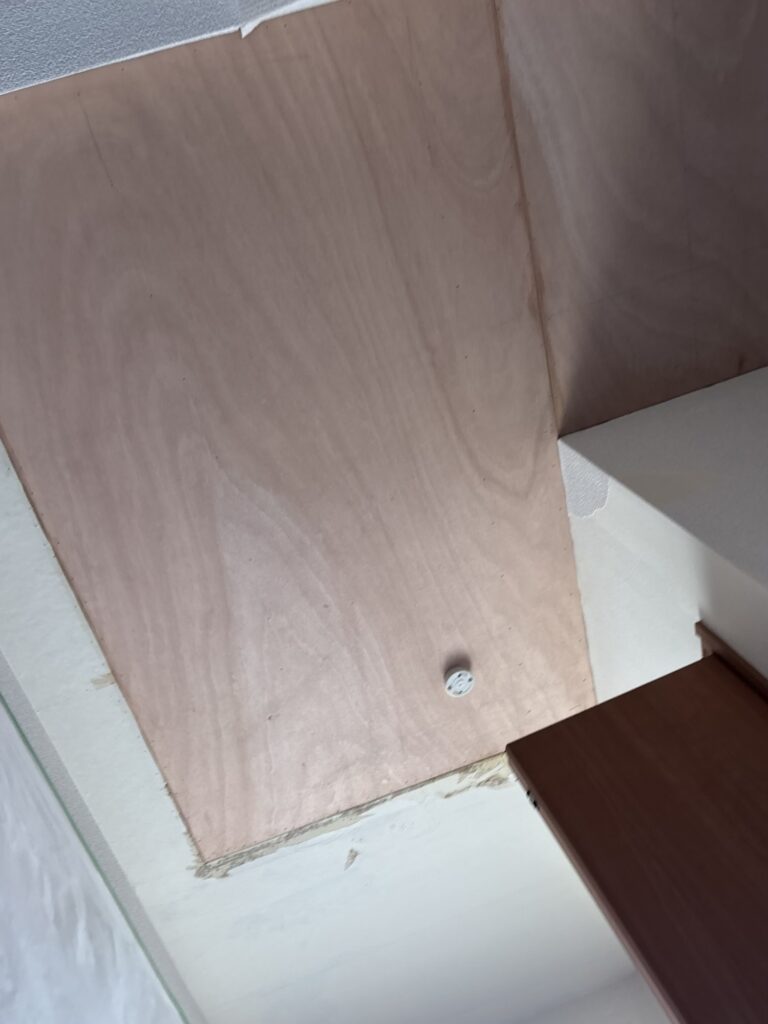
Today, I worked on a wallpaper replacement project in a fourth-floor apartment in Japan. The job involved replacing the wallpaper on the living room ceiling and walls after water leaked from a pipe running above the ceiling.
The water damage had affected some of the underlying wall and ceiling materials. As a result, sections of the original substrate had deteriorated and had already been replaced with new plywood.
The project was carried out by two workers, with one site supervisor and one representative from the general contractor also present.
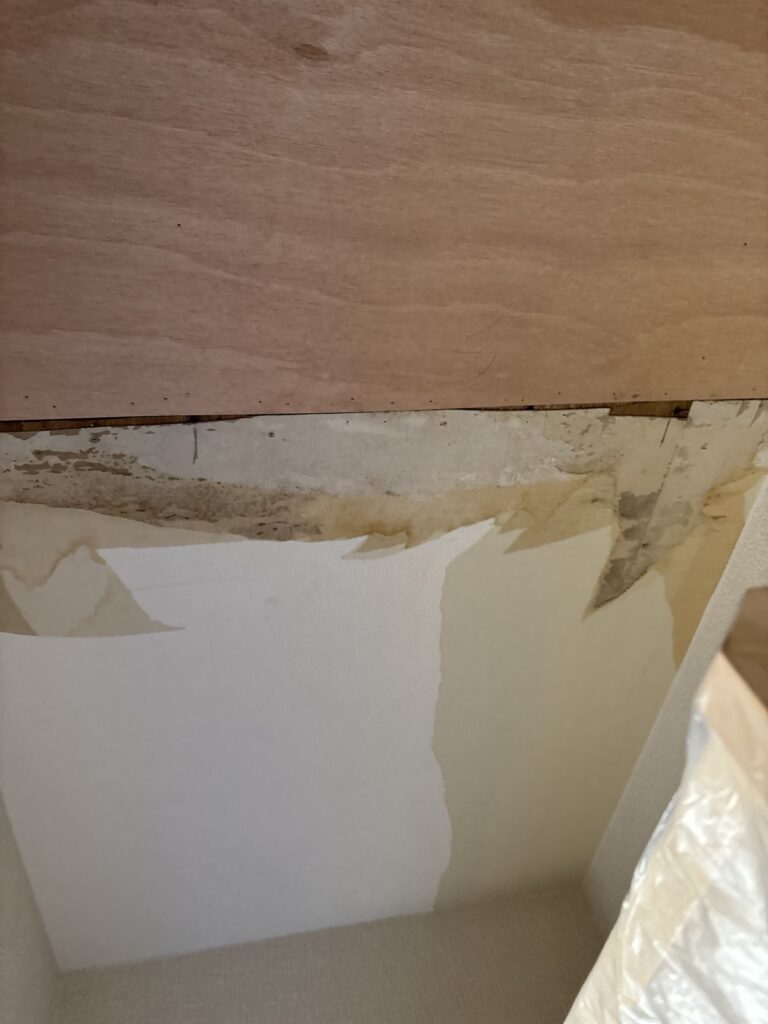
Because the apartment was still occupied, we needed to protect the resident’s furniture and flooring before starting work. We also had to pay special attention to the water-damaged areas and the condition of the existing wallpaper backing.
Although the project took only about three hours, careful preparation and attention to detail were essential to achieving a clean finish.
Related Project
Wallpaper Installation and Herringbone Cushion Flooring in a 2LDK Apartment
Job Site Report: Step-by-Step Process
1. Protecting the Floor and Furniture
The first step was to cover the floor, furniture, and other items with protective sheets.
Since the resident was still living in the apartment, protecting their belongings was a top priority. Even a small scratch or stain could cause unnecessary trouble.
Taking time to prepare the work area properly helped us work safely and efficiently.
2. Removing the Old Wallpaper
Next, we removed the existing wallpaper from the ceiling and walls.
The water-damaged areas were easy to identify because stains were visible on the surface. In these areas, there was a high chance that the backing paper underneath the old wallpaper had become loose due to moisture.
We paid particular attention to these spots and carefully removed any loose backing paper we found.
If loose backing paper is left in place, it can cause problems when new wallpaper is installed. The new material may not sit flat, and the loose areas can become visible through the finished surface.
This problem is especially noticeable when using thin wallpaper. Thicker, heavily textured wallpaper can hide minor imperfections more effectively, but removing loose backing paper beforehand is still important for a better finish.
3. Applying the Base Filler
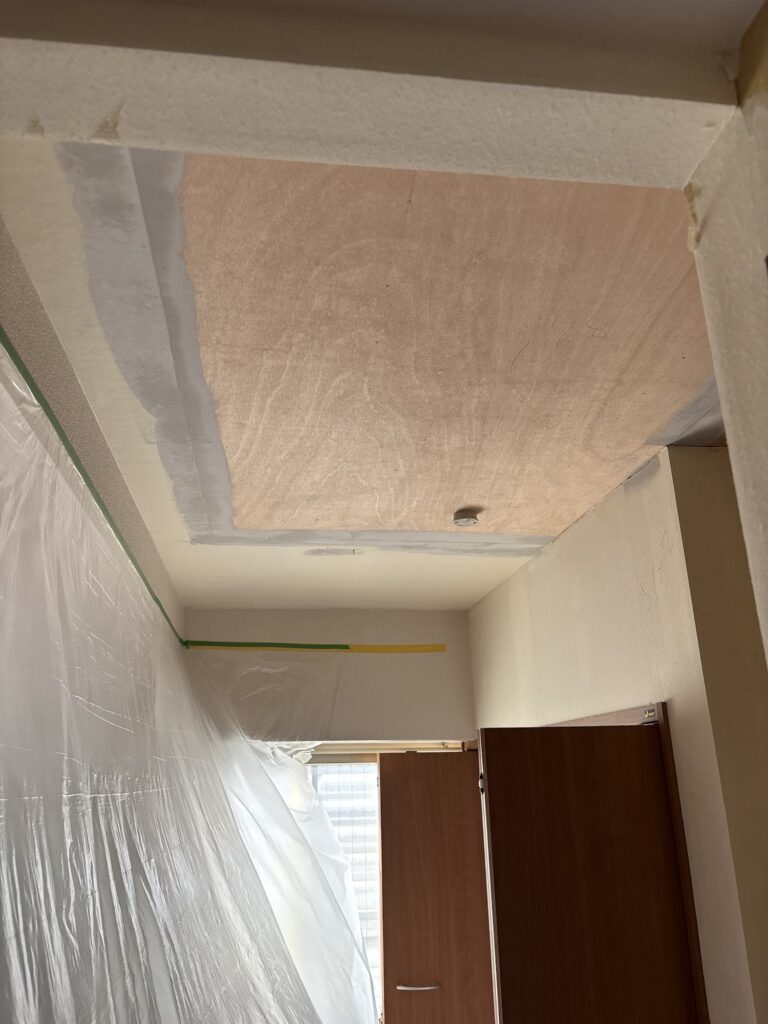
After removing all the old wallpaper, we applied base filler to the substrate twice.
The purpose of this step was to fill gaps and level the surface before applying the final layer of filler.
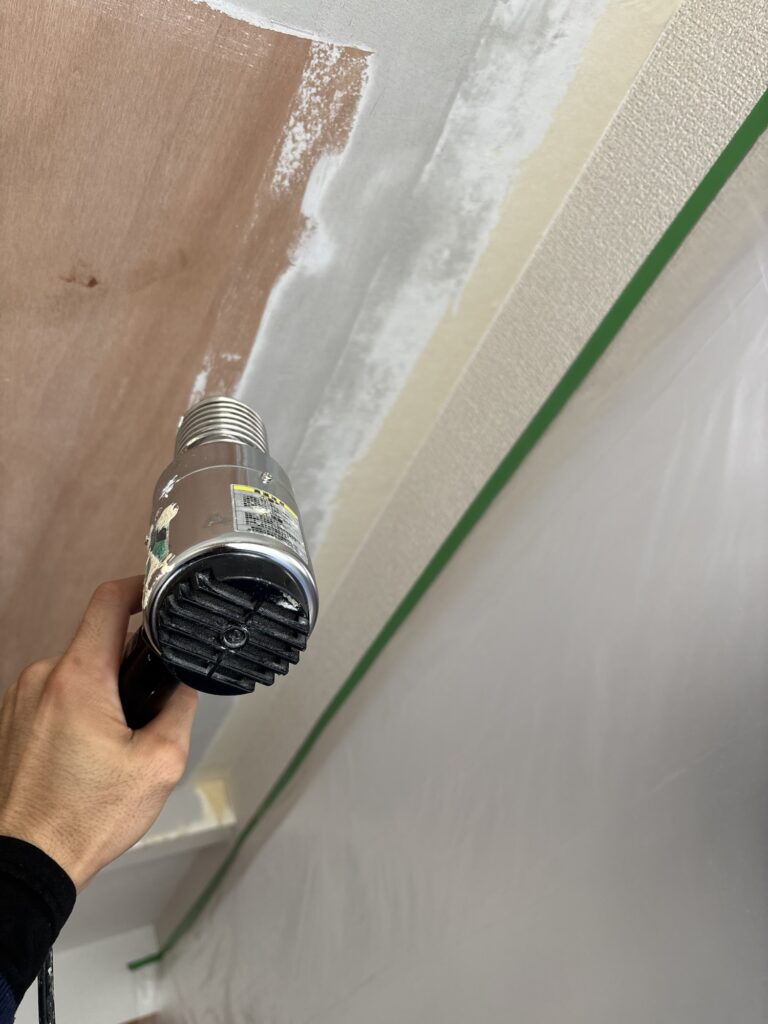
This time, the grooves along the wallpaper joints were not particularly deep. A short application of heat from a heat gun was enough to dry the filler quickly.
We then applied the finishing filler to prepare the surface for the new wallpaper.
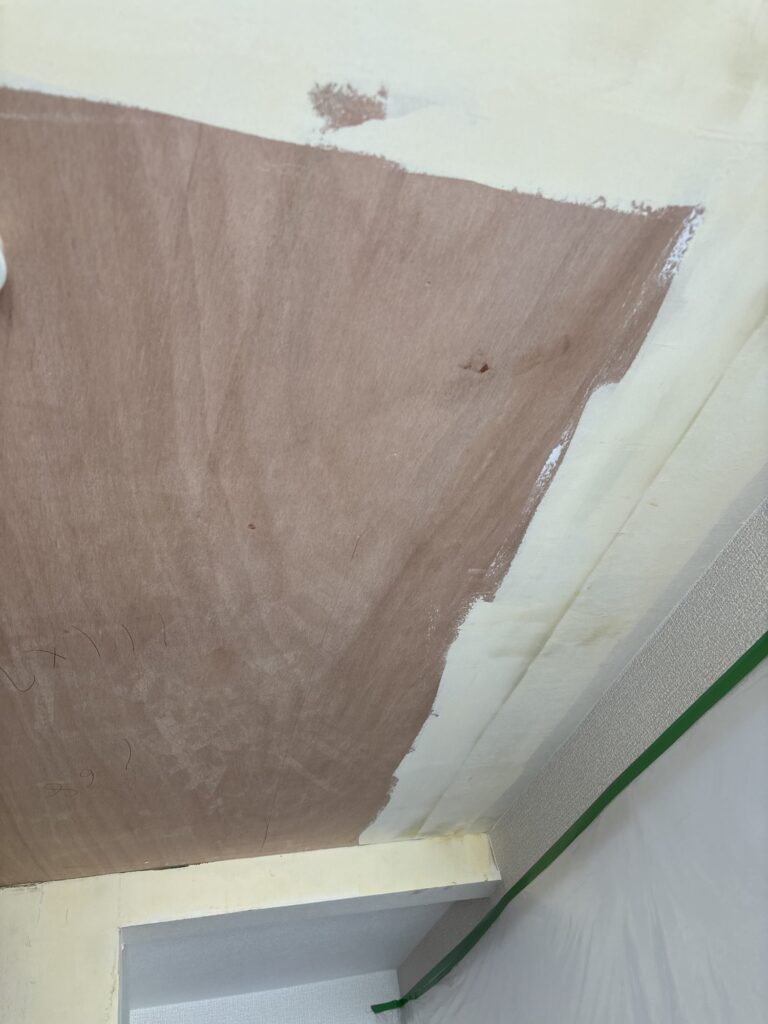
Proper surface preparation is essential because even small imperfections can become visible after wallpaper is installed, especially when working with thin materials.
4. Preparing the New Wallpaper
Once the substrate was ready, we prepared the new wallpaper using a wallpaper pasting machine.
For the ceiling, we used relatively thin white wallpaper. We prepared three strips measuring approximately 130 cm each, along with one 200 cm strip for the storage ceiling.
For the walls, we used thicker, off-white wallpaper with a pronounced embossed texture. The longest pieces measured approximately 230 cm, while the remaining pieces were cut to fit smaller sections.
Using a wallpaper pasting machine made it easier to apply adhesive evenly and prepare the materials efficiently.
5. Installing the Ceiling Wallpaper
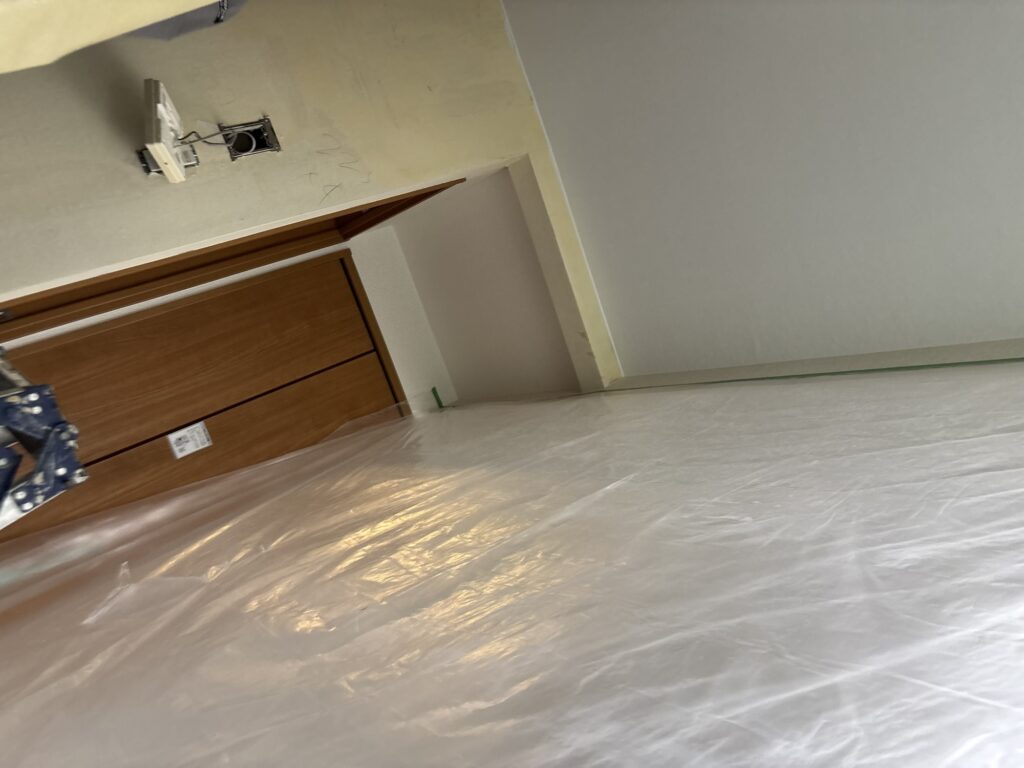
We installed the ceiling wallpaper first.
Because the ceiling strips had been prepared with shorter dimensions, I was able to install them by myself.
After positioning the wallpaper, I used a seam roller to bring the edges of the adjacent strips together.
However, the seams were slightly noticeable. Since the ceiling material was relatively thin, I knew that the joints would require extra attention.
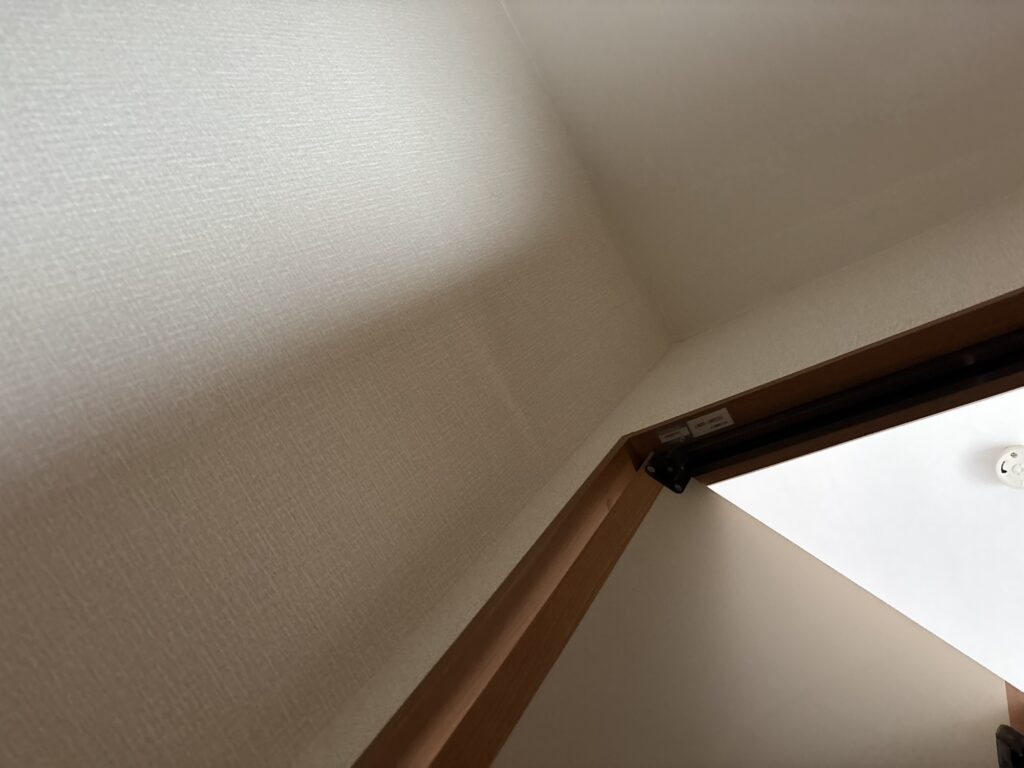
I checked and adjusted the seams several times throughout the job:
- Immediately after installation.
- Approximately 10 minutes later.
- Again after finishing the wallpaper installation.
- Once more before leaving the site, after cleaning.
This meant checking the ceiling seams four times in total.
Repeated inspections allowed me to monitor the joints and make further adjustments where necessary.
6. Installing the Wall Wallpaper
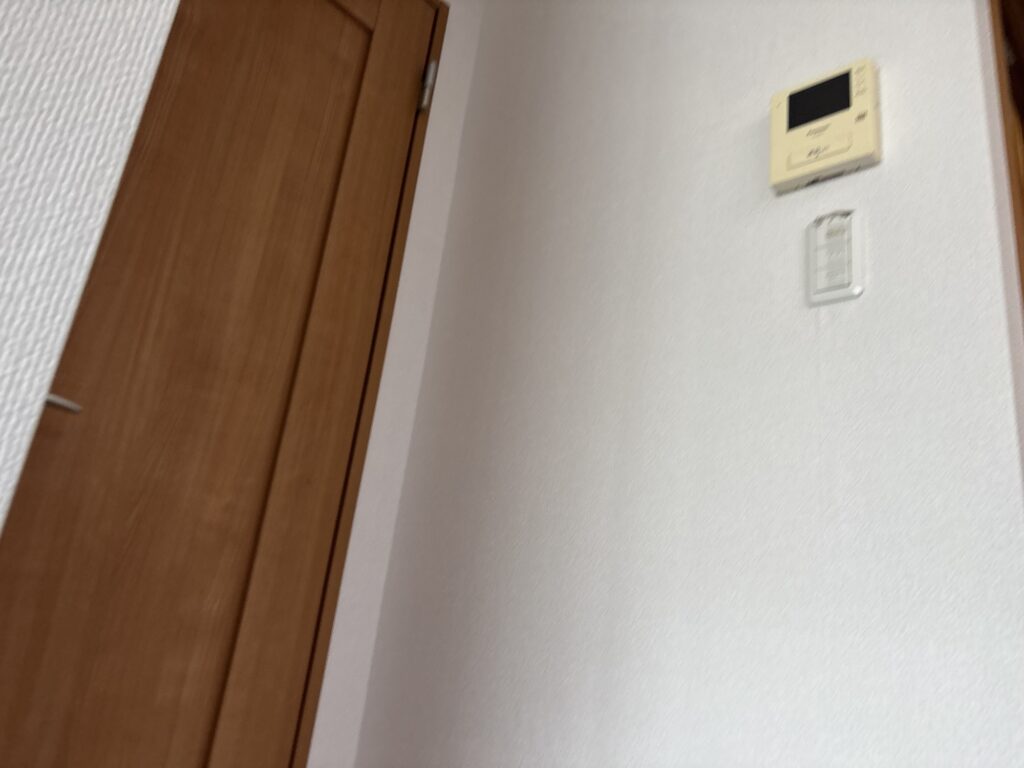
The wall wallpaper was thicker and had a more pronounced embossed texture than the ceiling material.
This made it easier to work with because the texture helped conceal minor surface imperfections.
Compared with the ceiling, I only needed to check the wall seams two or three times.
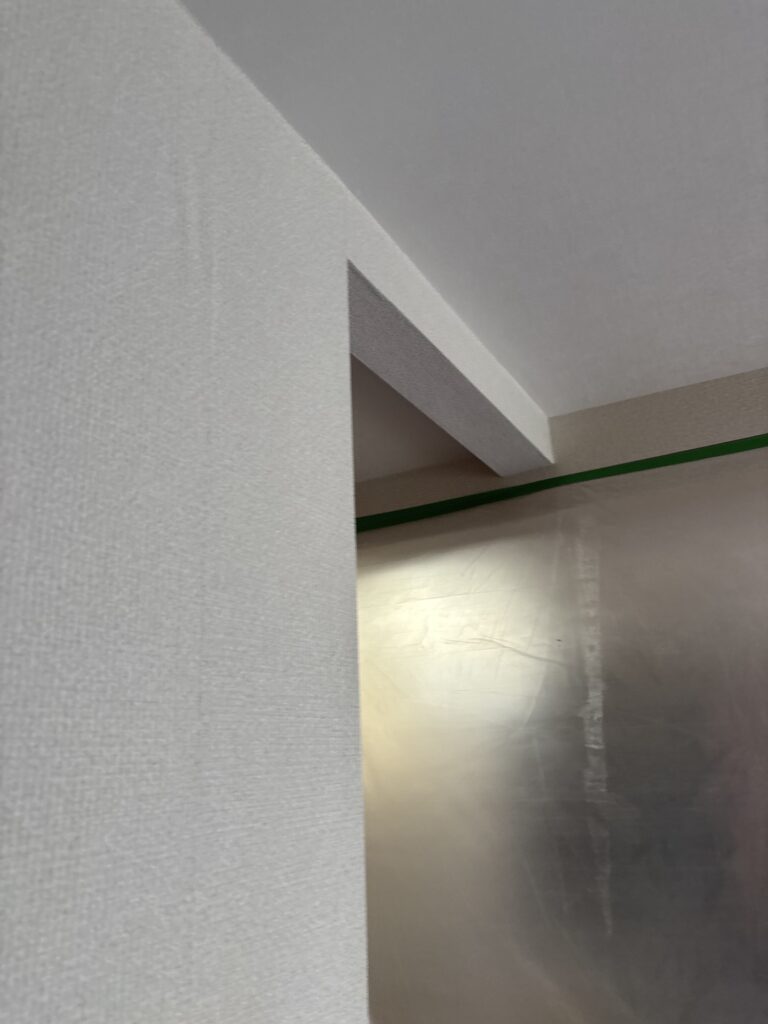
This project reminded me that different wallpaper materials require different levels of attention. Thin, smooth wallpaper tends to reveal imperfections more easily, while thicker textured wallpaper can be more forgiving.
Understanding these differences is an important part of developing experience as a wallpaper installer.
7. Final Inspection and Cleanup
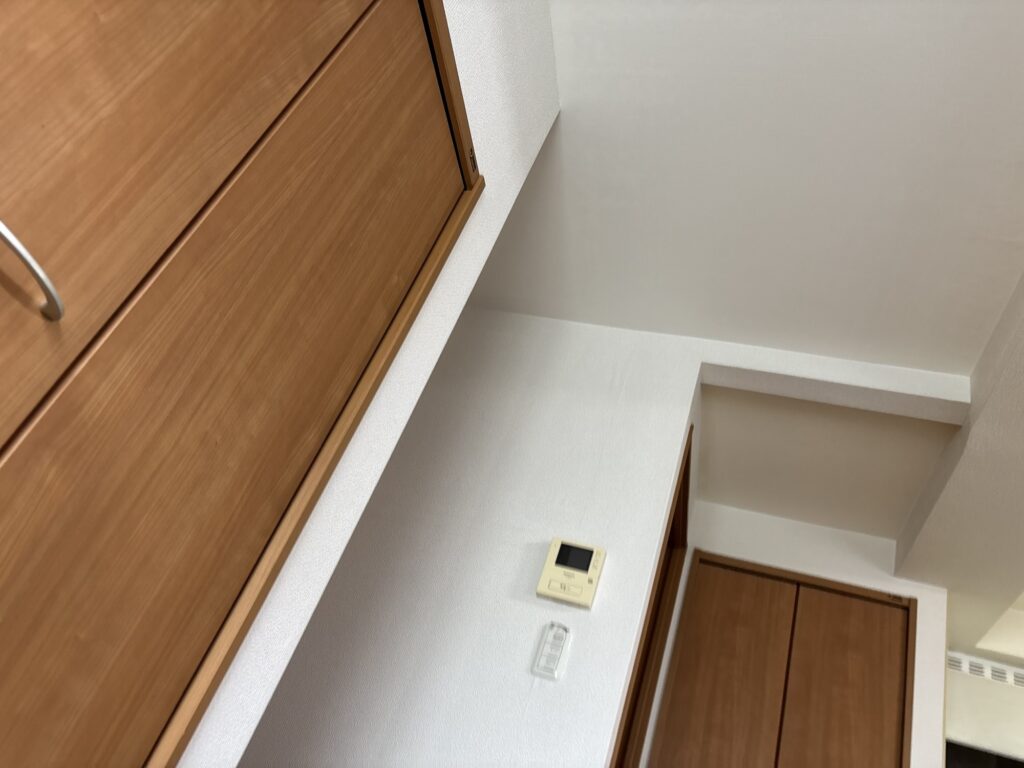
After completing the ceiling and wall installation, we cleaned the work area and checked the finished surfaces.
We paid particular attention to the ceiling joints because they had required more adjustments than the wall joints.
Once the inspection and cleanup were complete, the work was finished.
The entire project took approximately three hours.
Related Project
Wallpaper Replacement After Water Damage in a First-Floor Apartment in Japan
Tools Used
The following tools and materials were used for this project:
- Protective sheets for the floor and furniture
- Wallpaper removal tools
- Putty knives for applying filler
- Heat gun for drying the filler
- Wallpaper pasting machine
- Seam roller for adjusting wallpaper joints
- Measuring tape
- Cutting tools
- Base filler and finishing filler
- White ceiling wallpaper
- Textured off-white wall wallpaper
- Wallpaper adhesive
The exact tools required may vary depending on the condition of the substrate, the wallpaper material, and the size of the work area.
Professional Tips for a Better Wallpaper Finish
1. Pay Special Attention to Water-Damaged Areas
Water stains can indicate that the backing paper underneath the old wallpaper has loosened.
When removing wallpaper after a leak, inspect the affected areas carefully. Remove loose backing paper before installing new material.
Also, make sure the source of the leak has been repaired and that the substrate is sufficiently dry before proceeding.
2. Choose Your Preparation Method Based on the Wallpaper
Thin wallpaper is less forgiving than thick, textured wallpaper.
Even minor ridges, loose backing paper, or uneven filler can become visible through thin materials. Taking extra time to prepare the substrate can make a significant difference in the final result.
3. Check Ceiling Seams More Frequently
Ceiling joints can be particularly noticeable depending on the material, lighting, and viewing angle.
Do not assume that a seam is perfect simply because it looks good immediately after installation. Check it again as the wallpaper settles and the adhesive begins to take effect.
4. Avoid Excessive Pressure When Rolling Seams
A seam roller helps bring adjoining wallpaper edges together, but excessive pressure can damage the surface or squeeze too much adhesive out of the joint.
Use appropriate pressure for the material and follow the manufacturer’s recommendations.
5. Match the Work Method to the Material
Thicker, embossed wallpaper can conceal minor imperfections more effectively than thin wallpaper.
However, this does not mean surface preparation can be skipped. Good preparation and careful installation are important regardless of the material.
Common Mistakes to Avoid
1. Leaving Loose Backing Paper Behind
One common mistake is installing new wallpaper over loose backing paper.
The loose layer can create bumps or visible imperfections in the finished surface. Remove unstable material and prepare the substrate properly before continuing.
2. Ignoring Water Damage
Covering water stains without investigating the cause can lead to further problems.
The source of the leak should be addressed, and the substrate should be checked for moisture and deterioration before new wallpaper is installed.
3. Rushing the Surface Preparation
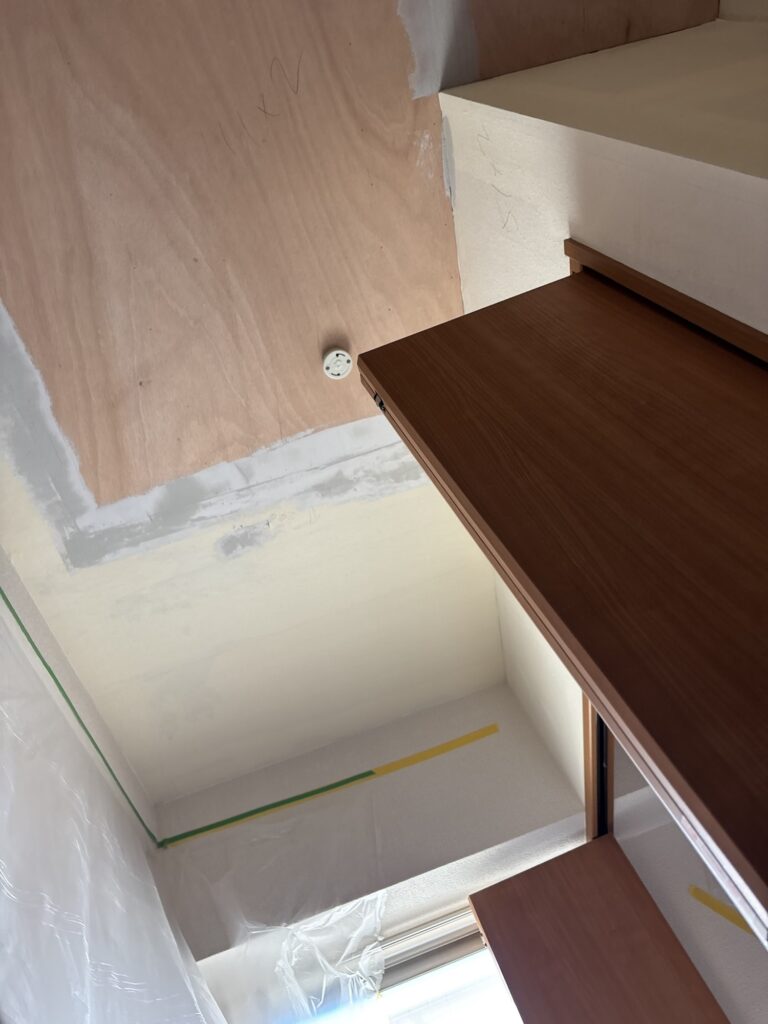
Skipping filler work or failing to level the surface can affect the appearance of the finished wallpaper.
Even when the installation itself is done well, defects underneath the material may still be visible.
4. Checking Seams Only Once
Some joints may look acceptable immediately after installation but become more noticeable later.
Inspect the seams again during the job and before leaving the site. Make adjustments only while they can be performed safely and without damaging the wallpaper.
5. Using the Same Technique for Every Wallpaper Type
Different materials behave differently during installation.
Thin wallpaper may require more careful seam alignment and more frequent inspections, while embossed wallpaper may hide small imperfections more effectively.
Adapting your approach to the material helps improve the final result.
What I Learned From This Project
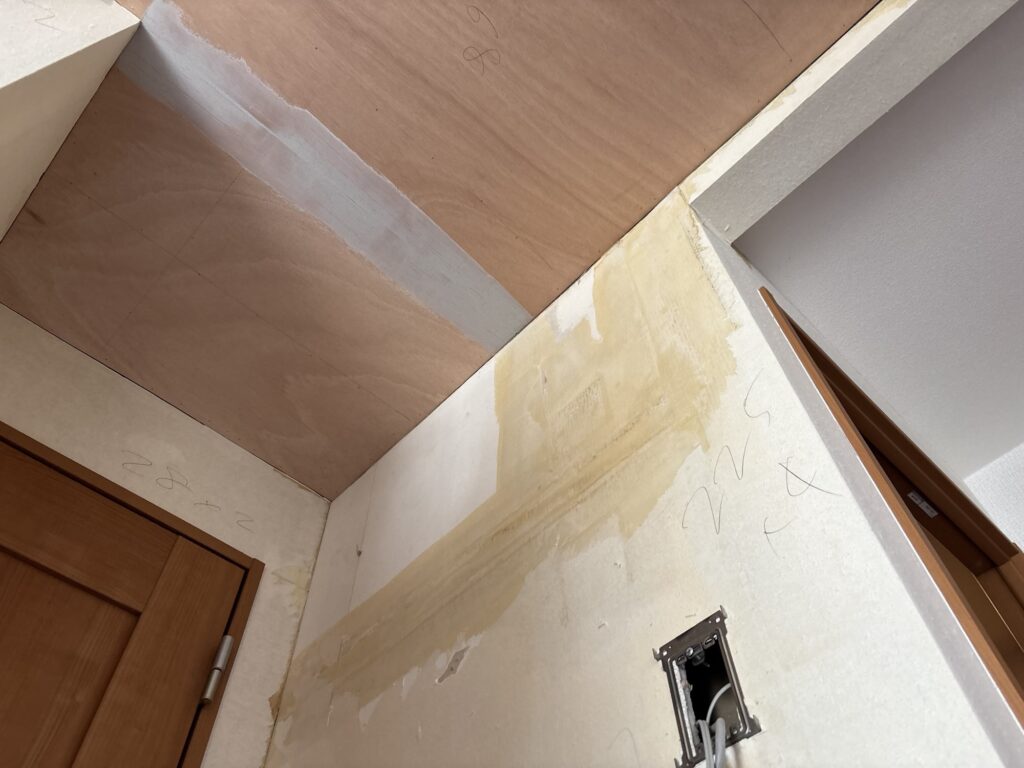
This project reinforced the importance of paying attention to the type of wallpaper being installed.
The ceiling material was relatively thin, so the seams were more noticeable and required repeated inspection. In contrast, the thicker, embossed wall wallpaper was easier to work with and needed fewer adjustments.
I also had to pay close attention to the water-damaged areas during wallpaper removal. Loose backing paper can become a problem if it is left behind, so identifying and removing it before installation is an important part of the preparation process.
Even though the entire job took only about three hours, the quality of the finished work depended on careful preparation, choosing the right techniques, and checking the seams several times.
As I gain more experience, I continue to learn that good wallpaper installation is not just about putting new material on a wall. It is also about understanding the condition of the substrate and knowing how each material behaves.
Frequently Asked Questions
1. Why did this apartment need wallpaper replacement?
A pipe running above the living room ceiling leaked water, causing damage to the ceiling and walls. The wallpaper needed to be replaced, and some deteriorated substrate had already been replaced with new plywood.
2. Can new wallpaper be installed directly over water-damaged wallpaper?
No. The damaged wallpaper should be removed, and the underlying surface should be inspected. Loose backing paper must be removed, and the source of the leak must be repaired. The substrate should also be sufficiently dry before new wallpaper is installed.
3. Why is loose backing paper a problem?
Loose backing paper can create bumps, uneven areas, and visible defects beneath new wallpaper. Thin wallpaper is particularly likely to reveal these imperfections.
4. Why is surface preparation important before wallpaper installation?
Surface preparation helps create a smooth, stable base for the new material. Filling gaps and leveling uneven areas can improve the appearance and durability of the finished installation.
5. Why was a heat gun used during this project?
A heat gun was used to help dry the filler in areas where the grooves were not particularly deep. Heat should be applied carefully and only when appropriate for the filler and substrate, following the manufacturer’s instructions.
6. Why was the ceiling wallpaper more difficult to finish?
The ceiling material was relatively thin, making the joints more noticeable. As a result, the seams required more frequent inspection and adjustment than the thicker, embossed wall wallpaper.
7. How many times should wallpaper seams be checked?
There is no fixed number for every project. In this case, the ceiling seams were checked four times, while the wall seams were checked two or three times. The appropriate frequency depends on the material, installation conditions, and appearance of the joints.
8. What is the advantage of textured wallpaper?
Textured wallpaper can help conceal minor surface imperfections because its embossed pattern breaks up the appearance of the surface. However, significant unevenness and poor preparation can still affect the final result.
9. How long did this wallpaper replacement project take?
The entire project took approximately three hours, including wallpaper removal, surface preparation, installation, inspection, and cleanup.
10. Can two people complete a similar wallpaper replacement project?
Two experienced workers may be able to complete a similar project efficiently, depending on the size of the area, the condition of the substrate, the complexity of the room, and the wallpaper material. The actual time required will vary from job to job.
Conclusion
Today’s project involved replacing the ceiling and wall wallpaper in a fourth-floor apartment after water damage from a leaking pipe.
The most important parts of the job were protecting the resident’s belongings, removing loose backing paper, preparing the substrate with filler, and paying close attention to the ceiling seams.
The thin ceiling wallpaper required more frequent inspections, while the thicker, embossed wall wallpaper was easier to finish.
Although the work took only about three hours, careful preparation and repeated quality checks were essential to achieving a satisfactory result.
Every job provides another opportunity to improve my skills and understand how different materials behave. By sharing these real-world projects, I hope to give readers a better understanding of wallpaper installation and the work involved in professional interior renovation in Japan.


Comments