
Project Data
- Project Type: Apartment Renovation – Flooring Installation and Interior Repair
- Location: Japan
- Building Type: Condominium Apartment
- Floor: 4th Floor
- Apartment Size: Approximately 70 m² (2LDK)
- Work Areas: Kitchen and Bedrooms
- Kitchen Area: Approximately 7 m²
- Bedroom Area: Approximately 12 m²
- Crew: 3 Workers
- Total Working Time: Approximately 7 hours
- Work Performed: Wood Flooring Installation, Wallpaper Removal, Drywall Installation, Tile Removal, Demolition and Cleanup
Introduction
Today, we continued work at the apartment where we previously removed the existing flooring.
The apartment is located on the fourth floor of a condominium and is approximately 70 m² with a 2LDK layout.
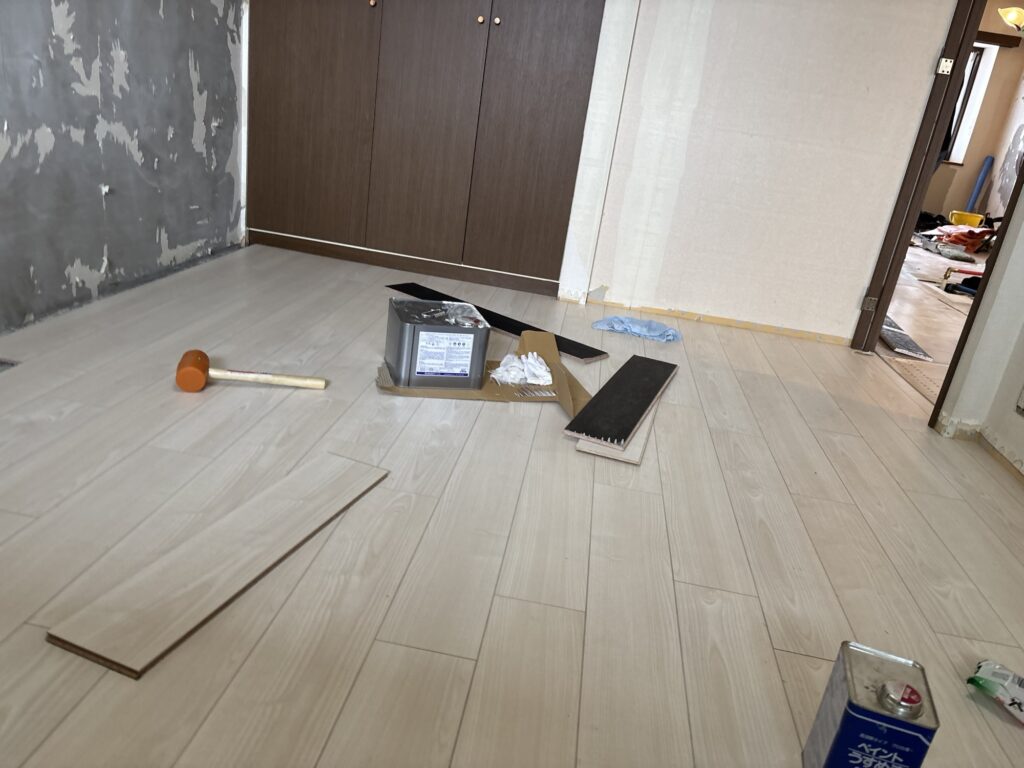
The carpenters had already installed the new flooring in the living room and hallway, so our job was to install the remaining flooring in the kitchen and bedroom areas.
They had also left some of the easier sections already completed, while leaving the more complicated areas around the hallway and door frames for us because they required more detailed cutting and fitting.
There were three workers on site.
The kitchen area was approximately 7 m², while one of the bedrooms was approximately 12 m².
Related Project
Work Flow – Site Report
1. Preparing the Floor
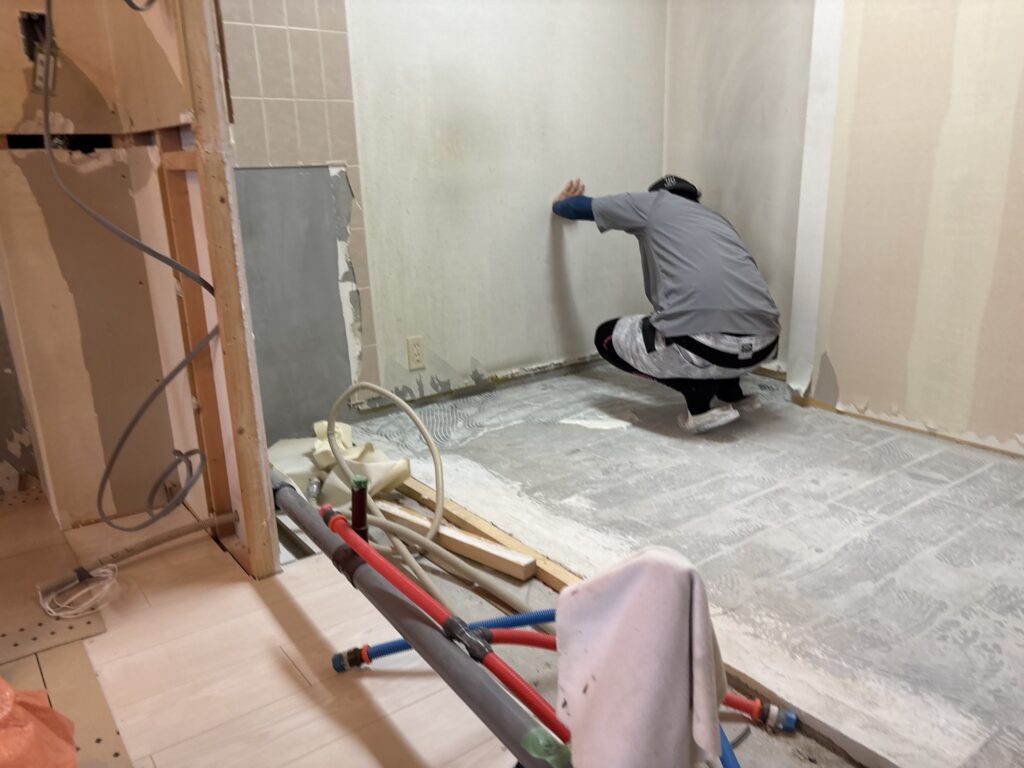
Before applying the flooring adhesive, we thoroughly swept the floor with a broom.
This is an important step because dust and debris can reduce the adhesion of the flooring.
Even small pieces of debris left underneath the flooring can affect the final result, so the substrate needs to be cleaned carefully before applying the adhesive.
2. Understanding the Tongue-and-Groove System
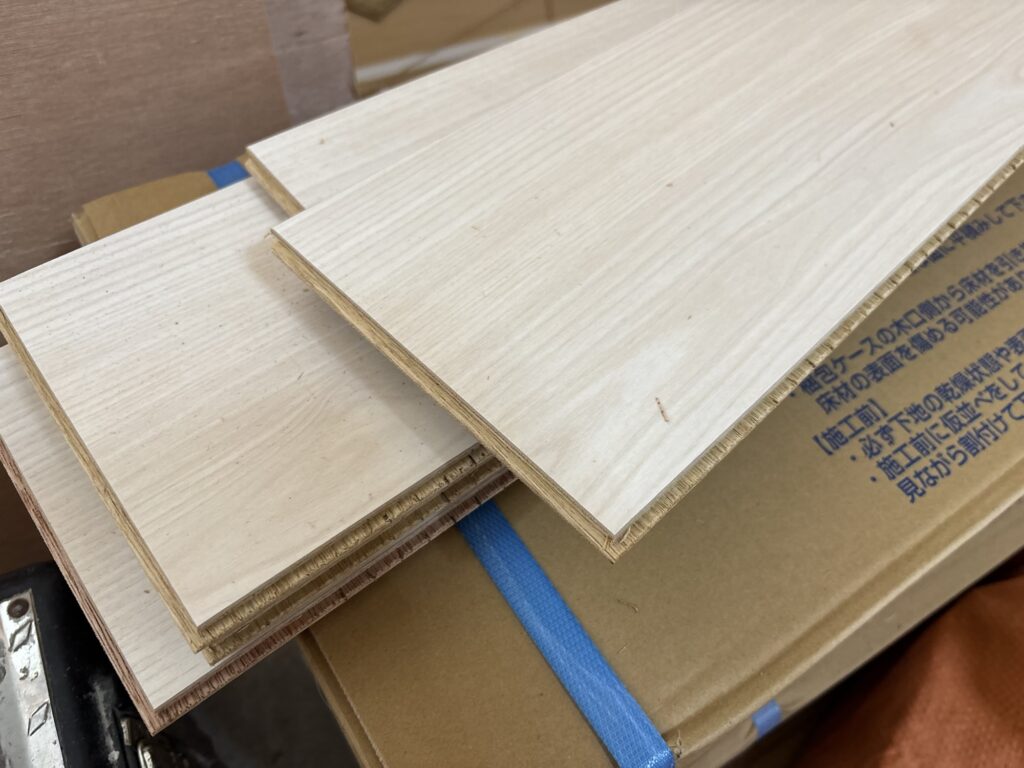
The flooring we used had a specific installation direction because it had a tongue-and-groove connection system.
One side has a slightly protruding tongue, while the opposite side has a recessed groove.
When installing the boards, we first connected the shorter end by fitting the tongue and groove together. We then connected the longer side until the boards clicked securely into place.
For someone who is not used to this type of flooring, getting the boards to fit correctly can take some time.
I normally install floor tiles, which do not have a tongue-and-groove system, so during this project I occasionally had to stop and check which side was the tongue and which side was the groove.
3. Cutting the Flooring
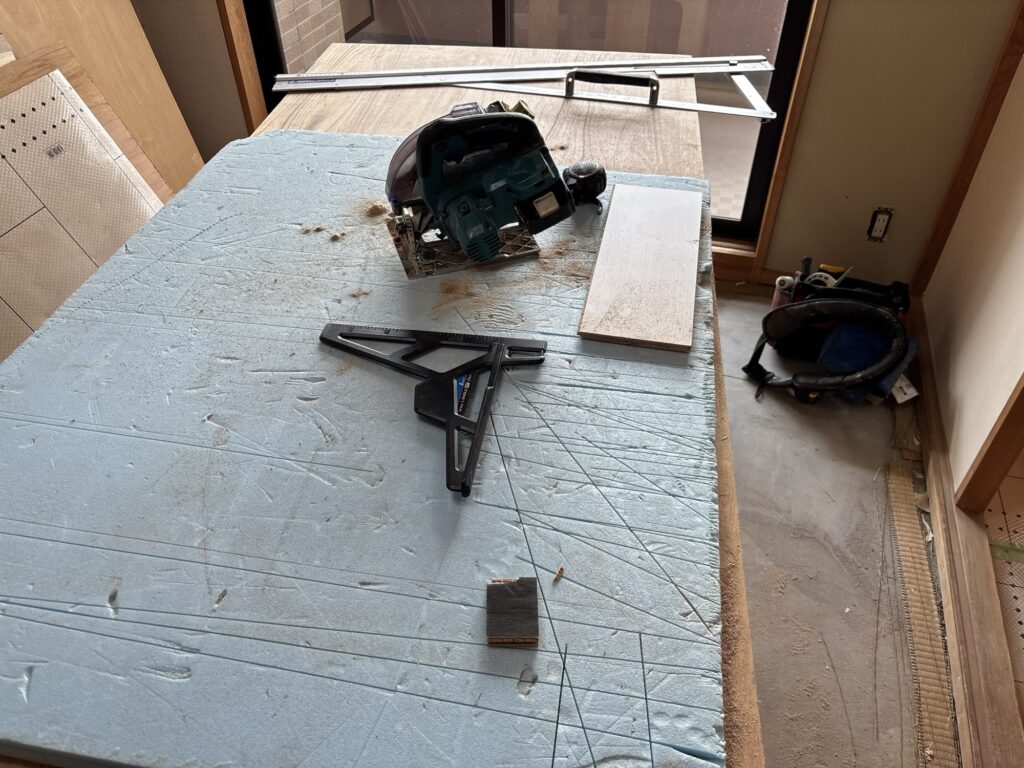
We used a power circular saw to cut the flooring boards.
One useful tip is to cut the boards approximately 1 mm shorter than the exact measured dimension.
If the board is cut to exactly the measured size, it can become too tight and may not fit properly.
Trying to force a board into a space can cause the tongue-and-groove connection to come apart. It can also create excessive pressure between the boards, which may eventually cause the flooring to lift.
4. Managing the Adhesive Open Time
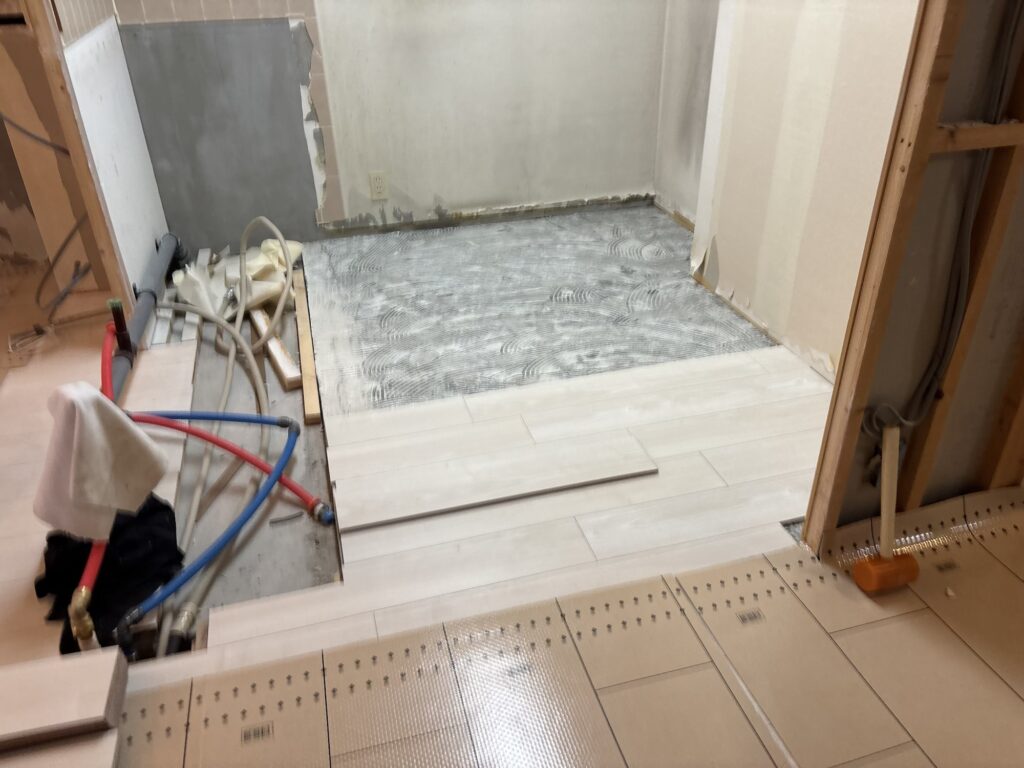
The adhesive also needs to be handled carefully.
If you leave the adhesive exposed for too long before installing the flooring, it can become more tacky and make it difficult to move the boards into the correct position while connecting the tongue and groove.
When working alone, I felt that applying adhesive to approximately two rows at a time and then installing those rows was a safer and easier method.
5. Closing Small Gaps
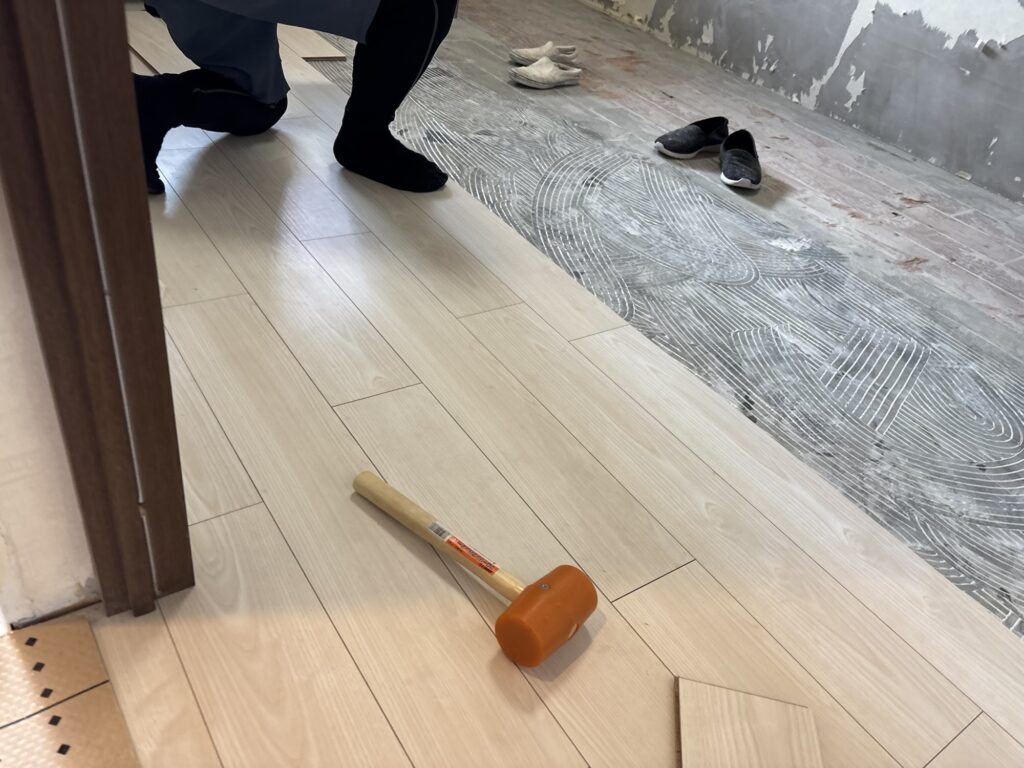
If a small gap remained between the flooring boards, we used a rubber mallet to gently tap the boards together.
The adhesive used for this type of flooring is quite strong.
If adhesive gets on your hands, simply washing with water may not remove it completely. Wiping it with an appropriate solvent or paint thinner can make it easier to remove.
Always follow the manufacturer’s safety instructions when handling solvents and use appropriate ventilation and protective equipment.
6. Securing the Flooring with Wedges
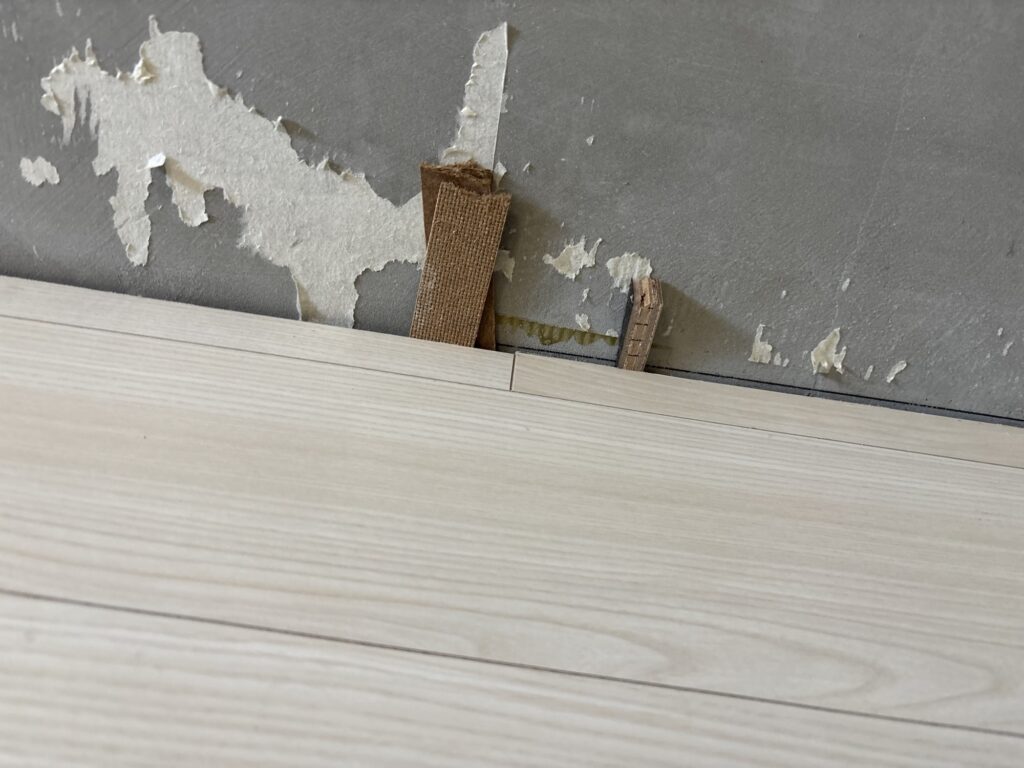
After all the flooring had been installed, we placed wedges along the edges to hold the flooring firmly in position.
Flooring can move slightly before the adhesive has fully cured, which can create unwanted gaps.
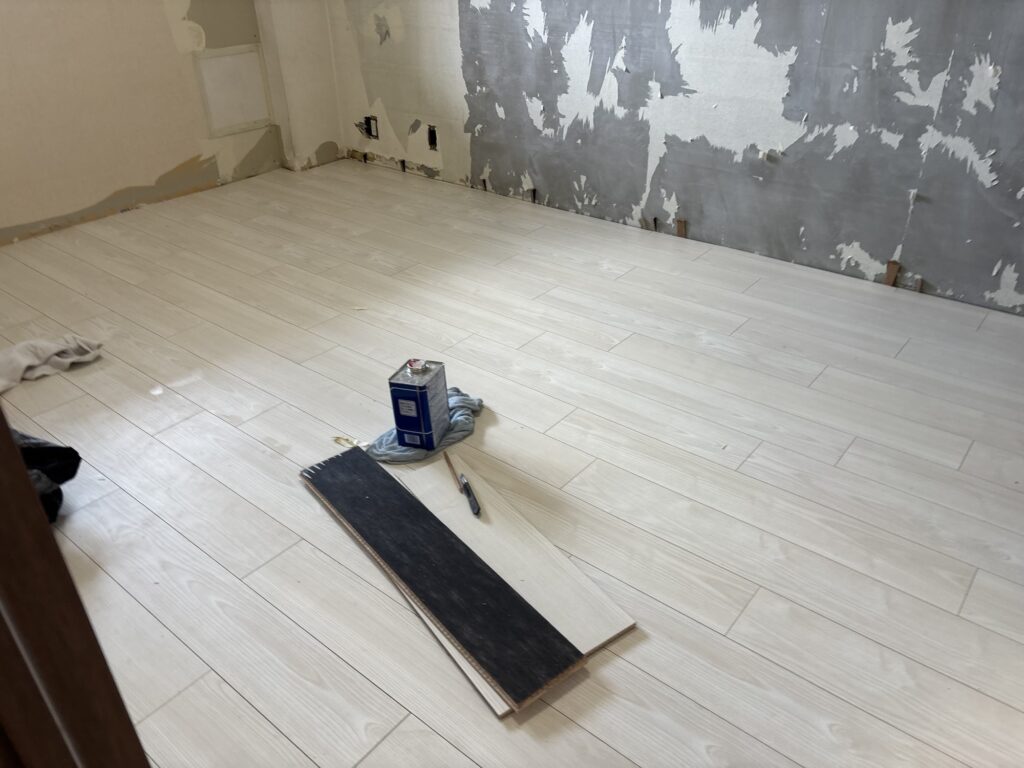
Using wedges helps prevent movement and keeps the flooring in the correct position while the adhesive sets.
The flooring installation took approximately three and a half hours.
Afternoon Work – Demolition and Drywall Repairs
After taking a lunch break, we moved on to several smaller renovation tasks.
These included removing wallpaper, installing drywall, and removing kitchen tiles.
7. Removing the Kitchen Tiles
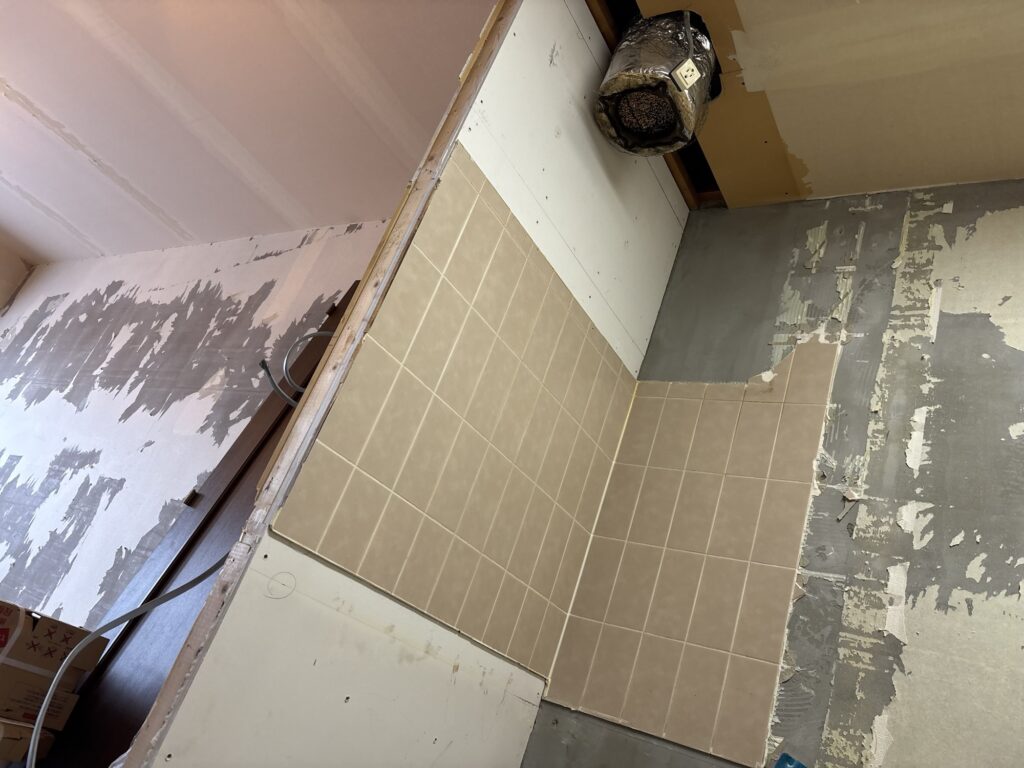
To remove the kitchen tiles, we inserted a pry bar into the joints between the tiles and struck it with a hammer.
There were pipes exposed underneath the tiles, so we placed protective mats over them to prevent accidental damage.
Pipes, electrical wires, and other hidden or exposed services require particular care during demolition.
Plumbing repairs are outside our main area of expertise, so we were especially careful not to damage anything that we would not be able to repair ourselves.
8. Removing an Unwanted Storage Shelf
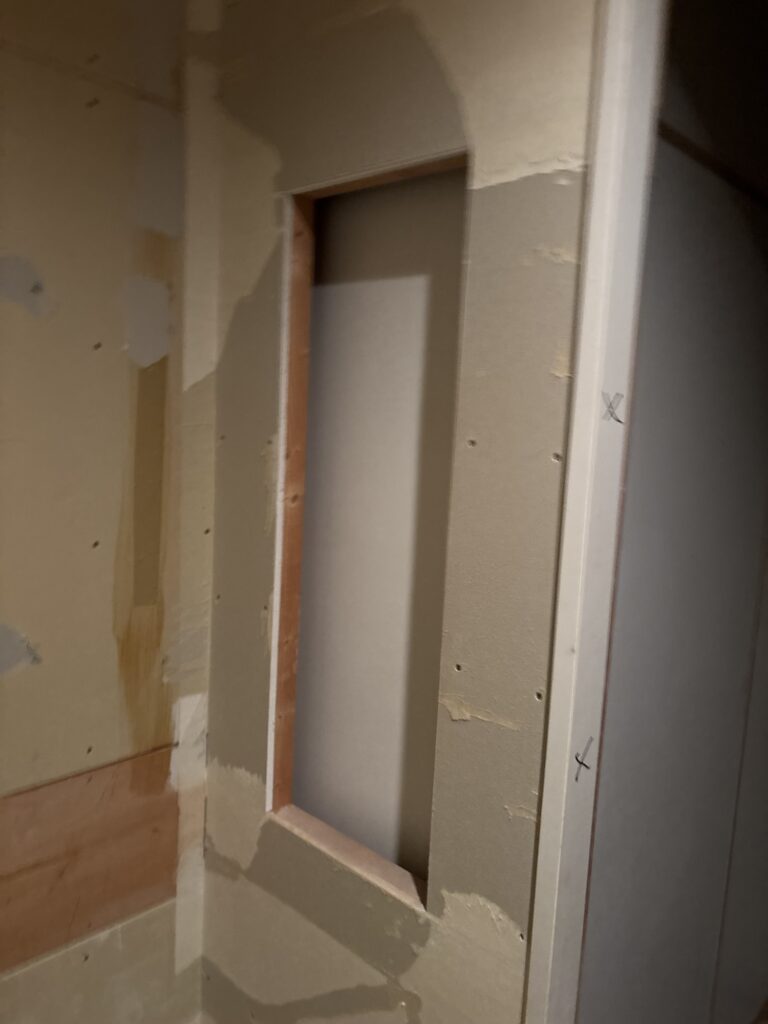
There had originally been a storage shelf in the changing area outside the bathroom.
The shelf was no longer needed, so we removed it and filled the resulting opening with new drywall.
Before cutting the drywall, we first checked the existing opening.
If the edges of the opening are uneven, they need to be trimmed with a utility knife or smoothed with a drywall rasp so that the opening is as straight and flat as possible.
Otherwise, even if the new drywall is cut perfectly straight, a gap can remain between the existing drywall and the new piece.
9. Cutting and Preparing the Drywall
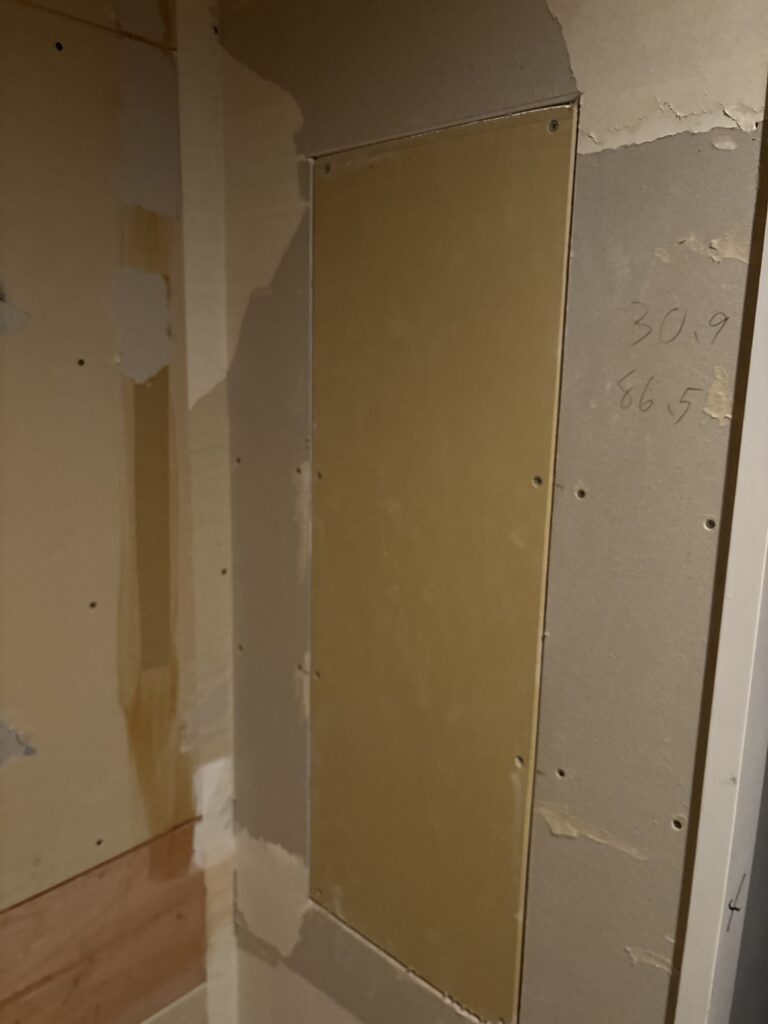
We cut the new drywall to the measured dimensions.
The piece was initially slightly too tight to fit into the opening, so we used a drywall rasp to adjust the edges and create the correct fit.
We also beveled the edges with an edge beveling tool.
Edge beveling is especially important when repairing drywall.
If two pieces of drywall are butted tightly together without a proper bevel, joint compound may not penetrate sufficiently into the joint.
This can increase the risk of cracking later.
After completing the various tasks, we cleaned the work area and organized the tools and materials.
The afternoon work took approximately three and a half hours.
The total working time for the day was approximately 7 hours.
Related Project
Replacing Water-Damaged Drywall and Rebuilding a Laundry Area Before Wallpaper Installation
Tools Used
- Broom
- Power circular saw
- Rubber mallet
- Pry bar
- Hammer
- Utility knife
- Drywall rasp
- Drywall edge beveling tool
- Flooring adhesive
- Flooring installation wedges
- Protective mats
- Measuring tools
- Personal protective equipment
Professional Tips
Keep the Subfloor Clean
Always sweep and clean the substrate before applying flooring adhesive.
Dust and debris underneath the flooring can reduce adhesion and affect the finished surface.
Do Not Force Flooring Into Place
When cutting flooring around walls, door frames, or other obstacles, avoid forcing a board into a space that is too tight.
A slightly undersized cut is often easier to install and reduces unnecessary pressure on the tongue-and-groove joints.
Pay Attention to Adhesive Open Time
Flooring adhesive becomes increasingly tacky as it sits.
If the adhesive becomes too tacky, it can make it difficult to position and connect the boards correctly.
Use Wedges During Curing
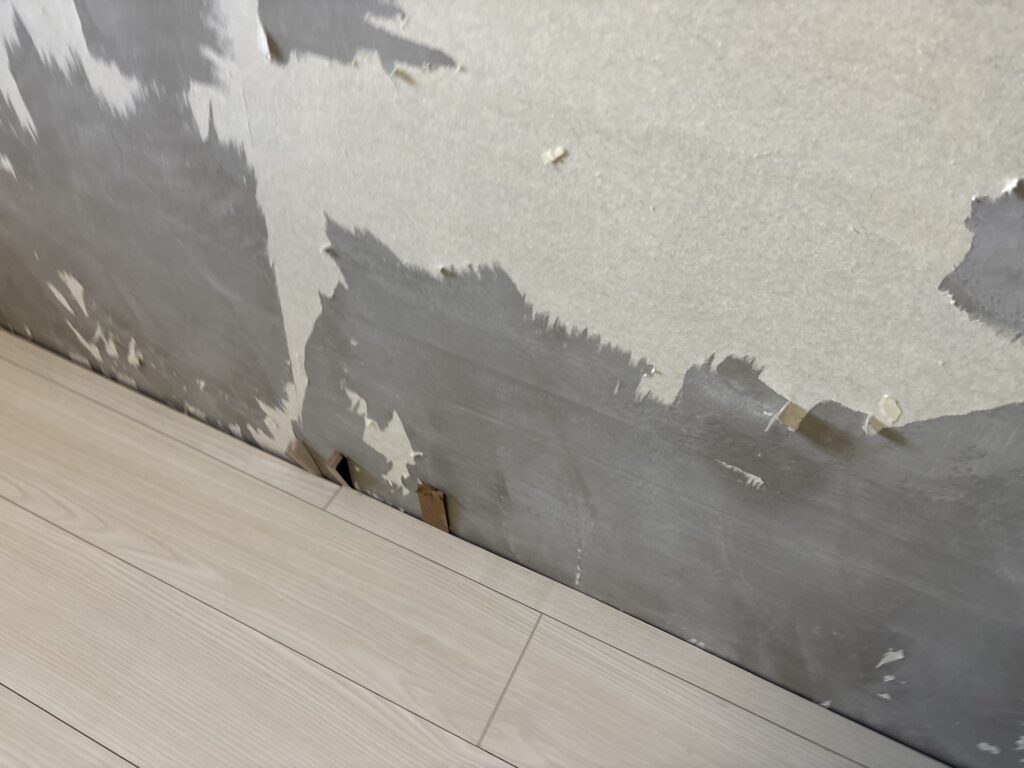
Even after the flooring has been installed, it can move before the adhesive has fully cured.
Using wedges along the perimeter helps maintain the correct position.
Bevel Drywall Edges
When repairing drywall, properly beveling the edges creates space for joint compound and helps reduce the risk of cracking.
Common Mistakes to Avoid
1. Leaving Dust Under the Flooring
Dust and debris can interfere with adhesion. Always clean the floor thoroughly before applying adhesive.
2. Cutting Flooring Too Tight
Cutting a board exactly to the measured dimension can sometimes make it too tight to install.
A small amount of clearance can make installation much easier.
3. Forcing Tongue-and-Groove Joints
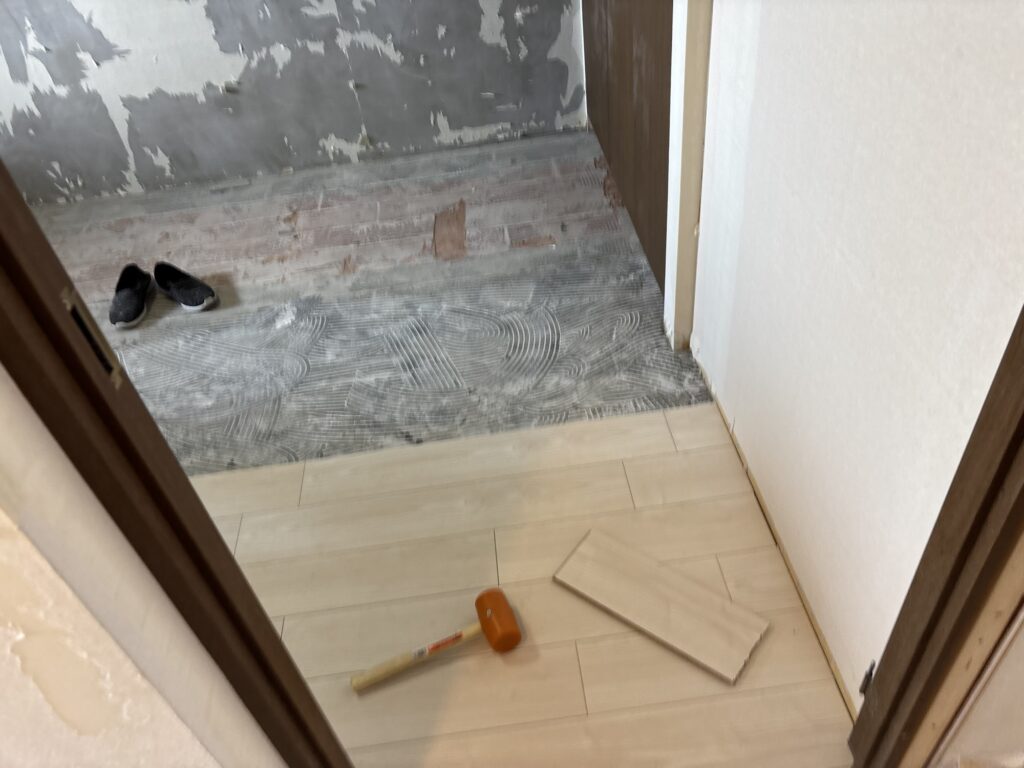
If the boards do not fit naturally, do not force them together.
Check the orientation and dimensions first.
4. Leaving Adhesive Open for Too Long
Excessive open time can make the adhesive too tacky and make installation more difficult.
5. Forgetting to Secure the Perimeter
Flooring can move before the adhesive cures. Use wedges to prevent unwanted movement.
6. Damaging Pipes or Electrical Wiring During Demolition
Always check what is behind or underneath the surface before using a pry bar, hammer, or other demolition tools.
7. Installing Drywall Without Preparing the Existing Opening
If the existing opening is uneven, simply cutting a new piece of drywall straight will not necessarily produce a good fit.
Prepare the opening first.
8. Skipping Drywall Edge Beveling
Without proper beveling, there may not be enough space for joint compound, increasing the risk of cracks at the joint.
What I Learned From This Project
This project reminded me that flooring installation requires a different approach from floor tile installation.
I usually work with floor tiles, so I am more accustomed to materials without a tongue-and-groove connection.
With this type of flooring, understanding the direction of the tongue and groove is essential.
I also found that small differences in cutting dimensions can have a significant effect on installation.
Cutting a board just slightly shorter than the measured dimension can make fitting much easier, while forcing a board that is too tight can create unnecessary pressure and potentially cause problems later.
The drywall repair work also reminded me that preparation is just as important as the actual installation.
Making the existing opening straight, adjusting the new board with a drywall rasp, and properly beveling the edges all contribute to a cleaner and more durable repair.
FAQ
1. Why should the floor be cleaned before applying flooring adhesive?
Dust and debris can interfere with the adhesive and reduce its ability to bond properly to the substrate.
2. What is the difference between the tongue and groove?
The tongue is the slightly protruding part of the flooring board, while the groove is the recessed section that receives the tongue.
3. Why shouldn’t flooring be cut exactly to the measured dimension?
A board cut exactly to the measured size can sometimes become too tight to install. Leaving approximately 1 mm of clearance can make fitting easier.
4. What happens if flooring is forced into a tight space?
The tongue-and-groove connection can separate, and excessive pressure can build up between the boards. This may contribute to the flooring lifting later.
5. Why are wedges used around the edge of the flooring?
Wedges help prevent the flooring from moving while the adhesive is curing and help maintain consistent positioning.
6. How do you remove small gaps between flooring boards?
A rubber mallet can be used to gently move the boards together. Care should be taken not to damage the flooring.
7. Why is adhesive open time important?
If the adhesive becomes too tacky, it can make it difficult to move and properly connect the flooring boards.
8. Why should drywall edges be beveled?
Beveling creates space for joint compound to penetrate the joint properly and helps reduce the risk of cracking.
9. Why is demolition around pipes and electrical wiring dangerous?
Pipes and electrical wiring can be damaged easily during demolition. Repairing these systems may require specialized knowledge or qualified professionals.
10. How long did this project take?
The flooring installation took approximately three and a half hours, followed by another three and a half hours of demolition and repair work. The total working time was approximately seven hours.
Conclusion
Today’s work involved more than simply installing new flooring.
We completed the remaining flooring installation in the kitchen and bedroom areas, then moved on to several smaller renovation tasks, including wallpaper removal, kitchen tile removal, and drywall repair.
The flooring installation required careful attention to the tongue-and-groove connections, cutting dimensions, adhesive open time, and perimeter protection.
The demolition work also required extra care because pipes and electrical wiring were present in some areas.
For the drywall repair, properly preparing the existing opening and beveling the new board edges were important steps for achieving a clean and durable repair.
After finishing the work, we cleaned and organized the site.
The total working time for the day was approximately 7 hours.


Comments