
Project Data
- Property Type: Japanese Apartment
- Floor: 2nd Floor
- Room Type: 1K Apartment
- Total Floor Area: Approximately 25 m²
- Work Area: Partial living room walls and washroom walls
- Number of Workers: 2
- Occupancy: Vacant
- Working Time: Approximately 4 hours
- Wallpaper: White embossed vinyl wallpaper
- Wallpaper Width: 90 cm
Construction Data
- Living Room: 5 sheets × 217 cm
- Washroom: 4 sheets × 222 cm, plus several smaller pieces
- Living Room Substrate: Concrete wall with adjustable wall rails installed with screws
- Washroom Substrate: Deteriorated gypsum board affected by moisture
- Living Room Surface Preparation: One application of finishing putty
- Washroom Surface Preparation: One application of base putty + drying with a heat gun + one application of finishing putty
- Flooring/Baseboard: Existing soft baseboard was kept in place
- Additional Work: Washroom mirror removed and reinstalled
Introduction
Today’s project was a wallpaper replacement job in a second-floor apartment in Japan.
The apartment was a vacant 1K unit with a total floor area of approximately 25 m². We were replacing wallpaper on part of the living room walls and the walls of the washroom.
Two workers handled the job.
At first glance, the project looked relatively straightforward. However, after removing the old wallpaper, we found a significant difference between the living room and the washroom.
The wall substrate in the living room was in good condition, while the washroom substrate had deteriorated considerably.
The washroom was located next to the bathroom and contained a sink, making it an area where moisture can easily accumulate.
The condition of the wall after removing the wallpaper clearly showed how much long-term moisture can damage gypsum board and the surface underneath wallpaper.
This project was a good reminder that even a relatively small wallpaper replacement can require very different levels of surface preparation depending on the environment.
Work Process — Field Report
1. Removing the Old Wallpaper
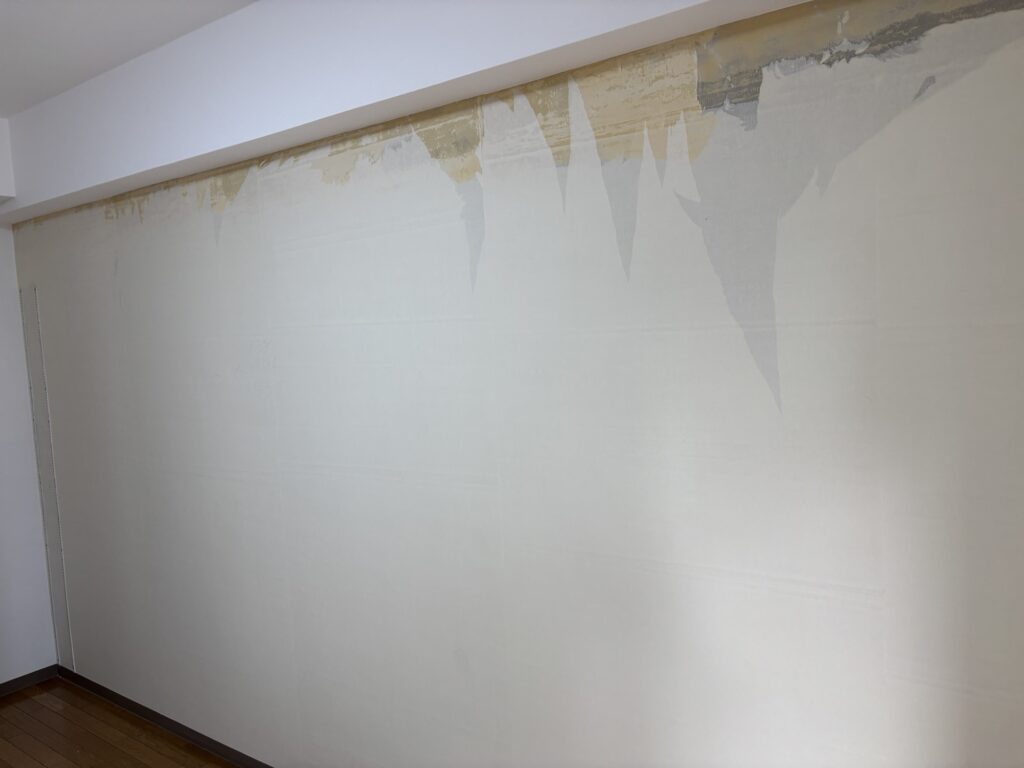
We started by removing the existing wallpaper from the designated areas.
Once the wallpaper was removed, the difference between the living room and washroom became obvious.
The living room substrate was in relatively good condition. The washroom, however, had significant deterioration caused by moisture.
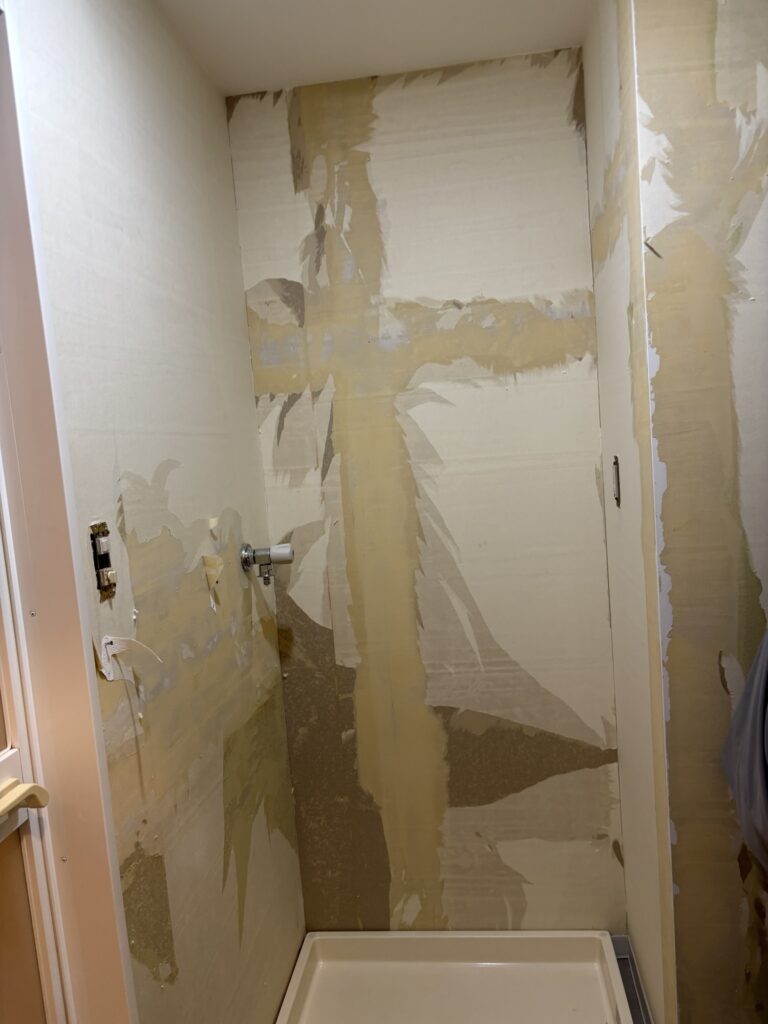
In areas with high humidity, the backing paper left behind after removing old wallpaper tends to lift and become difficult to work with.
The backing paper in the washroom took approximately three times longer to deal with than the backing paper in the living room.
This is one of the reasons why preparation can take much longer in bathrooms, washrooms, kitchens, and other areas where moisture is frequently present.
2. Surface Preparation in the Living Room
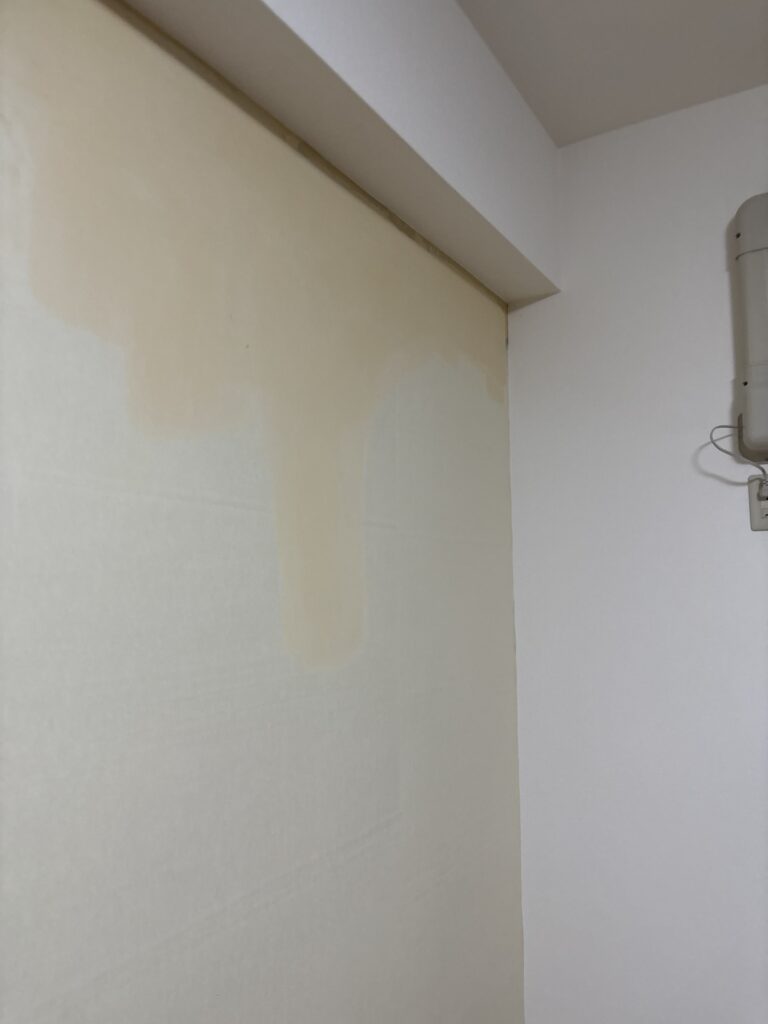
The living room substrate was in good condition, so we were able to complete the surface preparation with one application of finishing putty.
After the putty was applied and the surface was properly prepared, it was ready for wallpaper installation.
The wallpaper selected for this project was a white, heavily embossed material that was relatively easy to handle and install.
3. Surface Preparation in the Washroom
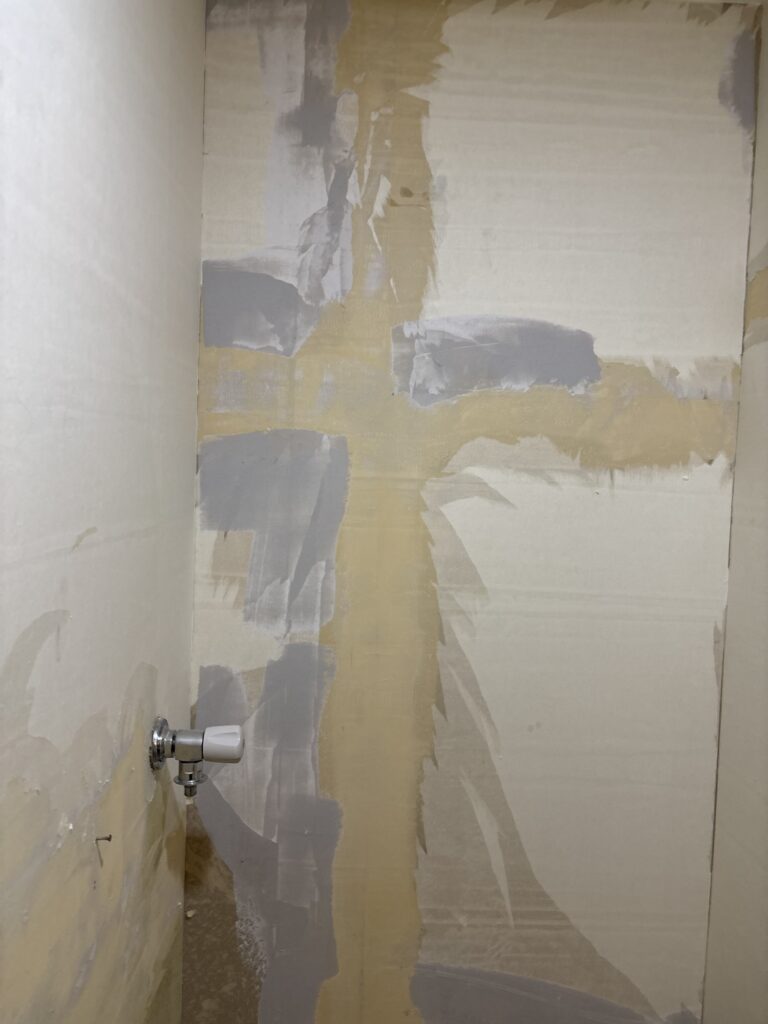
The washroom required considerably more preparation.
First, we applied one coat of base putty to the deteriorated areas.
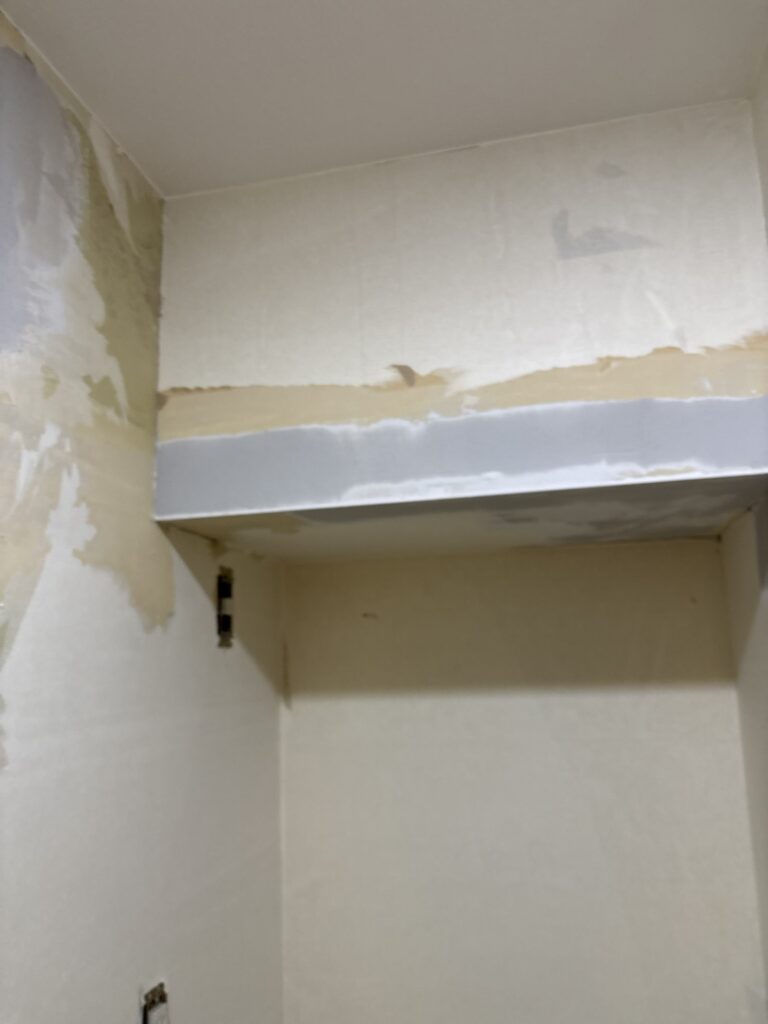
We then used a heat gun to thoroughly dry the surface.
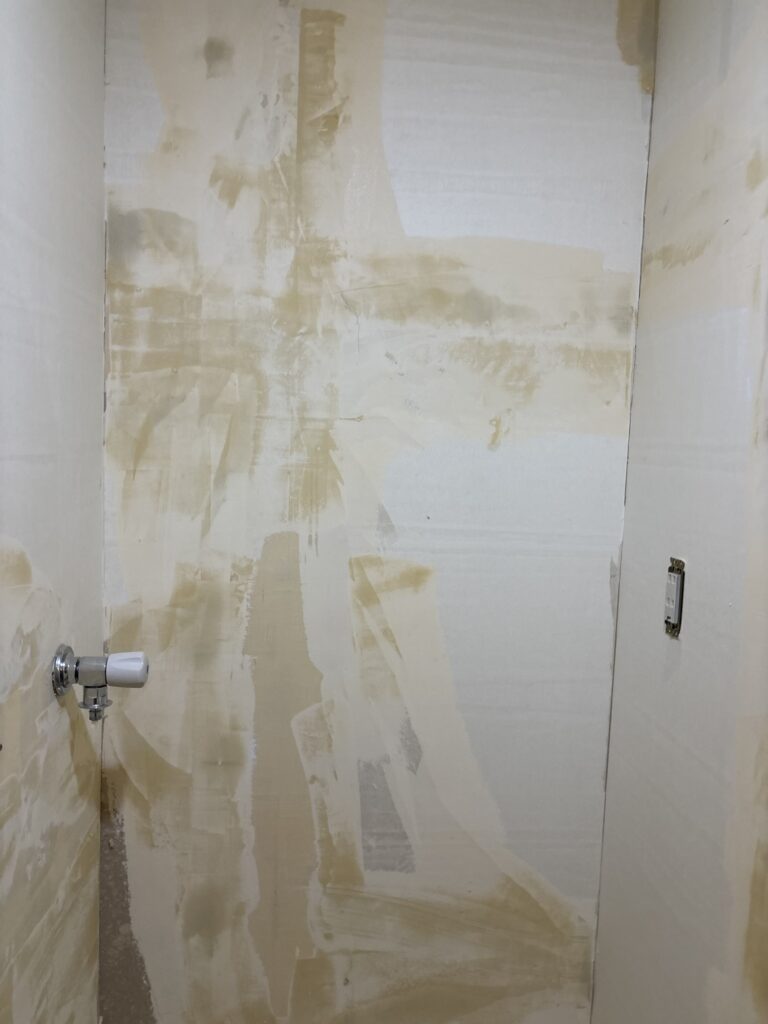
After the substrate had dried sufficiently, we applied one coat of finishing putty.
Once the surface was properly prepared, we were ready to install the new wallpaper.
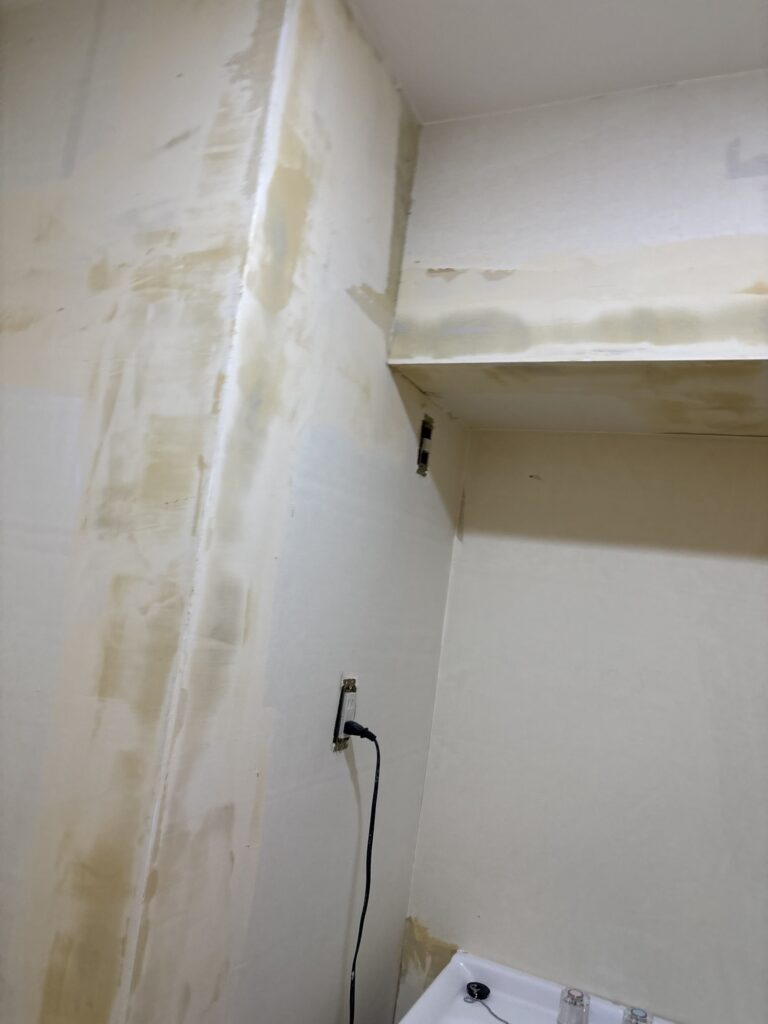
The extra preparation took time, but it was necessary to create a stable and smooth surface for the new wallpaper.
4. Measuring and Preparing the Wallpaper
We used a wallpaper pasting machine to apply adhesive to the wallpaper according to the required measurements.
For the living room, we prepared:
- 5 pieces at 217 cm
For the washroom, we prepared:
- 4 pieces at 222 cm
- Several additional smaller pieces for detailed areas
All of the wallpaper used for this project was 90 cm wide.
Using a pasting machine made it possible to prepare the required lengths efficiently and consistently.
5. Working Around Adjustable Wall Rails
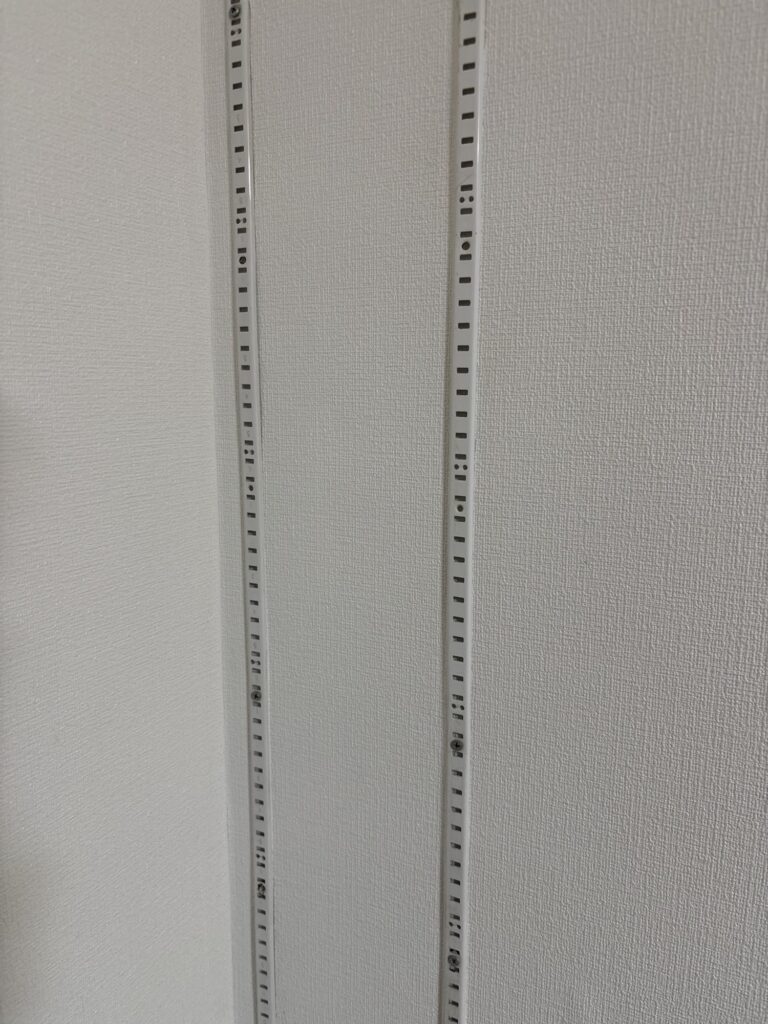
One of the more interesting parts of this project was the living room wall.
The wall had adjustable wall rails, sometimes called “gacha-bashira” rails in Japan, which were screwed directly into a concrete wall.
We decided not to remove them.
Removing the rails would have taken additional time, and reinstalling them could potentially cause problems.
For example, repeatedly removing and reinstalling screws can enlarge the existing holes and make it more difficult for the screws to hold securely.
Instead, we installed the wallpaper around the rails.
When installing wallpaper around this type of rail, we first pressed the wallpaper tightly into the inside corner and started installing it straight.
We then wrapped the wallpaper over the rail.
After smoothing out wrinkles and slack with a wallpaper smoother, we ran a cutter along the edge of the rail and carefully trimmed the wallpaper.
The cutter blade can become dull surprisingly quickly during this type of work.
For that reason, I changed the blade frequently.
If the blade becomes dull, the wallpaper can start catching on the blade instead of being cut cleanly. This can cause the material to tear or become damaged.
A sharp blade is especially important when making detailed cuts around rails, corners, and other obstacles.
6. Joining the Wallpaper
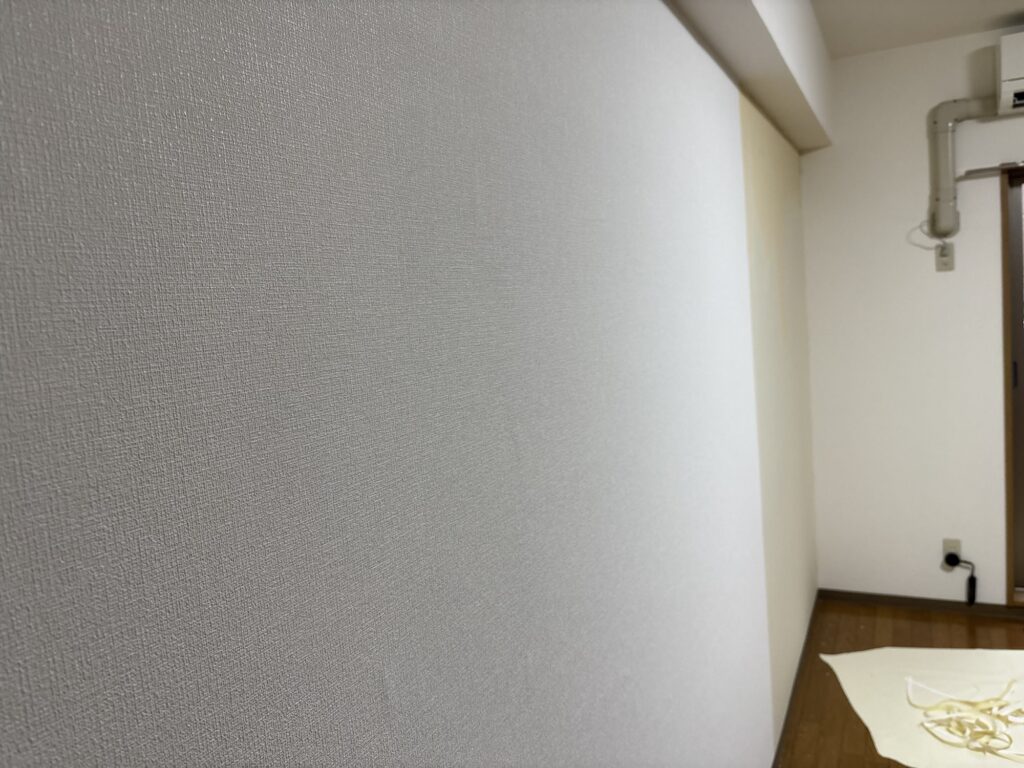
For the wallpaper joints, we used a seam roller.
Rather than forcing the wallpaper together directly next to the joint, we gradually moved the material toward the joint from both sides.
This is an important technique.
If you try to force the wallpaper together from a point too close to the joint, the material can twist or become distorted.
By gradually bringing the wallpaper toward the joint from farther away, it is easier to create a clean and natural seam.
7. Cutting Around the Existing Soft Baseboard
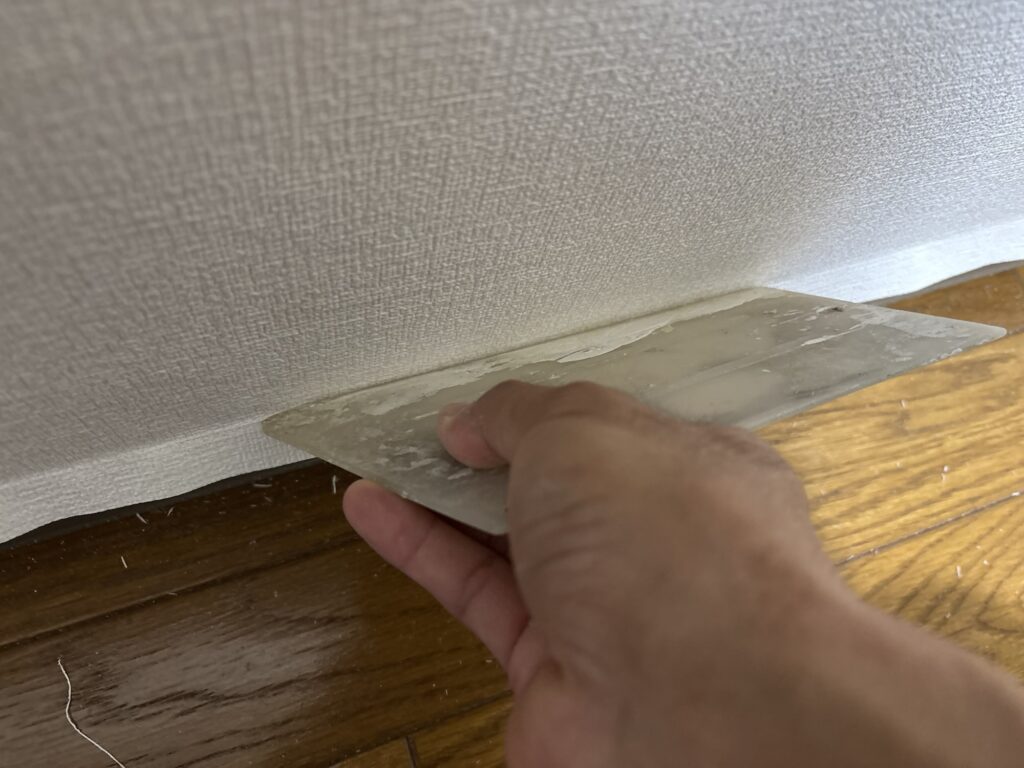
The soft baseboard was not being replaced, so we had to carefully cut the wallpaper along the existing baseboard.
First, we used a wallpaper smoother to create a clean, sharp corner.
Then we placed a thin trimming blade or spatula against the baseboard and carefully cut the wallpaper.
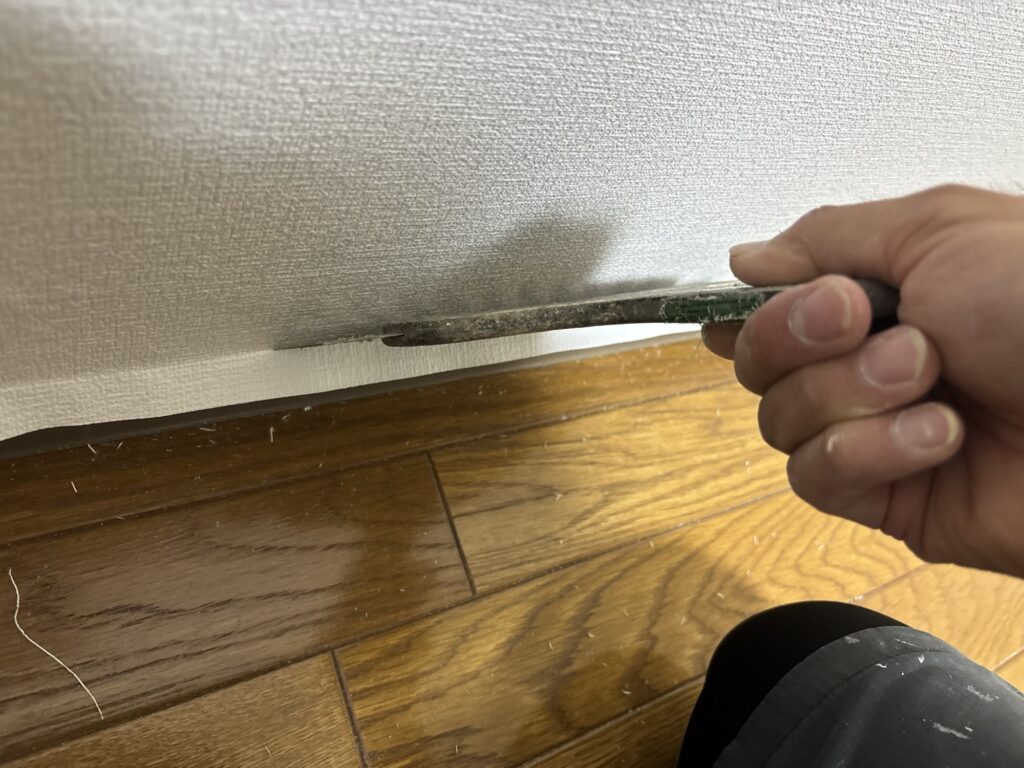
After cutting, we used our fingernail to tuck the edge of the wallpaper neatly into the gap between the wall and the soft baseboard.
This small step can make a noticeable difference in the final appearance.
I specifically used a thin blade for this area.
If a thick blade or spatula is used, the wallpaper can be left too long. When you try to tuck it into the narrow space near the soft baseboard, the excess material can bunch up and create wrinkles.
8. Removing the Washroom Mirror
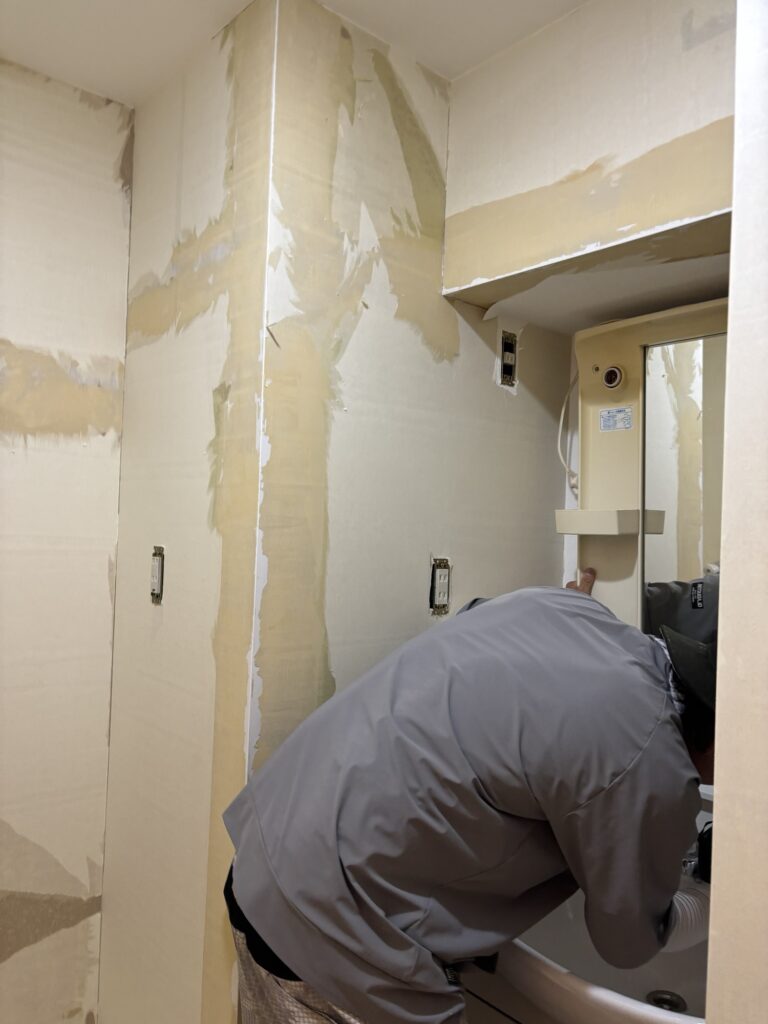
Before installing the wallpaper in the washroom, we removed the mirror above the sink.
Removing obstacles whenever possible makes wallpaper installation easier.
It can reduce working time and also improve the final appearance because the wallpaper can be installed more cleanly around the area.
Whenever there is a fixture that interferes with wallpaper installation, I try to remove it if it can be safely removed and reinstalled.
9. Reinstalling the Mirror
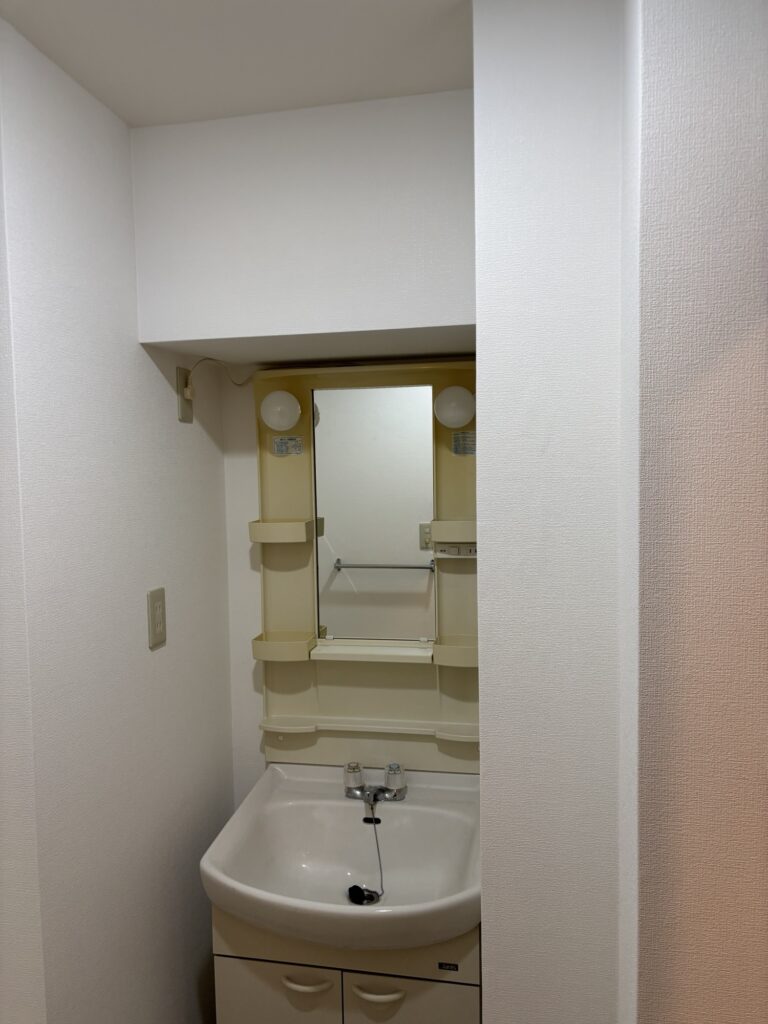
After all of the wallpaper installation was complete, we attempted to reinstall the mirror.
However, we discovered that the existing screw was no longer holding properly.
The wall substrate was gypsum board, so we initially considered using a drywall anchor.
However, there was not enough wall thickness for the anchor we had available.
As a result, we used a toggle-type anchor, known in Japan as a “Togura,” and secured the mirror with a screw.
This is something that can happen quite often when fixtures are removed and reinstalled.
The original screw hole can become enlarged, causing the original screw to lose its holding power.
When this happens with a gypsum board wall, options include using a suitable drywall anchor or a toggle-type anchor.
In some situations, using a screw that is slightly thicker and longer than the original can also provide enough holding power.
However, you should always check what is behind the wall before using a longer screw.
If another room is directly behind the wall, for example, you need to make sure that the new screw will not penetrate through the wall.
10. Final Inspection and Cleanup
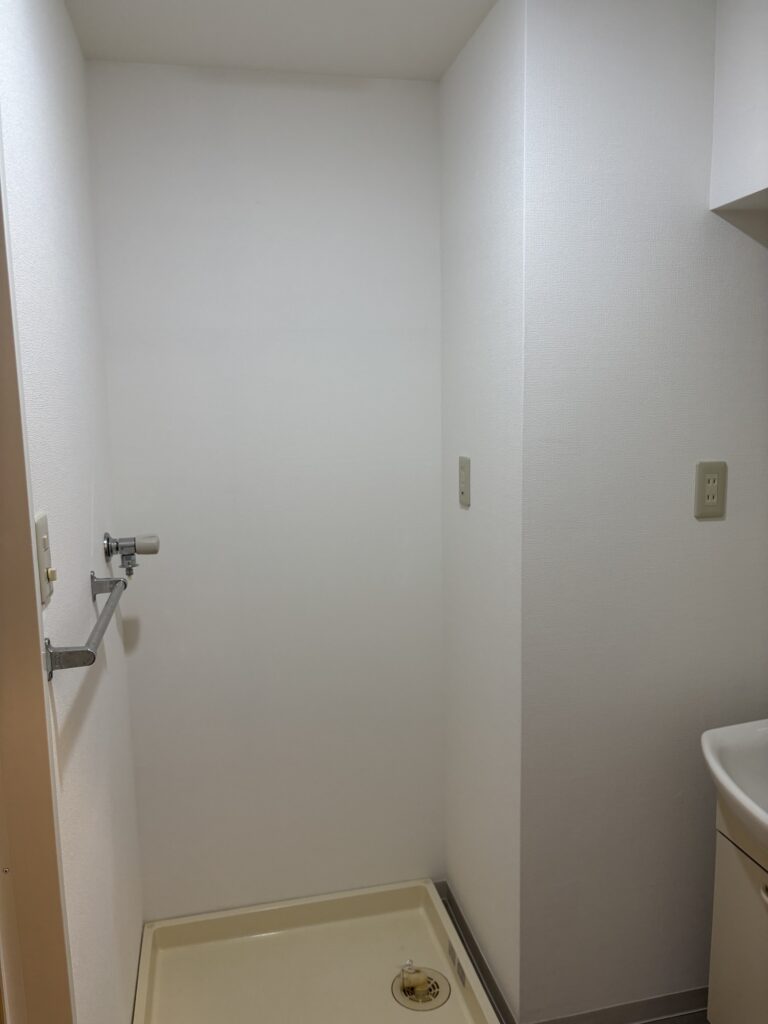
After all of the wallpaper had been installed, we checked the finished surfaces and made sure the edges, corners, seams, and areas around the fixtures were properly finished.
We then cleaned the work area and put all of the tools and materials back in order.
The entire job took approximately four hours.
Related Project
Tools Used
The main tools and equipment used during this project included:
- Wallpaper pasting machine
- Wallpaper smoother
- Wallpaper seam roller
- Utility knife
- Replacement cutter blades
- Thin trimming blade/spatula
- Putty knife
- Sanding tools
- Heat gun
- Drywall anchor
- Toggle-type anchor
- Measuring tools
Having the right tools is especially important when working around existing fixtures and detailed areas.
For wallpaper installation, small differences in tools can have a surprisingly large effect on the final finish.
Professional Tips
1. Pay Attention to Moisture
Areas around bathrooms and sinks can experience high humidity.
When removing old wallpaper, carefully inspect the substrate rather than assuming it is in good condition.
2. Spend Time on Surface Preparation
Good wallpaper installation starts with good surface preparation.
If the substrate is damaged, simply covering it with new wallpaper will not solve the underlying problem.
3. Keep Your Cutter Blade Sharp
A dull blade can cause tearing, dragging, and uneven cuts.
I prefer to replace the blade frequently rather than trying to get too much use out of one blade.
4. Do Not Force Wallpaper Toward a Joint
When closing a wallpaper seam, gradually move the material toward the joint from both sides.
This helps prevent twisting and distortion.
5. Remove Obstacles When Possible
Removing mirrors, fixtures, and other obstacles can make wallpaper installation faster and produce a cleaner finish.
6. Use the Right Thickness of Trimming Tool
When cutting wallpaper next to a soft baseboard, a thin trimming tool can make it easier to leave the correct amount of material for tucking into the edge.
Common Mistakes to Avoid
Mistake 1: Ignoring Moisture Damage
Do not assume that a washroom wall is in the same condition as a living room wall.
Moisture can cause serious deterioration behind the wallpaper.
Mistake 2: Installing Wallpaper Over Loose Backing Paper
Loose backing paper can cause problems with the new wallpaper.
Any unstable material should be properly dealt with before installation.
Mistake 3: Using a Dull Cutter Blade
A dull blade can damage the wallpaper, especially around rails and other detailed areas.
Mistake 4: Pulling Wallpaper Too Aggressively at the Joint
Forcing the material together near the seam can create wrinkles and twisting.
Mistake 5: Using an Inappropriate Anchor
When reinstalling a fixture on gypsum board, the appropriate anchor depends on the wall construction and available space.
Mistake 6: Using a Long Screw Without Checking Behind the Wall
A longer screw may provide better holding power, but it can also penetrate through the wall if there is not enough space.
Always check the wall construction before selecting the screw.
What I Learned From This Project
This project reinforced an important lesson: the size of a wallpaper job does not necessarily determine how difficult it will be.
The work area itself was relatively small, and the entire project took only about four hours.
However, the washroom required significantly more surface preparation than the living room because of moisture-related deterioration.
The backing paper alone took around three times longer to process in the washroom.
I was also reminded of the importance of planning around existing fixtures.
Removing the washroom mirror made the wallpaper installation easier and helped produce a cleaner finish. At the same time, reinstalling the mirror created another issue because the original screw hole had lost its holding strength.
These small details are often what make renovation work more complicated than it initially appears.
Every project provides an opportunity to learn something new, even when the overall job seems simple.
FAQ
1. How long did this wallpaper replacement project take?
The entire project took approximately four hours with two workers.
2. Why did the washroom require more surface preparation?
The washroom was exposed to more moisture because it was next to the bathroom and contained a sink. The moisture had caused deterioration of the wall substrate and made the old wallpaper backing paper more difficult to remove.
3. How many pieces of wallpaper were used?
The living room required five pieces at 217 cm each. The washroom required four pieces at 222 cm each, plus several smaller pieces.
4. What type of wallpaper was used?
We used white embossed wallpaper. It was relatively easy to handle and install.
5. Why didn’t you remove the adjustable wall rails?
The rails were screwed into a concrete wall. Removing and reinstalling them could take additional time and could potentially enlarge the screw holes, making it difficult for the screws to hold securely.
6. Why is a sharp cutter blade important?
A sharp blade produces cleaner cuts and reduces the risk of tearing the wallpaper. This is particularly important when cutting around rails, corners, and other detailed areas.
7. Why did you remove the washroom mirror?
Removing the mirror made it easier to install the wallpaper cleanly and reduced the amount of detailed cutting required around the fixture.
8. What can you do when a screw no longer holds in gypsum board?
Depending on the wall construction and available space, a suitable drywall anchor or toggle-type anchor can be used. In some situations, a thicker and longer screw may also work.
9. Can moisture damage the wall behind wallpaper?
Yes. Long-term moisture can cause wallpaper backing paper to lift and can also contribute to deterioration of the wall substrate.
10. What is the most important part of wallpaper installation?
In my opinion, proper surface preparation is one of the most important parts. Even high-quality wallpaper will not look good if the substrate underneath is uneven, damaged, or unstable.
Related Project
Replacing Wallpaper on Beams and Walls in a Japanese Apartment with Traditional Juraku Plaster Walls
Conclusion
This was a relatively small wallpaper replacement project, but it involved several important aspects of professional wallpaper installation.
The living room had a good substrate and required only one application of finishing putty. The washroom, on the other hand, required considerably more preparation because of moisture-related deterioration.
We also had to work around existing adjustable wall rails, carefully cut the wallpaper around an existing soft baseboard, and remove and reinstall the washroom mirror.
The project took approximately four hours with two workers.
Small renovation jobs can sometimes contain unexpected problems, especially when working with older walls, moisture, existing fixtures, and previously used screw holes.
For me, this project was another reminder that careful preparation, sharp tools, and attention to small details are essential for achieving a clean and professional wallpaper finish.


Comments