
Project Data
- Project Type: Residential Renovation – Water-Damaged Wallpaper Replacement
- Location: Japan
- Apartment Type: 1DK
- Apartment Size: Approximately 25 m²
- Kitchen Area: Approximately 10 m²
- Work Area: Kitchen ceiling and walls
- Cause of Replacement: Water leakage
- Crew: 2 wallpaper installers + 2 workers from the construction company
- Working Time: Approximately 4 hours
Installation Data
- Wallpaper: Thick, heavily embossed Japanese wallpaper
- Ceiling Size: Approximately 2.5 m × 1.3 m
- Ceiling Wallpaper: 2 pieces, each approximately 2.5 m long
- Substrate Condition: Minor deterioration caused by water leakage
- Surface Preparation: Loose backing paper removed + one finishing coat of joint compound
- Installation Method: Paste applied with a wallpaper pasting machine
- Main Details: Ceiling access panel, square box, narrow spaces around the door frame
Introduction
Today’s project was a wallpaper replacement job in a small 1DK apartment in Japan.
The apartment was approximately 25 m², and the kitchen area was about 10 m². The wallpaper on the kitchen ceiling and walls needed to be replaced because of water damage caused by a leak.
Two wallpaper installers worked on the project, while two workers from the construction company that commissioned the job were also present.
After removing the old wallpaper, we found that the plasterboard underneath had not deteriorated very much. This was probably because the water leakage had not been severe or prolonged enough to cause major damage.
The new wallpaper was also relatively thick and had a strong embossed texture, making it easier to install.
These two factors made a significant difference:
- The substrate was in relatively good condition.
- The new wallpaper was thick and heavily embossed.
When these two conditions come together, surface preparation before wallpaper installation can become much easier than usual.
In this case, we only removed the loose areas of the old wallpaper backing paper and applied one coat of finishing compound. We did not need to apply a separate base coat of joint compound.
That meant the substrate preparation was completed much faster than it would have been if the wall had been badly damaged.
Work Flow – Site Report
1. Checking the Substrate After Removing the Old Wallpaper
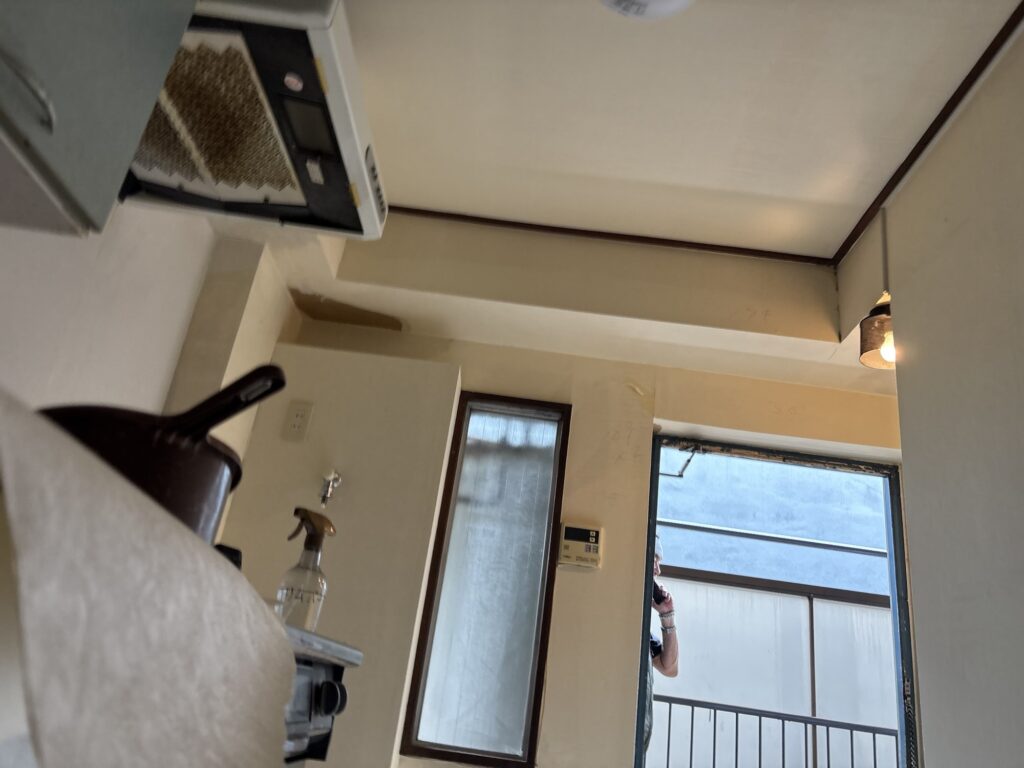
The first step was to remove the existing wallpaper and inspect the condition of the plasterboard underneath.
Because the water damage was relatively minor, the plasterboard remained in reasonably good condition.
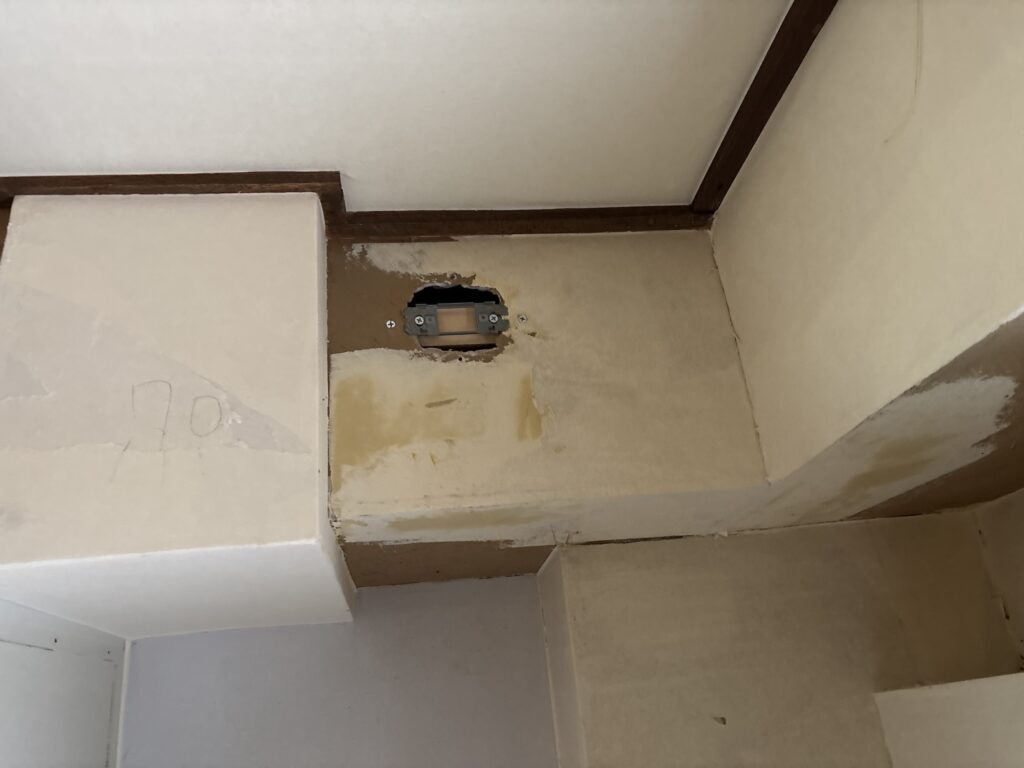
If the substrate had been heavily damaged, we would have needed considerably more preparation before installing the new wallpaper.
When the substrate is uneven and the new wallpaper is thin, imperfections can easily show through after installation.
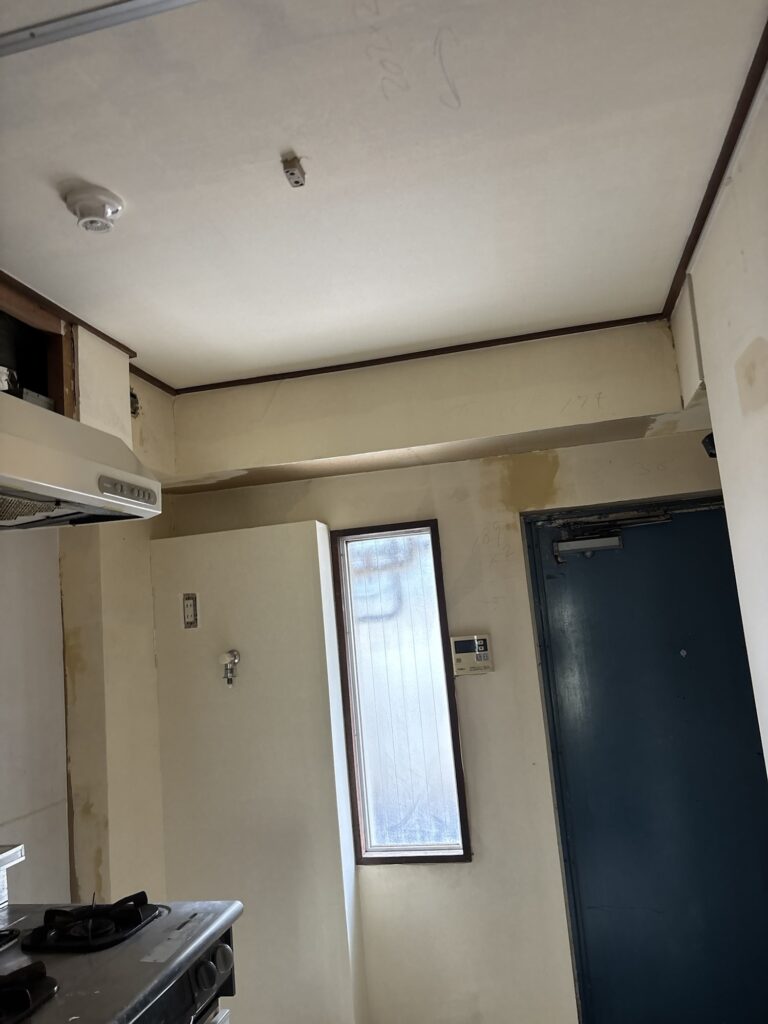
In that situation, an additional one or two coats of base joint compound may be necessary.
That additional preparation alone can easily add more than an hour to the job.
This is why the condition of the substrate and the thickness of the wallpaper are both important factors when estimating installation time.
2. Choosing the Right Wallpaper for Restoration Work
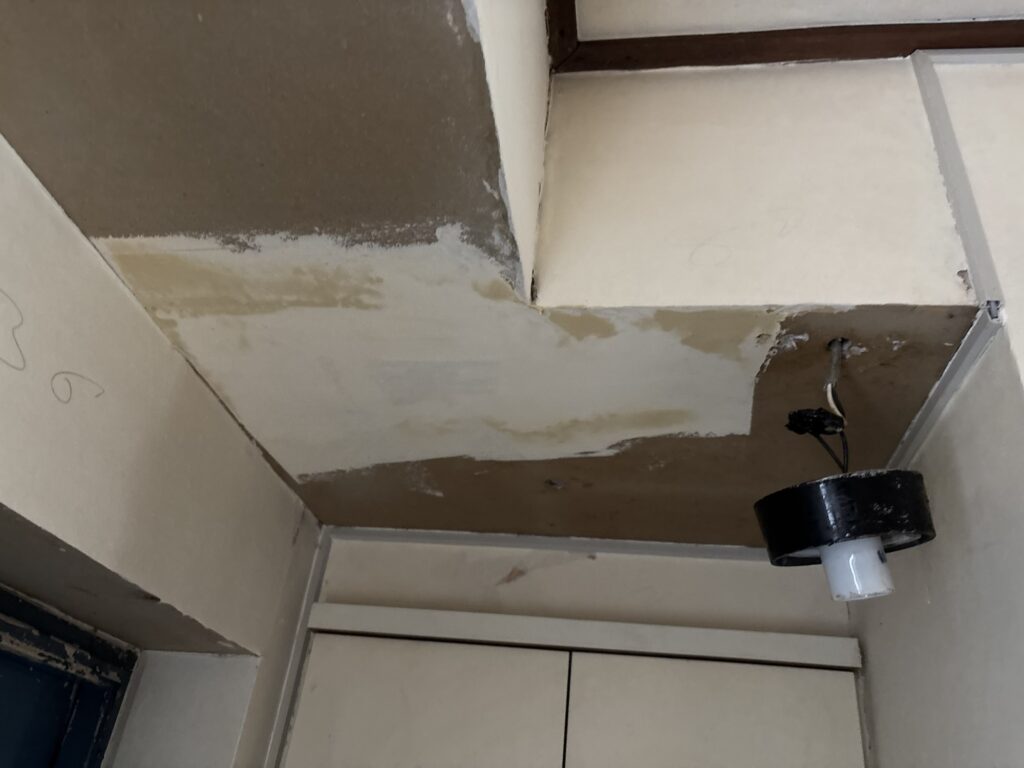
For restoration work, it is generally preferable to use wallpaper that is at least as thick as the original material, or thicker.
Using a thinner wallpaper can make surface imperfections much more visible.
A thinner material can work well when the substrate itself has been newly installed or properly rebuilt, such as when new plasterboard has been installed.
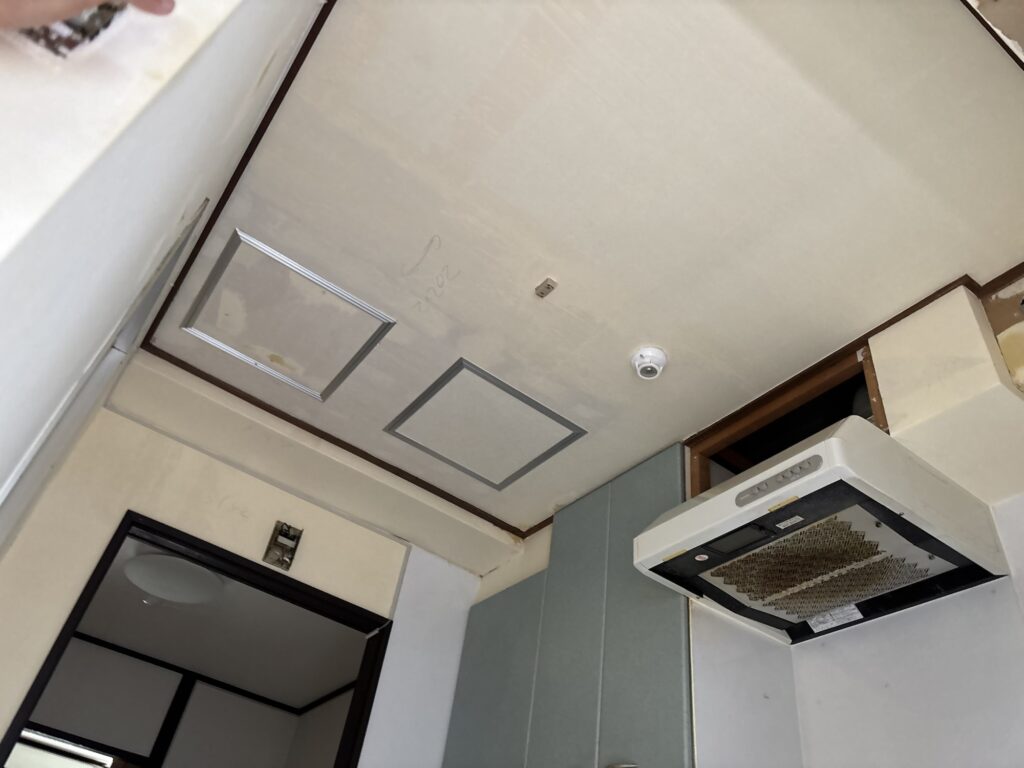
However, when replacing wallpaper over an existing substrate, choosing a material that is thinner than the original wallpaper is often a poor choice.
Understanding this is useful when recommending wallpaper to customers.
If you understand how wallpaper thickness interacts with substrate conditions, you can explain your recommendations to customers with much more confidence.
3. Preparing the Wallpaper
Once the substrate preparation was complete, we moved on to preparing the wallpaper.
We used a wallpaper pasting machine to apply paste to the wallpaper according to the measurements needed for each section.
The kitchen ceiling was approximately 2.5 m long and 1.3 m wide.
For readers who are unfamiliar with the Japanese wallpaper industry, there is an important difference between wallpaper commonly used in Japan and wallpaper sold in many other countries.
In many overseas markets, wallpaper is commonly sold in rolls approximately 50–70 cm wide and around 10 m long.
Japanese wallpaper installers, however, commonly work with rolls approximately 90 cm wide and 50 m long.
Because the Japanese rolls are wider, we only needed two pieces, each approximately 2.5 m long, to cover this ceiling.
4. Installing the Ceiling Wallpaper
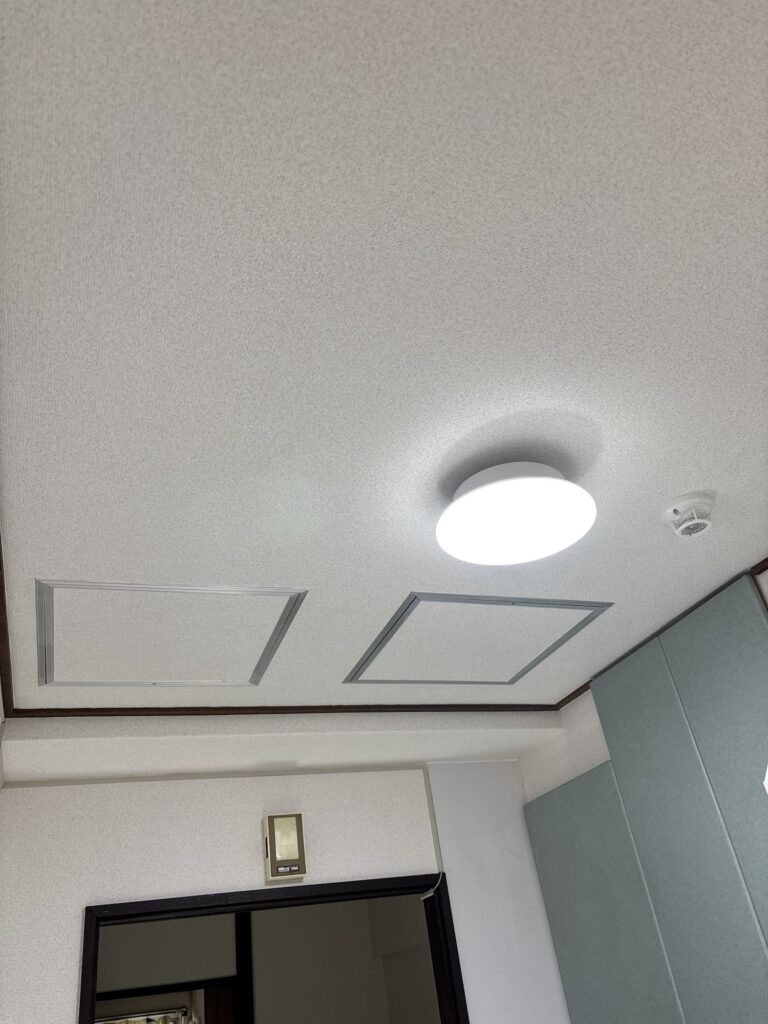
Two installers worked together to install the ceiling wallpaper.
Working as a pair makes handling a large sheet of wallpaper much easier, especially when working overhead.
The ceiling also had an access panel that required careful cutting.
After smoothing out the air bubbles with a wallpaper smoother, we carefully cut around the frame of the access panel by hand.
One important tip is to keep your utility knife blade sharp.
A dull blade is much more likely to tear the wallpaper or produce an uneven cut, so the blade should be replaced frequently.
When cutting around the frame, apply light and consistent pressure while allowing the knife to follow the edge of the frame.
If you are not comfortable cutting freehand, placing a thin putty knife or similar tool against the edge can make the cut easier and reduce the chance of making a mistake.
If you accidentally cut slightly too much and create a small gap, it can often be filled with caulking.
Thinking about how you can repair a mistake before you start can give you more confidence when attempting detailed work.
The goal is not to avoid every possible mistake.
The goal is to prepare well enough that you know how to recover if something goes wrong.
5. Installing the Wall Wallpaper
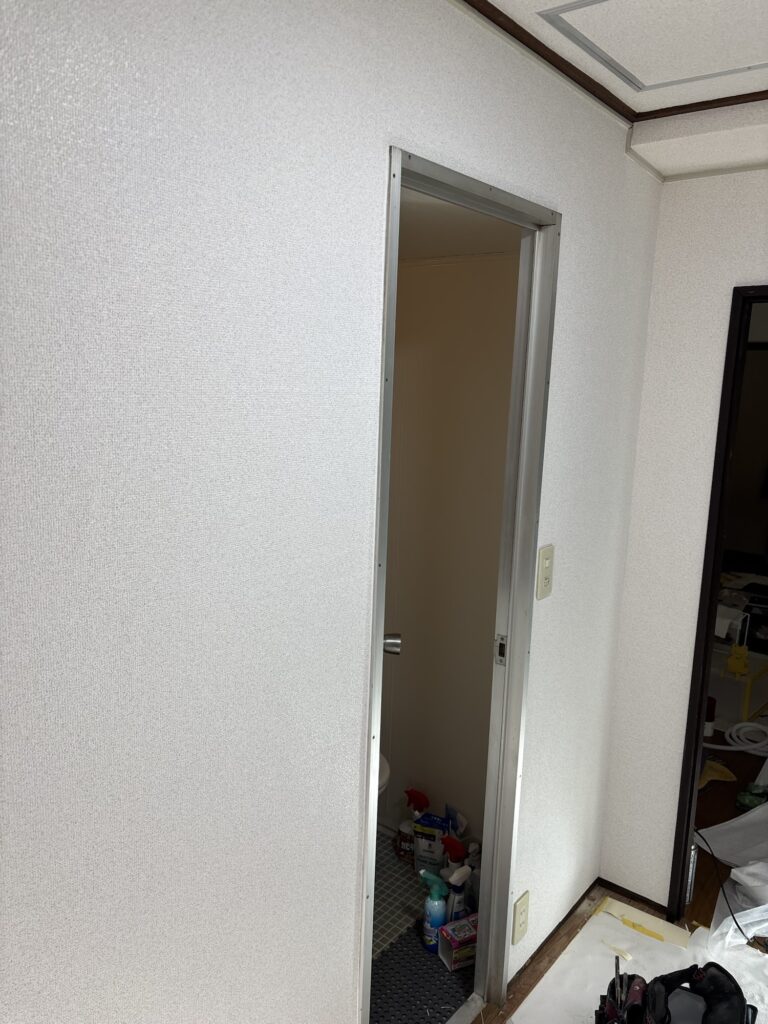
After finishing the ceiling, we divided the work and started installing the wallpaper on the walls.
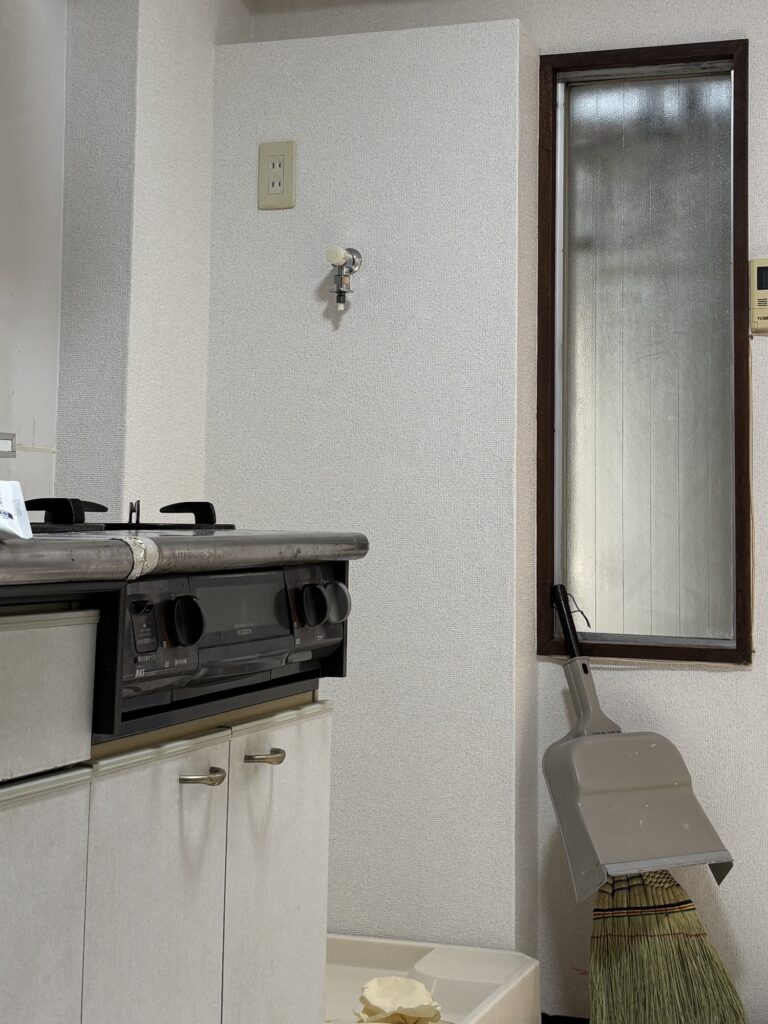
There was one particularly interesting detail in this kitchen: a square-shaped box.
The entire box was covered with a single piece of wallpaper measuring approximately 90 cm wide and 2.1 m long.
Can you figure out how it was installed?
If you have never installed wallpaper before and can work out the method just by looking at the finished result, you have a very good eye for wallpaper installation.
Here is the basic method.
First, the wallpaper is installed straight across the front surface.
The air bubbles are then removed with a wallpaper smoother.
Next, the wallpaper is carefully wrapped around the right-hand corner while using a damp sponge to smooth and shape the material.
The upper corner cannot simply be wrapped without making a cut.
A relief cut is made from the upper-right corner toward the top.
This allows the wallpaper to be wrapped around both the upper front corner and the upper right-hand corner.
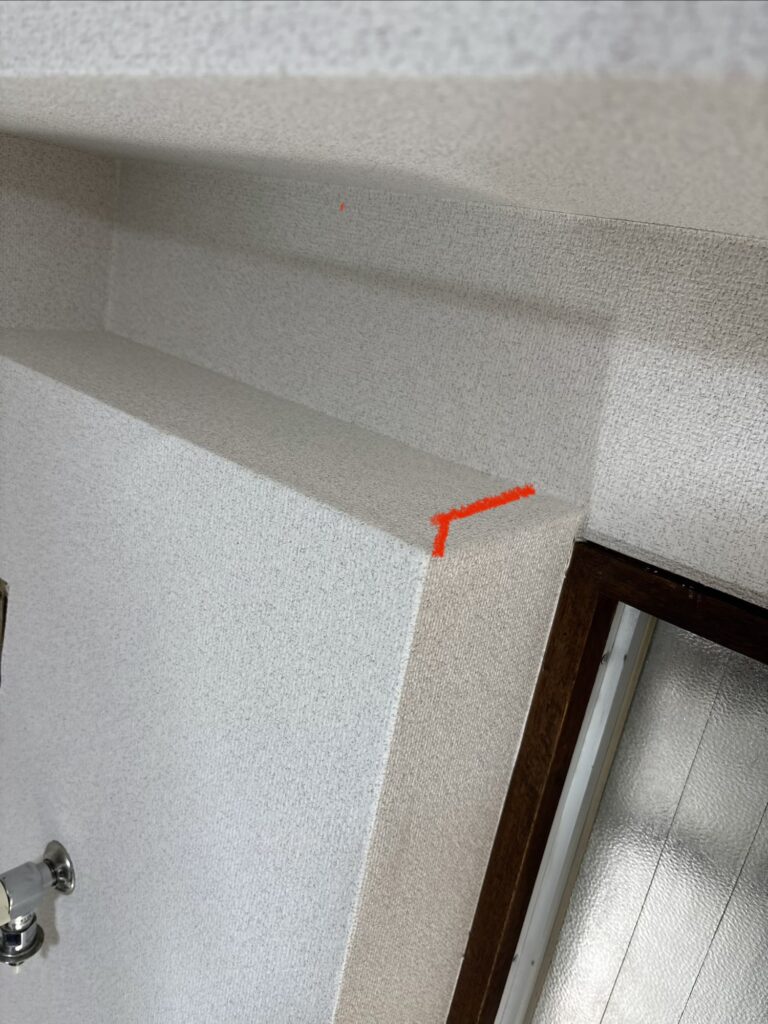
The overlapping sections are then trimmed with a double-cut along the appropriate joint line.
This is the basic method used to cover a square-shaped box with one piece of wallpaper.
The exact joint position and installation method can change depending on the shape and conditions of the area, but there are three important principles to remember.
Three Important Principles
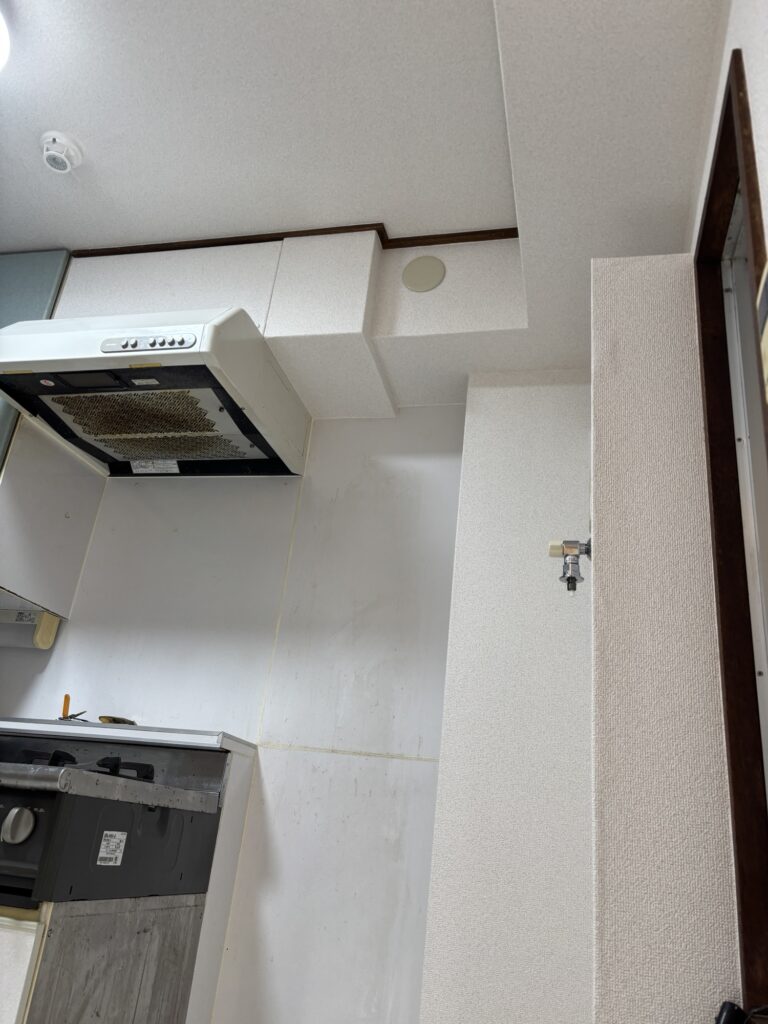
1. Place the joint where it is difficult to see.
The location of a joint can have a major effect on the finished appearance.
2. Keep the joint as short as practical.
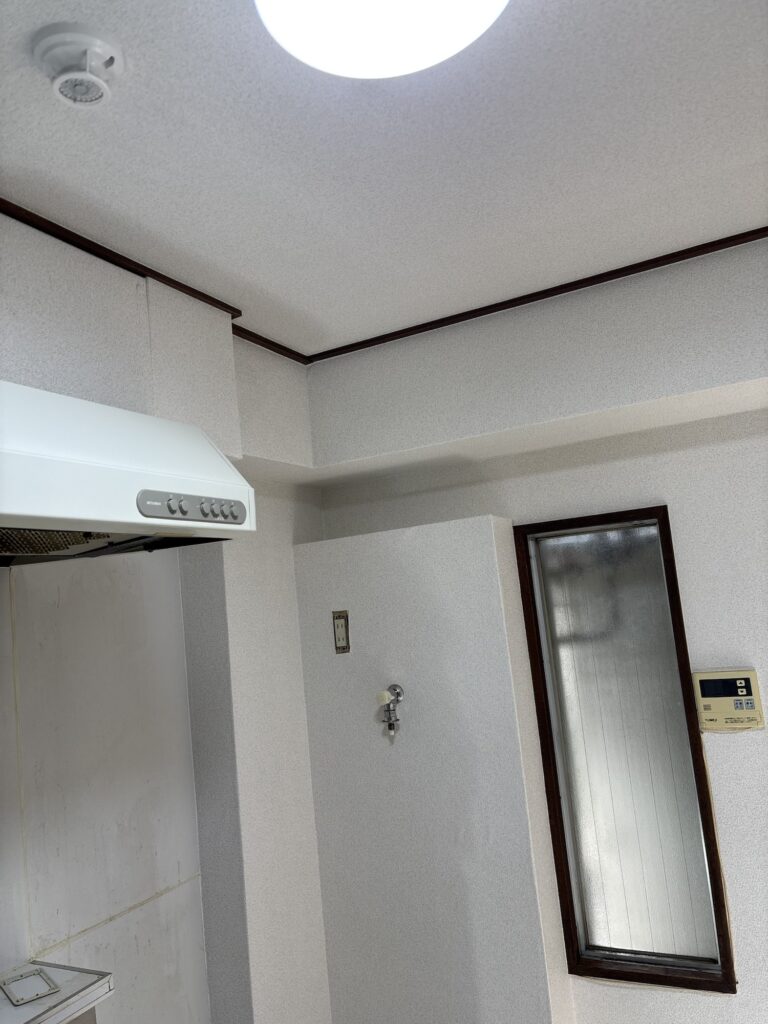
A shorter joint is generally easier to control and less likely to shift during installation.
For example, which is more likely to move: a 10 m joint or a 1 m joint?
Obviously, the longer joint has more opportunity to move or develop problems.
Japan is also a country where earthquakes are common. Repeated movement can sometimes cause plasterboard substrates to shift slightly, which can eventually cause wallpaper joints to open.
Keeping joints short can help reduce the potential impact of these movements.
3. Wrap the corners properly before making the joint cut.
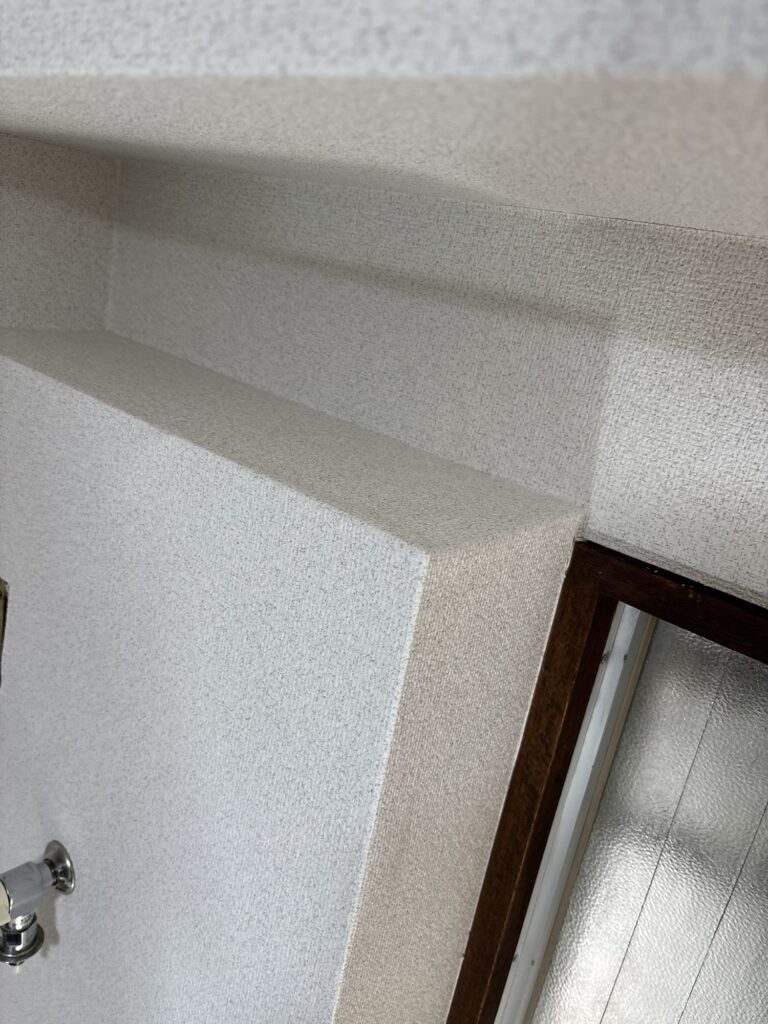
If a corner is still loose or has not been properly wrapped when the joint is cut, the joint can open later or the finished appearance may suffer.
These three points are simple, but they have a significant effect on the quality of the finished installation.
6. Cleaning Up
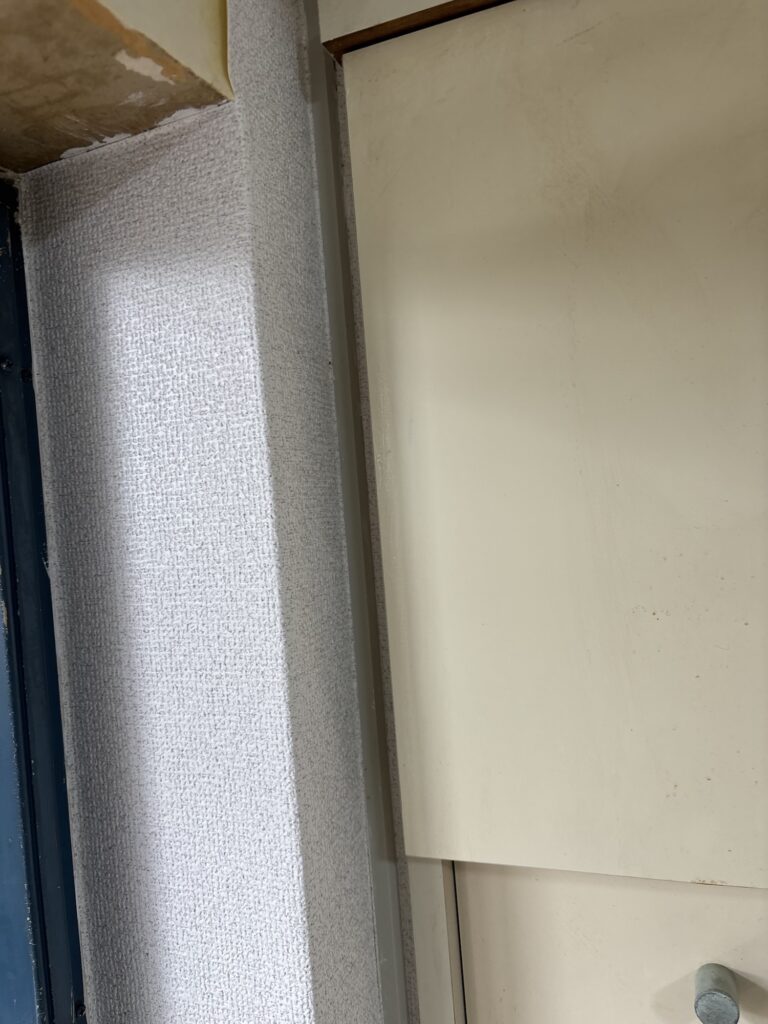
Although this was a relatively small kitchen and there was not a large amount of wallpaper to install, the job still required time because of the detailed areas.
The access panel, square-shaped box, and narrow spaces around the door frame all required careful work.
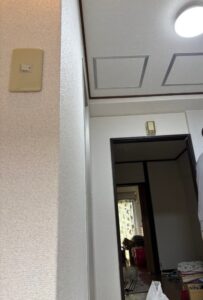
Once the wallpaper installation was complete, we cleaned the work area and put everything back in order.
The entire project took approximately four hours.
Tools Used
The main tools used during this project included:
- Wallpaper pasting machine
- Wallpaper smoother
- Utility knife
- Spare utility knife blades
- Thin putty knife
- Damp sponge
- Caulking gun
- Measuring tape
- Other standard wallpaper installation tools
A sharp utility knife was particularly important for cutting around the ceiling access panel and making clean cuts around detailed areas.
Professional Tips
1. Check the substrate before choosing the wallpaper.
The condition of the substrate should influence your material selection.
A thick, embossed wallpaper can hide minor imperfections much better than a thin, smooth material.
2. Match the wallpaper thickness to the existing substrate.
For restoration work, using wallpaper that is at least as thick as the original material is generally a safer choice.
3. Do not underestimate surface preparation.
Poor substrate preparation can create visible imperfections after installation.
If the substrate is bad and the wallpaper is thin, one or two additional coats of joint compound may be necessary.
4. Keep your knife blade sharp.
A sharp blade allows you to make cleaner and more controlled cuts.
Replacing the blade frequently is a small investment that can significantly improve the quality of detailed work.
5. Think about the joint location before you start.
Do not simply place the joint wherever it is easiest.
Look at the finished surface and decide where the joint will be least noticeable.
6. Keep joints as short as practical.
Shorter joints are easier to control and generally less susceptible to movement than very long joints.
7. Prepare for mistakes before starting.
Knowing how you will fix a small mistake gives you confidence to attempt difficult cuts and complicated shapes.
Good preparation allows you to work more confidently.
Common Mistakes to Avoid
Using wallpaper that is too thin
A thin wallpaper can make imperfections in an existing substrate much more visible.
Skipping necessary substrate preparation
Even if the new wallpaper looks thick enough to hide imperfections, serious substrate problems should not simply be covered up.
Using a dull knife
A dull blade can tear the wallpaper and make detailed cuts much more difficult.
Placing joints in highly visible locations
A technically correct joint can still look poor if it is placed where people naturally look.
Making unnecessarily long joints
Long joints are harder to control and can be more vulnerable to movement.
Cutting corners before they are properly wrapped
If a corner is not properly shaped and secured before the joint is cut, the finished joint may open or look uneven.
Being afraid of freehand cutting
Freehand cutting can be intimidating at first, but with a sharp blade, proper preparation, and controlled pressure, it can be done accurately.
What I Learned From This Project
This project reminded me how strongly the condition of the substrate and the choice of wallpaper affect installation efficiency.
The actual amount of wallpaper was relatively small, but the project still required careful attention because of the access panel, square box, and narrow areas around the door frame.
At the same time, the relatively good condition of the plasterboard and the thick, embossed wallpaper made the preparation process much easier than usual.
This is an important lesson for both installers and customers.
Wallpaper selection is not simply about choosing a pattern or color.
The material should also be selected based on the condition of the surface underneath it.
Understanding this relationship makes it easier to estimate the required preparation work and explain material choices to customers.
It also helps installers work more efficiently without sacrificing the quality of the finished result.
FAQ
1. How long did this wallpaper replacement project take?
The entire project took approximately four hours.
2. Why was the wallpaper being replaced?
The existing wallpaper had been damaged by water leakage, so it needed to be replaced.
3. Was the plasterboard badly damaged?
No. Fortunately, the water damage was relatively minor, and the plasterboard remained in reasonably good condition.
4. How much surface preparation was required?
Only the loose areas of the old wallpaper backing paper were removed, followed by one coat of finishing compound. A separate base coat was not necessary.
5. Why was the new wallpaper easy to install?
The new wallpaper was relatively thick and heavily embossed, which helped hide minor imperfections in the substrate and made it easier to work with.
6. Why can thin wallpaper be difficult to install over an existing substrate?
Thin wallpaper tends to show bumps, dents, and other imperfections underneath it. This can make additional surface preparation necessary.
7. What width is Japanese wallpaper typically?
Wallpaper commonly used by Japanese installers is approximately 90 cm wide and is often supplied in 50 m rolls.
8. Why are wallpaper joints important?
Poorly positioned or poorly executed joints can become highly visible. They can also open over time, particularly if the substrate moves.
9. How can a wallpaper installer make joints less noticeable?
Place joints in less visible locations, keep them as short as practical, and make sure the wallpaper is properly wrapped around corners before cutting the joint.
10. What is one of the most important tools for detailed wallpaper work?
A sharp utility knife is essential. A fresh blade allows the installer to make clean and controlled cuts around corners, access panels, and other detailed areas.
Conclusion
This was a relatively small wallpaper replacement project, but it included several details that required careful installation.
The biggest advantage was the combination of a relatively good substrate and thick, embossed wallpaper. Because of these conditions, we were able to keep the surface preparation to a minimum and move on to installation relatively quickly.
The project also included several detailed areas, including a ceiling access panel, a square-shaped box, and narrow spaces around a door frame.
These small details are a good reminder that the difficulty of a wallpaper project is not always determined by the total amount of wallpaper being installed.
A small room can still require a high level of skill when there are many corners, joints, openings, and difficult-to-reach areas.
For restoration work, understanding the relationship between the existing substrate and the wallpaper material is especially important.
Choose the material carefully, prepare the surface properly, plan your joints before cutting, and keep your tools sharp.
Good preparation makes difficult wallpaper installation much easier.
Want to see more professional renovation projects? Explore my latest articles below.
Replacing Wallpaper on Beams and Walls in a Japanese Apartment with Traditional Juraku Plaster Walls


Comments