

Project Type: Apartment Interior Renovation
Location: Japan
Property: 4th-Floor Apartment
Layout: 3LDK
Floor Area: Approximately 65㎡
Work: Surface Preparation and Ceiling Wallpaper Installation
Crew: 2 Wallpaper Installers, 1 Site Supervisor, and 1 Plumbing Technician
Working Time: 7 Hours
Introduction
Today, I worked on an interior renovation project in a 3LDK apartment on the fourth floor of a residential building in Japan.
The apartment has a total floor area of approximately 65 square meters.
The demolition work and old wallpaper removal had already been completed during a previous visit. Today’s main tasks were preparing the wall surfaces and installing new wallpaper, mainly on the ceilings.
Two wallpaper installers and one site supervisor were working on the project. A plumbing technician was also present to carry out separate installation work.
We carefully planned our work around the areas where the plumbing technician was working to avoid interfering with each other’s tasks.
Related Project
Apartment Renovation Project: Wallpaper Removal, Demolition, and Fixture Removal in a 65 m² Condo
Job Site Report: Surface Preparation and Wallpaper Installation
1. Applying Primer to the Substrate
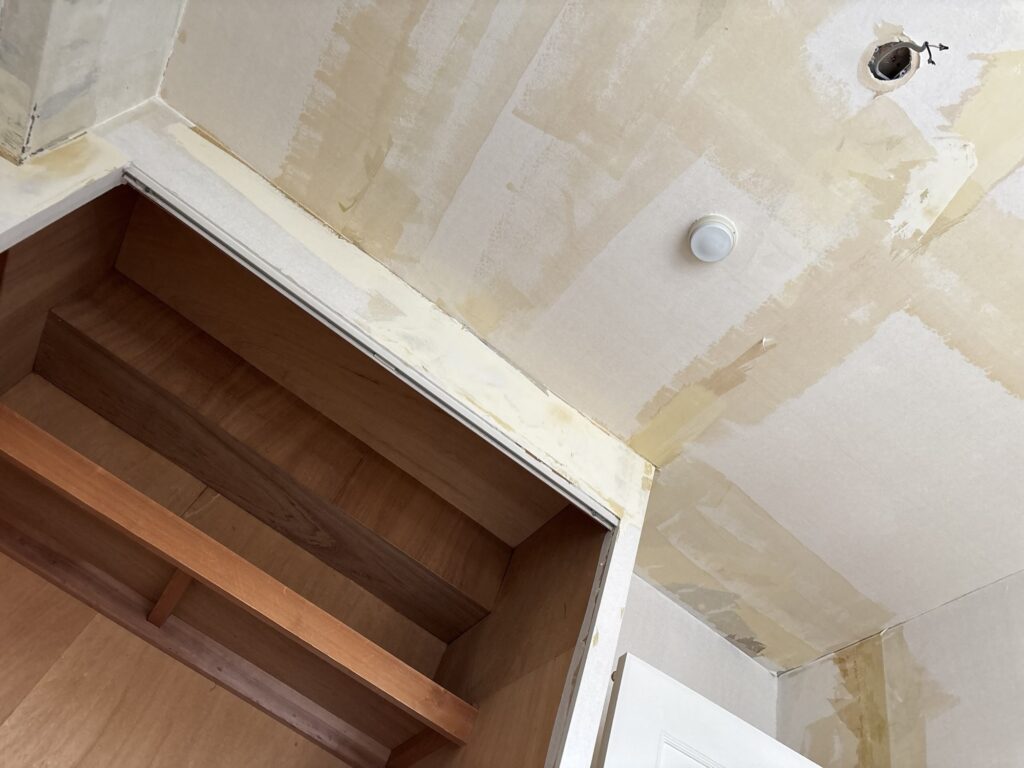
During the previous visit, I applied a surface-strengthening primer to areas where the substrate was exposed mortar and where the remaining wallpaper backing paper was loose.
The primer helps strengthen the surface and improves wallpaper adhesion.
It also hardens loose backing paper, making it easier to prepare a smooth and stable surface before applying putty.
This step is especially important when working with different types of substrates.
2. Applying Joint Compound and Finishing Putty
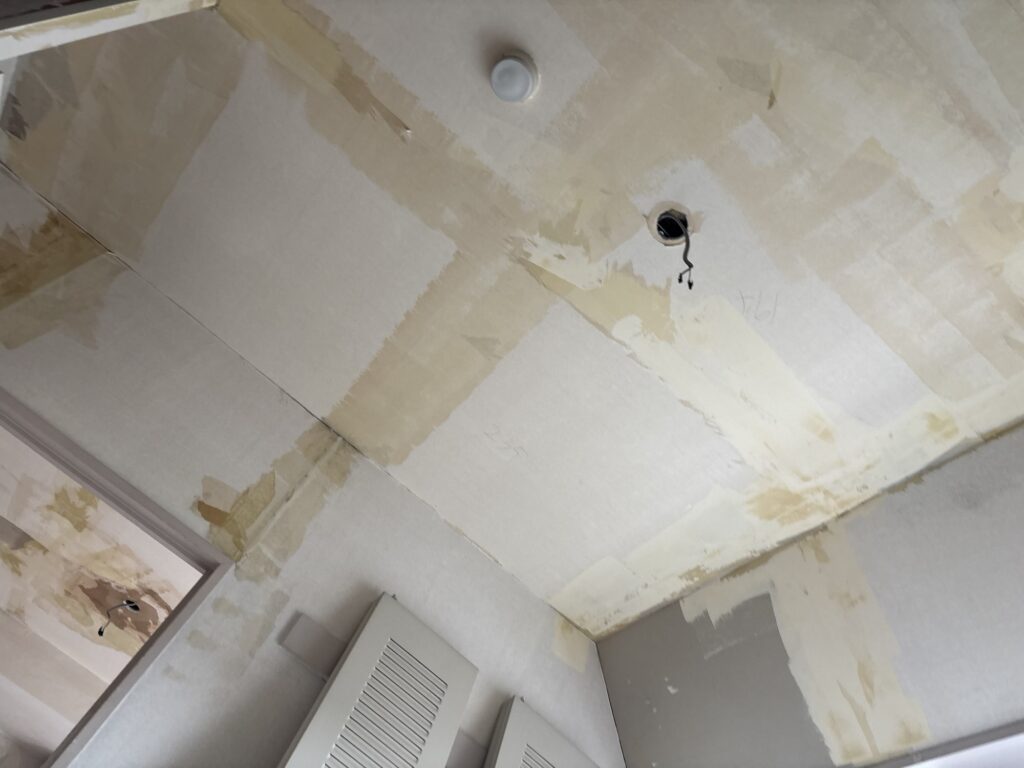
Next, I applied base putty to the deeper grooves and finishing putty to the shallower areas and exposed mortar surfaces.
The goal was to fill uneven areas and create a suitable surface for the new wallpaper.
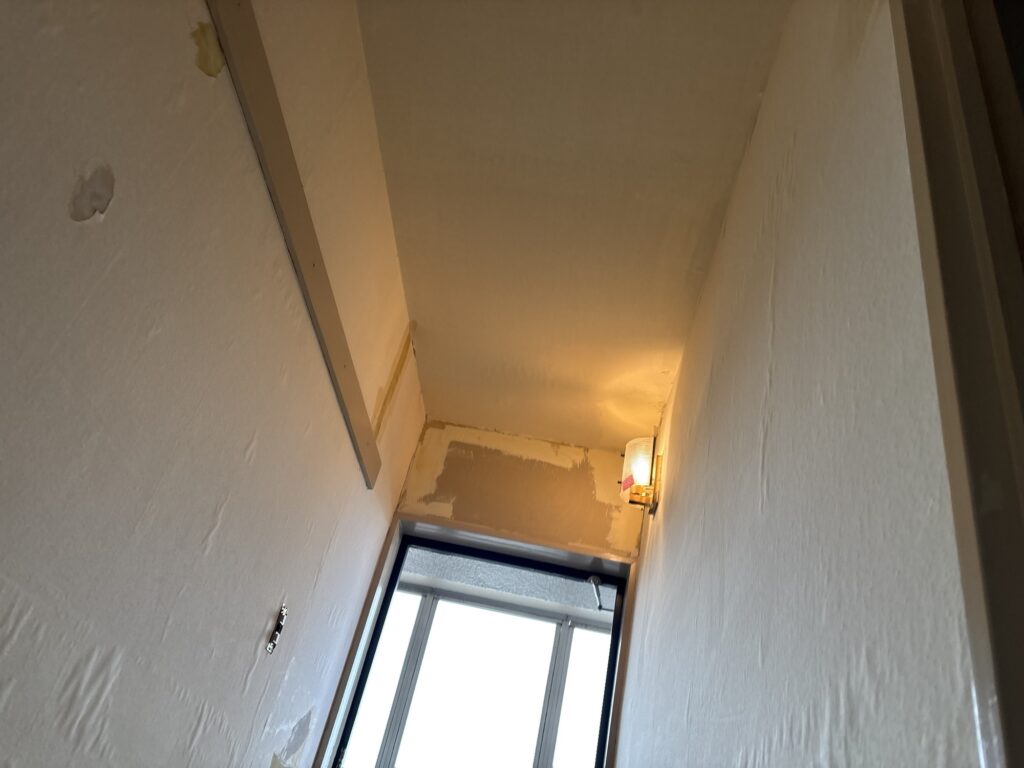
The wallpaper selected for this project was white with a noticeable embossed texture.
Because of its textured surface, minor imperfections in the substrate are less likely to stand out.
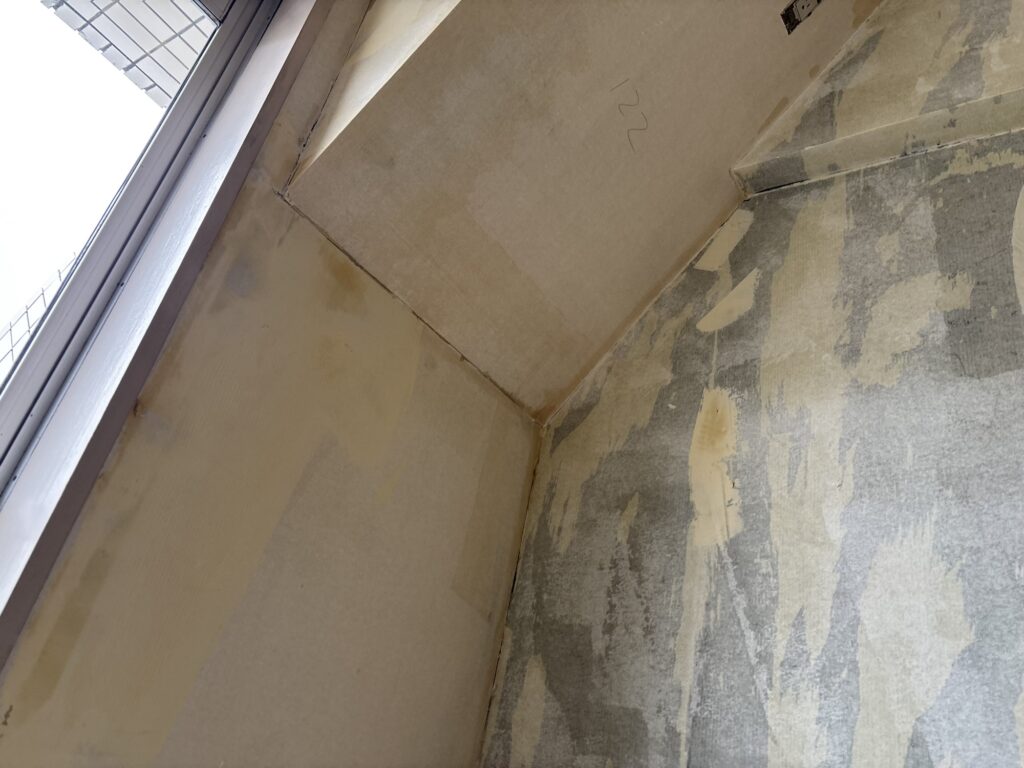
This meant we did not need to be quite as particular about achieving an absolutely perfect finish compared with installing smooth wallpaper.
However, proper surface preparation is still essential for a professional result.
3. Measuring and Preparing the Ceiling Wallpaper
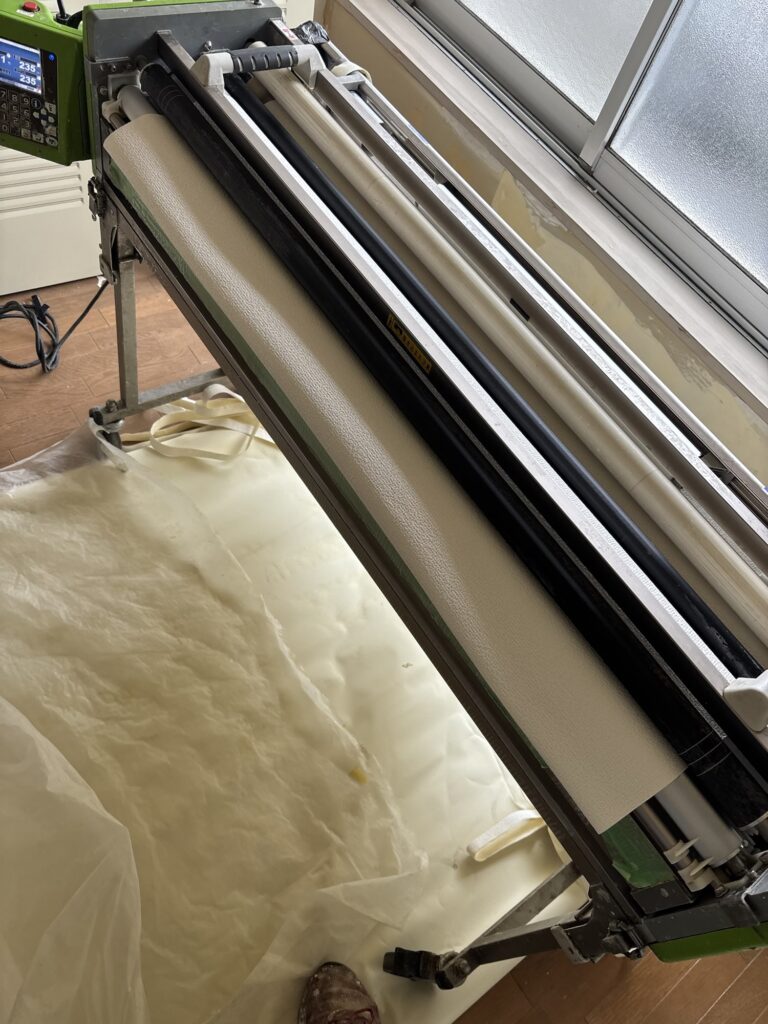
While waiting for the putty to dry, we measured the ceilings in several areas.
These included:
- The main living areas
- The toilet ceiling
- Ceiling beams
- An additional lowered ceiling
The longest measurement was 320 cm.
We prepared the other measurements individually and kept all wallpaper strips at a consistent width of 93 cm.
After measuring, we used a wallpaper pasting machine to apply adhesive to the required lengths.
Preparing the wallpaper in advance helped us work efficiently once the ceiling installation began.
4. Removing Old Caulking Before Installation
Before installing the ceiling wallpaper, the two of us removed the old caulking from the internal corners.
We used a utility knife to carefully scrape away the hardened material.
Old caulking can create raised areas along the corners, which may affect the final wallpaper finish.
Removing it beforehand helps create a cleaner surface and makes it easier to achieve a neat result.
5. Installing the Ceiling Wallpaper
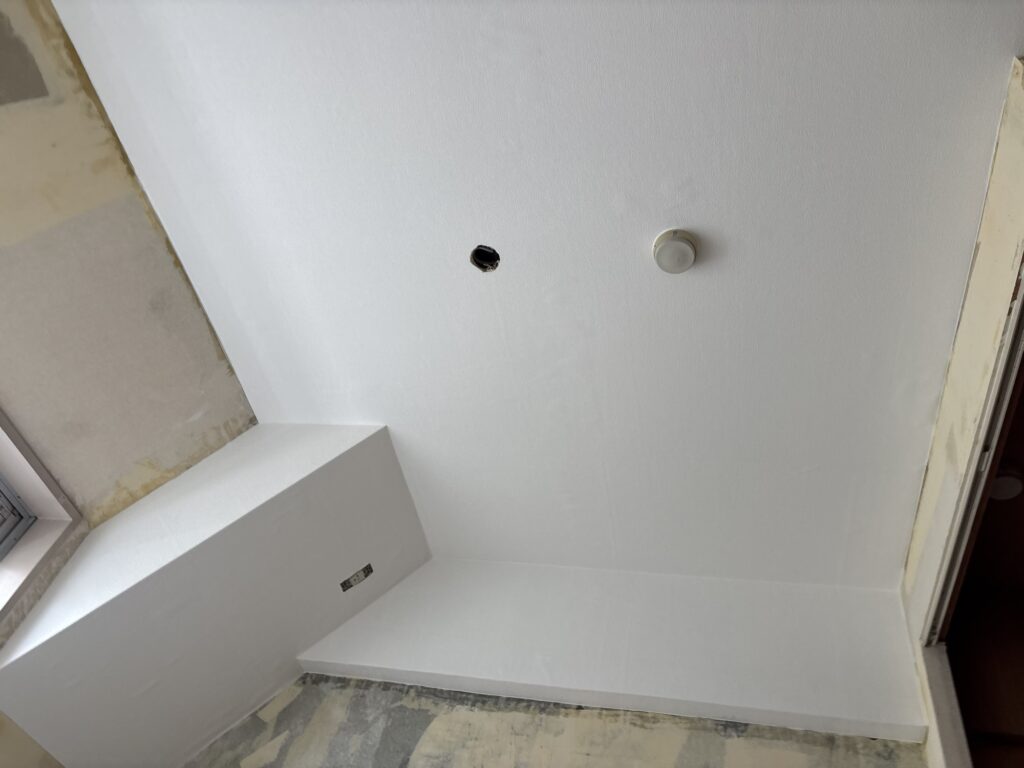
We started installing the wallpaper while paying close attention to keeping each sheet straight.
Using a wallpaper smoothing tool, we pushed air bubbles from the center toward the outer edges.
This helped the wallpaper adhere evenly to the ceiling.
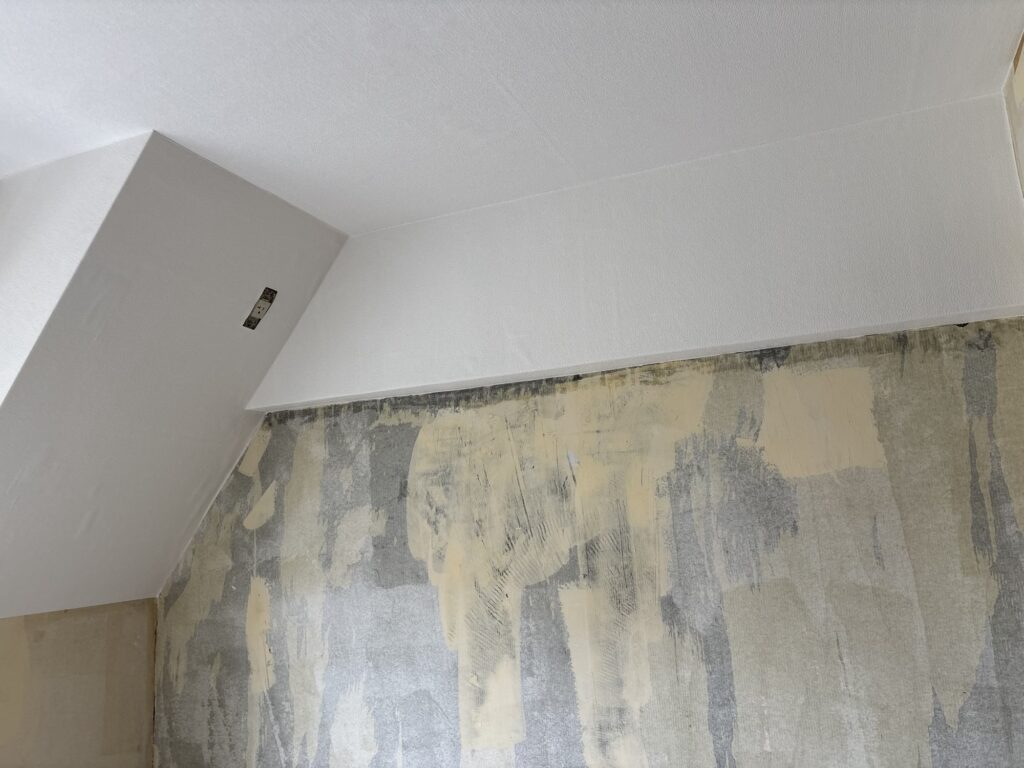
After positioning each sheet, we used a wallpaper spatula as a guide and trimmed the excess material with a utility knife.
One important thing to remember when working on mortar surfaces is that utility knife blades wear down faster than they do on gypsum board.
For this reason, we needed to replace the blades regularly to maintain clean and accurate cuts.
6. Installing Wallpaper Around the Box-Shaped Lowered Ceiling
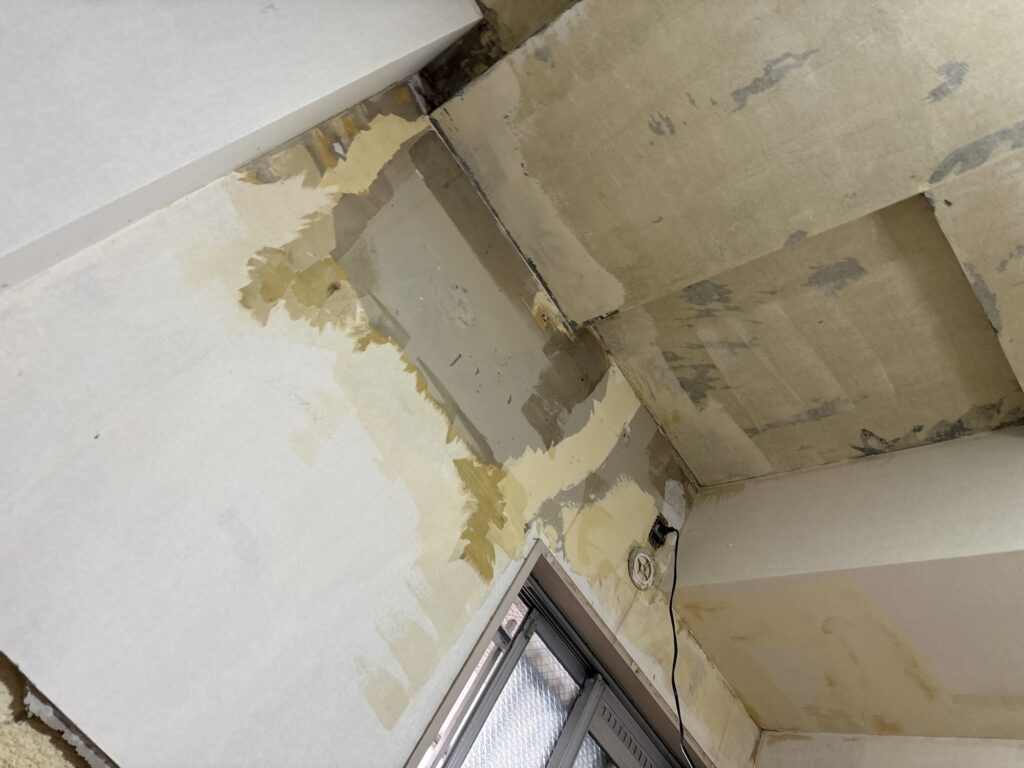
One of the more interesting parts of today’s work was installing wallpaper around a box-shaped lowered ceiling.
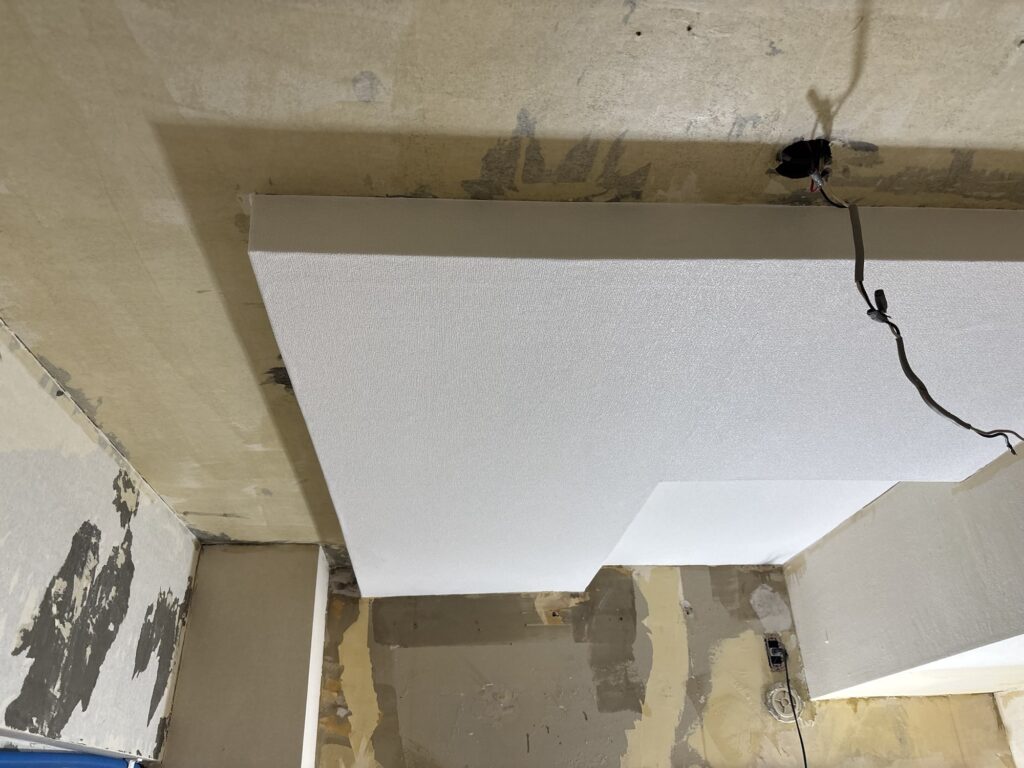
When covering this type of structure with a single sheet, the way the wallpaper is wrapped around the corners determines where the final seam will be located.
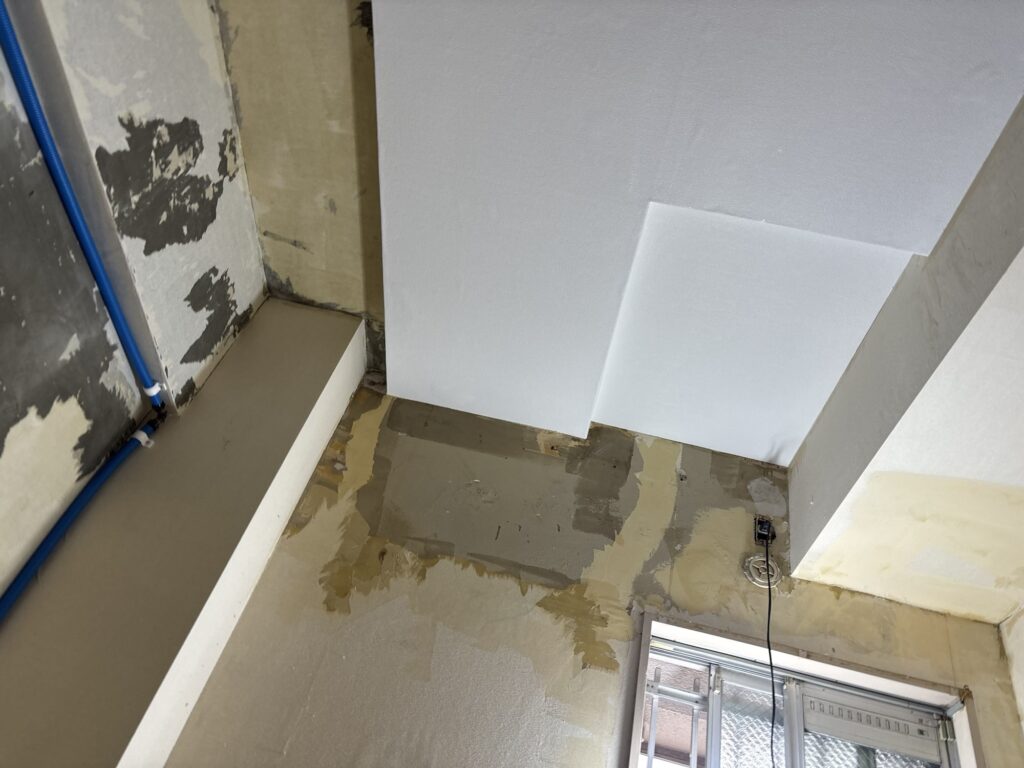
For the long side of the lowered ceiling, we started from the bottom, worked upward, and wrapped the wallpaper around the structure.
We then joined the overlapping edges on the less visible backside.
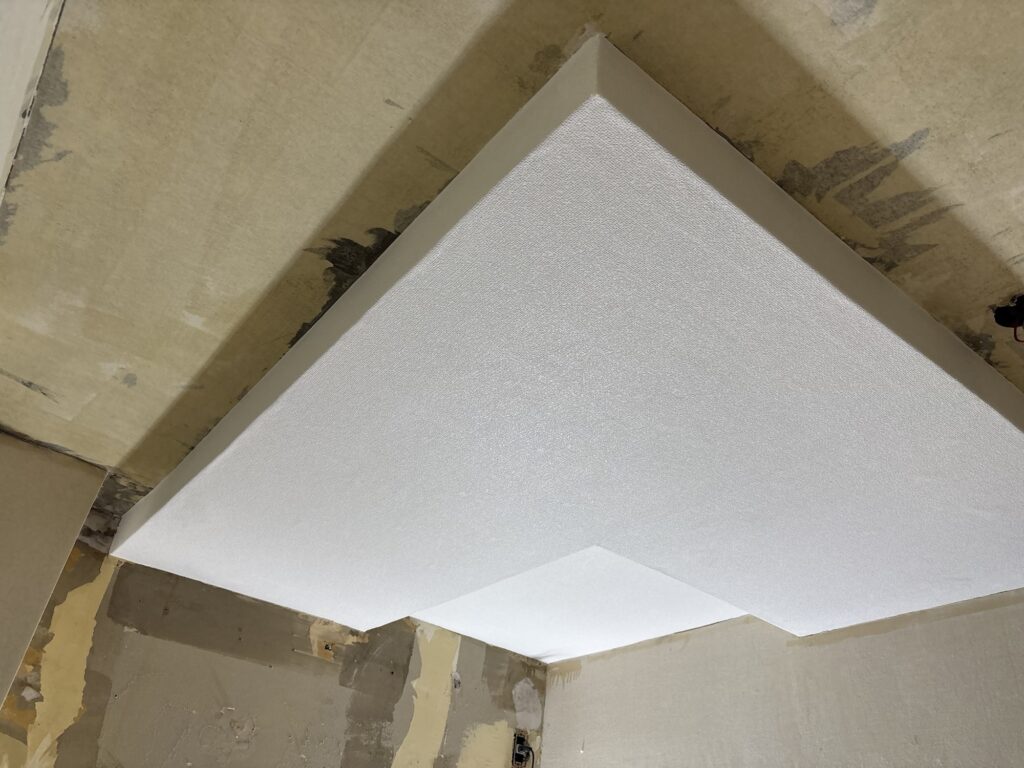
When planning wallpaper seams, it is generally preferable to place them somewhere they are less noticeable.
Keeping the seam as short as practical is also desirable.
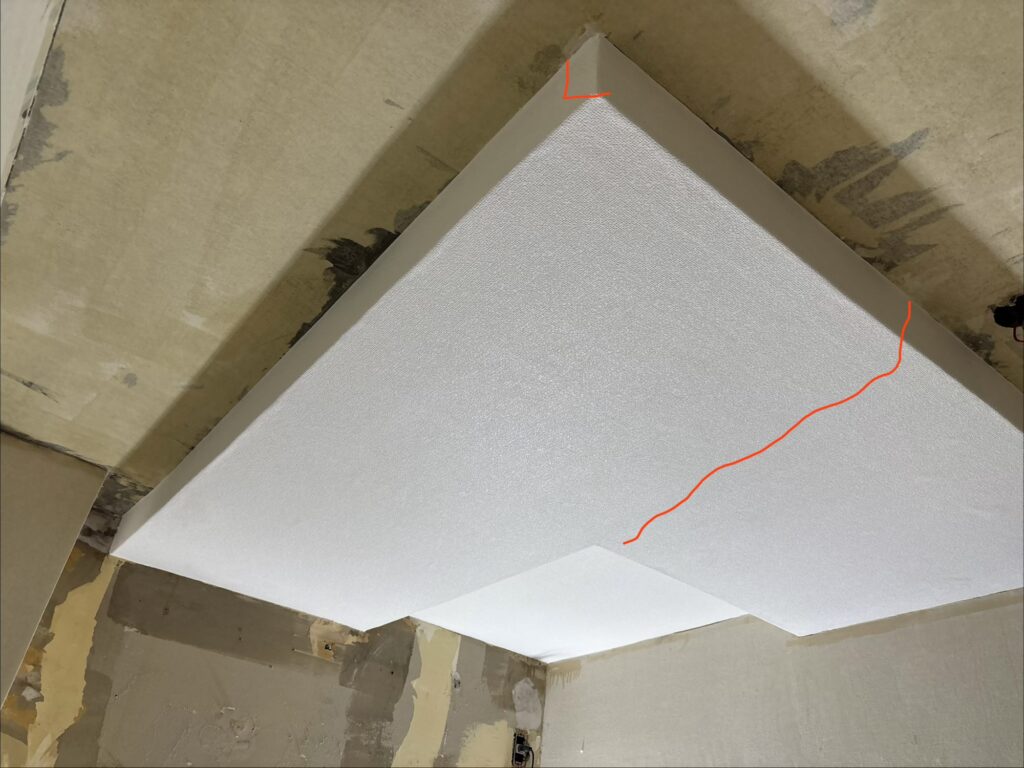
In this project, we positioned the seam where it could not easily be seen from the entrance to the room.
As a result, it was difficult to notice the joint at first glance.
These small decisions make a difference in the final appearance.
Knowing how to plan sheet direction and seam placement is something that naturally develops through years of hands-on experience.
7. Completing the Ceiling Installation
After finishing the lowered ceiling, we continued installing wallpaper on the hallway and kitchen ceilings.
Once all the planned ceiling areas were completed, we finished today’s work.
The total working time was approximately seven hours.
Tools Used
The following tools and materials were used during this project:
- Wallpaper pasting machine
- Wallpaper smoothing tool
- Wallpaper spatula
- Utility knife
- Replacement utility knife blades
- Measuring tape
- Surface-strengthening primer
- Base putty
- Finishing putty
- Wallpaper adhesive
- White embossed wallpaper
Professional Tips
1. Strengthen Weak Surfaces Before Applying Putty
Loose backing paper and exposed mortar can cause problems during wallpaper installation.
Applying an appropriate primer helps stabilize these surfaces and provides a better foundation for the next steps.
2. Match the Surface Preparation to the Wallpaper Texture
Different wallpaper materials reveal surface imperfections differently.
Smooth wallpaper tends to show minor unevenness more clearly, while embossed wallpaper can help conceal small imperfections.
However, textured wallpaper should never be used as a substitute for proper surface preparation.
3. Plan Seam Locations Before Installing Complex Sections
When working around beams, lowered ceilings, and box-shaped structures, think about where the seams will end up before cutting and installing the wallpaper.
A well-planned seam can make the finished installation look much cleaner.
4. Replace Utility Knife Blades Regularly
Mortar surfaces can wear down knife blades faster than gypsum board.
A dull blade can cause rough cuts and damage the wallpaper.
Replacing blades frequently helps maintain clean edges.
5. Remove Old Caulking From Internal Corners
Hardened caulking can create unwanted bumps beneath new wallpaper.
Removing old material before installation helps prevent uneven finishes around corners.
Common Mistakes to Avoid
1. Applying Wallpaper Without Strengthening Weak Substrates
If loose backing paper or weak mortar is left untreated, it may cause adhesion problems.
Always check the substrate and apply an appropriate primer when necessary.
2. Ignoring Minor Surface Imperfections
Even when using textured wallpaper, excessive unevenness can affect the final appearance.
Proper putty work is still important.
3. Placing Seams in Highly Visible Areas
Poor seam placement can make an otherwise good installation look untidy.
Consider the viewing angle from the entrance and other important areas of the room before deciding where to join the sheets.
4. Continuing to Use a Dull Utility Knife
A worn blade can produce rough edges and make precise cutting difficult.
Replace the blade whenever necessary instead of trying to finish the job with a dull one.
5. Leaving Old Caulking in Place
Hardened caulking can create raised areas that become visible through the finished wallpaper.
Check the internal corners carefully before installation.
What I Learned From This Project
Today’s project reminded me that wallpaper installation is not simply about covering a surface with new material.
The quality of the finished work depends on several decisions made before and during installation.
Preparing the substrate, selecting the right putty, measuring accurately, and planning seam locations all contribute to the final result.
I also had to think carefully about how to wrap the wallpaper around the lowered ceiling to keep the seam out of sight.
These are small details, but they make a big difference.
With experience, you gradually learn to recognize the best approach for each situation.
I believe that developing this kind of practical judgment is one of the most important parts of becoming a skilled wallpaper installer.
Related Project
Black Wallpaper Installation in a Lived-In Tokyo Apartment: Kitchen and Living Room
Frequently Asked Questions (FAQ)
1. Why is primer necessary before wallpaper installation?
Primer helps strengthen weak or porous surfaces and improves the conditions for wallpaper adhesion. It is especially useful on exposed mortar and loose backing paper.
2. What is the difference between base putty and finishing putty?
Base putty is generally used to fill deeper holes and grooves, while finishing putty is used to smooth shallower imperfections and create a suitable surface for wallpaper.
3. Can embossed wallpaper hide uneven surfaces?
Embossed wallpaper can make minor surface imperfections less noticeable compared with smooth wallpaper. However, proper surface preparation is still necessary.
4. Why should old caulking be removed before installing wallpaper?
Hardened caulking can create raised areas around internal corners. Removing it helps achieve a flatter and cleaner finish.
5. Why do utility knife blades wear out faster on mortar?
Mortar is generally more abrasive than gypsum board. As a result, knife blades can become dull more quickly when cutting wallpaper along mortar surfaces.
6. How do you prevent air bubbles when installing ceiling wallpaper?
Use a wallpaper smoothing tool and work from the center toward the outer edges to push trapped air out while maintaining even contact with the ceiling.
7. How do you make wallpaper seams less noticeable?
Plan the sheet direction and seam location before installation. Whenever possible, position joints in less visible areas and avoid unnecessary seams.
8. What is a lowered ceiling?
A lowered ceiling is a section of ceiling built below the main ceiling level. It is often used to accommodate lighting, air conditioning equipment, pipes, or other building services.
9. How long did this apartment wallpaper project take?
Today’s work took approximately seven hours. Two wallpaper installers and one site supervisor were involved, while a plumbing technician worked separately.
10. What is the most important part of professional wallpaper installation?
There is no single step that determines everything. Good surface preparation, accurate measurements, careful installation, and proper seam planning all work together to produce a high-quality finish.
Conclusion
Today’s project involved preparing the substrate and installing new embossed wallpaper on several ceiling areas in a 65-square-meter apartment.
Although the installation itself was straightforward in some areas, the lowered ceiling required careful planning to achieve a clean and less noticeable seam.
Working efficiently while coordinating with other trades was also an important part of the project.
For me, wallpaper installation is a job where experience and attention to detail continue to make a difference.
Every project brings a new situation to think about, and that is how I continue to improve my skills as a wallpaper installer.
Thanks for reading!
The Japanese Wallpaper Craftsman
Related projects
Installing New Drywall After Plumbing Work in a Japanese Apartment


Comments