

Project Information
- Project Type: Air Conditioner Replacement and Installation
- Location: Third-Floor Apartment
- Building Type: Three-Story Apartment Building
- Work Area: Occupied Residential Apartment
- Crew: 2 Workers
- Work Duration: 4 Hours
- Main Tasks: Air Conditioner Removal, Indoor Unit Installation, Refrigerant Piping, Rooftop Outdoor Unit Connection, Vacuuming, and Test Operation
Introduction
Today’s project involved replacing an air conditioner in a third-floor apartment of a three-story residential building.
The customer was still living in the apartment, so we had to be especially careful not to damage the furniture, floors, or walls during the installation.
Two workers handled the entire project.
One of the biggest challenges was the outdoor unit location. It was installed on the rooftop, and the refrigerant pipes had to run upward from the apartment to the roof.
To route the pipes outside the building, we had to work near and over the rooftop railing. This made the job particularly dangerous because of the risk of falling.
In fact, we had originally planned to complete this job about two weeks earlier. However, it was raining that day, and the wet surfaces created a serious slipping hazard.
We decided to postpone the work rather than take unnecessary risks.
Today, the weather conditions were suitable, so we finally started the installation.
Related Project
Air Conditioner Installation in a Japanese Apartment: A Step-by-Step Job Site Report
Job Site Report – Step-by-Step Installation Process
1. Protecting the Interior
Before starting the work, we laid down protective sheets on the floor.
Since the customer was living in the apartment, protecting the interior was one of our first priorities.
We made sure the work area was covered to prevent scratches, dirt, and other damage.
2. Pumping Down the Refrigerant
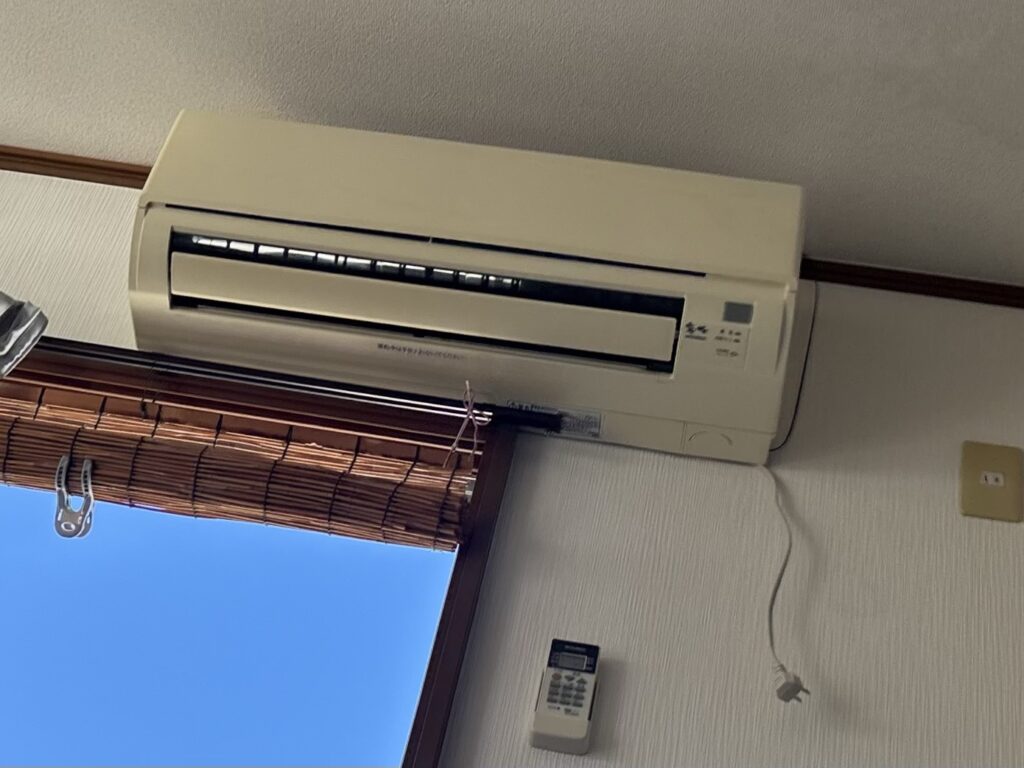
Next, we prepared the existing air conditioner for removal.
We operated the air conditioner in forced cooling mode and began the pump-down process.
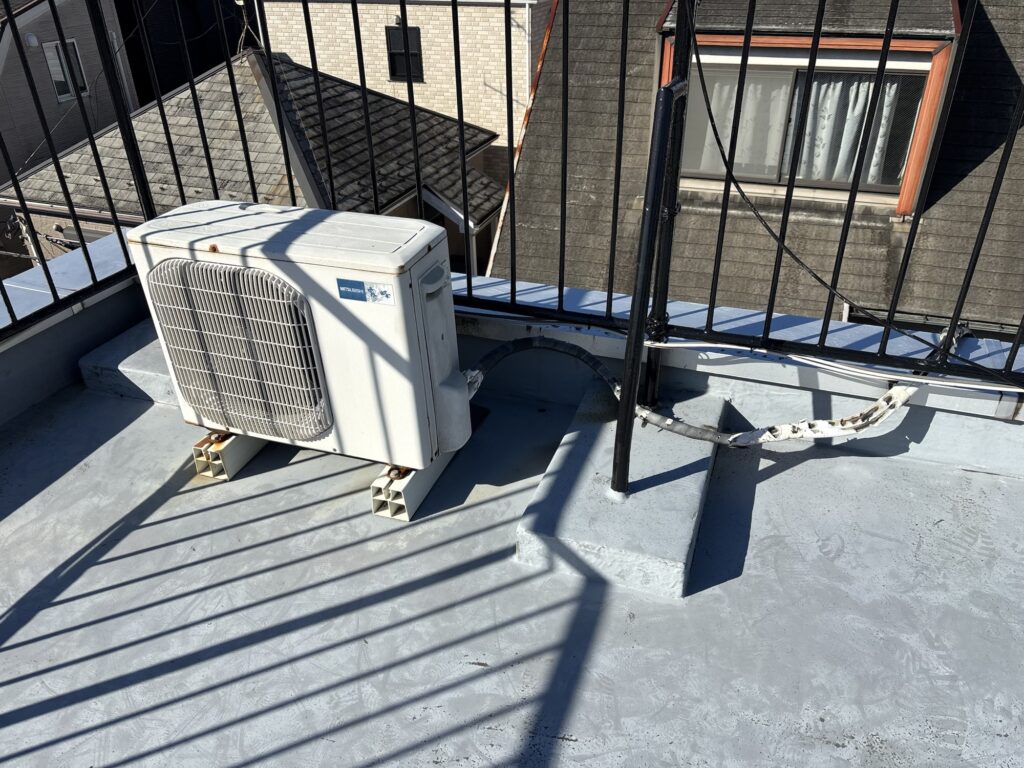
First, we closed the liquid-side service valve using a hex wrench.
After approximately five minutes, we monitored the outdoor unit’s operating sound and followed the manufacturer’s specified procedure to close the gas-side service valve.
The purpose of this process is to collect the refrigerant remaining in the indoor unit and connecting pipes back into the outdoor unit.
Closing the liquid-side valve first stops the supply of refrigerant from the outdoor unit, while the compressor continues drawing refrigerant from the indoor unit and piping through the gas-side line.
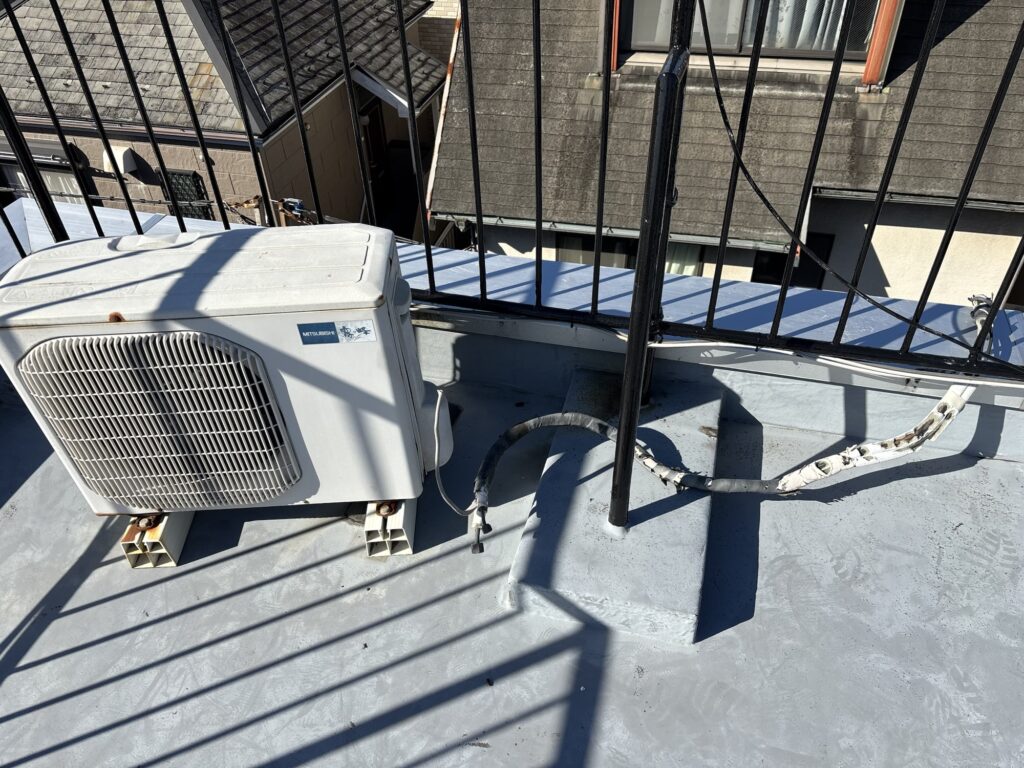
This allows the refrigerant to be recovered into the outdoor unit.
If this procedure is performed incorrectly, refrigerant can escape rapidly when the connections are disconnected.
Therefore, following the correct pump-down procedure is essential.
After completing the pump-down, we removed both the indoor and outdoor units.
3. Installing the Indoor Unit Mounting Plate
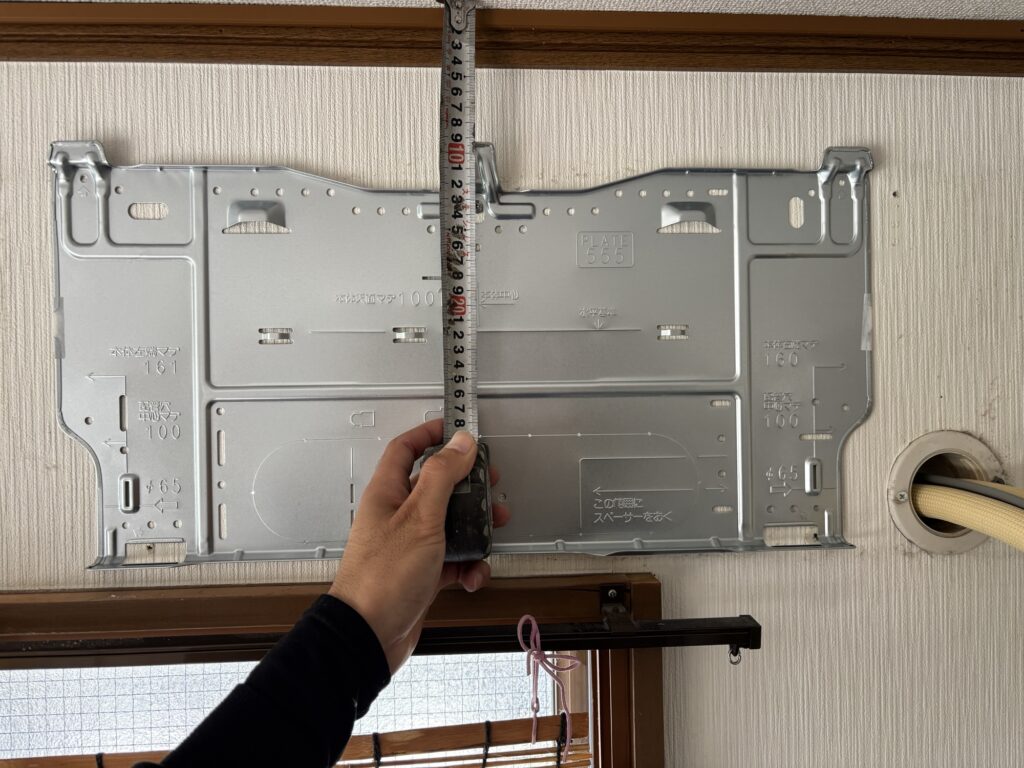
Once the old equipment was removed, we prepared the wall for the new indoor unit.
We positioned the mounting plate and used a spirit level to check that it was properly aligned.
Making sure the mounting plate is level is important for a clean installation and proper drainage.
After confirming the position, we secured the mounting plate to the wall.
4. Connecting the Electrical Wiring and Refrigerant Pipes
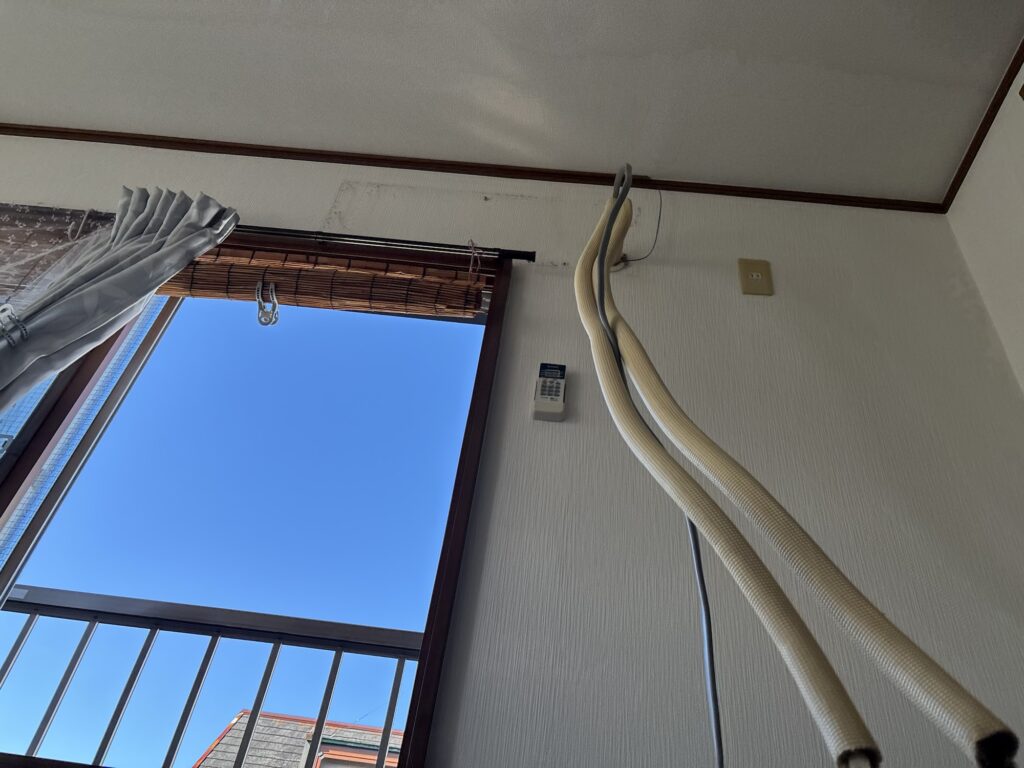
Next, we connected the electrical wiring to the indoor unit.
We then passed the refrigerant pipes through the wall opening.
After preparing the pipe ends, we created new flare connections and connected the pipes to the indoor unit.
One important detail is how smoothly the flare nuts engage with the threads.
The nuts should turn smoothly without resistance or cross-threading.
If a nut does not turn smoothly, stop and check the alignment and condition of the connection.
Never force it.
An improperly made connection can cause refrigerant leaks later.
Small mistakes during installation can lead to much bigger problems, so taking the time to make proper connections is essential.
5. Positioning the Indoor Unit
After completing the indoor connections, we carefully mounted the new indoor unit onto its mounting plate.
We checked that it was properly secured and that the piping was positioned correctly.
For this project, the refrigerant pipes and electrical wiring had to extend upward to the rooftop, while the drain hose was routed downward.
This required careful planning to keep the different lines in their correct positions.
6. Routing the Pipes to the Rooftop
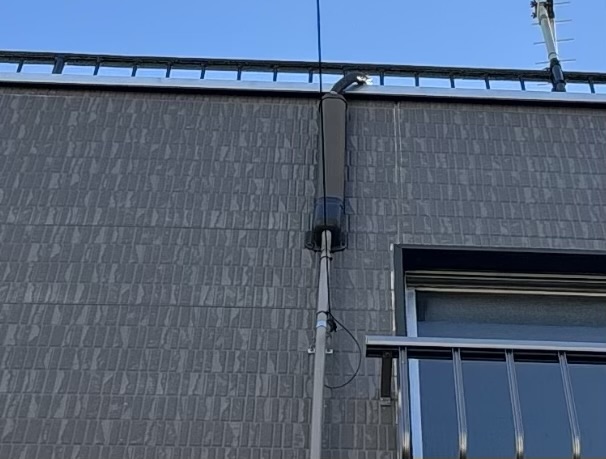
This was one of the most challenging parts of the project.
We routed the refrigerant pipes and electrical wiring upward toward the rooftop outdoor unit.
The drain hose was routed downward separately.
Because the outdoor unit was located on the roof, the piping route required work near the rooftop railing.
Working at height always involves serious risks, so proper fall protection and safe access procedures are essential.
We also replaced the existing pipe cover because the original one had deteriorated over time.
In addition, we installed a new flexible corrugated pipe cover between the point where the piping reached the rooftop and the outdoor unit.
This extra protection helps shield the insulation and piping from direct sunlight and rain.
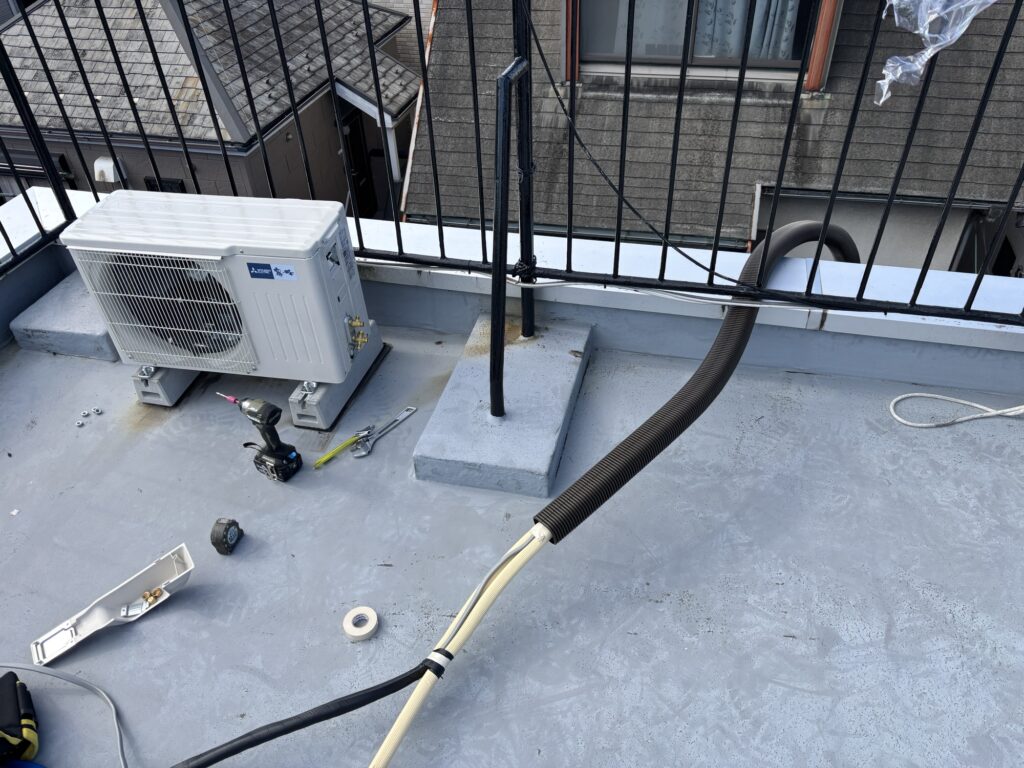
Without adequate protection, the insulation can deteriorate, crack, and eventually peel away.
Looking at the original installation, we could see that the exposed insulation had already suffered considerable deterioration.
Replacing the damaged sections and adding proper protection should help extend the life of the installation.
7. Connecting the Outdoor Unit
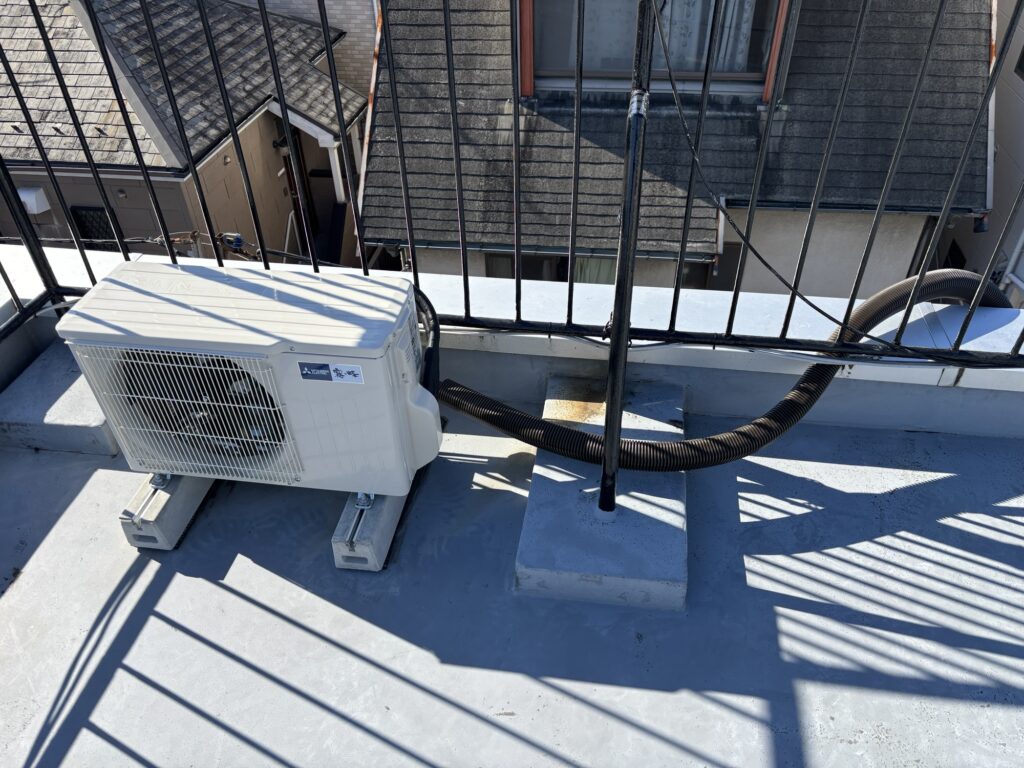
Once the piping reached the rooftop, we connected the refrigerant pipes to the outdoor unit.
We carefully prepared the flare connections and tightened them according to the manufacturer’s specifications.
We also checked the electrical connections and made sure the drain hose was routed correctly.
8. Vacuuming and Leak Checks
After completing the pipe connections, we performed vacuum evacuation using a vacuum pump.
This process removes air and moisture from the refrigerant piping before the system is operated.
We checked the vacuum condition and inspected the connections for leaks using the appropriate leak-checking procedure.
Proper evacuation is important because air and moisture inside the refrigerant circuit can affect system performance and reliability.
9. Test Operation
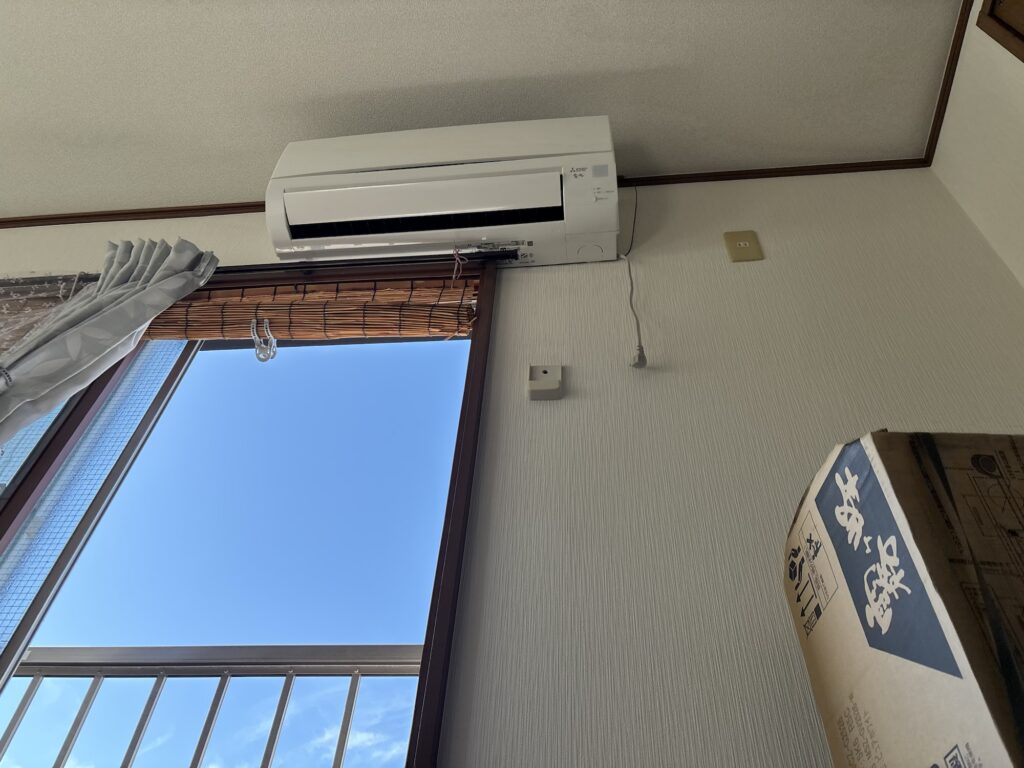
After completing the installation and final checks, we started the air conditioner.
We checked that the system operated normally and confirmed that there were no apparent problems.
Everything worked as expected.
The installation was complete.
Total work time: Approximately 4 hours.
Related Project
Installing a Used Air Conditioner in My 50-Year-Old House | A Craftsman’s DIY Project
Tools Used
The following tools and materials were used during this project:
- Hex wrench – For operating the service valves
- Spirit level – For leveling the indoor unit mounting plate
- Flaring tool – For preparing refrigerant pipe connections
- Vacuum pump – For evacuating air and moisture from the refrigerant piping
- Manifold gauge set – For checking refrigerant system pressure and vacuum conditions
- Pipe cutters and preparation tools – For preparing refrigerant pipes
- Protective sheets – For protecting the customer’s interior
- Flexible corrugated pipe cover – For protecting exposed piping
- Electrical installation tools – For connecting the wiring
Professional Tips
1. Never Rush Work at Height
Working near a rooftop railing is extremely dangerous.
Even experienced workers can lose their balance, especially when carrying tools or materials.
Always assess the working environment and use appropriate fall protection.
If safe working conditions cannot be guaranteed, postpone the job.
2. Do Not Work on Wet Surfaces Without Proper Safety Measures
Rain can make rooftops, ladders, and other surfaces extremely slippery.
We postponed this project because the weather conditions created an unnecessary risk.
Finishing a job on schedule is important, but worker safety must always come first.
3. Pay Attention to Flare Connections
Flare connections are critical points in an air conditioner installation.
Poorly prepared flares, incorrect alignment, or improper tightening can cause refrigerant leaks.
Always inspect the flare surfaces and follow the manufacturer’s specified tightening procedure.
4. Protect Refrigerant Pipe Insulation
Outdoor piping is constantly exposed to sunlight, rain, and temperature changes.
Damaged insulation can reduce efficiency and shorten the service life of the installation.
Use suitable pipe covers and UV-resistant protective materials where necessary.
5. Check the Drainage Route
The drain hose must have an appropriate downward slope so that condensation water can flow out properly.
Avoid unnecessary bends, blockages, or sections where water can collect.
Common Mistakes to Avoid
1. Rushing the Pump-Down Process
Incorrect valve operation can cause refrigerant to escape or damage the compressor.
Always follow the manufacturer’s procedure and use the appropriate equipment.
Never assume that a fixed time or change in operating sound alone confirms that refrigerant recovery is complete.
2. Forcing Flare Nuts
If a flare nut does not turn smoothly, do not force it.
Check the alignment and threading before continuing.
Forcing the connection can damage the threads or create a poor seal.
3. Leaving Insulation Exposed Outdoors
Refrigerant pipe insulation can deteriorate when exposed to direct sunlight and rain.
Leaving it unprotected can eventually lead to damaged insulation and reduced system performance.
4. Ignoring the Drain Hose Position
An incorrectly routed drain hose can cause water leakage inside the apartment.
Always check the slope and drainage path before finishing the installation.
5. Taking Unnecessary Risks on Rooftops
Working over or around a rooftop railing without appropriate protection is extremely dangerous.
Never prioritize finishing the job over personal safety.
What I Learned From This Project
This project reminded me that air conditioner installation is not simply about connecting pipes and wiring.
The surrounding environment and the route of the refrigerant pipes can make a relatively standard installation much more complicated.
In particular, installing an outdoor unit on a rooftop requires careful planning and additional attention to safety.
I also noticed how important proper pipe protection is.
The old insulation had deteriorated considerably because it had been exposed to the weather for a long time.
Adding new protective covers may seem like a small detail, but it can make a significant difference in long-term durability.
Another important lesson was the decision to postpone the original job because of rain.
Sometimes, the best decision a worker can make is to stop and wait for safer conditions.
In the end, we completed the installation in approximately four hours, and the air conditioner operated normally.
It was another good opportunity to improve my practical skills and learn from a real job site.
FAQ – Frequently Asked Questions
1. What is a pump-down procedure in air conditioner installation?
Pump-down is a procedure used to collect refrigerant from the indoor unit and connecting pipes back into the outdoor unit before removing the equipment.
It helps prevent refrigerant from escaping during removal.
2. Why is the liquid-side valve closed first?
Closing the liquid-side valve first stops the supply of refrigerant from the outdoor unit.
The compressor can then draw the remaining refrigerant from the indoor unit and piping through the gas-side line.
3. Why is a spirit level used when installing an indoor unit?
A spirit level helps ensure that the mounting plate is properly aligned.
Correct positioning is important for a neat installation and proper condensate drainage.
4. What is a flare connection?
A flare connection is a type of pipe connection made by expanding the end of a copper pipe into a cone shape.
It allows the refrigerant pipes to connect securely to the air conditioner.
5. Why should flare nuts turn smoothly?
Smooth threading helps prevent cross-threading and damage to the connection.
If a nut feels unusually tight, the alignment or threads should be checked before tightening.
6. Why is vacuum evacuation necessary?
Vacuum evacuation removes air and moisture from the refrigerant piping.
Air and moisture inside the refrigerant circuit can negatively affect system performance and reliability.
7. Why should outdoor refrigerant pipes be covered?
Outdoor pipes are exposed to sunlight, rain, and changing temperatures.
Protective covers help prevent the insulation from deteriorating and peeling away.
8. Why was the installation postponed because of rain?
The work involved accessing a rooftop and handling materials near a railing.
Wet surfaces increased the risk of slipping and falling, so we decided to postpone the work until safer conditions were available.
9. How long did this air conditioner installation take?
The entire project took approximately four hours.
Two workers completed the removal of the old equipment, installation of the new units, piping work, vacuum evacuation, and test operation.
10. What was the most challenging part of this project?
The most challenging part was routing the refrigerant pipes and electrical wiring from the third-floor apartment to the rooftop outdoor unit.
The elevated working area required extra attention to safety and careful planning.
Conclusion
Today’s project involved replacing an air conditioner in an occupied third-floor apartment, with the outdoor unit located on the rooftop.
Although the installation took approximately four hours, the unusual piping route and rooftop work made this project more challenging than a standard air conditioner replacement.
We carefully removed the old equipment, installed the new indoor unit, routed the pipes to the rooftop, replaced deteriorated pipe covers, and completed the vacuum evacuation and test operation.
Everything worked normally, and the job was completed successfully.
Every job site presents different challenges.
By paying attention to safety, taking care with small details, and learning from each installation, I hope to continue improving my skills as an interior and air conditioning installation worker.
Thanks for reading!
The Japanese Wallpaper Craftsman


Comments