

Project Type: Interior Painting
Location: Japan
Property Type: Apartment (4th Floor)
Area: Approximately 35 m² (1DK)
Work: Surface Preparation, Putty Repairs, Masking, and Interior Painting
Paint Colors: White and Gray
Paint Type: Water-Based Paint
Crew: 2 Workers
Working Time: Approximately 7.5 Hours
Introduction
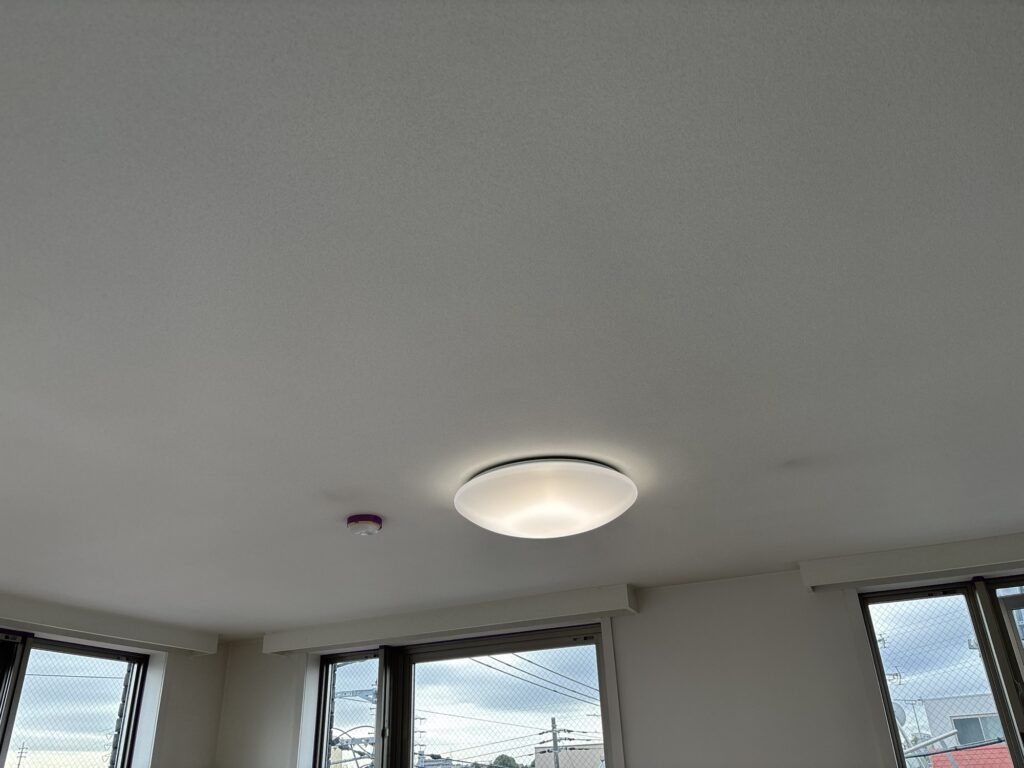
Today, I worked on an interior painting project in an apartment on the fourth floor of a building in Japan.
The apartment was approximately 35 square meters, with a 1DK layout. Two workers, including myself, were assigned to the job.
Another contractor was also working in the apartment on plumbing-related tasks. To avoid getting in their way, we started painting in areas where they did not need to work.
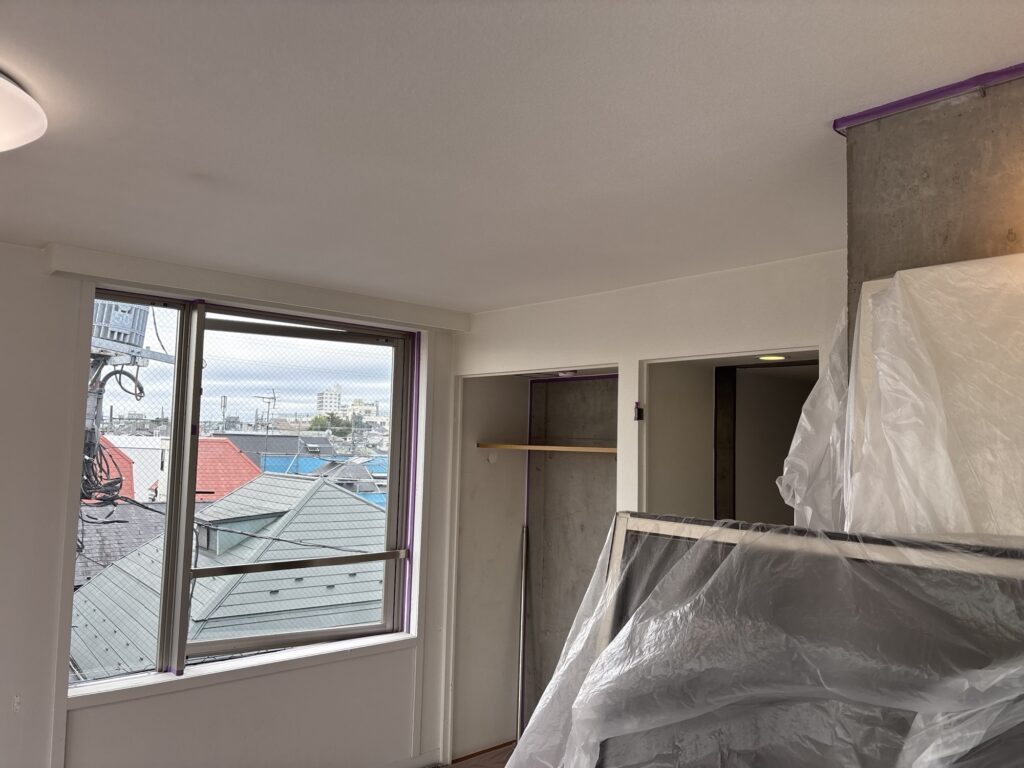
Our job involved painting the interior surfaces white and gray. Before applying the paint, we needed to protect the surrounding areas, repair damaged surfaces, and prepare the paint properly.
Although wallpaper installation is my main job, interior painting requires many of the same skills, especially when it comes to surface preparation and achieving a clean finish.
In this article, I will explain our workflow, the tools we used, and some important lessons I learned from this painting project.
Related Project
Ceiling and Wall Wallpaper Replacement in an Occupied-Ready Apartment in Japan
Job Site Report: Step-by-Step Painting Process
1. Planning the Work Around Other Contractors
Before starting, we checked which areas the plumbing contractor needed to access.
Since two other workers were carrying out plumbing-related work, we avoided those areas and began with the parts of the apartment where we could work safely without disturbing them.
Coordinating with other contractors is an important part of renovation work. Even if each worker does their job well, poor coordination can slow down the entire project.
By planning our work around the other contractors, we could make progress while allowing everyone to work efficiently.
2. Applying Masking Tape and Protecting the Surrounding Areas
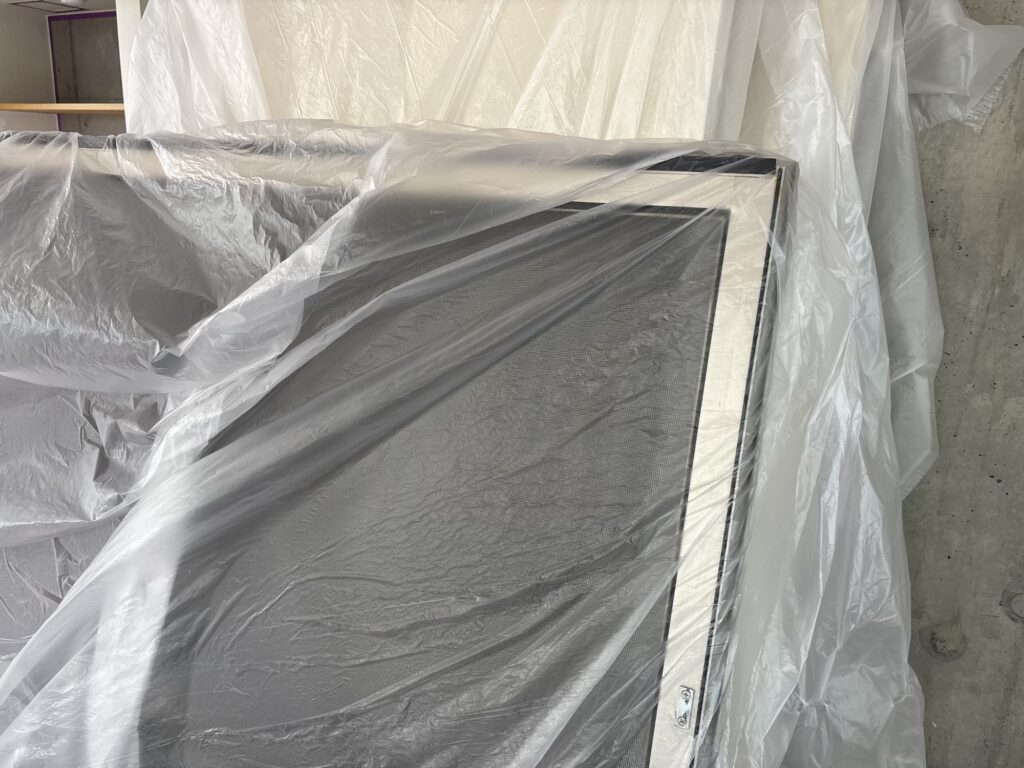
The apartment required both white and gray paint, so we first applied masking tape to the areas that would receive white paint.
We also covered the air conditioner, doors, window frames, and other surfaces that needed protection.
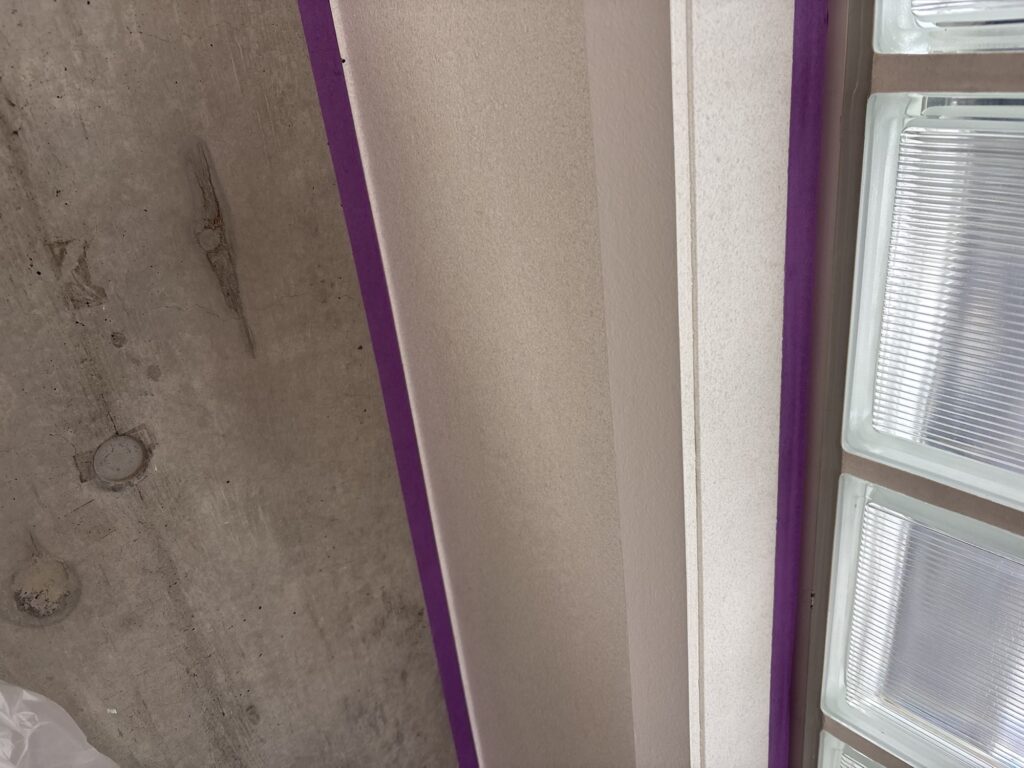
Proper masking is essential for interior painting. Paint can easily splatter onto nearby surfaces, and removing dried paint afterward can take a lot of time.
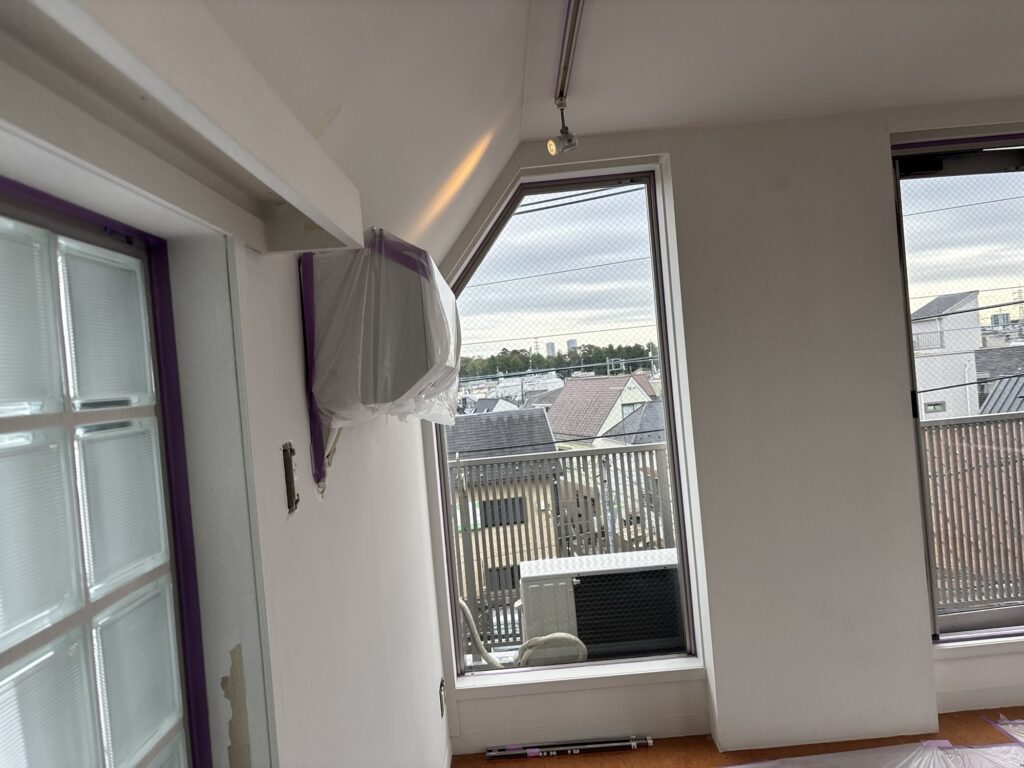
I always believe it is better to prevent a problem than to deal with it later.
Spending enough time on protection before painting can save considerable time during cleanup.
3. Repairing Cracks and Damaged Surfaces
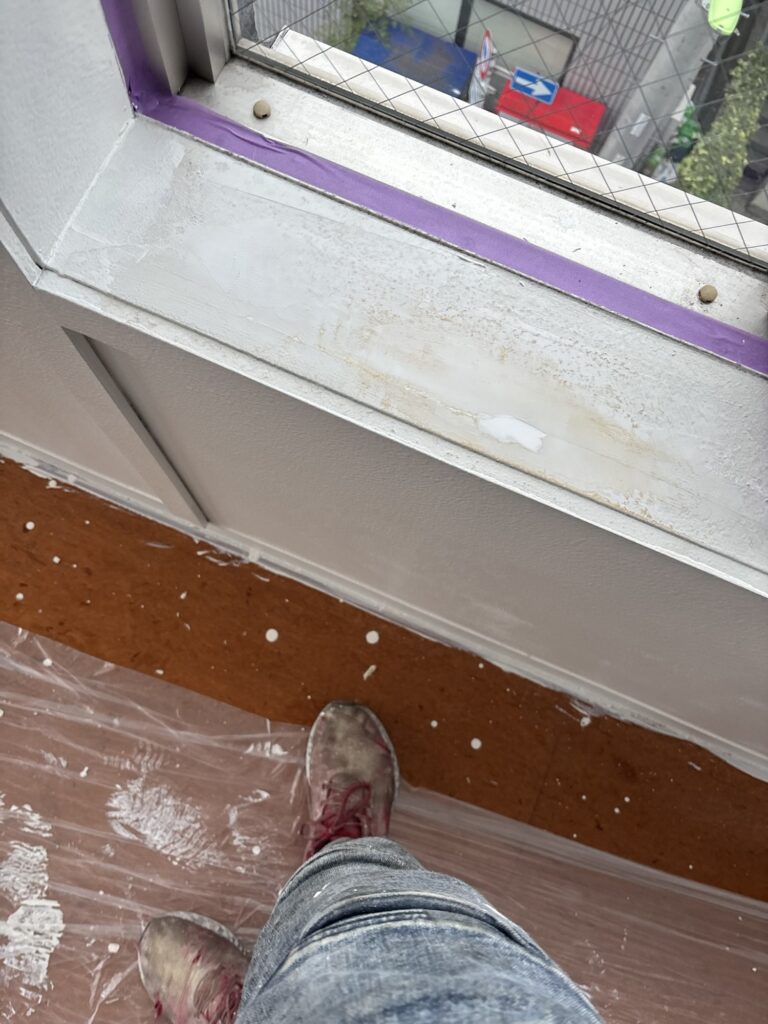
Before applying the paint, we inspected the surfaces for cracks, damaged areas, and uneven sections.
We removed loose or deteriorated material and applied putty to repair the damaged areas.
This step is especially important because painting does not hide every surface defect.
If you paint over cracks, damaged substrate, or uneven surfaces without repairing them first, the imperfections may remain visible after the paint dries.
Surface preparation is just as important as wallpaper installation. In fact, imperfections can sometimes be even more noticeable on painted surfaces because there is no wallpaper pattern to distract the eye.
Taking the time to repair the substrate helps create a smoother, more professional finish.
4. Preparing the White Water-Based Paint
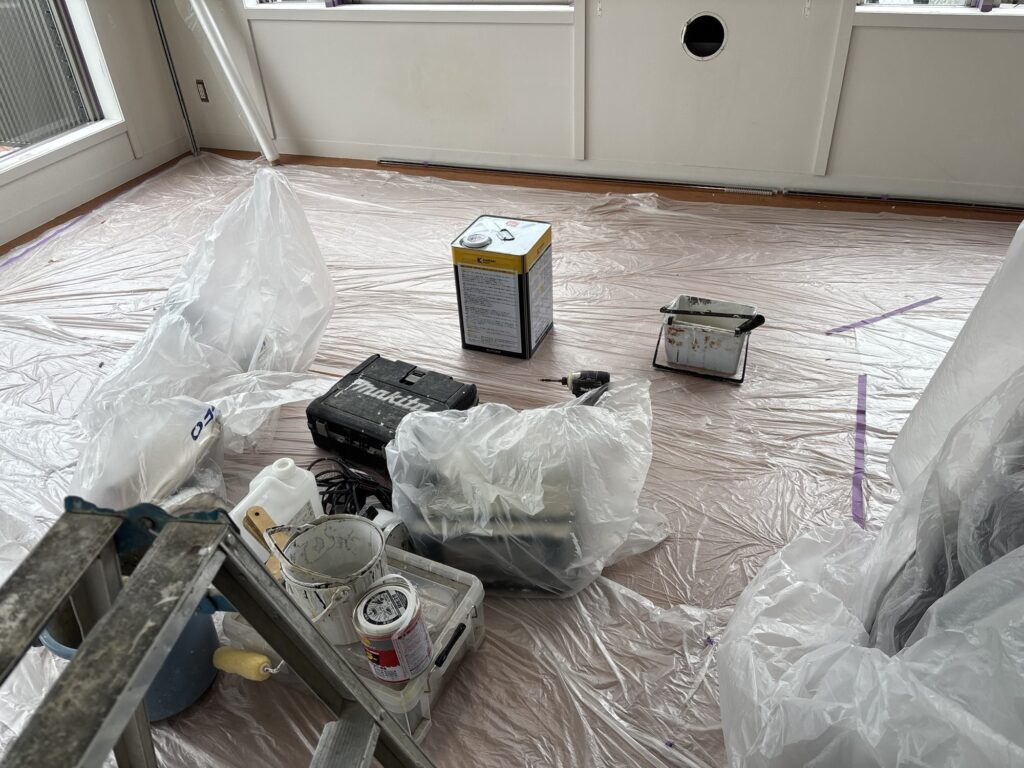
For this project, we used white water-based paint.
Before starting, we mixed the paint thoroughly to achieve an even consistency.
White paint can sometimes have difficulty covering a surface evenly, depending on the original color and the condition of the substrate.
In this project, we adjusted the white paint slightly by adding small amounts of black, yellow, and red pigment.
The purpose was to adjust the paint color and coverage characteristics for the surface we were working on.
However, adding pigment does not automatically improve coverage. The correct adjustment depends on the paint manufacturer’s specifications and the desired finish. For consistent results, it is important to follow the product instructions and test the color before applying it to a large area.
Because we were using water-based paint, we also checked its consistency before application.
If paint is too thick, it can become difficult to spread evenly, making the work harder and potentially leaving visible roller marks.
However, adding too much water can reduce coverage and affect the final finish.
For that reason, any dilution should be done according to the manufacturer’s recommendations.
5. Applying the Paint with a Roller
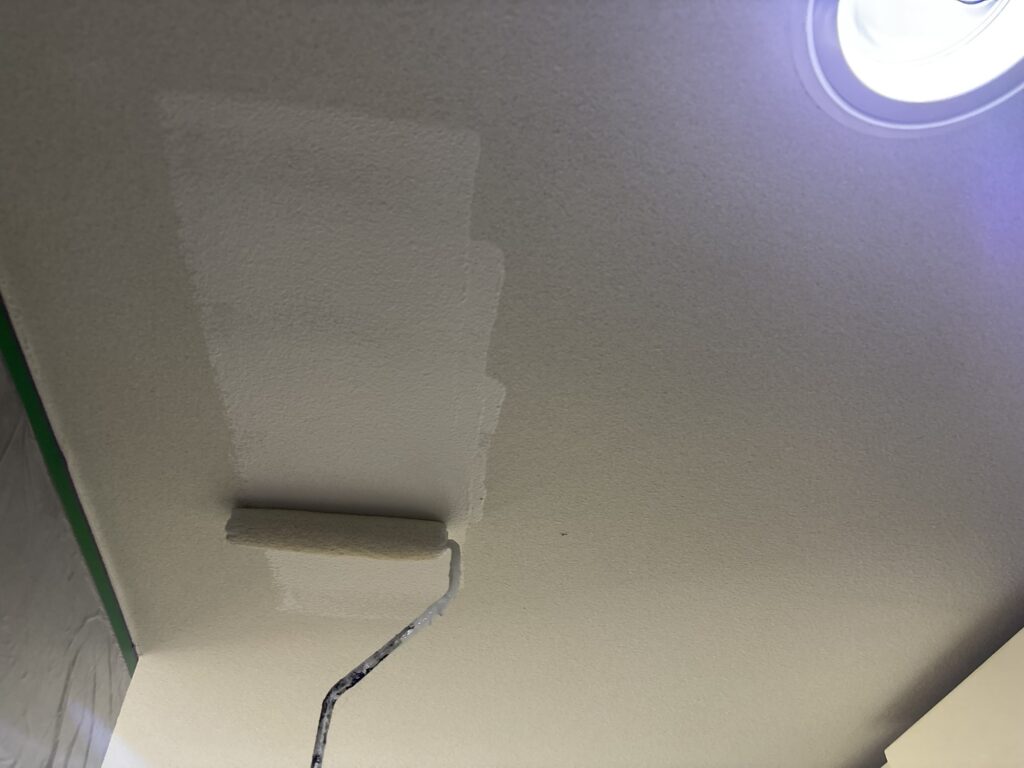
Once the surface preparation and paint mixing were complete, we began applying the white paint with a roller.
We dipped the roller into the paint tray and removed the excess paint before applying it to the surface.
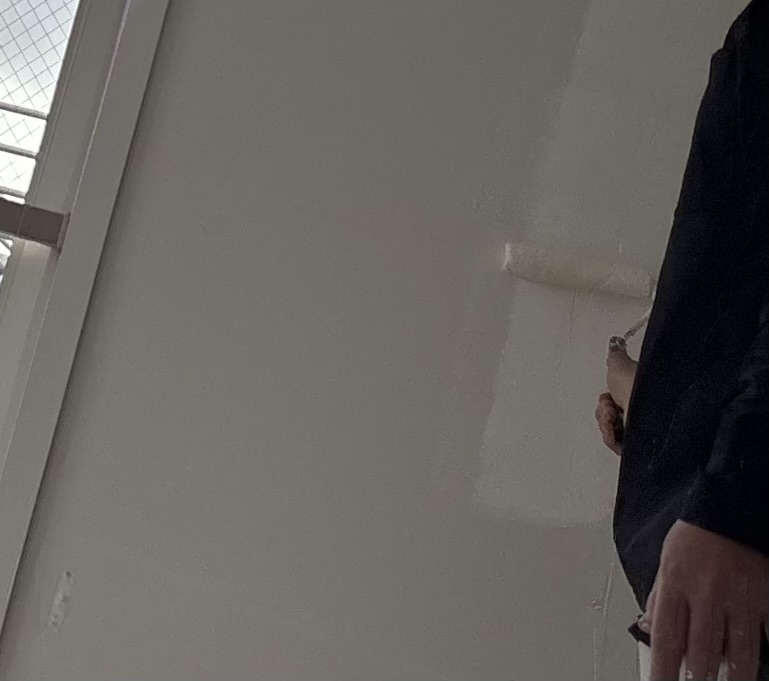
This helped prevent the paint from dripping and reduced the risk of uneven application.
While painting, I paid attention to how the paint spread across the surface.
If the roller holds too much paint, it can leave thick areas and uneven marks. On the other hand, using too little paint can make it difficult to achieve consistent coverage.
Maintaining the right amount of paint on the roller is important for a smooth finish.
As we continued working, the paint gradually became harder to spread in some areas.
When paint begins to dry or becomes difficult to work with, the correct response is to check its condition and follow the manufacturer’s instructions. Adding water without checking the recommended dilution ratio is not always the right solution.
It is also important to avoid repeatedly rolling over areas where the paint has already started to dry, as this can create uneven marks.
6. Painting Corners and Narrow Areas with a Brush
A roller is useful for covering large areas quickly, but it cannot reach every corner.
For narrow sections, inside corners, and other detailed areas, we used a paintbrush.
These areas require more careful work because mistakes can easily affect the final appearance.
Using the right tool for each part of the job helps improve both efficiency and quality.
By combining a roller for larger surfaces with a brush for detailed sections, we could cover the room more effectively.
7. Completing the First Coat
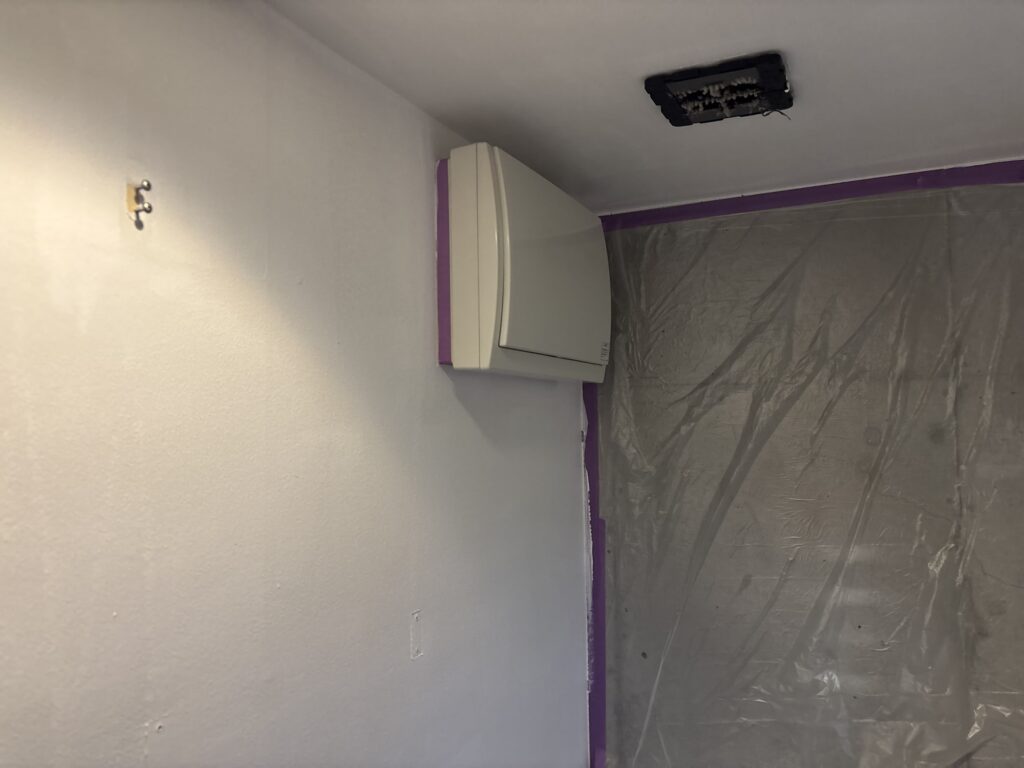
We applied one coat of paint throughout the room.
After completing the first coat, we checked the painted surfaces and noticed some uneven areas.
The color and coverage were not completely uniform yet, so we planned to apply a second coat the following day.
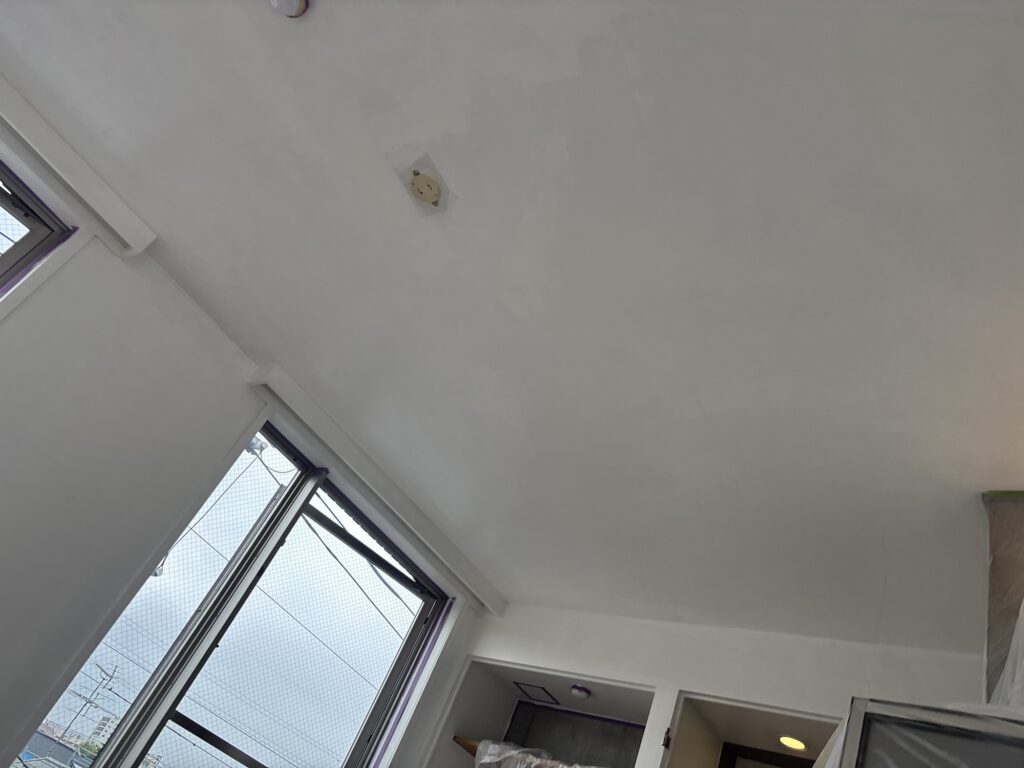
A single coat is not always enough to achieve an even finish. The required number of coats depends on the paint, the original surface color, the substrate condition, and the manufacturer’s recommendations.
Allowing the first coat to dry properly before applying the next coat is also important.
Although we completed the first round of painting, the project still needed another stage to achieve a better finish.
The total working time for the day was approximately seven and a half hours.
Related Project
Water-Damaged Ceiling Board Replacement and Navy Wallpaper Installation in a 20 m² Apartment
Tools Used
Here are the main tools and materials used during this painting project.
- Paint roller: For applying paint to large surfaces.
- Paintbrush: For corners, edges, and narrow areas.
- Paint tray: For holding paint and removing excess paint from the roller.
- Masking tape: For creating clean paint boundaries and protecting edges.
- Protective coverings: For protecting the air conditioner, doors, window frames, and other surfaces.
- Putty: For repairing cracks and damaged areas.
- Putty application tools: For applying and smoothing the repair material.
- White water-based paint: For painting the designated surfaces.
- Paint pigments: For making the necessary color adjustments.
- Mixing tools: For thoroughly mixing the paint.
- Water: For dilution when permitted by the paint manufacturer’s instructions.
Using appropriate tools and preparing them before starting helps prevent unnecessary interruptions during the job.
Professional Tips for Better Painting Results
1. Spend Enough Time on Masking
Masking may seem like a simple preparation task, but it has a significant effect on the overall efficiency of the job.
Paint splashes on doors, window frames, and air conditioners can create additional cleanup work.
Protecting these surfaces before painting helps prevent unnecessary rework.
2. Repair the Surface Before Applying Paint
Cracks, loose material, and uneven surfaces should be addressed before painting.
Paint is not a substitute for proper surface preparation.
Even high-quality paint cannot reliably hide every defect in the underlying surface.
3. Check the Paint Consistency
Paint that is too thick may be difficult to spread, while excessive dilution may reduce coverage.
Always follow the manufacturer’s instructions when adjusting the consistency.
If the paint starts becoming difficult to apply, check whether it is drying, whether the roller needs more paint, or whether the paint requires proper mixing.
4. Avoid Applying Too Much Paint at Once
Loading the roller with excessive paint can cause drips, thick areas, and an uneven finish.
Remove excess paint in the tray before applying it to the wall.
Working with a consistent amount of paint makes it easier to control the finish.
5. Allow Enough Time for Each Coat to Dry
If a second coat is necessary, allow the first coat to dry according to the product instructions.
Applying another coat too early can affect the finish and may lead to additional problems.
Patience during this stage can make a noticeable difference in the final result.
6. Coordinate with Other Contractors
When several trades are working in the same apartment, communication is essential.
Starting in an available area and moving to other sections as they become accessible helps reduce delays and prevents workers from getting in one another’s way.
Good coordination is an important part of completing renovation work efficiently.
Common Mistakes to Avoid
1. Skipping Surface Repairs
Painting over cracks or damaged substrate can leave visible defects in the finished surface.
Inspect the area carefully and complete the necessary repairs before painting.
2. Using Too Much Water
Adding excessive water to water-based paint can affect its coverage and performance.
Do not dilute paint based only on how thick it looks. Follow the manufacturer’s recommended dilution ratio.
3. Applying Paint Too Thickly
Thick applications can create an uneven appearance and make the surface more difficult to finish smoothly.
Apply paint evenly and avoid leaving excessive amounts in one area.
4. Neglecting Masking and Protection
Failing to protect nearby surfaces can result in paint splashes on doors, windows, air conditioners, and other fixtures.
Proper masking before painting is much easier than cleaning unwanted paint afterward.
5. Continuing to Roll Over Drying Paint
Repeatedly rolling over paint that has begun to dry can leave marks and create an uneven finish.
Work systematically and follow the recommended application method for the product.
6. Expecting Perfect Coverage from One Coat
Some surfaces require two or more coats to achieve a uniform appearance.
Check the result after the first coat and apply additional coats when necessary.
7. Ignoring Other Contractors’ Work Areas
Working in the same space as another contractor without coordination can interrupt their work and create unnecessary delays.
Communicate with other workers and plan the order of operations before starting.
What I Learned From This Project
Although wallpaper installation is my main occupation, this project gave me another opportunity to work on my painting skills.
One important lesson is that surface preparation plays a major role in the final result.
Repairing cracks, removing damaged material, and smoothing uneven areas may not be the most exciting parts of the job, but they are essential for achieving a clean finish.
I also realized how important masking is. Taking the time to protect surrounding surfaces can prevent a lot of unnecessary cleanup work later.
Another lesson was the importance of understanding the paint itself. Its consistency, coverage, and drying behavior all affect how easily it can be applied and how the finished surface looks.
Compared with wallpaper installation, painting has a different rhythm. With wallpaper, I spend much of my time measuring, cutting, preparing the adhesive, and carefully installing each piece. Painting requires a different approach, especially when controlling the roller and maintaining an even finish.
To be honest, if painting were my main job every day, I think I might get a little bored! Haha.
I enjoy wallpaper installation more because I like the process of transforming a room by applying new materials to the walls.
Still, learning different renovation skills is valuable. The more I understand about painting, surface preparation, and other interior finishing techniques, the more versatile I can become as a renovation worker.
We finished the first coat after approximately seven and a half hours. Some areas still looked uneven, so we planned to apply a second coat the next day.
The project was not completely finished yet, but the first stage was complete.
Frequently Asked Questions (FAQ)
1. How long does it take to paint a 35 m² apartment?
The working time depends on the number of workers, the condition of the surfaces, the amount of masking required, and the number of coats.
For this project, two workers spent approximately seven and a half hours completing the first round of painting and preparation-related work.
The total project time would be longer because a second coat was planned for the following day.
2. Why is surface preparation important before painting?
Surface preparation helps create a smooth and stable base for the paint.
Cracks, loose material, and uneven areas can remain visible after painting if they are not repaired properly.
Preparing the surface beforehand improves the appearance of the finished work.
3. Why do painters use masking tape?
Masking tape helps create clean edges and protects areas that should not receive paint.
It is especially useful around doors, window frames, fixtures, and boundaries between different colors.
Proper masking also reduces the amount of cleanup required after painting.
4. Can water-based paint be diluted with water?
Some water-based paints can be diluted with water, but the permitted amount depends on the product.
Always check the manufacturer’s instructions before adding water.
Excessive dilution can reduce coverage and affect the paint’s performance.
5. Why can white paint look uneven after the first coat?
Uneven coverage can result from the original surface color, differences in surface absorption, application technique, or the amount of paint applied.
In some cases, a second coat is necessary to achieve a uniform appearance.
The surface should be checked after the first coat has dried.
6. Is one coat of paint enough?
Sometimes one coat is sufficient, but many projects require two coats or more.
The required number depends on the paint, substrate, original color, and desired finish.
Follow the product instructions and inspect the surface before deciding whether another coat is needed.
7. What is the difference between a paint roller and a paintbrush?
A roller is generally more efficient for covering large, relatively flat surfaces.
A paintbrush is more suitable for corners, narrow sections, edges, and detailed areas.
Using both tools allows painters to work efficiently while maintaining control over the finish.
8. Why is painting over damaged surfaces a bad idea?
Paint does not reliably conceal cracks, loose material, or significant unevenness.
These defects may remain visible or become noticeable again after the paint dries.
Repairing the substrate before painting helps produce a better result.
9. How can paint splashes on fixtures be prevented?
Cover nearby fixtures with suitable protective materials and use masking tape where necessary.
Pay particular attention to air conditioners, doors, window frames, and other surfaces that would be difficult to clean.
Preventing splashes is usually easier than removing dried paint.
10. Is painting easier than wallpaper installation?
It depends on the individual worker and the condition of the job site.
Painting and wallpaper installation require different skills. Painting involves controlling the amount of paint, achieving even coverage, and managing drying time. Wallpaper installation requires accurate measuring, cutting, adhesive application, and careful alignment.
Both trades require patience, experience, and proper surface preparation to achieve a high-quality finish.
Conclusion
Today, we worked on painting an approximately 35 m² apartment on the fourth floor of a building in Japan.
With two workers on the job, we coordinated our work with the plumbing contractor, protected the surrounding surfaces, repaired damaged areas, and applied the first coat of white water-based paint.
The first round of painting took approximately seven and a half hours.
Although some areas still looked uneven, we planned to apply a second coat the following day to improve the coverage and overall appearance.
This project reminded me that a good paint finish depends on more than simply applying paint to a wall. Proper preparation, careful masking, suitable application techniques, and coordination with other contractors all play important roles.
My main job is wallpaper installation, but I believe learning other interior finishing skills will help me become a more capable renovation worker.
Every job provides another opportunity to learn something new, improve my technique, and gain practical experience.
Thanks for reading about today’s painting project in Japan!


Comments