

Project Type: Air Conditioner Installation
Location: 4th Floor Apartment, Japan
Property Type: 1K Apartment (Studio with Kitchen)
Floor Area: Approximately 20 m²
Crew Size: 2 Workers
Work Time: 5 Hours
Previous Work: Wallpaper Replacement
Main Tasks: Indoor Unit Installation, Refrigerant Piping, Electrical Wiring, Drain Hose Installation, Vacuuming, and Test Operation
Introduction
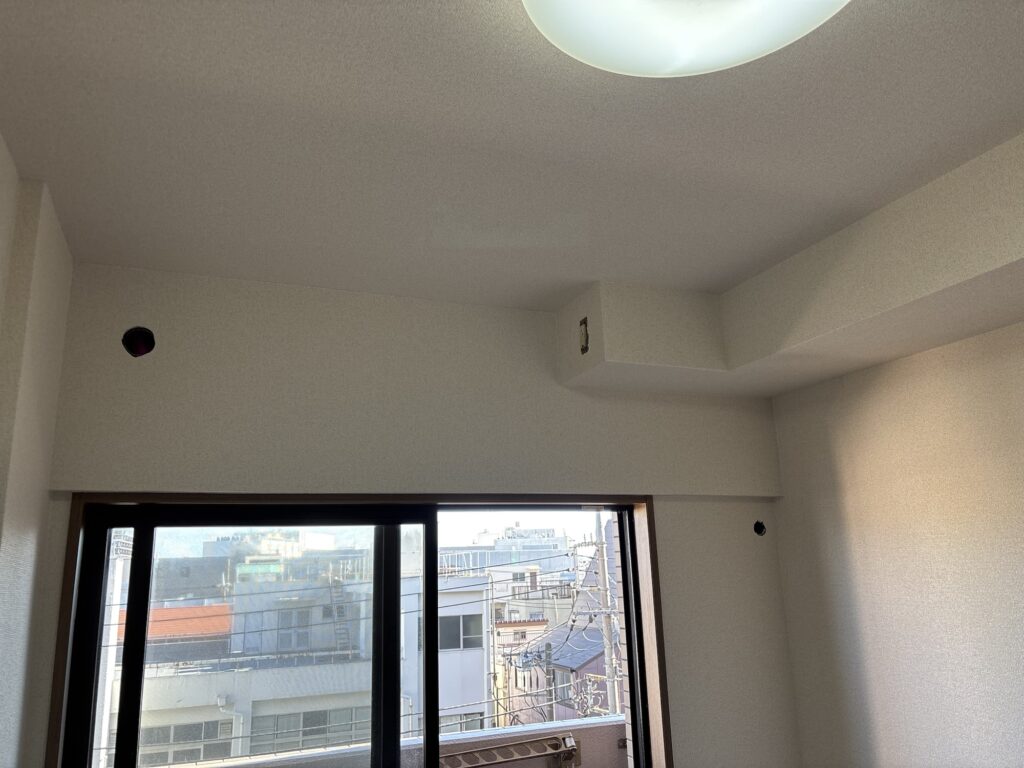
Today, we returned to an apartment where we had previously replaced the wallpaper to install a new air conditioner.
The property is a 1K apartment on the fourth floor of a Japanese apartment building, with a total floor area of approximately 20 square meters.
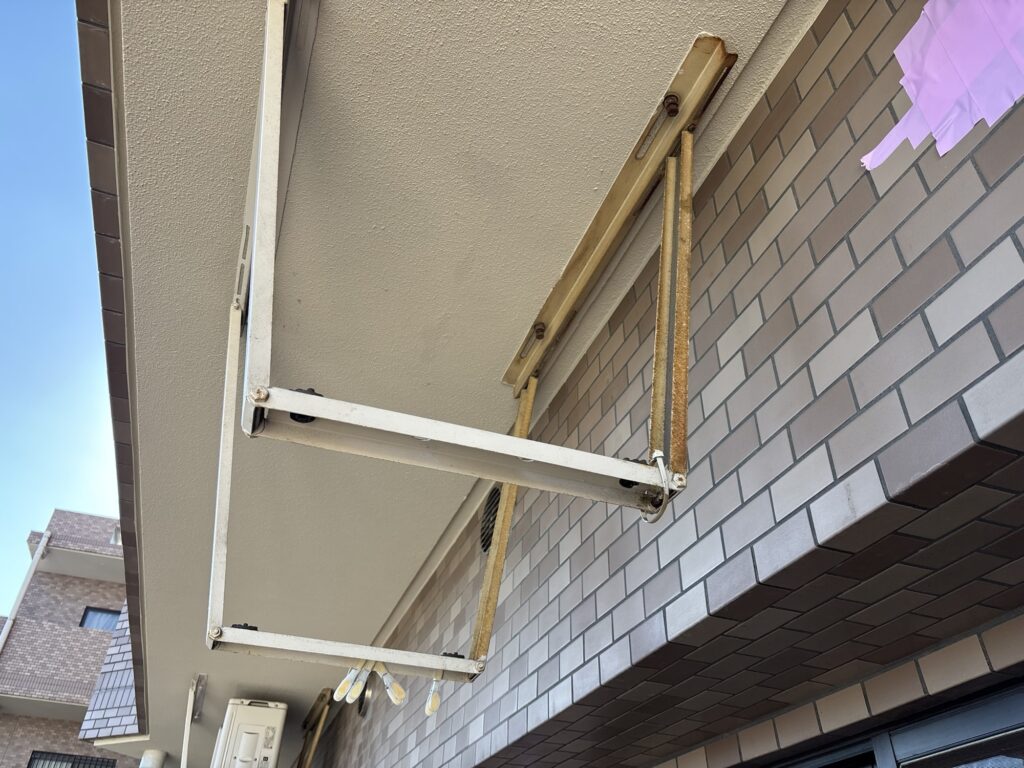
Two workers handled the installation, which took about five hours to complete.
Although installing an air conditioner may look straightforward, several details require careful attention. These include securing the mounting plate, preparing the refrigerant pipes, connecting the wiring, insulating the pipes, and ensuring proper drainage.
Small mistakes during installation can lead to refrigerant leaks, water leaks, condensation, or other problems.
In this article, I’ll explain the installation process and share some practical lessons from the job site.
Related Project
Job Site Report: Step-by-Step Air Conditioner Installation
1. Preparing the Work Area
First, we laid down protective moving blankets to protect the floor and create a safe working area.
Because we were installing a brand-new air conditioner, we needed to handle the equipment carefully. Scratching or damaging a new unit could lead to unnecessary problems.
Protecting the surrounding area before starting work is an important part of any installation.
2. Installing the Indoor Unit Mounting Plate
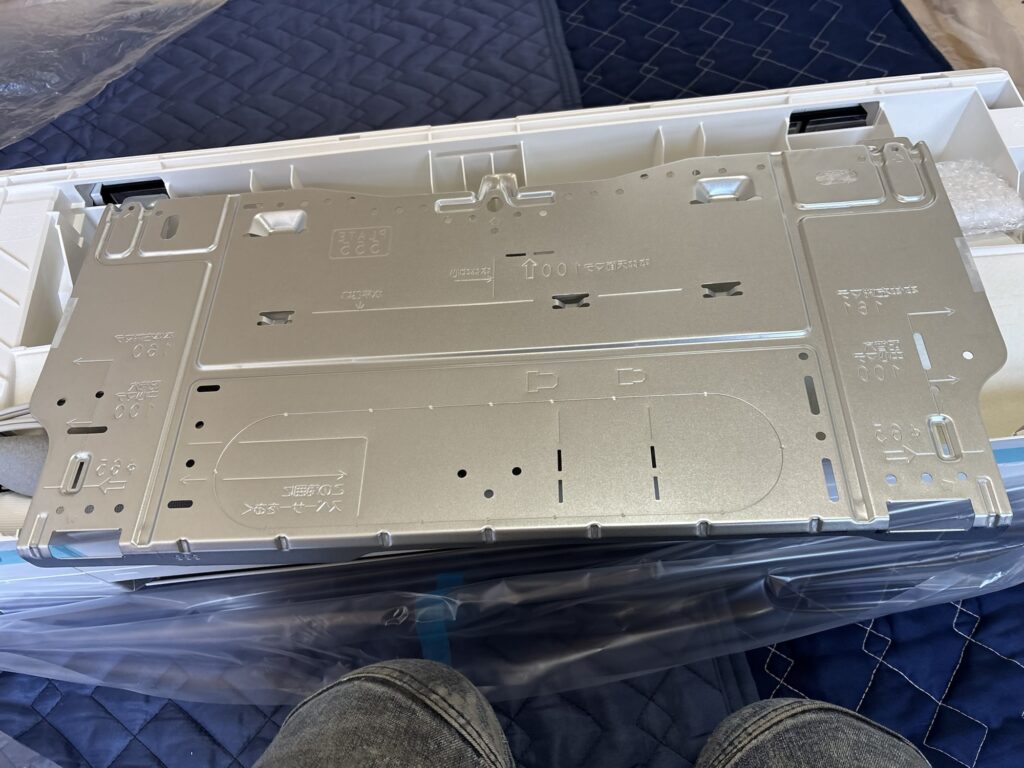
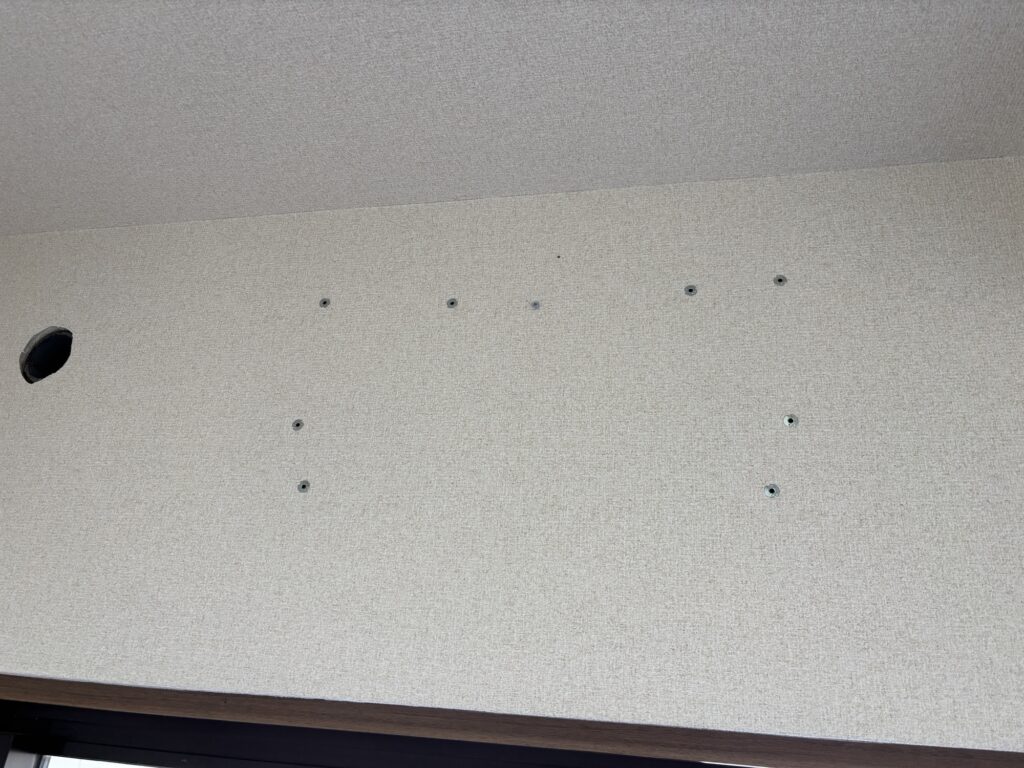
Since we had previously removed the old air conditioner, the first installation task was to mount the new indoor unit’s mounting plate.
The wall was covered with gypsum board. However, screws alone would not provide sufficient holding strength in the board, so we used suitable wall anchors to secure the mounting plate.
The mounting plate must be firmly attached because it supports the indoor unit.
We also checked the plate’s level and positioning. The drainage arrangement must follow the manufacturer’s requirements to ensure that condensate can flow out properly.
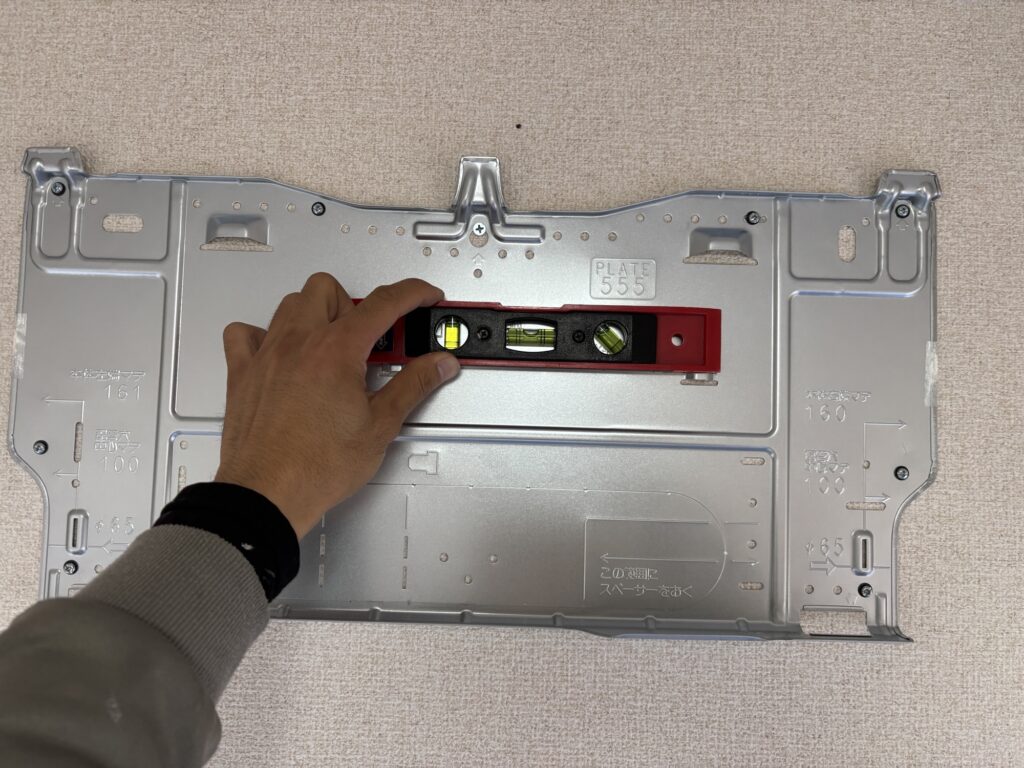
A poorly positioned indoor unit can cause drainage problems later, so this step requires care.
3. Cutting and Connecting the Electrical Wiring
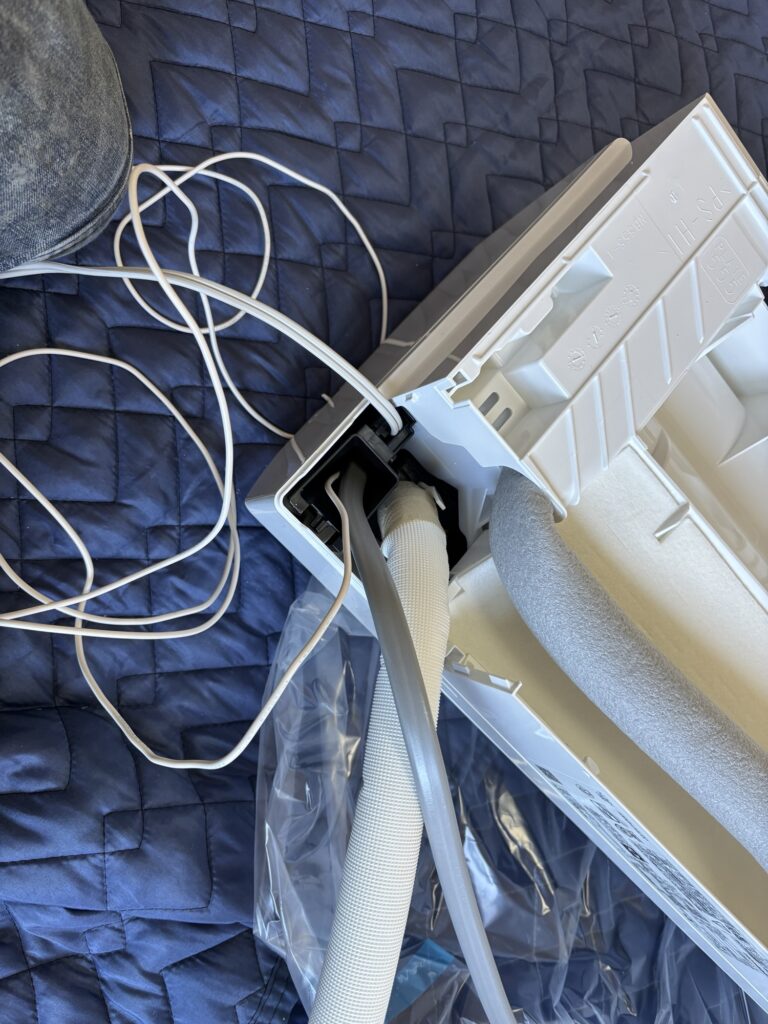
Next, we cut the electrical cable to a length of approximately 3.5 meters and connected it to the indoor unit.
When inserting the cable into its terminal, it is important to make sure that it is fully and securely connected.
A loose connection can cause electrical problems later.
We also connected the grounding wire.
Electrical connections must follow the manufacturer’s instructions and applicable electrical safety requirements. Any work requiring a qualified electrician should be performed by an appropriately licensed professional.
4. Preparing the Refrigerant Pipes
Next, we cut the refrigerant pipes to approximately 3 meters and prepared them for connection to the indoor unit.
On this job, we kept the refrigerant pipes about 50 centimeters shorter than the electrical cable.
This arrangement gave us additional cable length when connecting the lines to the outdoor unit, making the work easier to handle.
However, the correct pipe and cable lengths depend on the equipment specifications, installation layout, and manufacturer’s requirements.
5. Making the Flare Connections
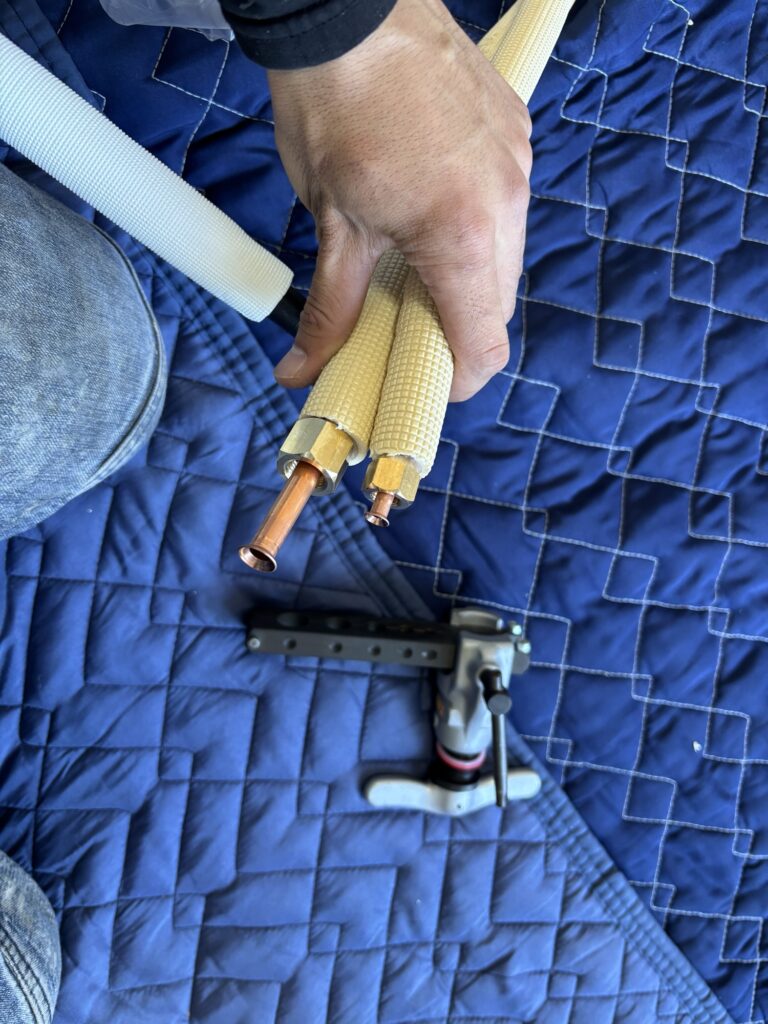
After cutting the refrigerant pipes, we prepared the flare ends for connection.
A properly formed flare is essential for creating a reliable seal between the pipe and the connection fitting.
We checked the flare dimensions with a flare gauge and inspected the finished surface before proceeding.
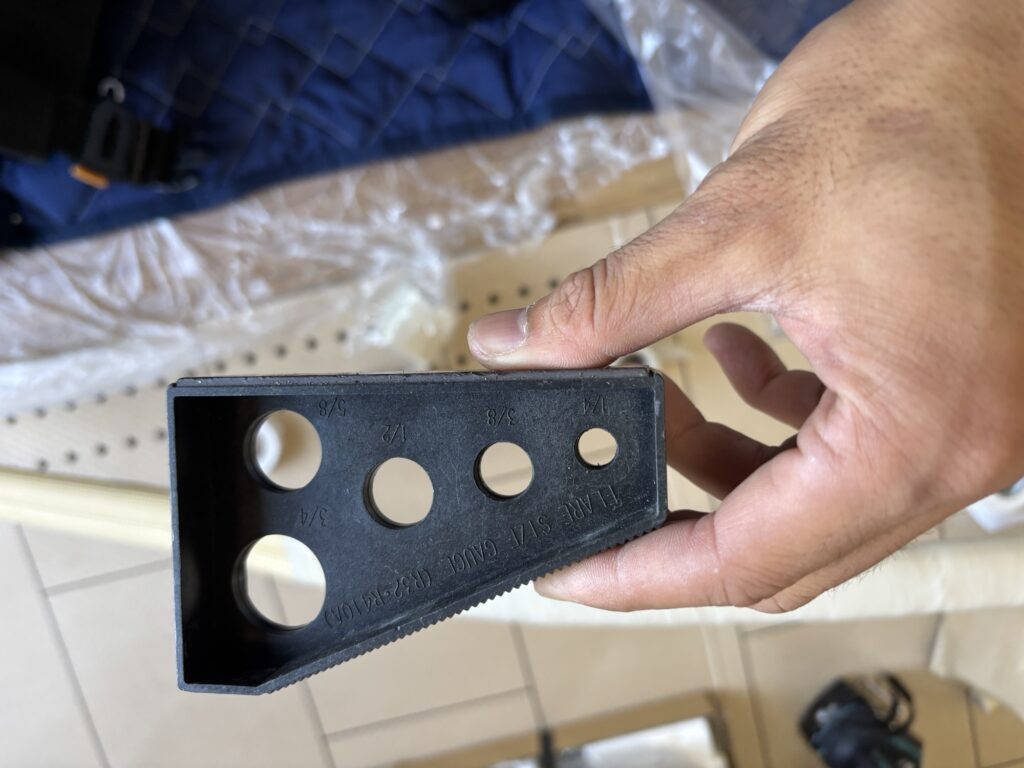
The flare must meet the equipment manufacturer’s specified dimensions. If it is too small, too large, uneven, or damaged, the connection may not seal properly.
A poor flare can lead to refrigerant leaks, so this is one of the most important steps in refrigerant piping work.
6. Connecting the Refrigerant Pipes to the Indoor Unit
Next, we connected the prepared refrigerant pipes to the indoor unit.
When positioning the flare nut, we made sure that the pipe and fitting were properly aligned so the nut could turn smoothly.
If the nut becomes difficult to turn during initial threading, it is important to stop and check the alignment rather than force it.
Cross-threading or misalignment can damage the connection and compromise the seal.
After confirming that the connections were correctly aligned, we tightened them according to the manufacturer’s specifications.
7. Insulating the Refrigerant Pipes
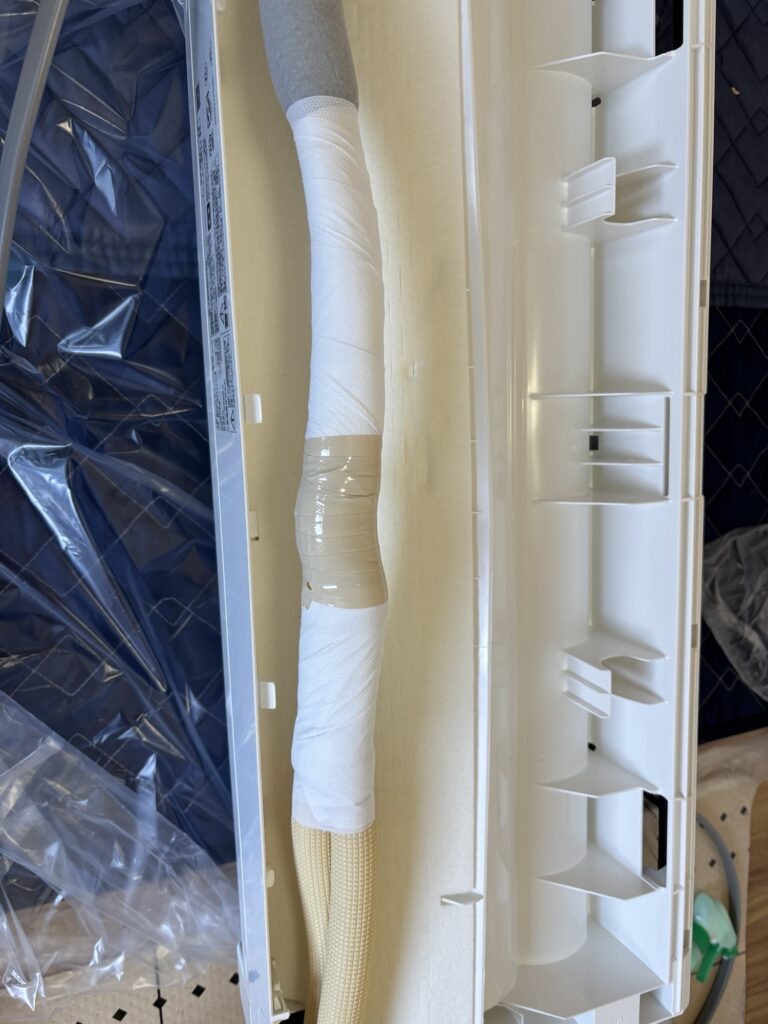
After connecting the refrigerant pipes, we installed the required insulation.
Pipe insulation is essential because temperature differences between the refrigerant pipes and the surrounding air can cause condensation.
If the insulation is incomplete, damaged, or poorly fitted, water may form on the pipe surface and drip onto nearby areas.
We made sure the insulation was properly positioned and that the pipework was protected as required.
Good insulation helps prevent condensation and supports reliable air conditioner operation.
8. Preparing the Pipes for the Wall Opening
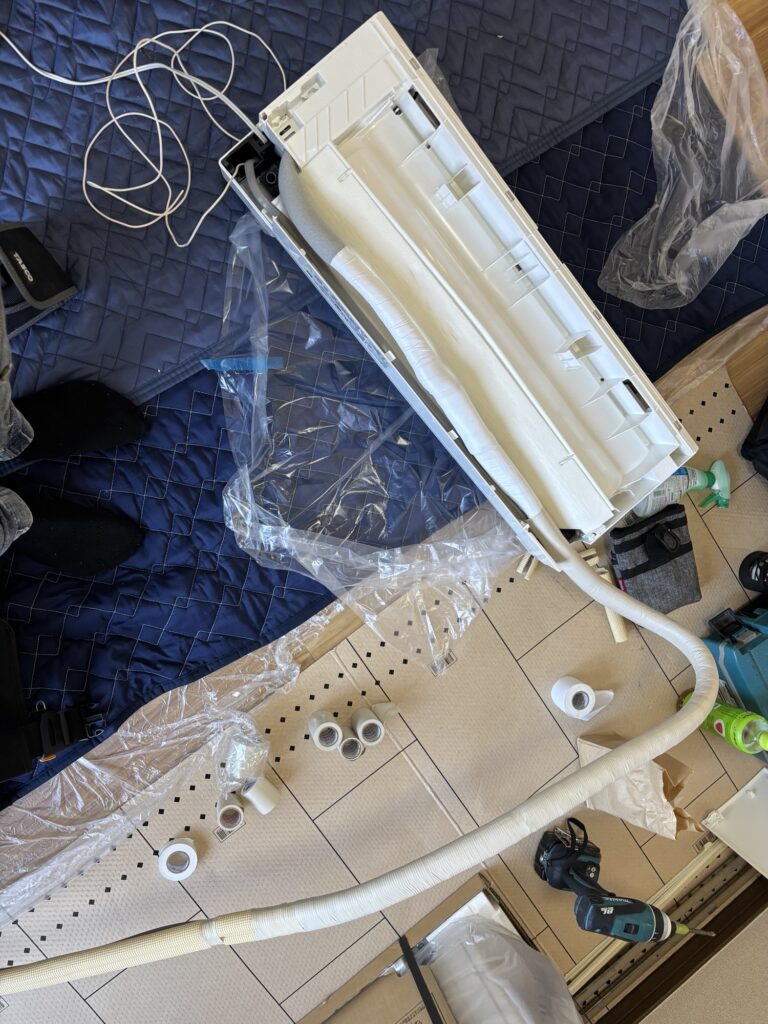
Before hanging the indoor unit, we carefully bent the pipes into the required position so they could pass through the wall opening without becoming trapped.
Preparing the pipe bends in advance makes it easier to position the indoor unit correctly.
If the pipes are not shaped properly, they may become pinched or obstructed when the unit is mounted.
For this installation, we bent the pipes toward the wall opening at a point approximately 25 centimeters from the edge of the indoor unit. The bend was positioned about 15 centimeters higher than the reference point.
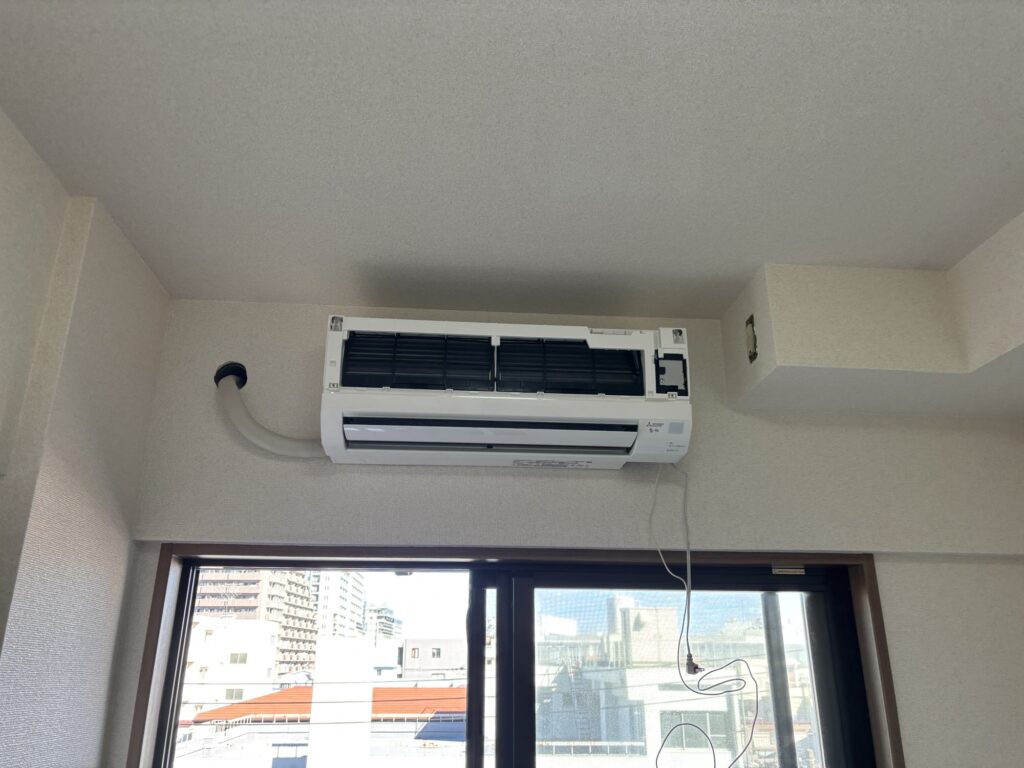
These measurements were specific to this installation. Pipe routing and bending must always be adjusted to the actual wall opening, equipment design, and manufacturer’s requirements.
Once the pipes were positioned correctly, we mounted the indoor unit on the mounting plate.
9. Connecting the Outdoor Unit
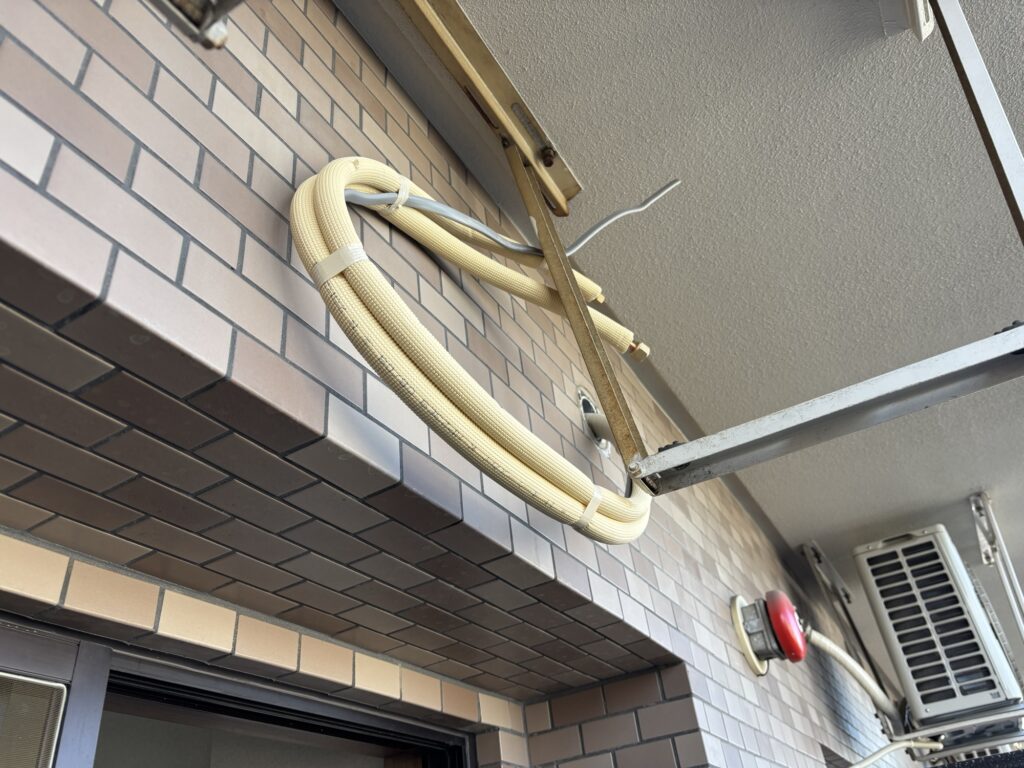
After securing the indoor unit, we connected the refrigerant pipes to the outdoor unit.
The connections must be properly aligned and tightened according to the manufacturer’s specifications.
We then used a vacuum pump and the appropriate equipment to evacuate the refrigerant piping.
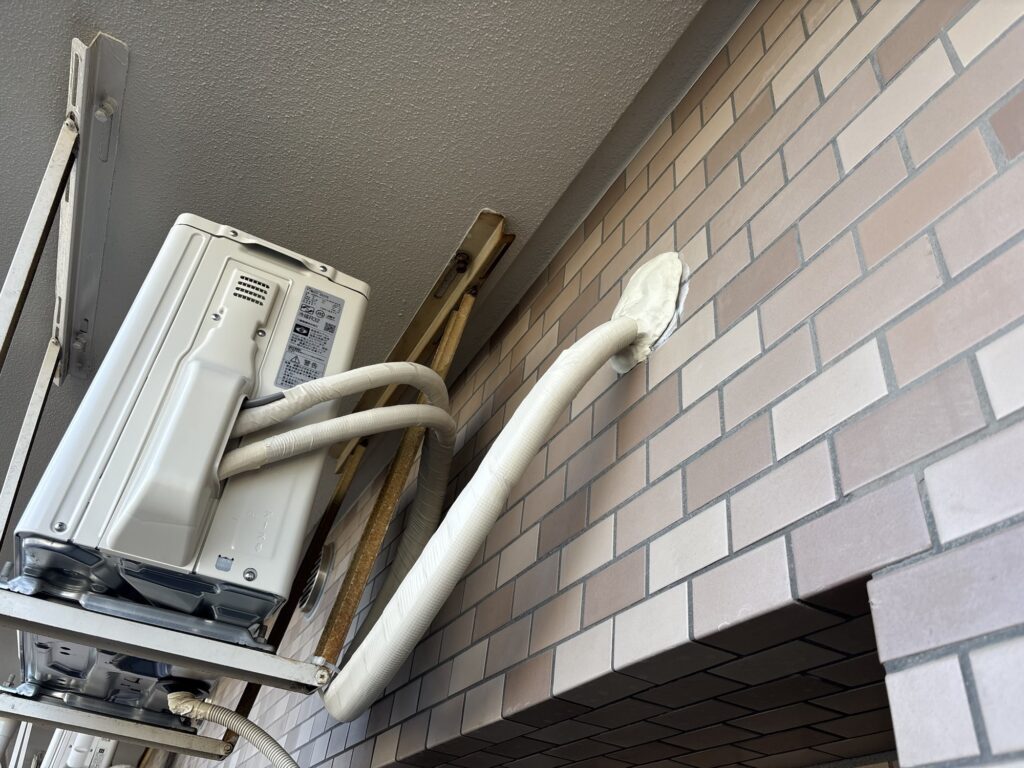
Vacuum evacuation removes air and moisture from the refrigerant circuit before the system is placed into operation.
We also checked that the system maintained the required vacuum in accordance with the manufacturer’s procedure.
If the vacuum reading rises unexpectedly or the system fails the required checks, the cause must be investigated before proceeding.
On this job, the vacuum procedure was completed successfully.
It is important to understand that a satisfactory vacuum test does not, by itself, prove that every connection is leak-free under operating conditions. The required leak checks and commissioning procedures must also be followed.
10. Installing the Drain Hose
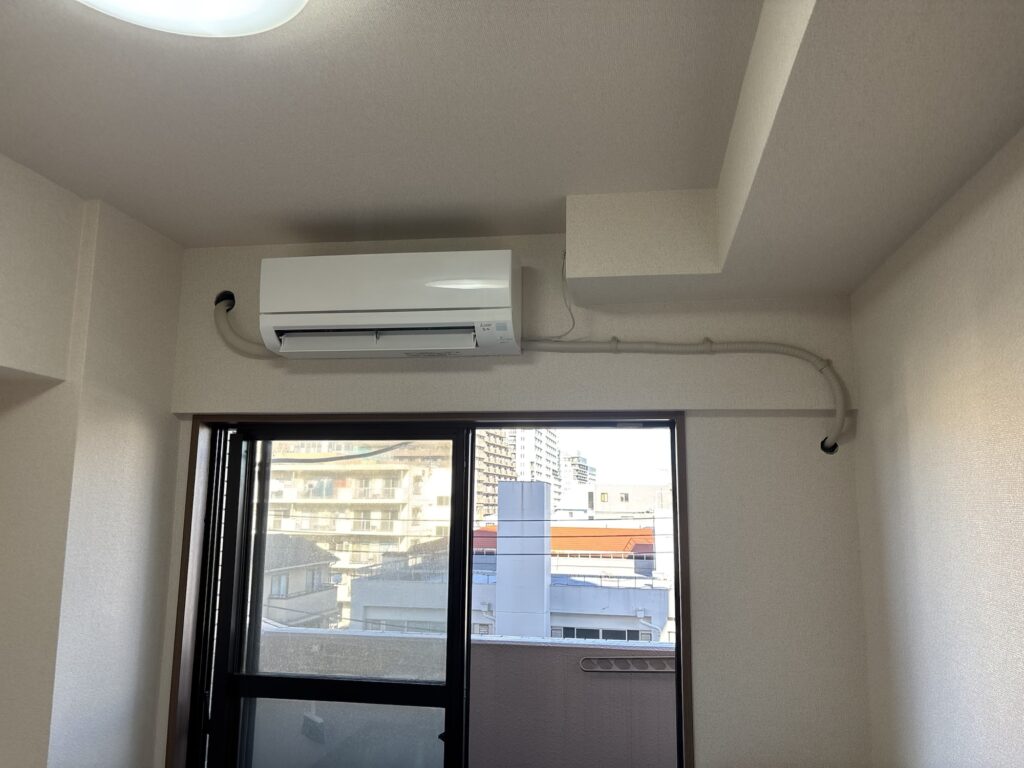
For this installation, we routed the drain hose through a separate wall opening.
The original opening was not suitable because we could not achieve the necessary downward slope for the hose.
The drain hose must be routed so that condensate can flow away from the indoor unit by gravity, following the manufacturer’s requirements.
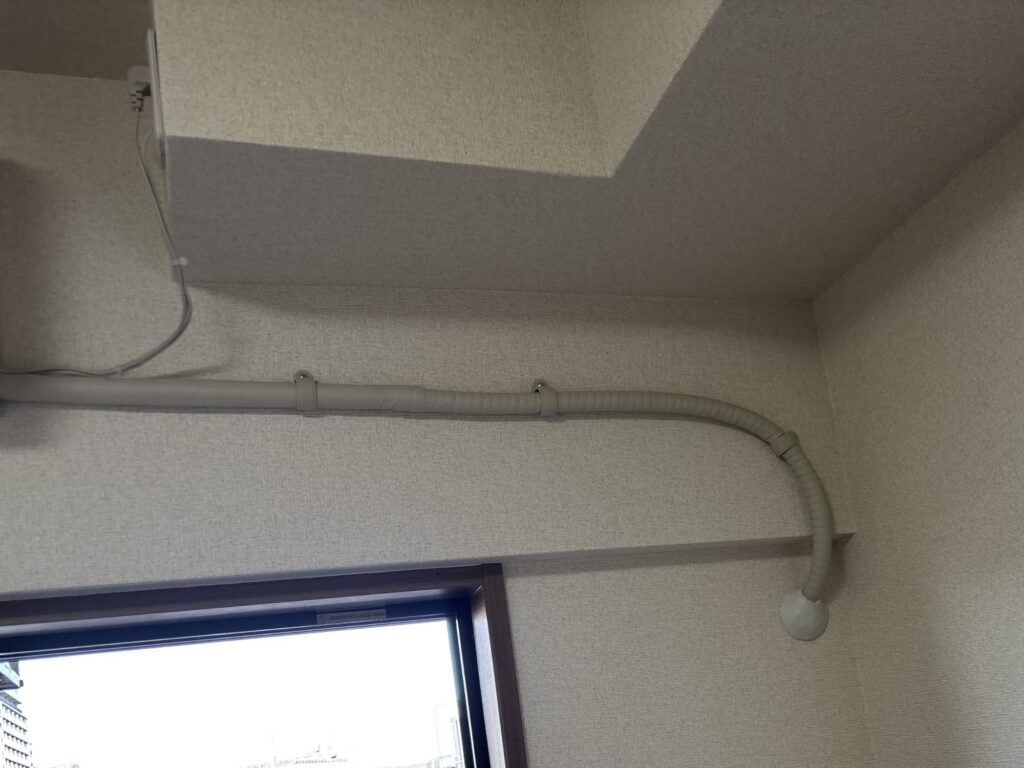
If the hose has an upward section, a low point, or an unsuitable slope, water may collect in the hose or flow back toward the indoor unit.
This can result in water leakage inside the apartment.
Choosing the correct drain route is therefore just as important as installing the refrigerant pipes.
11. Sealing the Wall Opening
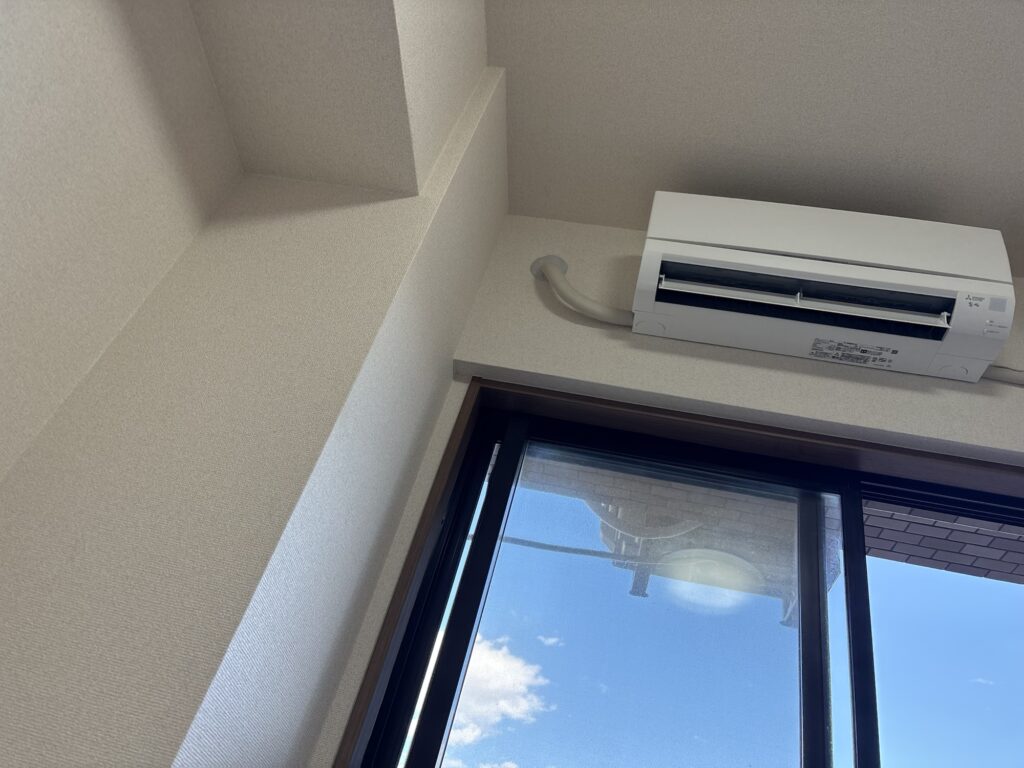
After completing the pipe and hose routing, we filled the gap around the wall opening with suitable putty.
Sealing the opening helps prevent outside air, insects, and other unwanted elements from entering the room.
The seal must be appropriate for the wall construction and installation conditions.
Care is also needed to avoid damaging the pipes or obstructing the drainage route while applying the putty.
12. Opening the Outdoor Unit Valves and Testing the System
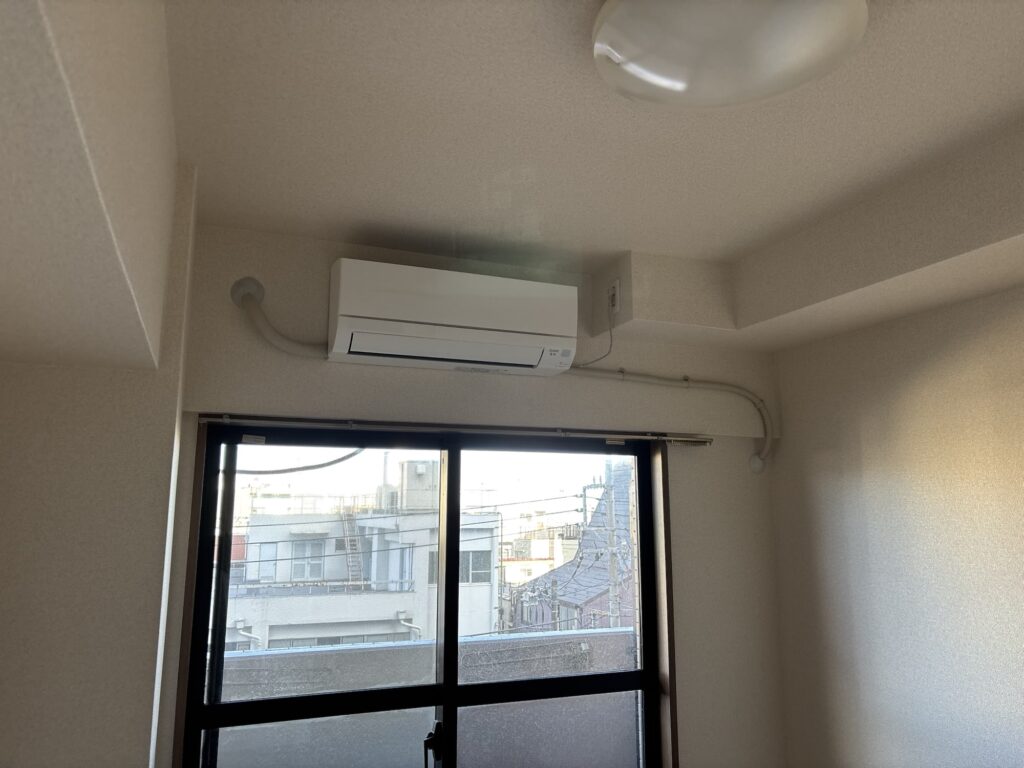
Once the installation work was complete, we opened the outdoor unit’s service valves in accordance with the manufacturer’s procedure and performed a test run.
We checked that the air conditioner operated normally.
The unit started without any apparent problems, and the installation was completed successfully.
Total installation time: approximately five hours.
Related Project
Installing a Used Air Conditioner in My 50-Year-Old House | A Craftsman’s DIY Project
Tools Used
The following tools and materials were used or required for this type of installation:
- Protective moving blankets
- Measuring tape
- Level
- Drill and appropriate drill bits
- Suitable wall anchors and screws
- Electrical cable and connection tools
- Cable cutters and wire preparation tools
- Refrigerant pipe cutter
- Flaring tool
- Flare gauge
- Appropriate spanners or torque tools
- Pipe insulation
- Vacuum pump
- Refrigeration manifold and suitable measuring equipment
- Suitable drain hose
- Wall-hole sealing putty
- Personal protective equipment
The exact tools depend on the air conditioner model, wall construction, pipe layout, and installation requirements.
Refrigerant work and electrical connections must be performed using the correct equipment and procedures. Applicable Japanese regulations, qualification requirements, and manufacturer instructions should always be followed.
Professional Tips
1. Protect New Equipment Before Starting
Always protect the floor and surrounding area before bringing equipment into the work area.
A new air conditioner can be damaged by tools, debris, or careless handling. Taking a few minutes to prepare the workspace can prevent unnecessary trouble.
2. Secure the Mounting Plate Properly
Gypsum board alone may not provide sufficient support for an air conditioner mounting plate.
Check the wall construction and use an appropriate fixing method. Suitable anchors or structural fixing points must be selected according to the load and wall conditions.
3. Check the Flare Before Making the Connection
A good refrigerant connection starts with a correctly prepared pipe.
Inspect the flare for cracks, uneven surfaces, incorrect dimensions, or other damage before connecting it.
Follow the manufacturer’s specifications rather than relying on appearance alone.
4. Never Force a Flare Nut
A flare nut should start threading smoothly when the pipe and fitting are aligned correctly.
If it becomes difficult to turn, stop and check the alignment.
Forcing a misaligned nut can damage the threads or prevent the connection from sealing properly.
5. Pay Attention to Pipe Insulation
Insulation is not just a finishing detail.
Gaps, damaged insulation, or poorly fitted joints can lead to condensation and water dripping onto walls or floors.
Inspect the insulation carefully before finishing the installation.
6. Plan the Pipe Bends Before Mounting the Indoor Unit
Refrigerant pipes can be difficult to reposition once the indoor unit is hanging on the wall.
Preparing the bends before mounting the unit helps prevent pinched pipes and makes it easier to pass the pipework through the opening.
Avoid sharp bends and follow the manufacturer’s minimum bending radius.
7. Check the Drain Hose Slope
A drain hose must allow water to flow away from the indoor unit.
If the existing wall opening does not allow a suitable slope, the drainage route may need to be reconsidered.
Always verify the drain hose routing before completing the installation.
8. Follow the Correct Vacuum and Leak-Checking Procedures
Vacuum evacuation is essential for preparing the refrigerant piping.
However, a successful vacuum reading alone is not a substitute for all required leak checks.
Follow the manufacturer’s commissioning procedure and use appropriate instruments to verify that the installation is ready for operation.
Common Mistakes to Avoid
1. Rushing the Initial Preparation
Failing to protect the floor or equipment can result in scratches, damage, and unnecessary cleanup.
Prepare the work area before starting the installation.
2. Using Inadequate Wall Fixings
Attaching a mounting plate without considering the wall construction can leave the indoor unit insufficiently supported.
Select fixings appropriate for the actual wall and installation load.
3. Making Incorrect Flare Connections
A flare that does not meet the required dimensions or has a damaged surface may cause a refrigerant leak.
Inspect every flare before tightening the connection.
4. Forcing Misaligned Pipe Connections
If a flare nut does not turn smoothly, forcing it can damage the threads or connection surfaces.
Realign the pipe and fitting before continuing.
5. Leaving Gaps in the Insulation
Incomplete insulation can allow condensation to form on the refrigerant pipes.
Check insulation joints and exposed sections before finishing the job.
6. Bending the Pipes Too Sharply
Sharp bends can restrict the pipe or damage it.
Plan the route in advance and observe the minimum bending radius specified by the manufacturer.
7. Installing the Drain Hose Without Enough Slope
Poor drainage can cause water to collect in the hose or flow back toward the indoor unit.
Check the entire route, not just the section immediately beside the unit.
8. Assuming That a Successful Vacuum Test Guarantees a Leak-Free System
Vacuum readings are important, but they do not replace all required leak checks.
Complete the appropriate inspection and commissioning procedures before opening the system for normal operation.
9. Skipping the Final Test Run
An installation is not complete simply because the indoor and outdoor units are connected.
Confirm that the system operates correctly and check the drainage and other installation details required by the manufacturer.
What I Learned From This Project
This project reminded me that air conditioner installation requires attention to many small details.
Although the apartment was relatively small, we spent approximately five hours completing the installation.
One of the most important lessons was the value of planning the pipe route before mounting the indoor unit. Preparing the bends in advance helped us position the unit without trapping the pipes.
The drain hose was another important consideration. The original wall opening did not allow us to achieve the required slope, so we routed the hose through a separate opening.
This reinforced the importance of checking the actual site conditions instead of assuming that the existing openings will always be suitable.
I also learned how much the quality of the finished installation depends on details that are not immediately visible, such as the flare connections, insulation, electrical connections, and drainage route.
Even when an air conditioner looks properly installed from the outside, these hidden details can affect its long-term performance.
By taking the time to check each stage carefully, we were able to complete the installation and confirm that the unit operated normally.
FAQ: Air Conditioner Installation in Japan
1. How long does it take to install an air conditioner in Japan?
The time required depends on the property, wall construction, pipe route, and installation conditions.
For this project, two workers completed the installation in approximately five hours.
A straightforward replacement may take less time, while jobs involving difficult pipe routing or additional work may take longer.
2. Why was the mounting plate secured with wall anchors?
The wall was covered with gypsum board, which may not provide sufficient holding strength for ordinary screws alone.
We used suitable anchors to secure the mounting plate. The correct fixing method depends on the wall structure and the weight and loading requirements of the equipment.
3. Why is the mounting plate position important?
The mounting plate determines the position and support of the indoor unit.
Incorrect positioning can make installation more difficult and may contribute to drainage problems if the unit is not installed according to the manufacturer’s requirements.
4. Why must refrigerant pipes be flared correctly?
Flared connections create the seals between the refrigerant pipes and the air conditioner’s fittings.
Incorrectly formed or damaged flares may cause refrigerant leaks. The flare dimensions and tightening torque must meet the equipment manufacturer’s specifications.
5. Why is pipe insulation necessary?
Refrigerant pipes can become much colder or warmer than the surrounding air.
Without suitable insulation, moisture may condense on the pipe surface and cause water to drip onto walls, ceilings, or floors.
6. Why is vacuum evacuation necessary during installation?
Vacuum evacuation removes air and moisture from the refrigerant piping before the system is placed into operation.
Air and moisture left in the system can interfere with proper operation and may damage components.
The procedure must be performed using suitable equipment and according to the manufacturer’s instructions.
7. Why must the drain hose slope downward?
The drain hose carries condensate away from the indoor unit.
A suitable downward slope allows water to flow out by gravity. An unsuitable route may allow water to collect in the hose or return toward the indoor unit, potentially causing water leakage.
8. Why did you use a separate opening for the drain hose?
The original wall opening did not allow us to achieve a suitable drain hose slope.
We therefore used a separate opening to create a better drainage route.
The best route depends on the wall layout, the available openings, and the manufacturer’s installation requirements.
9. Can I install an air conditioner myself?
Some basic preparation and planning may be possible for a homeowner, but a complete installation involves electrical work, refrigerant piping, vacuum evacuation, leak checks, and other technical procedures.
In Japan, applicable laws and qualification requirements must be considered, particularly for electrical work. Refrigerant handling and installation procedures must also comply with the manufacturer’s instructions and relevant regulations.
If you lack the necessary skills, equipment, or qualifications, hiring a qualified professional is the safer choice.
10. What should be checked after installing an air conditioner?
The final checks depend on the equipment and installation conditions.
They generally include confirming the mounting and connections, checking the refrigerant circuit using the required procedures, inspecting the drain hose, and verifying that the unit operates normally.
The installation should not be considered complete until the required commissioning checks have been carried out.
Conclusion
Today, we installed a new air conditioner in a 20 m² apartment on the fourth floor of a Japanese apartment building.
Two workers completed the job in approximately five hours.
The main tasks included securing the mounting plate, preparing the electrical wiring and refrigerant pipes, connecting the indoor and outdoor units, insulating the pipes, routing the drain hose, sealing the wall opening, and testing the system.
The most important lesson from this project is that careful preparation makes a significant difference.
Correct pipe routing, reliable connections, proper insulation, and effective drainage all contribute to a successful installation.
Even when the work appears simple, paying attention to these details helps prevent problems and improves the quality of the finished job.
For me, every job site is an opportunity to improve my practical skills and learn more about residential renovation and building maintenance in Japan.
I’ll continue sharing real job site reports and practical lessons from my work as a Japanese wallpaper craftsman.
Thanks for reading!


Comments