
Project Data
- Project Type: Residential Interior Renovation – Vinyl Flooring & Soft Baseboard Installation
- Location: Japan
- Building Type: Apartment
- Room Size: Approximately 20 m²
- Areas: Kitchen and Main Room
- Existing Floor: Wood Flooring
- Flooring Material: Vinyl Sheet Flooring (Cushion Floor)
- Baseboard: Soft Vinyl Baseboard
- Crew: 2 workers initially, increased to 3 workers during installation
- Working Time: Approximately 5 hours
Installation Data
- Main Room Size: Approximately 3.7 m × 2.1 m
- Vinyl Flooring: Two sheets, approximately 3.8 m long × 1.8 m wide
- Work Performed: Floor squeak repair, damaged flooring removal, surface preparation, vinyl flooring installation, joint cutting, seam sealing, and soft baseboard installation
- Existing Condition: Existing wood flooring with minor squeaking and localized deterioration
⸻
Introduction
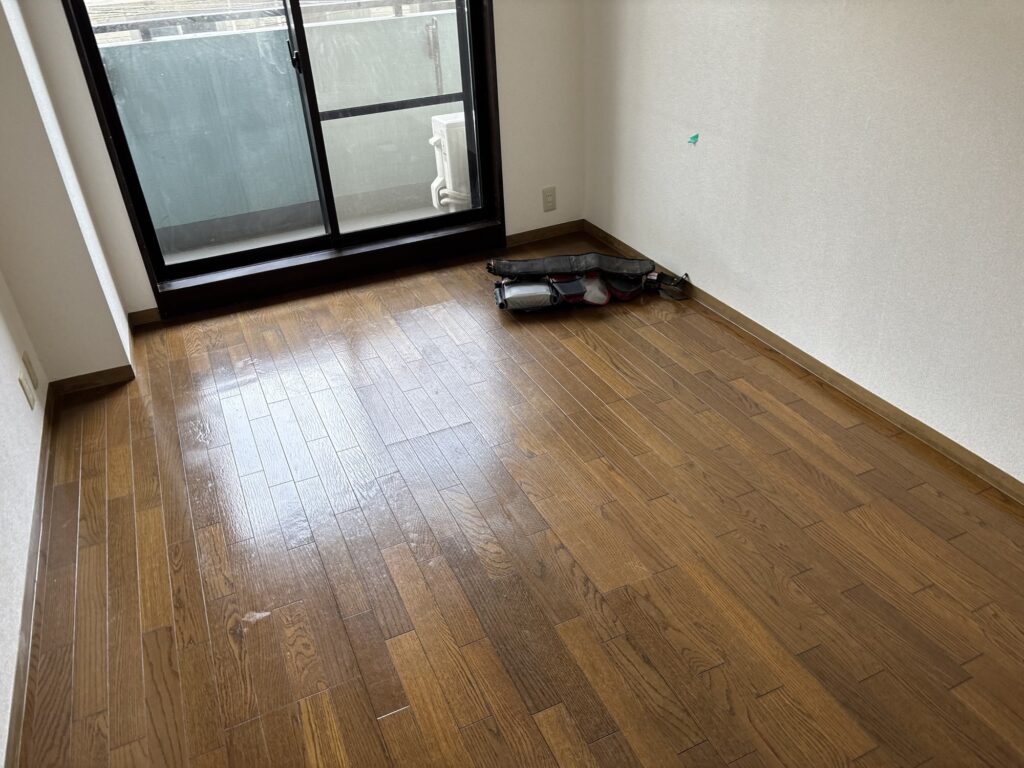
Today’s project was a vinyl flooring and soft baseboard installation in a small approximately 20 m² apartment.
The work covered both the kitchen and the main living area. The existing floor was wood flooring, so the vinyl flooring could not simply be installed immediately. We first needed to inspect the existing surface and make several repairs.
There were a few areas where the floor made a slight squeaking noise, so we secured those areas with screws as a simple repair.
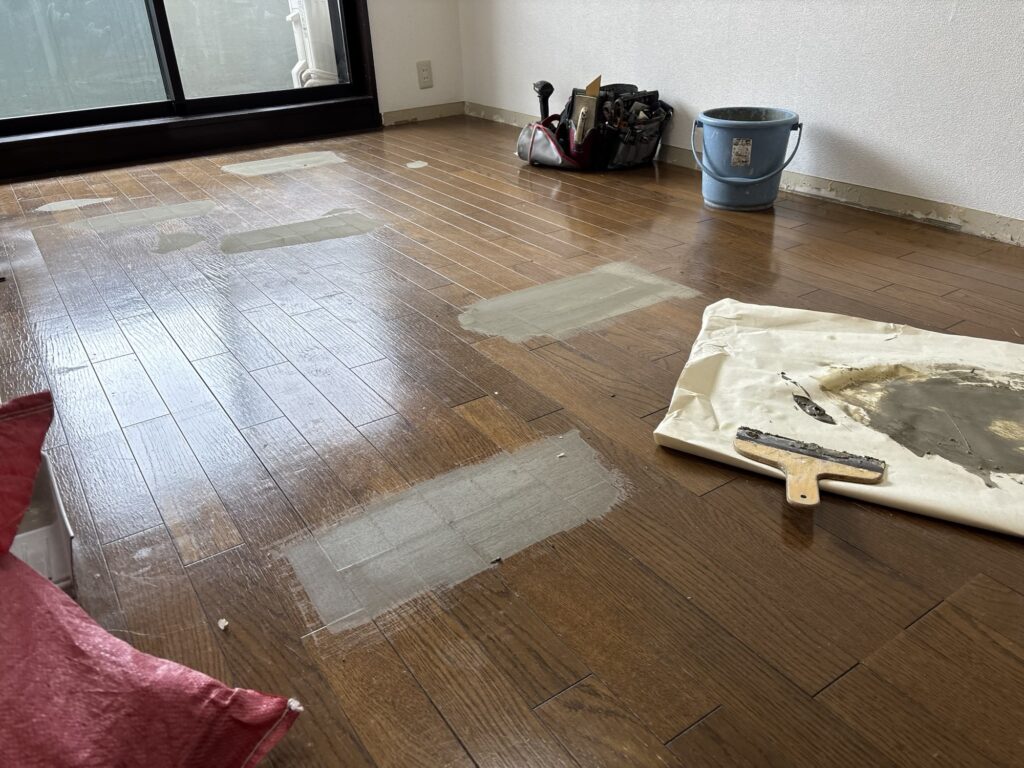
Some sections of the existing wood flooring were also deteriorated. These areas were partially removed and repaired with filler before installing the new vinyl flooring.
This preparation is important.
If deteriorated sections are left untreated and vinyl flooring is installed directly over them, the damaged areas can later become soft, uneven, or feel like they are floating when stepped on.
This project also had an interesting challenge at the transition between the kitchen floor and the entrance to the main room.
The finished height of the vinyl flooring would have exceeded the existing transition height. Normally, we would install a transition molding and secure it with screws. However, neither the customer nor the site supervisor had expected this height issue, so no transition material had been prepared.
Instead of stopping the work and buying additional material, we found another solution on site.
⸻
Work Flow – Site Report
1. Inspecting and Repairing the Existing Floor
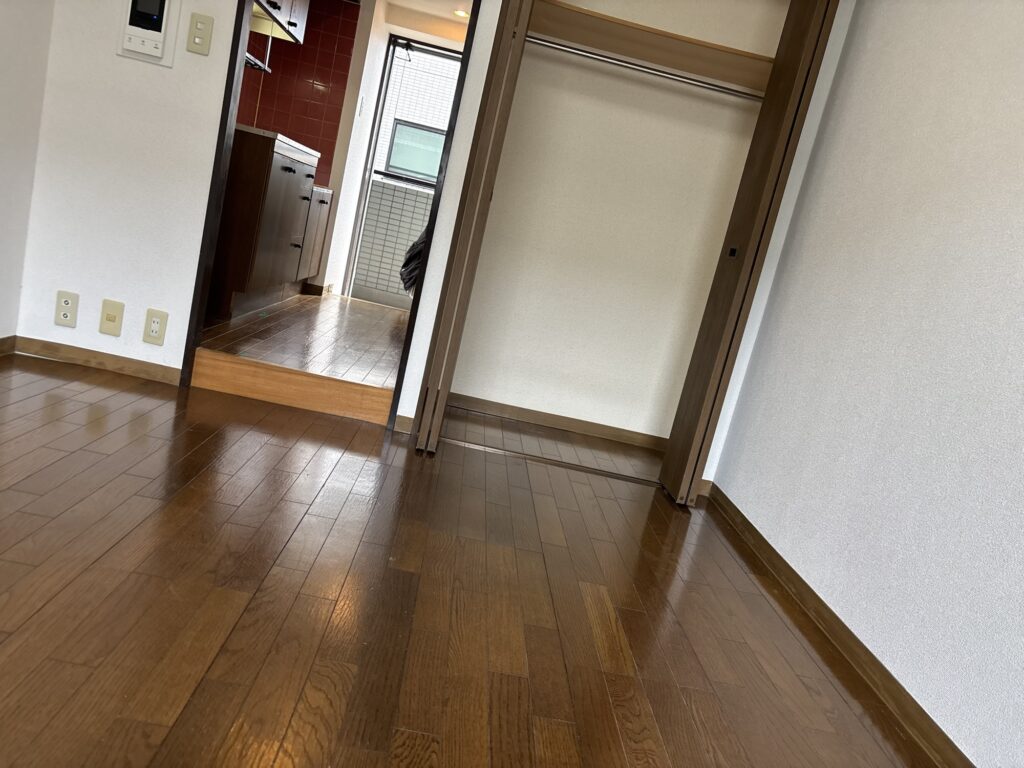
The existing floor was wood flooring.
Before installing the new vinyl flooring, we checked the condition of the existing surface.
There was some minor floor squeaking, so we secured the affected areas with screws.
This was not a major structural repair, but it was important to deal with the movement before covering the floor with the new material.
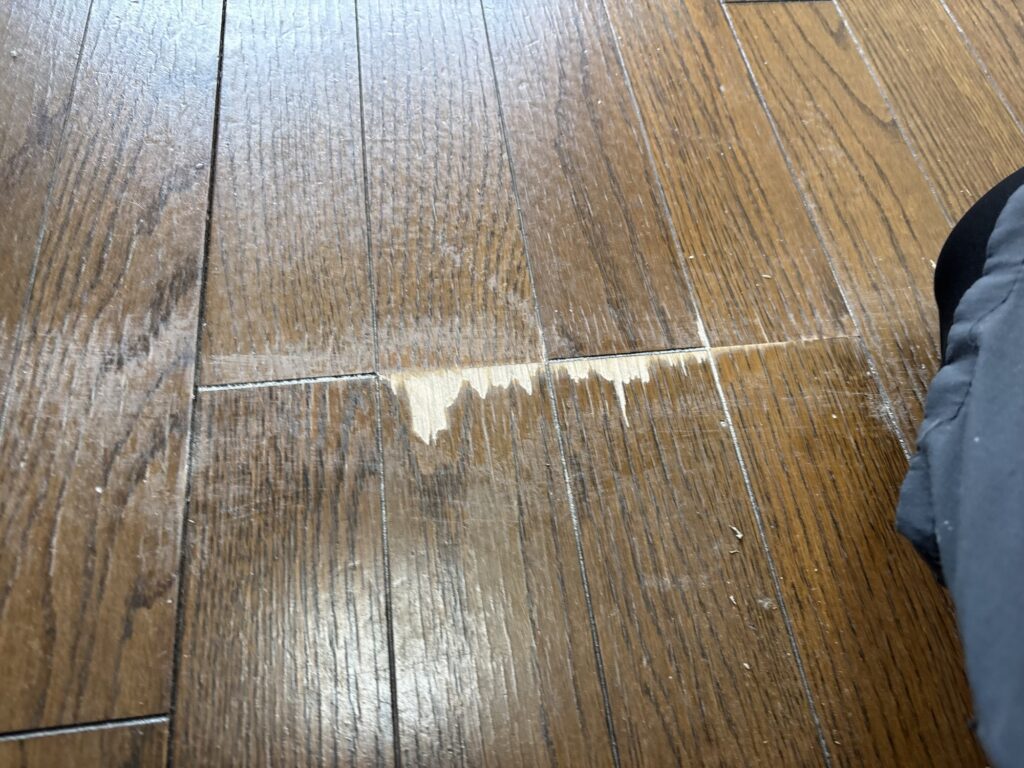
We also found some deteriorated sections of flooring.
Those areas were partially removed, and filler was applied to create a more stable and even surface.
One important lesson is that vinyl flooring does not hide every problem underneath it.
In fact, some problems can become more noticeable after installation.
If deteriorated flooring is left underneath, the vinyl flooring can eventually move, sink slightly, or feel soft when stepped on.
Proper surface preparation is therefore one of the most important parts of a quality installation.
⸻
2. Solving the Transition Height Problem
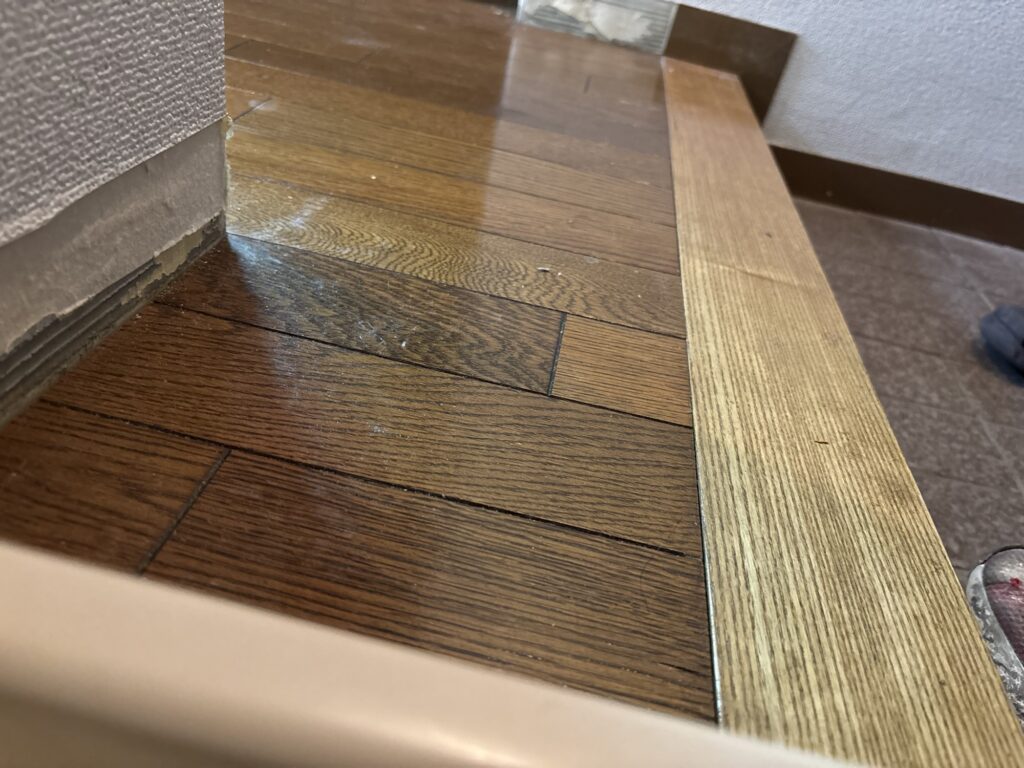
One of the unexpected problems was at the transition between the kitchen and the entrance area of the main room.
After installing the vinyl flooring, the finished floor height would have been higher than the existing transition.
Normally, we would use a transition molding and secure it with screws.
However, no suitable transition material had been prepared because the customer and site supervisor had not expected the finished height to become an issue.
At first, I thought we would need to go and buy a transition piece.
However, my boss looked at the situation differently.
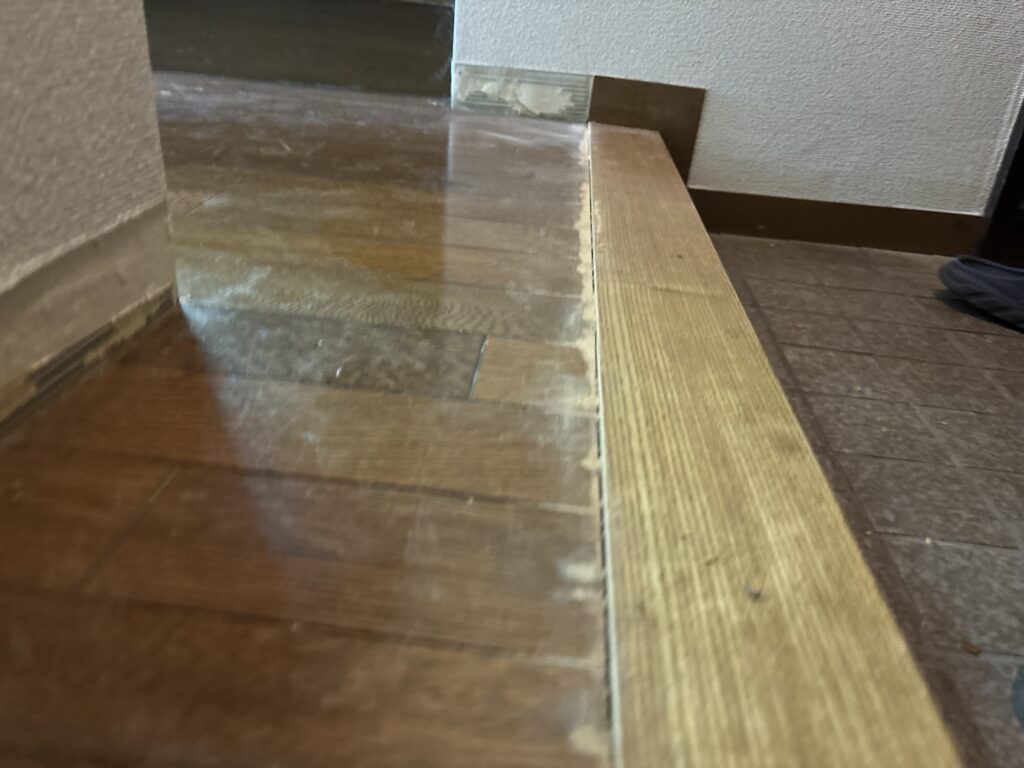
He suggested cutting down the existing area before installing the vinyl flooring.
By carefully removing material from the transition area with a utility knife, we were able to create enough clearance for the vinyl flooring.
This allowed us to complete the installation without purchasing additional materials.
I thought this was a great example of how experience changes the way a professional looks at a problem.
If I had immediately gone to buy a transition molding, we would have lost time, and the customer might also have had to pay for additional material.
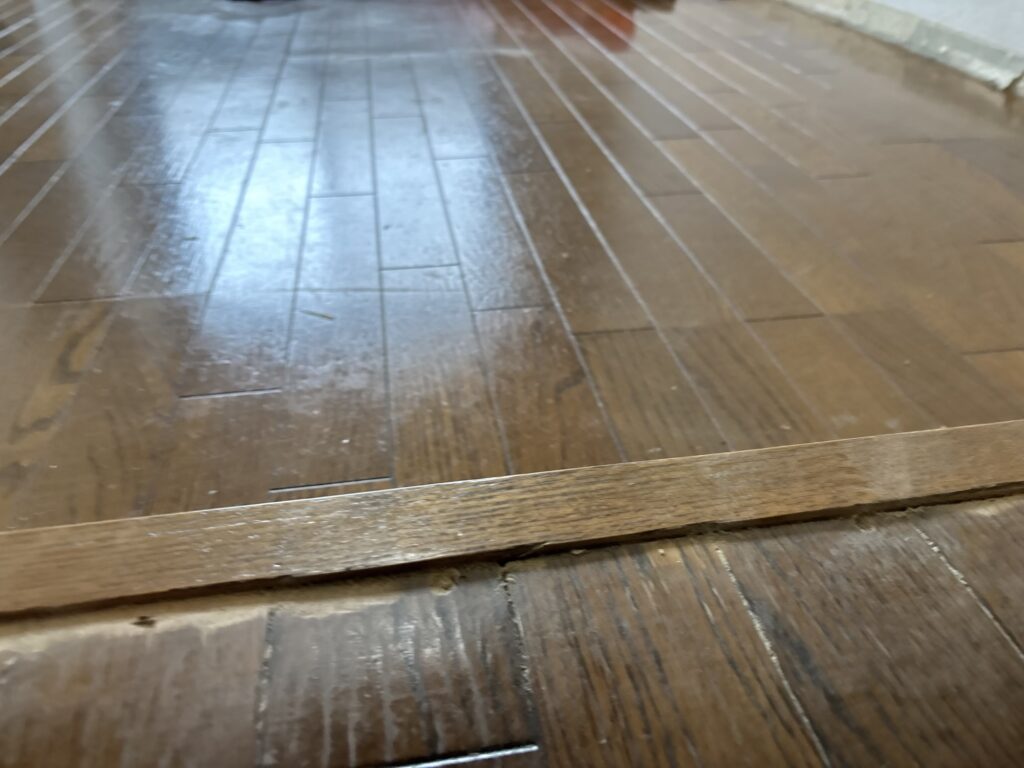
Instead, we found a practical solution using the existing conditions.
It was a win-win situation for both the customer and the installers.
⸻
3. Preparing the Walls for Soft Baseboard Installation
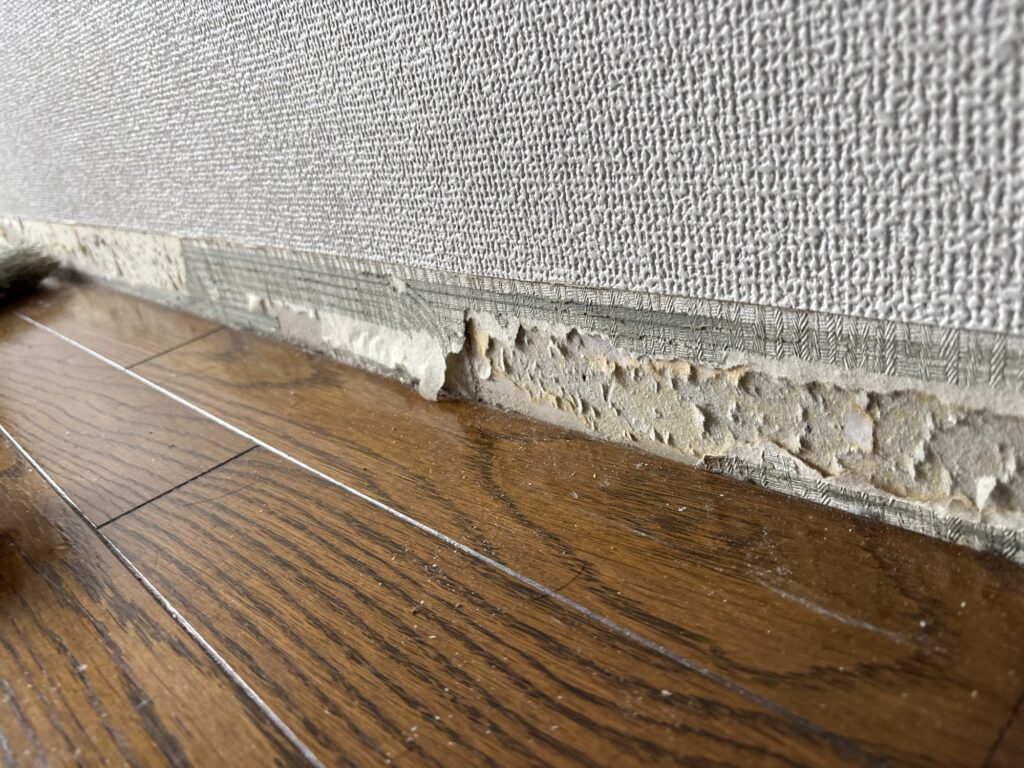
After removing the old soft baseboard, we prepared the area for the new flooring.
At this point, my boss noticed that some old wallpaper was still attached underneath the old baseboard.
He told me to remove it.
I already knew that loose or lifted wallpaper could prevent the new soft baseboard from bonding properly.
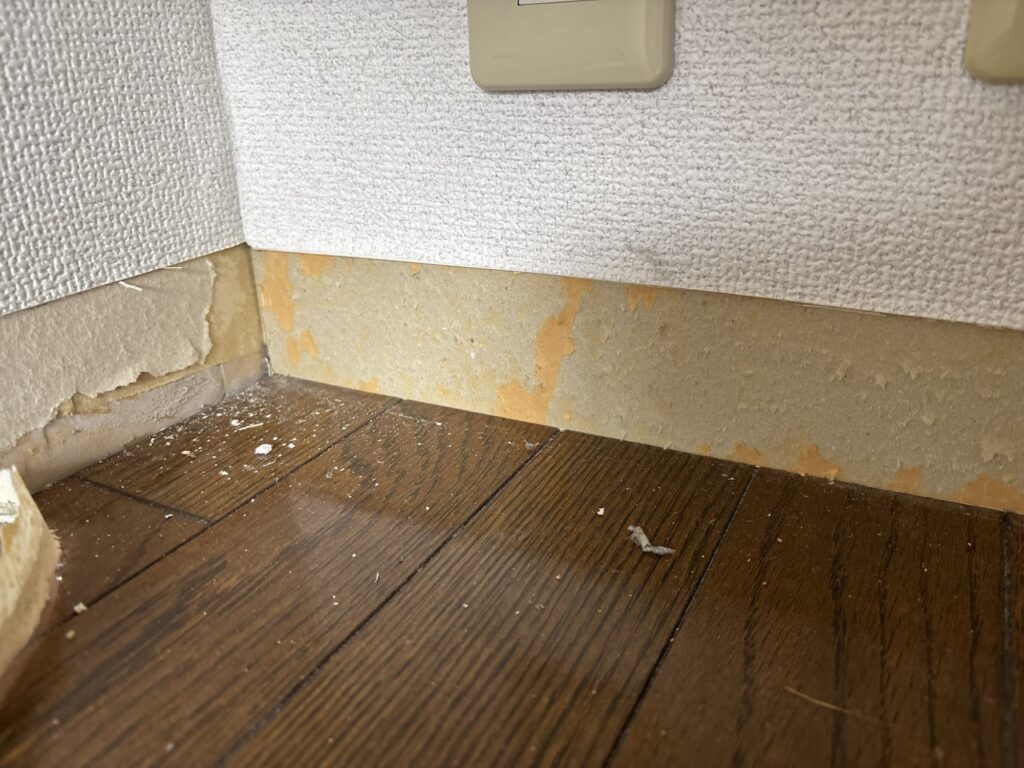
However, I had been thinking that we could simply remove it later when we installed the new baseboard.
My boss saw the situation differently.
If we waited until the baseboard installation stage, we would have to stop installing the baseboard, remove the old wallpaper, clean the area, and then continue.
That interrupts the workflow.
Instead, removing the wallpaper beforehand allowed the baseboard installation to proceed continuously.
This taught me an important lesson:
Remove when it is time to remove. Install when it is time to install.
When removal work gets mixed into the installation process, you have to constantly switch your attention between different tasks.
That uses unnecessary mental energy and can also increase the chance of small mistakes.
Keeping each stage simple makes the work more efficient and helps reduce errors.
The important thing is not just to complete the task in front of you.
You should also imagine what the next step will look like and prepare the work area accordingly.
⸻
4. Planning the Vinyl Flooring Layout
The main room measured approximately 3.7 m long by 2.1 m wide.
The vinyl flooring material consisted of two sheets, each approximately 3.8 m long and 1.8 m wide.
We planned the layout so that the joint would not be located directly at the entrance.
The entrance is an area where people walk frequently and apply a lot of pressure with their feet.
If the joint is placed in a high-traffic area, repeated pressure can eventually cause the joint to move or become noticeable.
Whenever possible, it is better to position joints away from areas that receive frequent foot traffic.
⸻
5. Checking the Flooring Before Applying Adhesive
Before applying adhesive, we first spread the vinyl flooring out across the room.
We pushed it toward the walls and checked whether there were any gaps.
If a gap appears at the wall, the sheet can be positioned so that there is slightly more material on the opposite side.
A chalk line can then be marked, allowing the sheet to be cut accurately after installation.
For this particular room, the sheet could be installed directly against the wall, so we did not need to use a chalk line.
This kind of dry positioning is a simple step, but it can prevent unnecessary mistakes later.
⸻
6. Applying the Adhesive
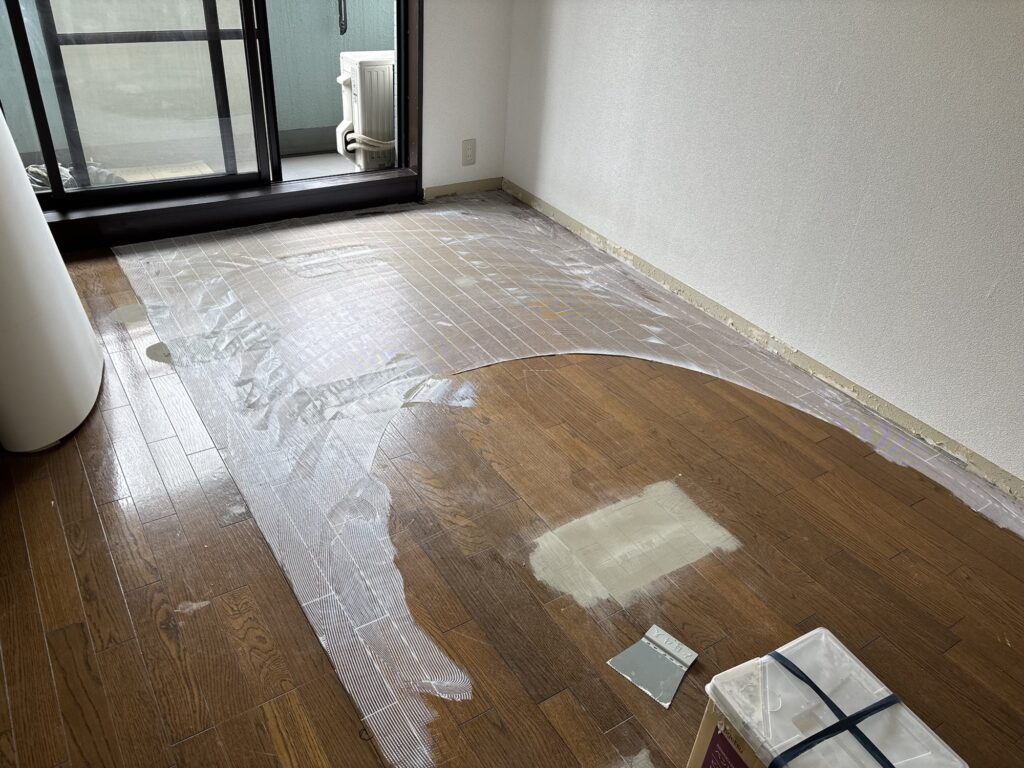
The adhesive needs to be spread evenly.
Avoid creating thick areas or puddles of adhesive.
If too much adhesive accumulates in one location, it can create a visible bump underneath the vinyl flooring.
One important technique is to keep the adhesive spreader relatively upright while applying the adhesive.
If the spreader is held too flat, too much adhesive can accumulate and create uneven areas.
The four corners also need special attention because they are areas that can be more vulnerable to lifting.
Make sure there is sufficient adhesive coverage in these areas.
⸻
7. Installing the First Sheet
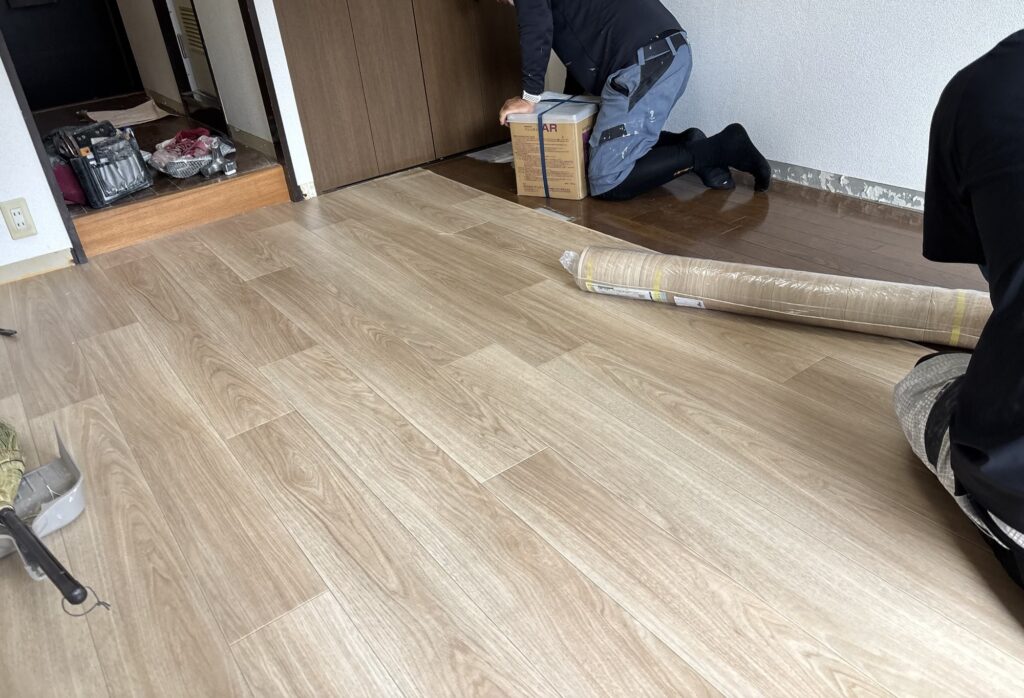
During the installation, one additional worker joined us, bringing the crew to three people.
Working together made it easier to position the large sheet accurately.
We carefully placed the vinyl flooring onto the adhesive and then used a flooring smoother to push out trapped air.
Even after you think all the air has been removed, it is worth checking the surface from different angles.
Using a light or changing your viewing angle can reveal small bubbles that were difficult to see initially.
Take your time during this inspection.
Once the surface looked good, we moved on to trimming the excess material.
⸻
8. Cutting the Vinyl Flooring
The main tools used for cutting were:
- Corner cutter
- Utility knife
- Putty knife or flooring spatula
Where the flooring could be cut in a straight line and would later be covered by the baseboard, we used a corner cutter.
For detailed areas around columns, window frames, or other locations where the corner cutter could not be used, we used a putty knife and utility knife.
One important rule when cutting vinyl flooring is:
Do not try to make the final cut in one shot.
If you cut too short, you cannot put the material back.
If you leave it slightly long, however, you can gradually trim it down.
For beginners, cutting slightly long and gradually adjusting the edge is a much safer approach.
When cutting, we pressed the putty knife into the corner at approximately a 45-degree angle and used it as a guide for the knife.
The angle of the putty knife has a major effect on the final cut.
If the tool is held too flat, the cut may become longer.
However, if wood baseboards or other finished surfaces are nearby, this can increase the risk of damaging them.
If the tool is held too vertically, the cut can become too short, leaving insufficient flooring material.
It can be useful to practice with different angles and see how the cutting result changes.
⸻
9. The Putty Knife Is More Important Than You Might Think
One of the most important lessons I have learned about vinyl flooring installation is that cutting is not only about how you use the knife.
It is also about how you use the putty knife.
An experienced installer can often predict how another installer will cut simply by watching how they position and control their putty knife.
That is how important this tool is.
For small or narrow areas, a smaller putty knife can also be very useful because it allows more precise control.
Another important point is the sharpness of the utility knife blade.
Vinyl flooring can quickly dull a blade.
A dull blade makes cutting harder and can lead to poor control.
Replacing the blade frequently with a sharp new blade makes the work much easier and safer.
⸻
10. Installing the Second Sheet and Creating the Joint
After finishing the first sheet, we moved on to the second sheet.
Approximately 45 cm was trimmed from the second sheet before positioning it.
The second sheet was carefully aligned with the joint line of the first sheet.
If the alignment is incorrect, the sheet may need to be lifted and repositioned.
For this reason, we checked the joint alignment by carefully lifting and lowering the sheet little by little.
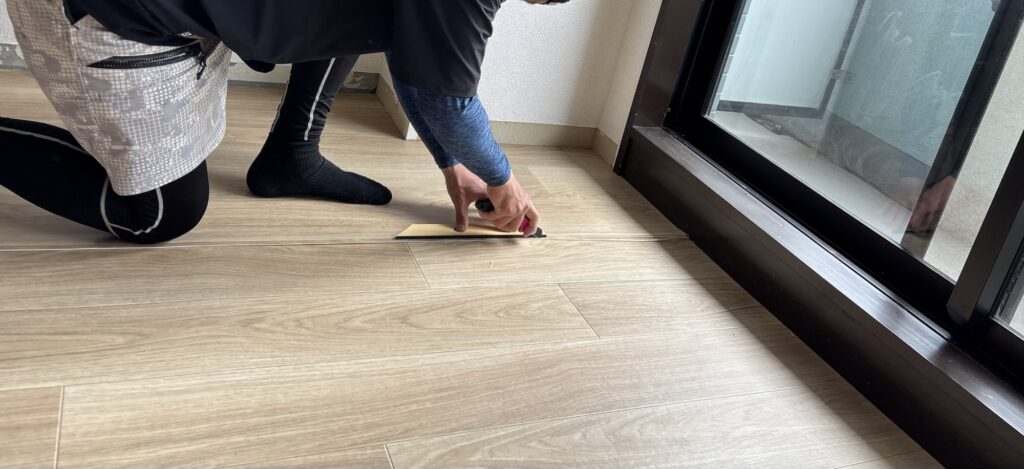
After trimming the excess material, we performed the joint cut.
For this step, we used a large-blade utility knife together with a straightedge or putty knife.
Because two layers of vinyl flooring were overlapping, the cut needed to be deep and controlled enough to pass through both layers.
If the pressure is too light, the lower sheet may not be completely cut.
A large-blade utility knife is useful because it allows more pressure to be applied and generally provides better cutting control for this type of work.
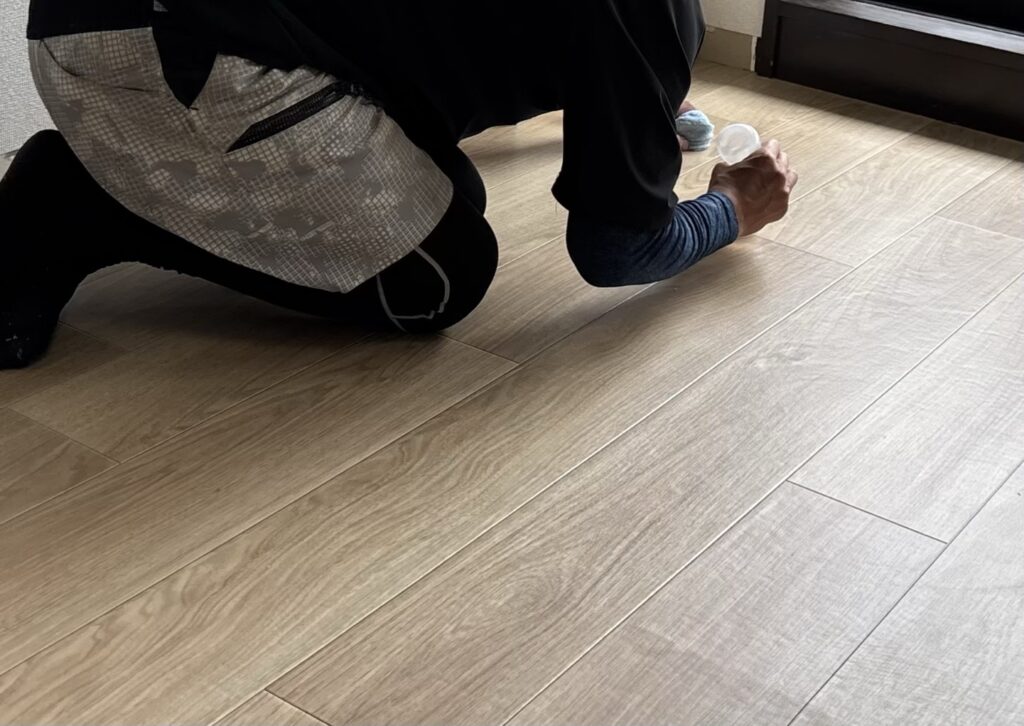
After completing the joint cut, seam sealer was applied to the joint.
This helps stabilize and protect the joint after installation.
⸻
11. Cutting the Kitchen Transition Area
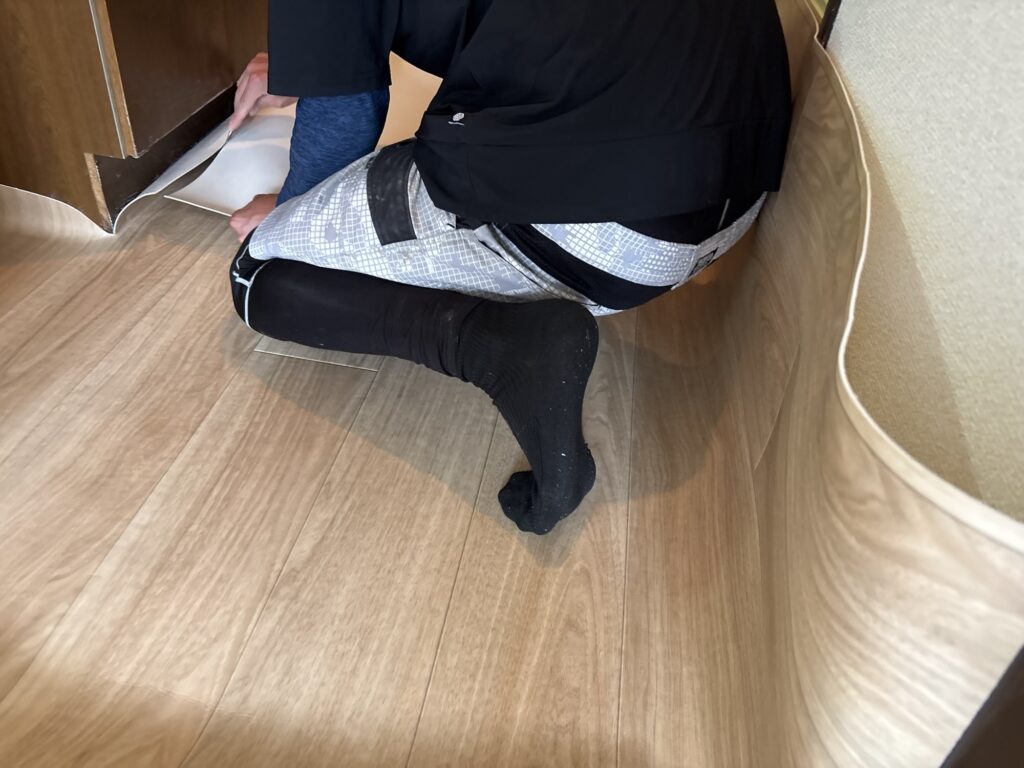
The most difficult part of the kitchen installation was cutting around the transition area.
The existing wooden transition section had deteriorated over time and was no longer perfectly straight.
Instead of trying to force the vinyl flooring into an uneven line, we carefully trimmed the material little by little.
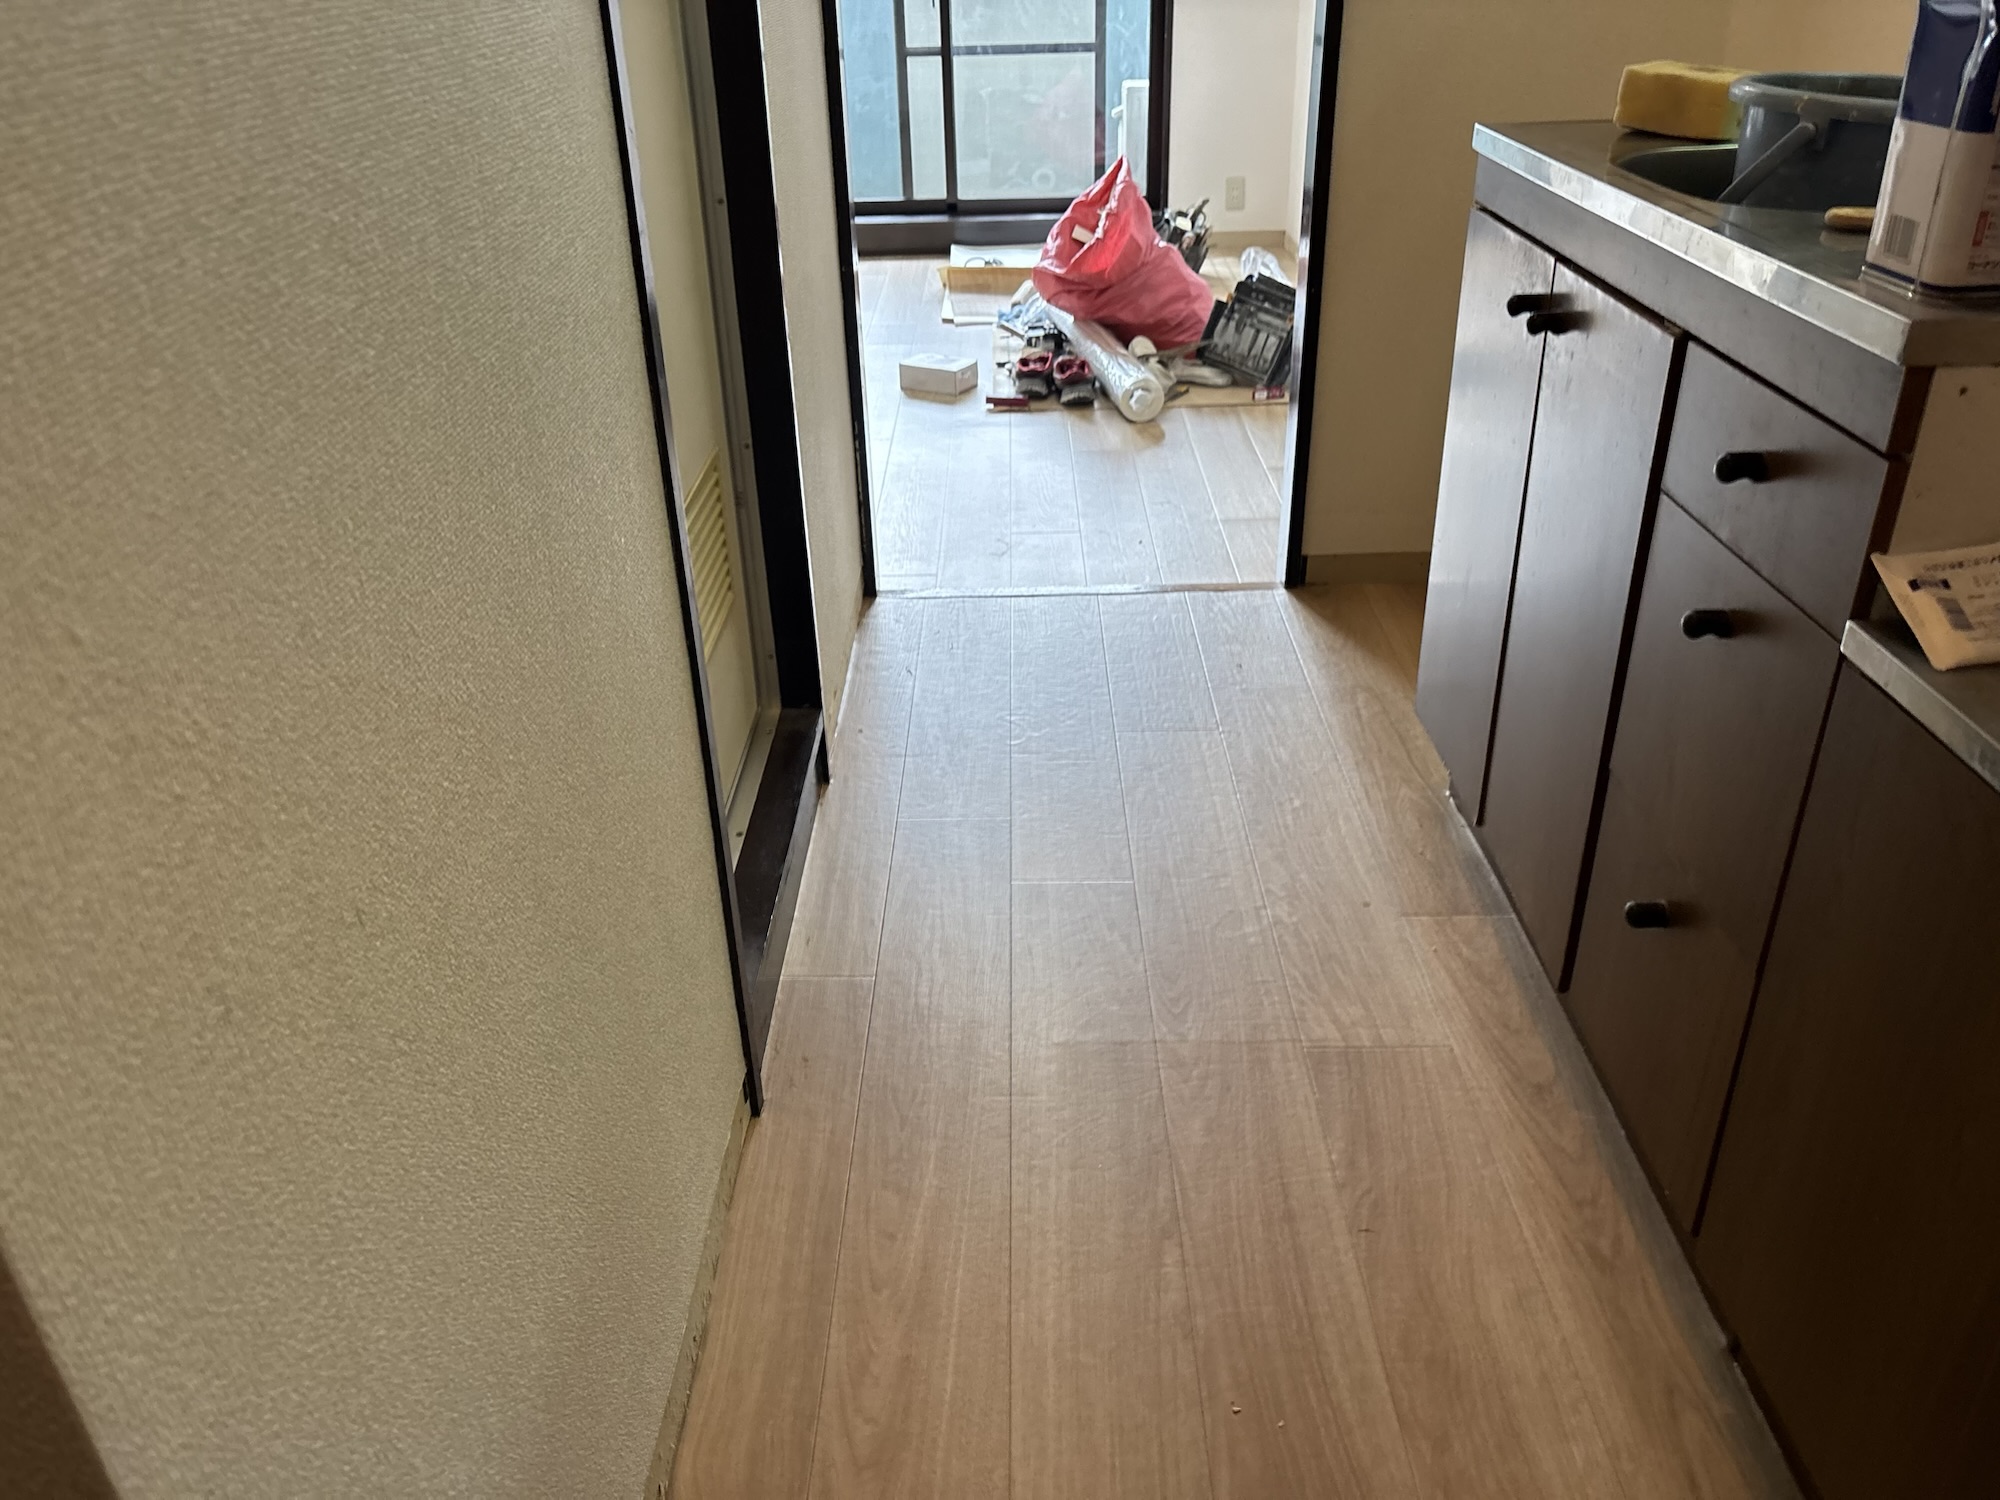
The goal was to create a clean line that looked straight when viewed from the room.
Because we had also reduced the height of the transition area beforehand, the finished vinyl flooring fit properly without exceeding the required height.
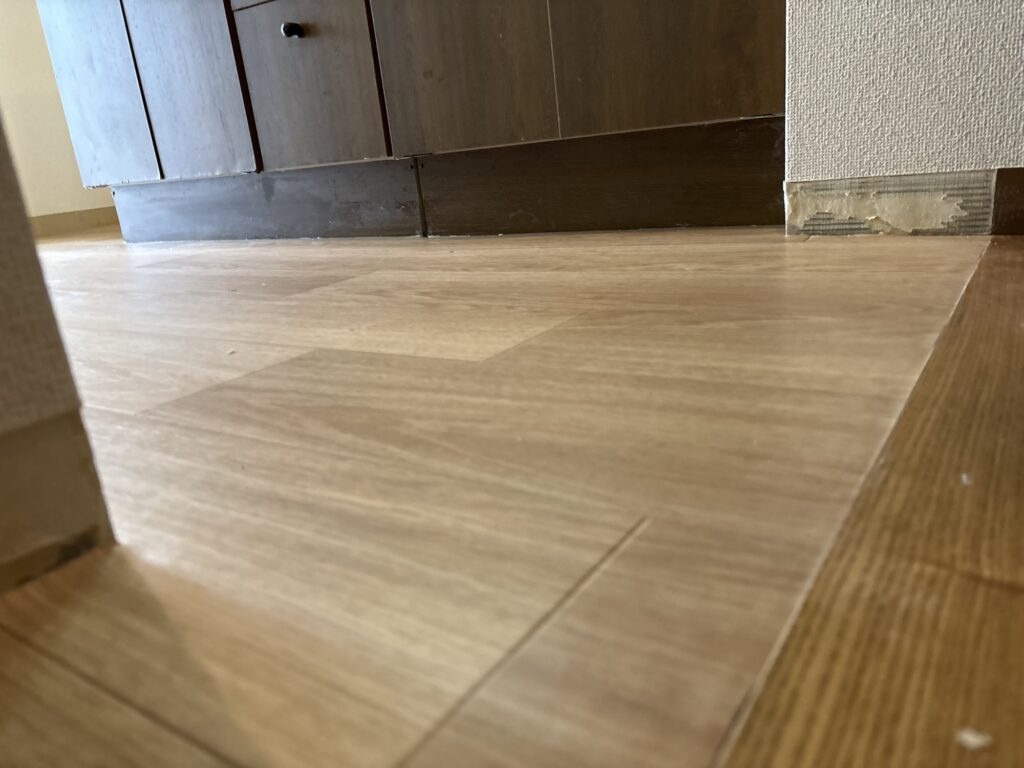
This was another example of why careful preparation can make the final installation much easier.
⸻
12. Installing the Soft Baseboard
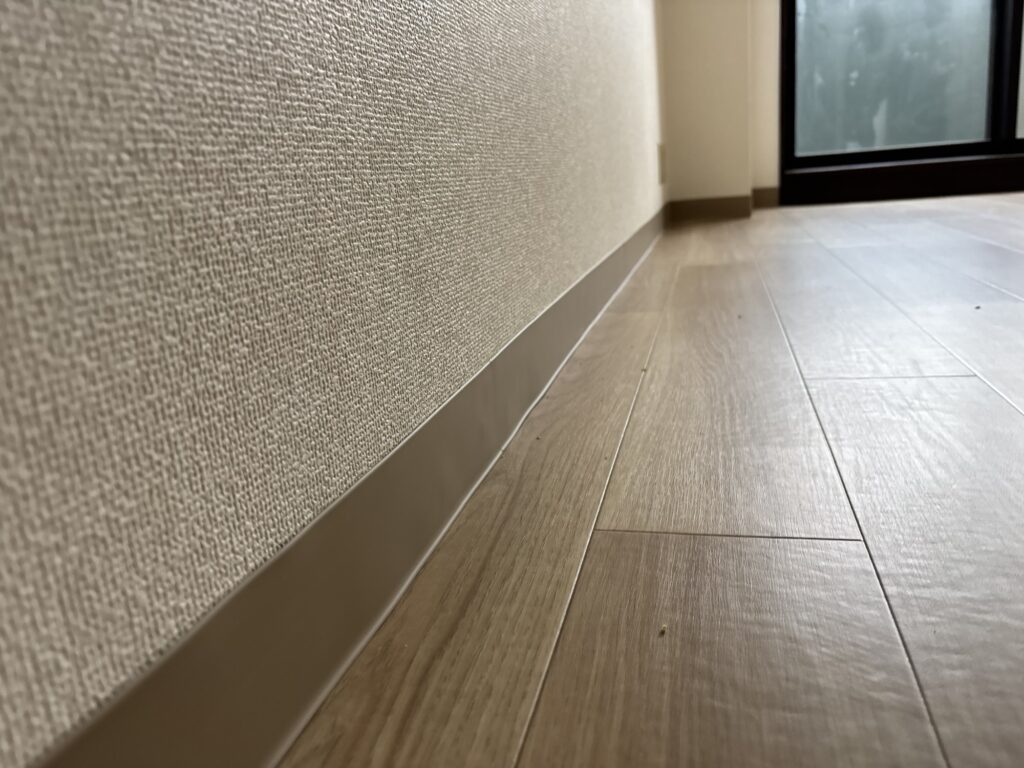
After the vinyl flooring installation was complete, we moved on to the soft baseboard.
We applied adhesive to the back of the baseboard and carefully installed it along the walls.
Straight sections are relatively easy to install.
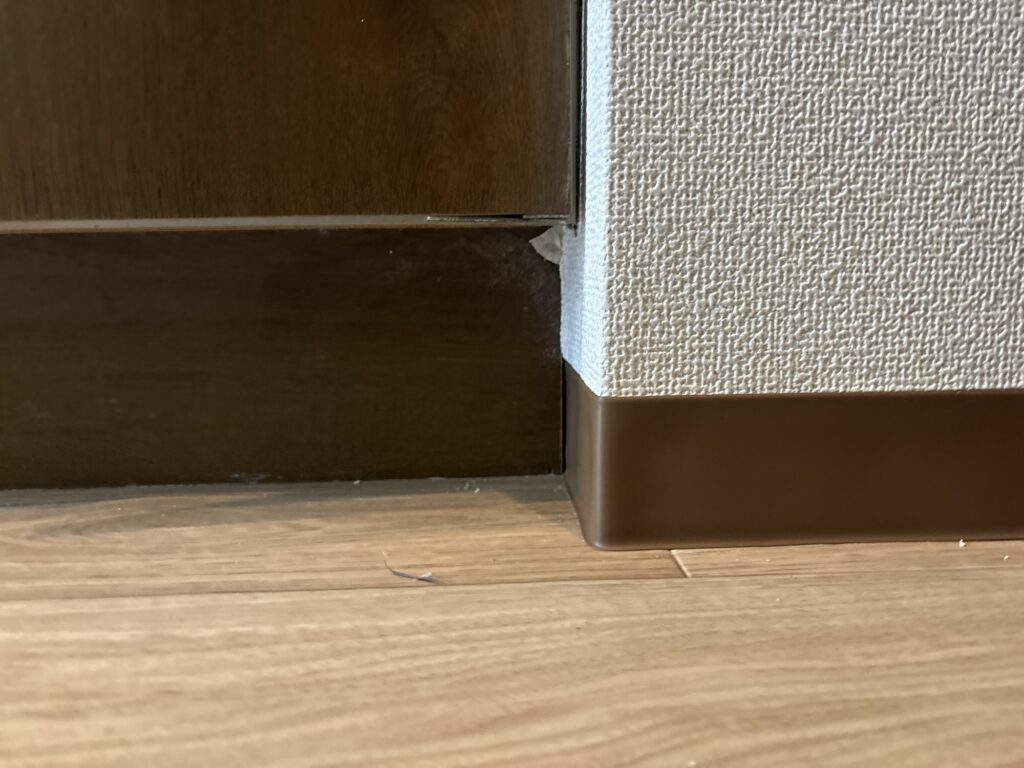
However, wrapping the baseboard around columns and corners requires a little more technique.
If the corner is not wrapped tightly enough, the material can become loose and look wavy.
One method is to warm the soft baseboard with a hair dryer.
As the material becomes softer, it can be gently stretched and wrapped around the corner.
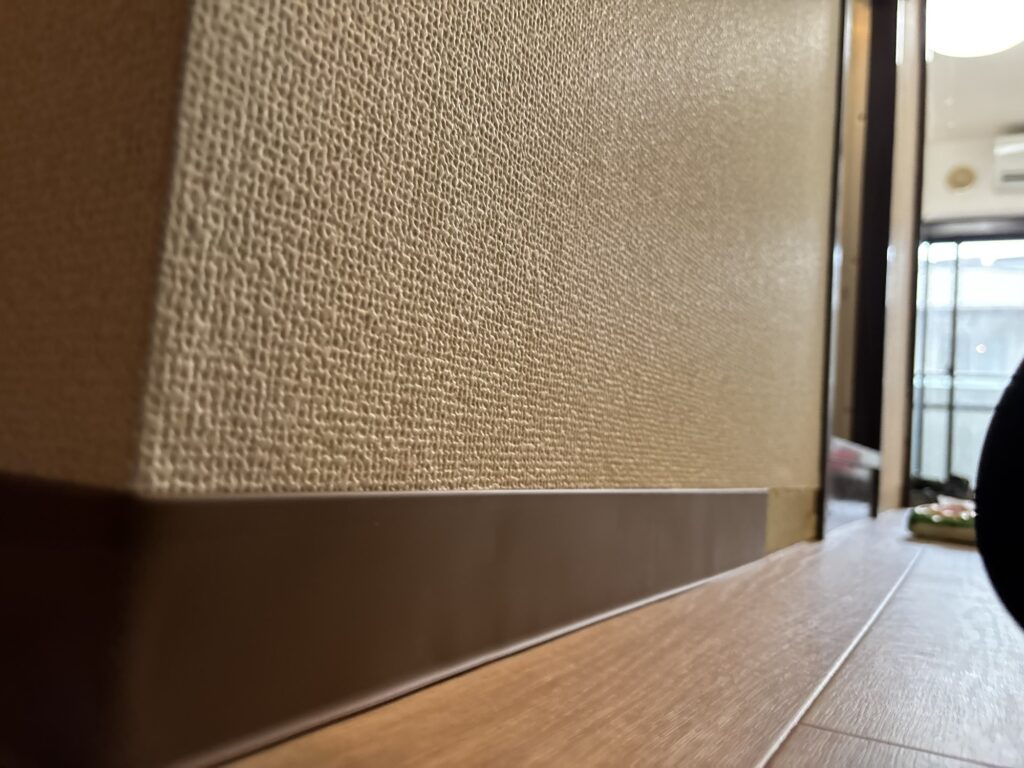
Another option is to make a shallow relief cut on the back of the baseboard with a utility knife.
This allows the material to bend more easily and can help create a cleaner corner.
Care needs to be taken not to cut too deeply into the visible surface.
⸻
Tools Used
The main tools used during this project included:
- Utility knife
- Large-blade utility knife
- Spare utility knife blades
- Corner cutter
- Putty knife
- Small putty knife
- Straightedge
- Flooring smoother
- Adhesive spreader
- Screwdriver or drill/driver
- Screws
- Hair dryer
- Seam sealer
- Cleaning tools
Each tool has a specific purpose, but the most important thing is knowing how to use the tools together.
Good results come from combining the right tools with accurate judgment and careful preparation.
⸻
Professional Tips
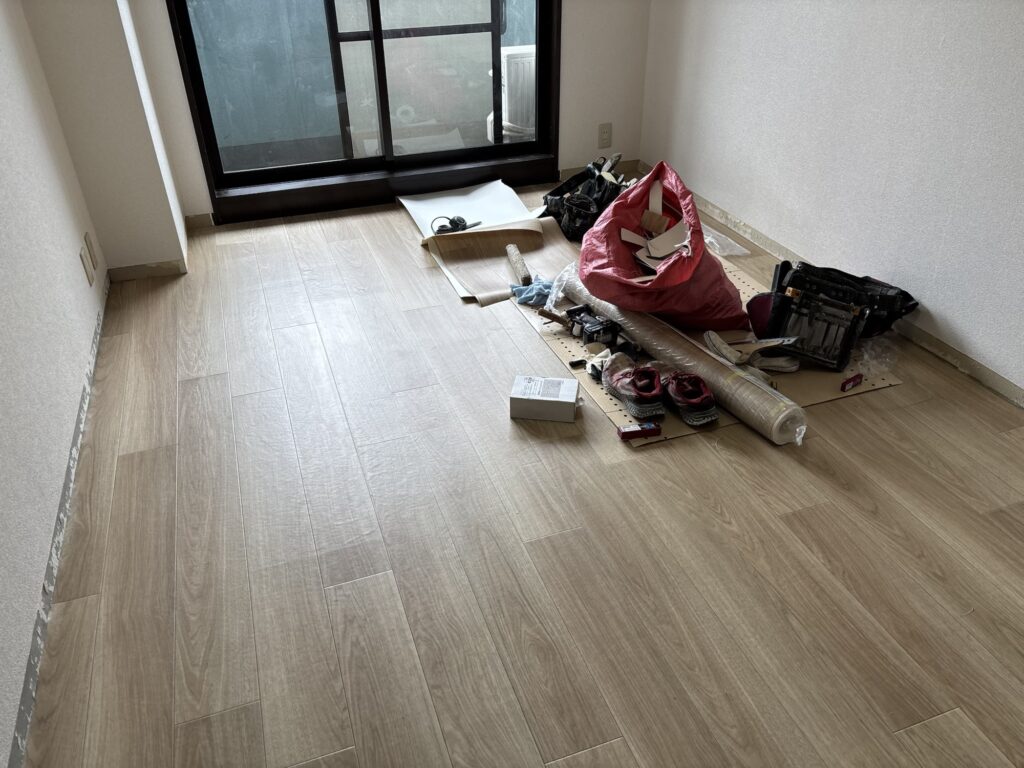
1. Always inspect the existing floor first
Do not assume that the existing flooring is ready to receive new material.
Look for movement, squeaks, deterioration, uneven areas, and loose sections.
2. Repair damaged areas before installation
Vinyl flooring can reproduce problems underneath it.
A damaged substrate can eventually cause soft spots, movement, or visible imperfections.
3. Plan the joint location
Avoid placing joints in areas that receive frequent foot traffic whenever possible.
4. Check the flooring before applying adhesive
Dry positioning allows you to identify potential problems before the adhesive is applied.
5. Spread adhesive evenly
Avoid adhesive buildup.
Uneven adhesive can create bumps and affect the final appearance.
6. Keep your cutting tool sharp
A dull blade reduces control and makes precise cutting more difficult.
Change blades frequently.
7. Let the putty knife guide the cut
The angle and position of the putty knife have a major effect on the final cut.
8. Cut slightly long when you are unsure
You can always remove more material.
You cannot add material back after cutting too short.
9. Think about the next step
Prepare the area before you reach the next stage.
This keeps the workflow smooth and reduces unnecessary interruptions.
10. Use experience to find practical solutions
Not every problem requires additional materials.
Sometimes the existing material can be adjusted or modified to solve the problem efficiently.
⸻
Common Mistakes to Avoid
Cutting the flooring too short
This is one of the easiest mistakes to make.
Always leave a little extra material when you are uncertain and trim it gradually.
Installing over deteriorated flooring
Damaged flooring underneath can cause the finished vinyl flooring to feel soft or uneven.
Leaving adhesive buildup
Thick areas of adhesive can create visible bumps underneath the vinyl flooring.
Forgetting the corners
The corners are vulnerable areas where flooring can lift if there is insufficient adhesive.
Placing the joint in a high-traffic area
Repeated foot pressure can increase the risk of joint movement.
Using a dull knife
A dull blade makes accurate cutting more difficult.
Not checking the joint alignment
Once adhesive has been applied, repositioning the sheet becomes much more difficult.
Take time to check the alignment beforehand.
Removing wallpaper during baseboard installation
This interrupts the workflow.
Remove loose or unwanted wallpaper before starting the baseboard installation whenever possible.
⸻
What I Learned From This Project
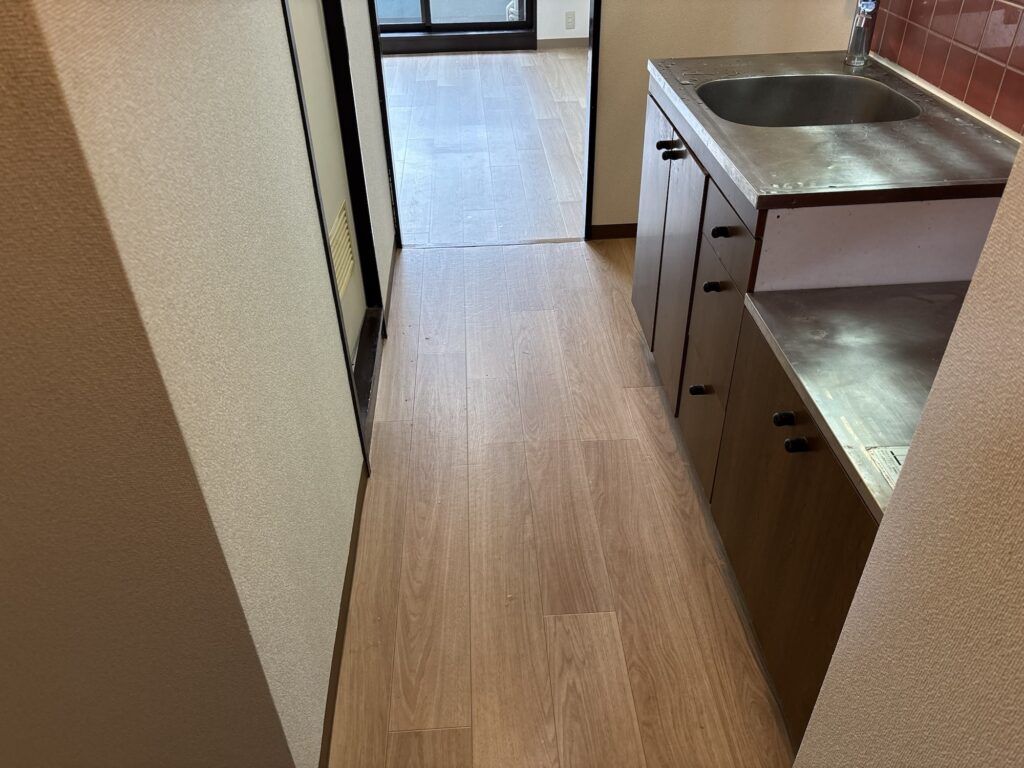
The biggest lesson from this project was not about vinyl flooring itself.
It was about how an experienced installer thinks ahead.
I initially thought that we would need to purchase a transition molding because the finished floor would exceed the existing transition height.
My boss immediately saw another possibility: reduce the height of the existing area and install the vinyl flooring without adding another material.
That saved time and prevented an unnecessary additional cost for the customer.
I also learned an important lesson about preparation from the soft baseboard installation.
I knew that old loose wallpaper could interfere with baseboard adhesion, but I was thinking about removing it later when we actually installed the baseboard.
My boss told me to remove it beforehand.
That made me realize that good preparation is not simply about completing every task eventually.
It is about completing tasks at the right time.
Remove when it is time to remove.
Install when it is time to install.
When you keep the workflow simple, your hands can continue moving without unnecessary interruptions.
You also reduce the amount of mental switching required between different tasks, which can help prevent small mistakes.
This project reminded me that professional work is not just about technical skill.
It is also about anticipating what comes next, finding simple solutions, and keeping the entire workflow efficient.
⸻
FAQ
1. Can vinyl flooring be installed directly over existing wood flooring?
Yes, vinyl flooring can sometimes be installed over existing wood flooring, provided that the existing surface is stable, flat, clean, and suitable for the installation. Any damaged, loose, or deteriorated areas should be repaired first.
2. Why is surface preparation important before installing vinyl flooring?
Because imperfections underneath the flooring can become visible or noticeable after installation. Damaged areas can also cause soft spots, movement, or an uneven finished surface.
3. Why should joints be avoided near entrances?
Entrances receive frequent foot traffic. Repeated pressure can place stress on the joint and potentially cause it to move or become more noticeable over time.
4. Why should the adhesive be spread evenly?
Uneven adhesive can create thick spots underneath the vinyl flooring. These areas may appear as bumps after the flooring is installed.
5. Why do professional installers replace utility knife blades frequently?
Vinyl flooring can dull a blade quickly. A sharp blade provides better control and makes accurate cutting easier.
6. What is the safest way to cut vinyl flooring if you are inexperienced?
It is generally safer to leave the material slightly long and gradually trim it. Cutting too short cannot be corrected by simply adding the material back.
7. What is the purpose of seam sealer?
Seam sealer is applied to the joint between vinyl flooring sheets to help stabilize and protect the seam.
8. How can soft baseboard be installed neatly around corners?
The material can be gently warmed with a hair dryer and stretched around the corner. A shallow relief cut on the back can also help the baseboard bend more cleanly.
9. Why should old loose wallpaper be removed before installing soft baseboard?
Loose wallpaper can interfere with adhesion and prevent the soft baseboard from bonding properly to the wall.
10. How long did this project take?
The entire project took approximately five hours, including floor preparation, vinyl flooring installation, joint cutting, seam sealing, soft baseboard installation, and cleanup.
⸻
Conclusion
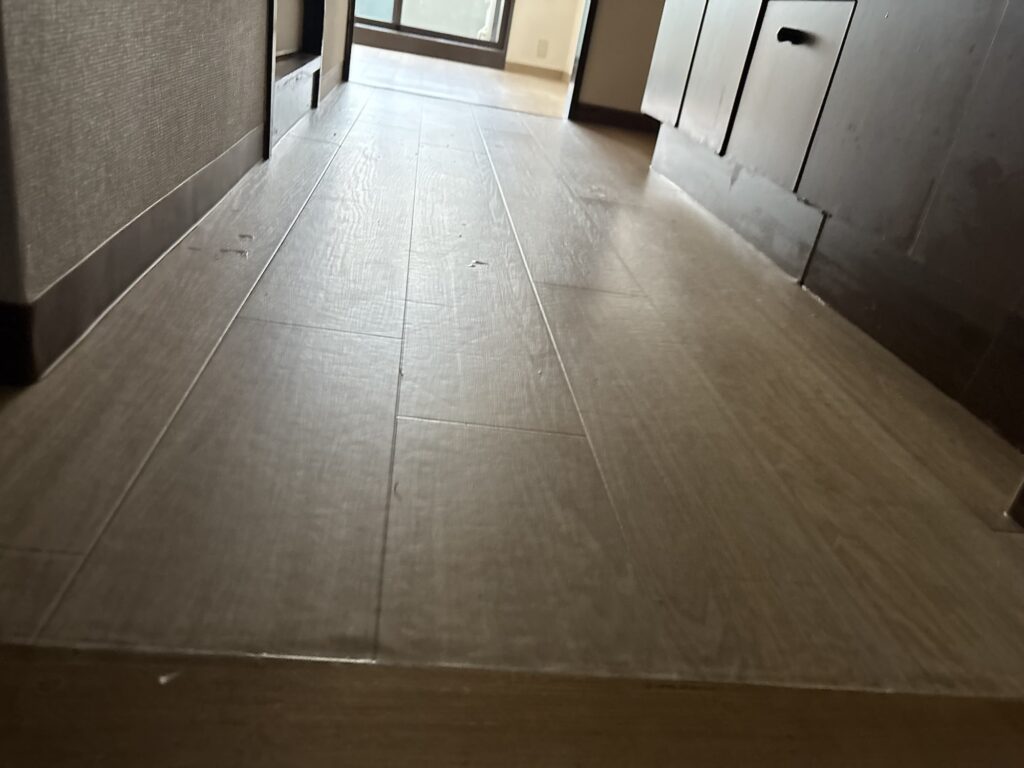
This 20 m² apartment project was a relatively small flooring job, but it included several valuable lessons about professional installation.
The most important points were proper surface preparation, careful layout planning, accurate cutting, joint positioning, and efficient workflow.
The unexpected transition-height problem was solved without purchasing additional materials, while the old wallpaper underneath the baseboard was removed before it could interrupt the installation process.
These small decisions can make a significant difference on a real job site.
Professional installation is not simply about putting materials into place.
It is about understanding the condition of the existing surface, anticipating problems, choosing efficient solutions, and keeping the workflow organized.
For me, one of the biggest lessons from this project was that experienced installers often see possibilities that are easy to overlook.
The more experience you gain, the more you learn to look beyond the immediate problem and think about the entire installation process.
That mindset is just as important as the tools and techniques themselves.
Want to see more professional renovation projects? Explore my latest articles below.
Installing Vinyl Flooring in an Occupied Kitchen: Professional Preparation Tips
Replacing Wallpaper, Vinyl Flooring, and Baseboards in an Occupied Laundry Room


Comments